Annotation in Flutter Cartesian Chart
18 Nov 201824 minutes to read
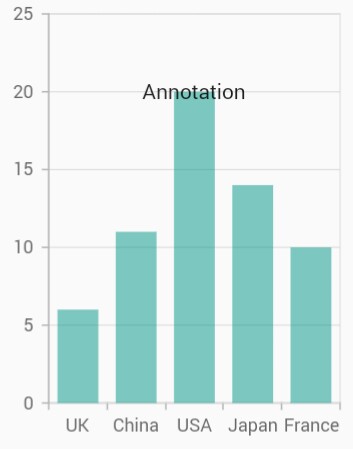
The chart supports annotations, which allow you to mark a specific area of interest in the chart area. You can add custom widgets using this annotation feature as shown below.
@override
    Widget build(BuildContext context) {
      return Scaffold(
        body: SafeArea(
          child: Center(
            child: Container(
              child: SfCartesianChart(
                primaryXAxis: CategoryAxis(),
                annotations: <CartesianChartAnnotation>[
                  CartesianChartAnnotation(
                    widget:
                      Container(
                        child: const Text('Annotation')
                      ),
                    coordinateUnit: CoordinateUnit.point,
                    x: 'USA',
                    y: 20
                  )
                ]
              )
            )
          )
        )
      );
    }
Positioning the annotation
The x and y values can be specified with axis units, pixel units, or percentage units, and these can be identified by using the coordinateUnit property. When CoordinateUnit.logicalPixel is specified, the annotation will be placed with respect to pixel values. When CoordinateUnit.point is specified, the annotation will be placed with respect to series point values.
Positioning based on coordinateUnit as point
To position the annotation based on the axis, set the x and y properties based on axis range values, and set the coordinateUnit value to CoordinateUnit.point.
@override
    Widget build(BuildContext context) {
      return Scaffold(
        body: SafeArea(
          child: Center(
            child: Container(
              child: SfCartesianChart(
                annotations: <CartesianChartAnnotation>[
                  CartesianChartAnnotation(
                    widget: Container(
                      child: const Text('Text')
                    ),
                    coordinateUnit: CoordinateUnit.point,
                    // x position of annotation
                    x: 20,
                    // y position of annotation
                    y: 40
                  )
                ]
              )
            )
          )
        )
      );
    }
Positioning based on coordinateUnit as pixels
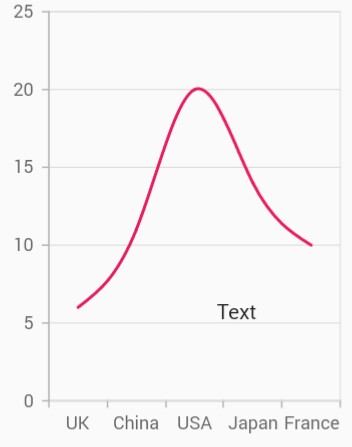
To position the annotation based on pixel values, set the coordinateUnit value to CoordinateUnit.logicalPixel, and set the pixel values in the x and y properties of the annotation as shown in the following code snippet.
@override
    Widget build(BuildContext context) {
      return Scaffold(
        body: SafeArea(
          child: Center(
            child: Container(
              child: SfCartesianChart(
                primaryXAxis: CategoryAxis(),
                annotations: <CartesianChartAnnotation>[
                  CartesianChartAnnotation(
                    widget: Container(
                      child: const Text('Text')
                    ),
                    // Coordinate unit type
                    coordinateUnit: CoordinateUnit.logicalPixel,
                    x: 150,
                    y: 200
                  )
                ]
              )
            )
          )
        )
      );
    }
Positioning based on coordinateUnit as percentage
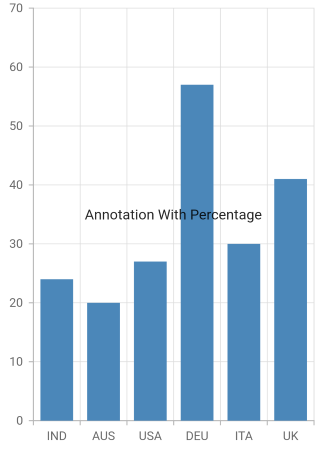
To position the annotation based on percentage values, set the coordinateUnit value to CoordinateUnit.percentage, and set the percentage values in the x and y properties of the annotation as shown in the following code snippet.
@override
    Widget build(BuildContext context) {
      const List<ChartData> chartData = [
        ChartData('IND', 24),
        ChartData('AUS', 20),
        ChartData('USA', 27),
        ChartData('DEU', 57),
        ChartData('ITA', 30),
        ChartData('UK', 41),
      ];

    return Scaffold(
        body: Center(
          child: SfCartesianChart(
            primaryXAxis: CategoryAxis(interval: 1),
              annotations: const <CartesianChartAnnotation>[
               CartesianChartAnnotation(
                coordinateUnit: CoordinateUnit.percentage,
                region: AnnotationRegion.plotArea,
                widget: Text('Annotation With Percentage',
                  style: TextStyle(
                  fontSize: 14,
                  )),
                  x: '50%',
                  y: '50%'
              )
            ],
            series: <CartesianSeries<ChartData, String>>[
              ColumnSeries<ChartData, String>(
                  dataSource: chartData,
                  xValueMapper: (ChartData data, _) => data.x,
                  yValueMapper: (ChartData data, _) => data.y)
            ]
          ),
        )
      );
    }

    class ChartData {
      const ChartData(this.x, this.y);
      final String x;
      final int y;
    }
Positioning based on region
Annotations can be placed with respect to either AnnotationRegion.plotArea or AnnotationRegion.chart by using the region property.
@override
    Widget build(BuildContext context) {
      return Scaffold(
        body: SafeArea(
          child: Center(
            child: Container(
              child: SfCartesianChart(
                annotations: <CartesianChartAnnotation>[
                  CartesianChartAnnotation(
                    widget: Container(
                      child: const Text('Text')
                    ),
                    region: AnnotationRegion.chartArea,
                    coordinateUnit: CoordinateUnit.logicalPixel,
                    x: 150,
                    y: 200
                  )
                ]
              )
            )
          )
        )
      );
    }
Alignment of annotation
CartesianChartAnnotation can be aligned to the center, near, or far using the horizontalAlignment and verticalAlignment properties of the annotation.
The following code example demonstrates how to set the horizontalAlignment for an annotation.
@override
    Widget build(BuildContext context) {
      return Scaffold(
        body: SafeArea(
          child: Center(
            child: Container(
              child: SfCartesianChart(
                annotations: <CartesianChartAnnotation>[
                  CartesianChartAnnotation(
                    widget: Container(
                      child: const Text('Text')
                    ),
                    region: AnnotationRegion.chartArea,
                    coordinateUnit: CoordinateUnit.logicalPixel,
                    x: 150,
                    y: 200,
                    horizontalAlignment: ChartAlignment.near,
                  )
                ]
              )
            )
          )
        )
      );
    }
Adding multiple annotations
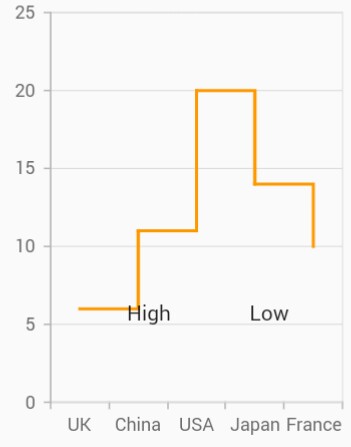
You can add multiple annotations to the chart by adding multiple widgets to the annotations property, as shown in the following code snippet.
@override
    Widget build(BuildContext context) {
      return Scaffold(
        body: SafeArea(
            child: Center(
                child: Container(
                    child: SfCartesianChart(
                        primaryXAxis: CategoryAxis(),
                        primaryYAxis: NumericAxis(interval: 5),
                        annotations: <CartesianChartAnnotation>[
                        // first annotation
                        CartesianChartAnnotation(
                        widget: Container(child: const Text('High')),
                        coordinateUnit: CoordinateUnit.point,
                        x: 'China',
                        y: 6,
                        ),
                        // second annotation
                        CartesianChartAnnotation(
                        widget: Container(child: const Text('Low')),
                        coordinateUnit: CoordinateUnit.point,
                        x: 'Japan',
                        y: 6)
                        ],
                        series: <CartesianSeries<ChartData, String>>[
                        StepLineSeries<ChartData, String>(
                            dataSource: <ChartData>[
                                        ChartData('UK', 6),
                                        ChartData('China', 11),
                                        ChartData('USA', 20),
                                        ChartData('Japan', 14),
                                        ChartData('France', 10)
                                      ],
                            xValueMapper: (ChartData data, _) => data.x,
                            yValueMapper: (ChartData data, _) => data.y)
                          ]
                        )
                      )
                    )
                  )
                );
              }

            class ChartData {
              ChartData(this.x, this.y);
              final String x;
              final double y;
            }
Adding annotation for multiple axes
When there are multiple axes in the chart, annotation can be added for a particular axis by using the xAxisName and yAxisName properties. It is shown in the below code snippet.
@override
    Widget build(BuildContext context) {
      final List<ChartData> chartData = [
        ChartData(10, 17, 132),
        ChartData(20, 34, 134),
        ChartData(30, 24, 124),
        ChartData(40, 30, 130),
        ChartData(50, 10, 110)
      ];

      return Scaffold(
        body: SafeArea(
          child: Center(
            child: Container(
              child: SfCartesianChart(
                primaryXAxis: NumericAxis(),
                annotations: <CartesianChartAnnotation>[
                  CartesianChartAnnotation(
                    widget: Container(child: const Text('Low')),
                    coordinateUnit: CoordinateUnit.point,
                    x: 15,
                    y: 50
                  ),
                  CartesianChartAnnotation(
                    widget: Container(child: const Text('High')),
                    coordinateUnit: CoordinateUnit.point,
                    x: 35,
                    y: 130,
                    yAxisName: 'YAxis' // Refers to the additional axis
                  )
                ],
                primaryYAxis: NumericAxis(minimum: 0, maximum: 80),
                axes: <ChartAxis>[
                  NumericAxis(name: 'YAxis', opposedPosition: true)
                ],
                series: <CartesianSeries>[
                  ColumnSeries<ChartData, double>(
                    dataSource: chartData,
                    xValueMapper: (ChartData data, _) => data.x,
                    yValueMapper: (ChartData data, _) => data.y
                  ),
                  ColumnSeries<ChartData, double>(
                    dataSource: chartData,
                    xValueMapper: (ChartData data, _) => data.x,
                    yValueMapper: (ChartData data, _) => data.y2,
                    yAxisName: 'YAxis'
                  )
                ]
              )
            )
          )
        )
      );
    }

    class ChartData {
      ChartData(this.x, this.y, this.y2);
      final double x;
      final double y;
      final double y2;
    }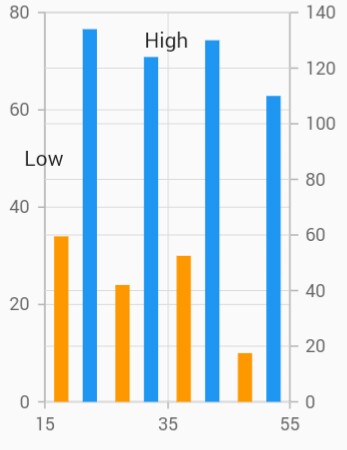
Chart with watermark
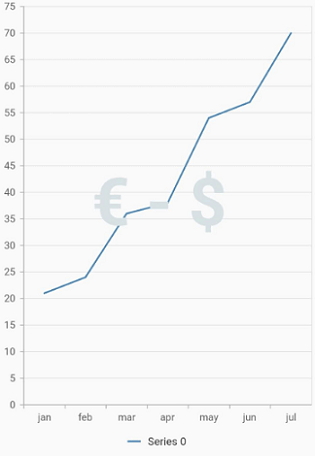
Chart supports watermark which allows you to mark the specific area of interest in the chart area. You can add the custom widgets and watermarks using this annotations feature as depicted below.
@override
    Widget build(BuildContext context) {
      return Scaffold(
        body: SafeArea(
          child: Center(
            child: Container(
              child: SfCartesianChart(
                primaryXAxis: CategoryAxis(labelPlacement: LabelPlacement.betweenTicks),
                  annotations: <CartesianChartAnnotation>[
                  CartesianChartAnnotation(
                  widget: Container(
                  child: const Text(
                  '€ - \$ ',
                  style: TextStyle(
                  color: Color.fromRGBO(216, 225, 227, 1),
                  fontWeight: FontWeight.bold,
                  fontSize: 80),
                  ),
                ),
                coordinateUnit: CoordinateUnit.point,
                region: AnnotationRegion.chart,
                x: 'apr',
                y: 38,
                )
              ],
                series: <CartesianSeries<ChartData, String>>[
                LineSeries<ChartData, String>(
                    dataSource: <ChartData>[
                    ChartData('jan', 21),
                    ChartData('feb', 24),
                    ChartData('mar', 36),
                    ChartData('apr', 38),
                    ChartData('may', 54),
                    ChartData('jun', 54),
                    ChartData('jul', 70),
                    ],
                    xValueMapper: (ChartData data, _) => data.x,
                    yValueMapper: (ChartData data, _) => data.y),
                  ],
                )
              )
            )
          )
        );
      }

    class ChartData {
      ChartData(this.x, this.y);
      final String x;
      final double y;
    }
Note:
chartDatain the above code snippets is a class type list and holds the data for binding to the chart series. Refer Bind data source topic for more details.