Getting Started with Windows Forms Syntax Editor
18 Nov 20186 minutes to read
This section explains how to create an interactive code editor application like the Microsoft Visual Studio Editor by using the Syntax Editor (EditControl).
Assembly deployment
Refer to the Control Dependencies section for the list of assemblies or the NuGet package details that must be referenced to use the control in any application.
Refer to NuGet Packages to learn how to install NuGet packages in a Windows Forms application.
To install via the NuGet Package Manager Console, run:
Install-Package Syncfusion.Edit.Windows
Adding Syntax Editor via designer
-
Create a new Windows Forms project in Visual Studio.
-
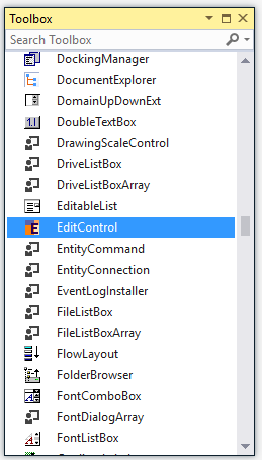
Add the EditControl to the application by dragging it from the toolbox to the designer surface. The following dependent assemblies are added automatically:
- Syncfusion.Shared.Base
- Syncfusion.Tools.Windows
- Syncfusion.Edit.Windows
Adding Syntax Editor via code
To add the control manually, follow these steps:
-
Create a C# or VB.NET application in Visual Studio.
-
Add the following assembly references to the project:
- Syncfusion.Shared.Base
- Syncfusion.Tools.Windows
- Syncfusion.Edit.Windows
-
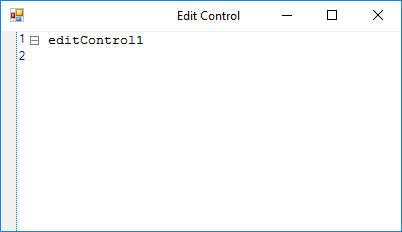
Create an instance of the EditControl and add it to the form.
private Syncfusion.Windows.Forms.Edit.EditControl editControl1;

editControl1 = new Syncfusion.Windows.Forms.Edit.EditControl();
editControl1.Size = new Size(50, 50);
editControl1.Dock = DockStyle.Fill;
editControl1.BorderStyle = BorderStyle.Fixed3D;
this.Controls.Add(editControl1);
private editControl1 As Syncfusion.Windows.Forms.Edit.EditControl editControl1 = New Syncfusion.Windows.Forms.Edit.EditControl() editControl1.Size = New Size(50, 50) editControl1.Dock = DockStyle.Fill editControl1.BorderStyle = BorderStyle.Fixed3D Me.Controls.Add(editControl1)
Loading a file into the document
This section explains how to load a file into the Syntax Editor.
// Loading the files into edit control by passing the file name as parameter to the LoadFile function.

this.editControl1.LoadFile(Path.GetDirectoryName(Application.ExecutablePath) + @"\..\..\FileName.cs");
` Loading the files into edit control by passing the file name as parameter to the LoadFile function.
Me.editControl1.LoadFile(Path.GetDirectoryName(Application.ExecutablePath) + @"\..\..\FileName.cs")Syntax highlighting
The EditControl offers built-in syntax highlighting for the most commonly used languages and also provides support for configuring a new custom language.
The Syntax Editor has built-in syntax highlighting support for the following languages:
- C#
- VB.NET
- XML
- HTML
- Java
- SQL
- PowerShell
- C
- JavaScript
- VBScript
- Delphi
// Apply the built-in configuration for a known language.

this.editControl1.ApplyConfiguration(KnownLanguages.CSharp);
' Apply the built-in configuration for a known language.
Me.editControl1.ApplyConfiguration(KnownLanguages.CSharp)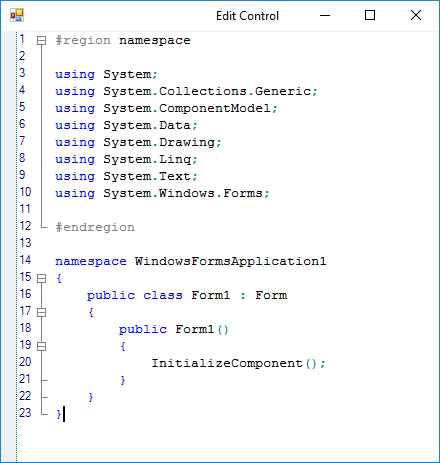
Custom language configuration
The Syntax Editor supports custom language configuration. You can plug in an external XML configuration file that defines a custom language and then apply it with the Configurator.Open and ApplyConfiguration methods.
-
Create a configuration file (for example,
config.xml) and set its Copy to Output Directory property to Copy if newer. - XAML
-
Apply the configuration file to the Syntax Editor.
private string configFile = Path.GetDirectoryName(Application.ExecutablePath) + @"\..\..\config.xml"; // Plug in an external configuration file. this.editControl1.Configurator.Open(configFile); // Apply the configuration defined in the configuration file. this.editControl1.ApplyConfiguration("LISP");private string configFile = Path.GetDirectoryName(Application.ExecutablePath) + @"\..\..\config.xml"; ' Plug in an external configuration file. Me.editControl1.Configurator.Open(configFile) ' Apply the configuration defined in the configuration file. Me.editControl1.ApplyConfiguration("LISP")
<?xml version="1.0" encoding="utf-8" ?>
<ArrayOfConfigLanguage>
	<ConfigLanguage name="LISP">
		<formats>
			<format name="Text" Font="Courier New, 10pt" FontColor="Salmon" />
			<format name="KeyWord" Font="Courier New, 10pt" FontColor="Blue" />
			<format name="String" Font="Courier New, 10pt, style=Bold" FontColor="Red" />
			<format name="Operator" Font="Courier New, 10pt" FontColor="DarkCyan" />
		</formats>
		<extensions>
			<extension>lsp</extension>
		</extensions>
		<lexems>
			<lexem BeginBlock="(" Type="Operator" />
			<lexem BeginBlock=")" Type="Operator" />
			<lexem BeginBlock="'" Type="Operator" />
			<lexem BeginBlock="car" Type="KeyWord" />
			<lexem BeginBlock="cdr" Type="KeyWord" />
			<lexem BeginBlock="cons" Type="KeyWord" />
		</lexems>
		<splits>
			<split>#Region</split>
			<split>#End Region</split>
		</splits>
	</ConfigLanguage>
</ArrayOfConfigLanguage>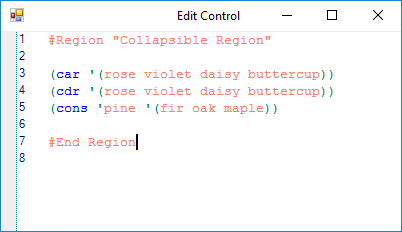
You can refer to our WinForms Syntax Editor feature tour page for its unique feature set. You can also explore our WinForms Syntax Editor example that shows how to create interactive code-editor applications with syntax highlighting, text indentation, IntelliSense, and more.