Needle Pointer in Flutter Radial Gauge (SfRadialGauge)
18 Nov 201824 minutes to read
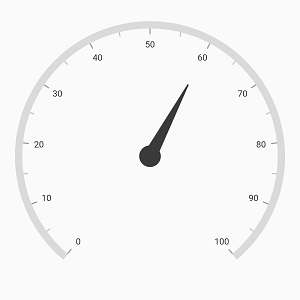
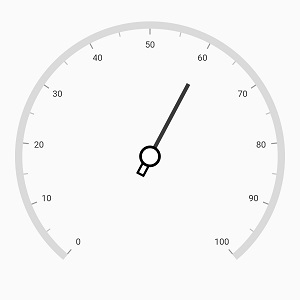
Needle Pointer contains three parts namely needle, knob, and tail and that can be placed on a Flutter Radial Gauge to mark values.
import 'package:flutter/material.dart';
import 'package:syncfusion_flutter_gauges/gauges.dart';

void main() => runApp(const NeedlePointerDemo());

class NeedlePointerDemo extends StatelessWidget {
  const NeedlePointerDemo({Key? key}) : super(key: key);

  @override
  Widget build(BuildContext context) {
    return MaterialApp(
      home: Scaffold(
        body: Center(
          child: SfRadialGauge(
            axes: <RadialAxis>[
              RadialAxis(
                pointers: <GaugePointer>[
                  NeedlePointer(value: 60)
                ]
              )
            ],
          )
        ),
      ),
    );
  }
}
Needle customization
The needle can be customized using the following properties:
-
needleLength– Customizes the length of the needle. The length of the pointer can be set either in logical pixel or factor. -
lengthUnit– Specifies whether to set the length in logical pixel or factor. -
needleStartWidth– Specifies the start width of the needle. -
needleEndWidth– Specifies the end width of the needle. -
needleColor– Specifies the needle color. -
gradient- Specifies the gradient for the needle.
Needle length customization
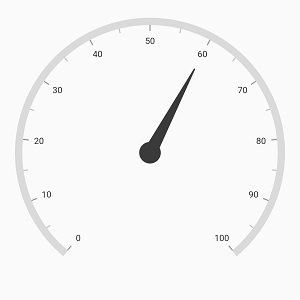
The needle length can be controlled using the needleLength and lengthUnit properties. The length can be set either in logical pixels or factor using lengthUnit.
If the lengthUnit is set to logical pixel, the logical pixel value will be set to the needleLength
If the lengthUnit is set to factor, then the factor value will be set to the needleLength. The factor value ranges from 0 to 1. For example, if the needle length is set to 0.5, half of the radius value of axis will be used as the needle length. The default value of lengthUnit is GaugeSizeUnit.factor
import 'package:flutter/material.dart';
import 'package:syncfusion_flutter_gauges/gauges.dart';

void main() => runApp(const NeedleLengthDemo());

class NeedleLengthDemo extends StatelessWidget {
  const NeedleLengthDemo({Key? key}) : super(key: key);

  @override
  Widget build(BuildContext context) {
    return MaterialApp(
      home: Scaffold(
        body: Center(
          child: SfRadialGauge(
            axes: <RadialAxis>[
              RadialAxis(
                pointers: <GaugePointer>[
                  NeedlePointer(
                    value: 60,
                    lengthUnit: GaugeSizeUnit.logicalPixel,
                    needleLength: 130
                  )
                ]
              )
            ],
          )
        ),
      ),
    );
  }
}
Needle width customization
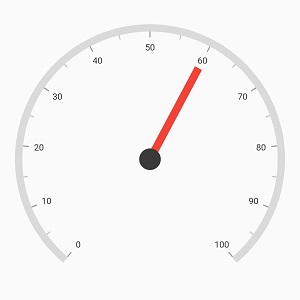
The width of the needle pointer can be customized using the needleStartWidth and needleEndWidth properties.
import 'package:flutter/material.dart';
import 'package:syncfusion_flutter_gauges/gauges.dart';

void main() => runApp(const NeedleWidthDemo());

class NeedleWidthDemo extends StatelessWidget {
  const NeedleWidthDemo({Key? key}) : super(key: key);

  @override
  Widget build(BuildContext context) {
    return MaterialApp(
      home: Scaffold(
        body: Center(
          child: SfRadialGauge(
            axes: <RadialAxis>[
              RadialAxis(
                pointers: <GaugePointer>[
                  NeedlePointer(
                    value: 60,
                    lengthUnit: GaugeSizeUnit.factor,
                    needleLength: 0.75,
                    needleColor: Colors.red,
                    needleStartWidth: 6,
                    needleEndWidth: 6
                  )
                ]
              )
            ],
          )
        ),
      ),
    );
  }
}
Gradient support for needle
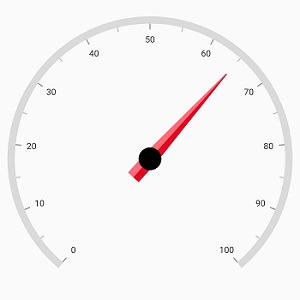
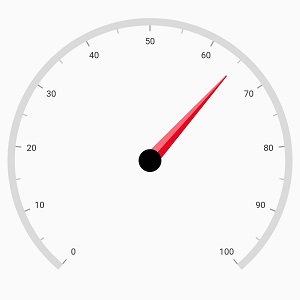
The gradient property of needle pointer allows you to specify a smooth color transition for the pointer by defining different colors based on provided factor values.
import 'package:flutter/material.dart';
import 'package:syncfusion_flutter_gauges/gauges.dart';

void main() => runApp(const NeedleGradientDemo());

class NeedleGradientDemo extends StatelessWidget {
  const NeedleGradientDemo({Key? key}) : super(key: key);

  @override
  Widget build(BuildContext context) {
    return MaterialApp(
      home: Scaffold(
        body: Center(
          child: SfRadialGauge(
            axes: <RadialAxis>[
              RadialAxis(
                pointers: <GaugePointer>[
                  NeedlePointer(
                    value: 65,
                    lengthUnit: GaugeSizeUnit.factor,
                    needleLength: 0.8,
                    needleEndWidth: 11,
                    gradient: const LinearGradient(
                      colors: <Color>[
                        Color(0xFFFF6B78), Color(0xFFFF6B78),
                        Color(0xFFE20A22), Color(0xFFE20A22)
                      ],
                      stops: <double>[0, 0.5, 0.5, 1]
                    ),
                    needleColor: const Color(0xFFF67280),
                    knobStyle: KnobStyle(
                      knobRadius: 0.08,
                      sizeUnit: GaugeSizeUnit.factor,
                      color: Colors.black
                    )
                  ),
                ]
              ),
            ]
          ),
        ),
      ),
    );
  }
}
Knob customization
The knob can be customized using the following properties:
-
knobRadius– Specifies the knob radius either in logical pixels or factor. -
color– Specifies the knob color. -
borderWidth– Specifies the border width of knob either in logical pixels or factor. -
borderColor– Specifies the border color of knob. -
sizeUnit– Allows you to specify whether the value of knob radius and border width is in logical pixels or in factor.
Knob radius customization
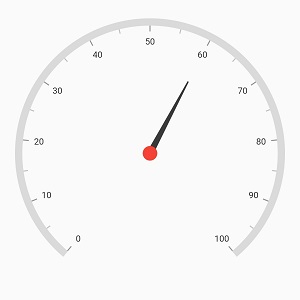
The radius of the knob can be customized using the knobRadius and sizeUnit.
The logical pixel value can be set to knob radius when the sizeUnit is set to logical pixel
import 'package:flutter/material.dart';
import 'package:syncfusion_flutter_gauges/gauges.dart';

void main() => runApp(const KnobRadiusDemo());

class KnobRadiusDemo extends StatelessWidget {
  const KnobRadiusDemo({Key? key}) : super(key: key);

  @override
  Widget build(BuildContext context) {
    return MaterialApp(
      home: Scaffold(
        body: Center(
          child: SfRadialGauge(
            axes: <RadialAxis>[
              RadialAxis(
                pointers: <GaugePointer>[
                  NeedlePointer(
                    value: 60,
                    needleStartWidth: 1,
                    needleEndWidth: 5,
                    knobStyle: KnobStyle(
                      knobRadius: 10,
                      sizeUnit: GaugeSizeUnit.logicalPixel,
                      color: Colors.red
                    )
                  )
                ]
              )
            ],
          )
        ),
      ),
    );
  }
}
If the sizeUnit is set to factor, the factor value will be set to knob radius. The factor value ranges from 0 to 1. For example, if the knob radius is set to 0.1, 10% of the radius value of axis will be set to knob radius. By default, the value of sizeUnit is GaugeSizeUnit.factor
Knob border customization
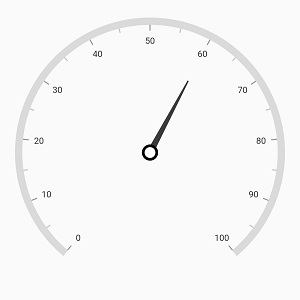
Like radius, the borderWidth can be specified either in logical pixel or factor. The sizeUnit property of knob style is common for both knobRadius and borderWidth properties.
import 'package:flutter/material.dart';
import 'package:syncfusion_flutter_gauges/gauges.dart';

void main() => runApp(const KnobBorderDemo());

class KnobBorderDemo extends StatelessWidget {
  const KnobBorderDemo({Key? key}) : super(key: key);

  @override
  Widget build(BuildContext context) {
    return MaterialApp(
      home: Scaffold(
        body: Center(
          child: SfRadialGauge(
            axes: <RadialAxis>[
              RadialAxis(
                pointers: <GaugePointer>[
                  NeedlePointer(
                    value: 60,
                    needleStartWidth: 1,
                    needleEndWidth: 5,
                    knobStyle: KnobStyle(
                      knobRadius: 0.05,
                      borderColor: Colors.black,
                      borderWidth: 0.02,
                      color: Colors.white
                    )
                  )
                ]
              )
            ],
          )
        ),
      ),
    );
  }
}
Tail customization
The tail of the needle can be customized using the following properties,
-
length– Specifies the length of tail either in logical pixels or factor. -
lengthUnit– Specifies whether the tail length value is defined in logical pixels or factor. -
width– Specifies the width for the tail. -
borderColor– Allows you to specify the border color of tail. -
borderWidth– Allows you to specify the border width of tail. -
gradient- Specifies the gradient for the tail.
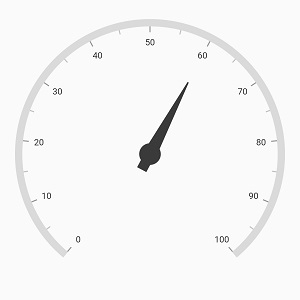
By default, the value of lengthUnit is GaugeSizeUnit.factor. The factor value ranges from 0 to 1. When the length is set to 0.2, 20% of axis radius value will be considered as tail length. The following code example shows how to specify the length in factor.
import 'package:flutter/material.dart';
import 'package:syncfusion_flutter_gauges/gauges.dart';

void main() => runApp(const TailFactorDemo());

class TailFactorDemo extends StatelessWidget {
  const TailFactorDemo({Key? key}) : super(key: key);

  @override
  Widget build(BuildContext context) {
    return MaterialApp(
      home: Scaffold(
        body: Center(
          child: SfRadialGauge(
            axes: <RadialAxis>[
              RadialAxis(
                pointers: <GaugePointer>[
                  NeedlePointer(
                    value: 60,
                    tailStyle: TailStyle(width: 8, length: 0.15)
                  )
                ]
              )
            ],
          )
        ),
      ),
    );
  }
}
The following code example shows how to specify the length in logical pixels.
import 'package:flutter/material.dart';
import 'package:syncfusion_flutter_gauges/gauges.dart';

void main() => runApp(const TailPixelDemo());

class TailPixelDemo extends StatelessWidget {
  const TailPixelDemo({Key? key}) : super(key: key);

  @override
  Widget build(BuildContext context) {
    return MaterialApp(
      home: Scaffold(
        body: Center(
          child: SfRadialGauge(
            axes: <RadialAxis>[
              RadialAxis(
                pointers: <GaugePointer>[
                  NeedlePointer(
                    value: 60,
                    needleStartWidth: 3,
                    needleEndWidth: 3,
                    knobStyle: KnobStyle(
                      color: Colors.white,
                      knobRadius: 0.07,
                      borderColor: Colors.black,
                      borderWidth: 0.02
                    ),
                    tailStyle: TailStyle(
                      width: 5,
                      length: 30,
                      lengthUnit: GaugeSizeUnit.logicalPixel,
                      color: Colors.white,
                      borderWidth: 3,
                      borderColor: Colors.black
                    )
                  )
                ]
              )
            ],
          )
        ),
      ),
    );
  }
}
The following code shows how to apply the gradient for the tail.
import 'package:flutter/material.dart';
import 'package:syncfusion_flutter_gauges/gauges.dart';

void main() => runApp(const TailGradientDemo());

class TailGradientDemo extends StatelessWidget {
  const TailGradientDemo({Key? key}) : super(key: key);

  @override
  Widget build(BuildContext context) {
    return MaterialApp(
      home: Scaffold(
        body: Center(
          child: SfRadialGauge(
            axes: <RadialAxis>[
              RadialAxis(
                pointers: <GaugePointer>[
                  NeedlePointer(
                    value: 65,
                    lengthUnit: GaugeSizeUnit.factor,
                    needleLength: 0.8,
                    needleEndWidth: 11,
                    tailStyle: TailStyle(
                      length: 0.2,
                      width: 11,
                      gradient: LinearGradient(
                        colors: <Color>[
                          Color(0xFFFF6B78), Color(0xFFFF6B78),
                          Color(0xFFE20A22), Color(0xFFE20A22)
                        ],
                        stops: <double>[0, 0.5, 0.5, 1]
                      ),
                    ),
                    gradient: LinearGradient(
                      colors: <Color>[
                        Color(0xFFFF6B78), Color(0xFFFF6B78),
                        Color(0xFFE20A22), Color(0xFFE20A22)
                      ],
                      stops: <double>[0, 0.5, 0.5, 1]
                    ),
                    needleColor: Color(0xFFF67280),
                    knobStyle: KnobStyle(
                      knobRadius: 0.08,
                      sizeUnit: GaugeSizeUnit.factor,
                      color: Colors.black
                    )
                  ),
                ]
              ),
            ]
          ),
        ),
      ),
    );
  }
}