Annotation in Flutter Radial Gauge (SfRadialGauge)
22 May 202516 minutes to read
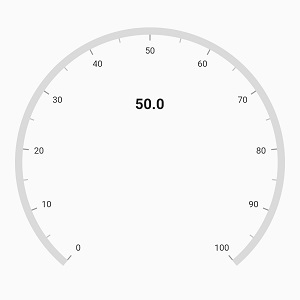
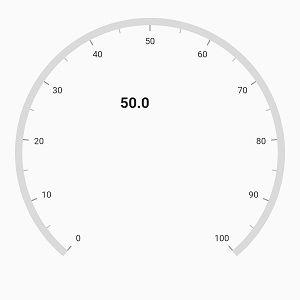
Radial axis allows you to add multiple widgets such as text and image as annotations to specific points of interest in the radial gauge.
The following properties are available in annotation to customizes the position and alignment of annotation widget
-
angle– Allows you to position the annotation using the angle. -
axisValue– Allows you to position the annotation using the axis value. -
positionFactor– Specifies the factor value to position the annotation based on the providedaxis valueorangle -
horizontalAlignment– Specifies the horizontal alignment for positioning the annotation widget. -
verticalAlignment– Specifies the vertical alignment for positioning the annotation.
@override
  Widget build(BuildContext context) {
    return Scaffold(
      body: Center(
        child: SfRadialGauge(
          axes: <RadialAxis>[
            RadialAxis(
              annotations: <GaugeAnnotation>[
                GaugeAnnotation(
                  axisValue: 50,
                  positionFactor: 0.4,
                  widget: Text(
                    '50.0',
                    style: TextStyle(fontWeight: FontWeight.bold, fontSize: 20),
                  )
                )
              ]
            )
          ],
        )
      )
    );
  }
Positioning annotation
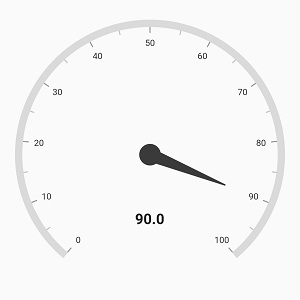
The annotation can be positioned either using the angle or axis value. When providing both the angle and the axis value, priority will be given to the angle value. The following example shows how to position the annotation widget using angle.
@override
  Widget build(BuildContext context) {
    return Scaffold(
      body: Center(
        child: SfRadialGauge(
          axes: <RadialAxis>[
            RadialAxis(
              pointers: <GaugePointer>[NeedlePointer(value: 90)],
              annotations: <GaugeAnnotation>[
                GaugeAnnotation(
                  angle: 90,
                  positionFactor: 0.5,
                  widget: Text(
                    '90.0',
                    style: TextStyle(fontWeight: FontWeight.bold, fontSize: 20),
                  )
                )
              ]
            )
          ],
        )
      ),
    );
  }
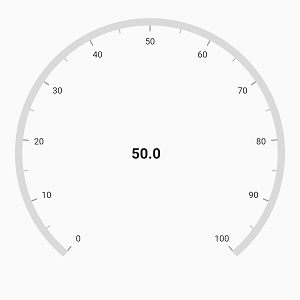
The following code example shows how to position the annotation using axis value
@override
  Widget build(BuildContext context) {
    return Scaffold(
      body: Center(
        child: SfRadialGauge(
          axes: <RadialAxis>[
            RadialAxis(
              annotations: <GaugeAnnotation>[
                GaugeAnnotation(
                  axisValue: 50,
                  positionFactor: 0.4,
                  widget: Text(
                    '50.0',
                    style: TextStyle(fontWeight: FontWeight.bold, fontSize: 20),
                  )
                )
              ]
            )
          ],
        )
      )
    );
  }
The positionFactor is used to move the annotation widget from the center of axis to the edge of the axis. For example, when you specify the positionFactor as 0.5, the annotation widget will be moved from the center towards the corresponding direction with the distance of half of the radius value of the axis.
By default, the value of positionFactor is 0.
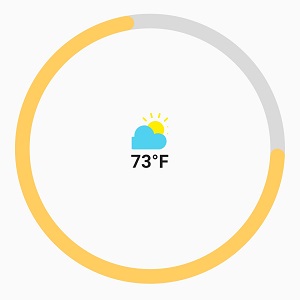
Setting image for annotation
Annotations provide options to add any image over the gauge control with respect to its offset position. You can add multiple images in a single control.
@override
  Widget build(BuildContext context) {
    return Scaffold(
      body: Center(
        child: SfRadialGauge(
          axes: <RadialAxis>[
            RadialAxis(
              interval: 10,
              startAngle: 0,
              endAngle: 360,
              showTicks: false,
              showLabels: false,
              axisLineStyle: AxisLineStyle(thickness: 20),
              pointers: <GaugePointer>[
                RangePointer(
                  value: 73,
                  width: 20,
                  color: Color(0xFFFFCD60),
                  enableAnimation: true,
                  cornerStyle: CornerStyle.bothCurve
                )
              ],
              annotations: <GaugeAnnotation>[
                GaugeAnnotation(
                  widget: Column(
                    children: <Widget>[
                      Container(
                        width: 50.00,
                        height: 50.00,
                        decoration: new BoxDecoration(
                          image: new DecorationImage(
                            image: ExactAssetImage('images/sun.png'),
                            fit: BoxFit.fitHeight,
                          ),
                        )
                      ),
                      Padding(
                        padding: EdgeInsets.fromLTRB(0, 2, 0, 0),
                        child: Container(
                          child: Text(
                            '73°F',
                            style: TextStyle(fontWeight: FontWeight.bold, fontSize: 25)
                          ),
                        ),
                      )
                    ],
                  ),
                  angle: 270,
                  positionFactor: 0.1
                )
              ]
            )
          ]
        )
      )
    );
  }
Alignment of annotation
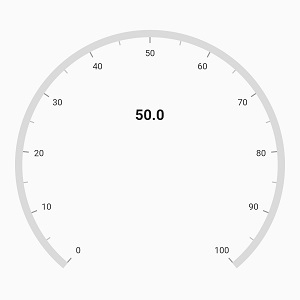
Annotation can be aligned to center, near and far using the horizontalAlignment and verticalAlignment properties of annotation.
The following code example demonstrates how to set the horizontalAlignment for annotation
@override
  Widget build(BuildContext context) {
    return Scaffold(
      body: Center(
        child: SfRadialGauge(
          axes: <RadialAxis>[
            RadialAxis(
              annotations: <GaugeAnnotation>[
                GaugeAnnotation(
                  axisValue: 50,
                  positionFactor: 0.4,
                  horizontalAlignment: GaugeAlignment.far,
                  widget: Text(
                    '50.0',
                    style: TextStyle(fontWeight: FontWeight.bold, fontSize: 20),
                  )
                )
              ]
            )
          ],
        )
      )
    );
  }
The following code example demonstrates how to set verticalAlignment for annotation,
@override
  Widget build(BuildContext context) {
    return Scaffold(
      body: Center(
        child: SfRadialGauge(
          axes: <RadialAxis>[
            RadialAxis(
              annotations: <GaugeAnnotation>[
                GaugeAnnotation(
                  axisValue: 50,
                  positionFactor: 0.4,
                  verticalAlignment: GaugeAlignment.far,
                  widget: Text(
                    '50.0',
                    style: TextStyle(fontWeight: FontWeight.bold, fontSize: 20),
                  )
                )
              ]
            )
          ],
        )
      )
    );
  }