Flutter Linear Gauge Getting Started (SfLinearGauge)
16 Apr 20268 minutes to read
This section explains the steps required to add the Linear Gauge and its elements such as axis, range, and pointer, and also covers basic features needed to get started with the Linear Gauge widget.
To get started quickly with our Flutter Linear Gauge widget, you can check out this video:
Add Linear Gauge to an application
Create a simple project using the instructions given in the Getting Started with your first Flutter app documentation.
Add dependency
Add the Syncfusion® Flutter Gauge dependency to your pubspec.yaml file.
dependencies:

    syncfusion_flutter_gauges: ^xx.x.xx
NOTE
Here xx.x.xx denotes the current version of the
Syncfusion Flutter Gaugepackage.
Get packages
Run the following command to get the required packages.
$ flutter pub getImport package
Import the following package in your Dart code.
import 'package:syncfusion_flutter_gauges/gauges.dart';Initialize the Linear Gauge
After the package has been imported, initialize the SfLinearGauge as a child of any widget such as a container widget.
@override
  Widget build(BuildContext context) {
    return MaterialApp(
      home: Scaffold(
        body: Center(
          child:SfLinearGauge()
        )
      )
    );
  }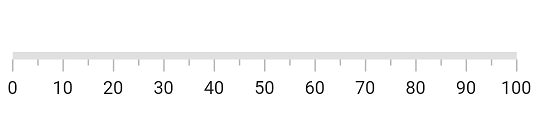
Add axis
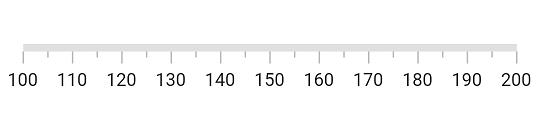
The Linear Gauge axis is a scale where a set of values can be plotted. You can specify the minimum and maximum values of the axis using the minimum and maximum properties as demonstrated in the following code sample.
@override
  Widget build(BuildContext context) {
    return MaterialApp(
      home: Scaffold(
        body: Center(
          child: SfLinearGauge(minimum: 100, maximum: 200)
        )
      )
    );
  }
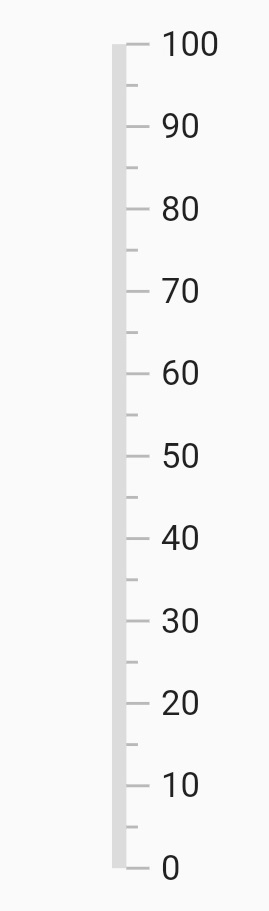
Update orientation
As you can see in the above image, the default orientation of the Linear Gauge is horizontal. You can change it with the orientation property of the Linear Gauge widget.
SfLinearGauge(
    orientation: LinearGaugeOrientation.vertical
  ),
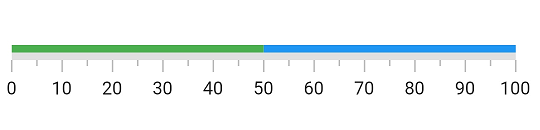
Add range
A range is a visual element that helps you to quickly visualize where a range falls on the axis track. Multiple ranges with different styles can be added to a Linear gauge. You can also specify the start value, end value, and color for a range as demonstrated in the following code sample.
SfLinearGauge(
    ranges: <LinearGaugeRange>[
      //First range
      LinearGaugeRange(startValue: 0, endValue: 50, color: Colors.green),
      //Second range
      LinearGaugeRange(startValue: 50, endValue: 100, color: Colors.blue)
    ]
  )
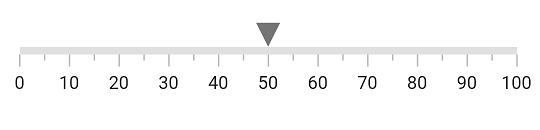
Add marker pointer
The Linear Gauge supports two marker pointers - shape pointer and widget pointer. The shape pointer has a default set of pre-built icons to point to a value in an axis track, while the widget pointer facilitates using any Flutter widget to point to a value in an axis track.
The following code sample demonstrates how to add a shape pointer:
SfLinearGauge(
    markerPointers: [LinearShapePointer(value: 50)]
  ),
The following code sample demonstrates how to add a widget pointer.
SfLinearGauge(
    markerPointers: [
      LinearWidgetPointer(
        value: 40,
        child: Container(
          height: 20,
          width: 20,
          decoration: BoxDecoration(color: Colors.blueAccent)
        ),
      ),
    ],
  ),
Add bar pointer
In a Linear Gauge, the bar pointer is used to specify a value in an axis track by drawing a track from the axis’s minimum value to its specified value.
SfLinearGauge(
    barPointers: [LinearBarPointer(value: 40)]
  ),
The following code example gives you the complete view of the above configurations:
import 'package:flutter/material.dart';
  import 'package:syncfusion_flutter_gauges/gauges.dart';

  void main() => runApp(LinearGaugeDemo());

  class LinearGaugeDemo extends StatelessWidget {
    @override
    Widget build(BuildContext context) {
      return MaterialApp(
        home: Scaffold(
          body: Center(
            child: SfLinearGauge(
              ranges: <LinearGaugeRange>[
                //First range
                LinearGaugeRange(
                  startValue: 0,
                  endValue: 50,
                  color: Colors.green
                ),
                //Second range
                LinearGaugeRange(
                  startValue: 50,
                  endValue: 100,
                  color: Colors.blue
                ),
              ],
              markerPointers: [
                LinearShapePointer(value: 50),
                LinearWidgetPointer(
                  value: 40,
                  child: Container(
                    height: 20,
                    width: 20,
                    decoration: BoxDecoration(color: Colors.blueAccent)
                  ),
                ),
              ],
              barPointers: [LinearBarPointer(value: 40)]
            ),
          )
        )
      );
    }
  }