Convert Word to PDF in Azure App Service Windows
13 Aug 202613 minutes to read
Syncfusion® DocIO is a .NET Core Word library used to create, read, edit and convert Word documents programmatically without Microsoft Word or interop dependencies. Using this library, you can convert a Word document to PDF in Azure App Service on Windows.
Prerequisites
- An active Azure subscription. If you do not have one, create a free Azure account before you begin.
- Visual Studio 2022 or later with the ASP.NET and web development workload installed.
- .NET 8 SDK or a later supported version.
- A valid Syncfusion® license key. Refer to this link to generate and register your license key.
Steps to convert Word document to PDF in Azure App Service on Windows
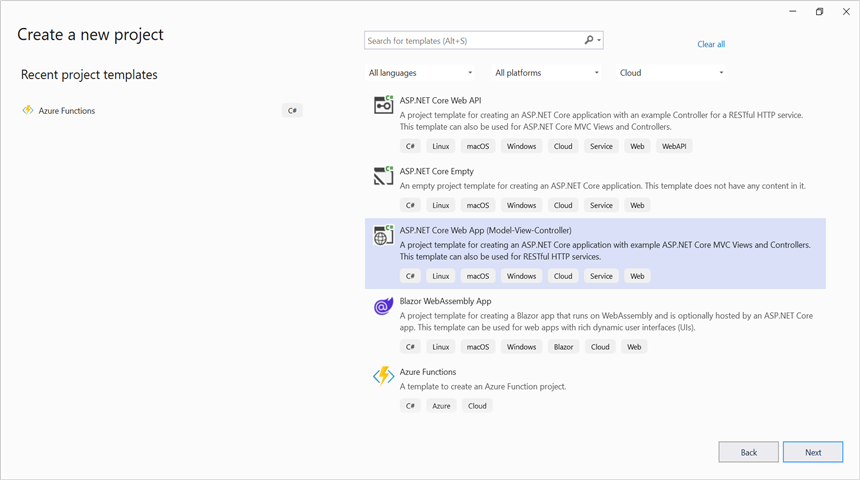
Step 1: Create a new ASP.NET Core Web App (Model-View-Controller).
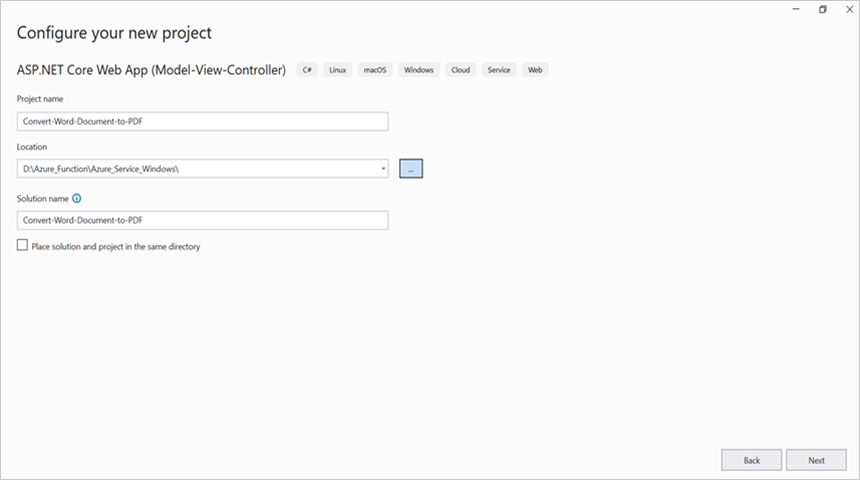
Step 2: Create a project name and select the location.
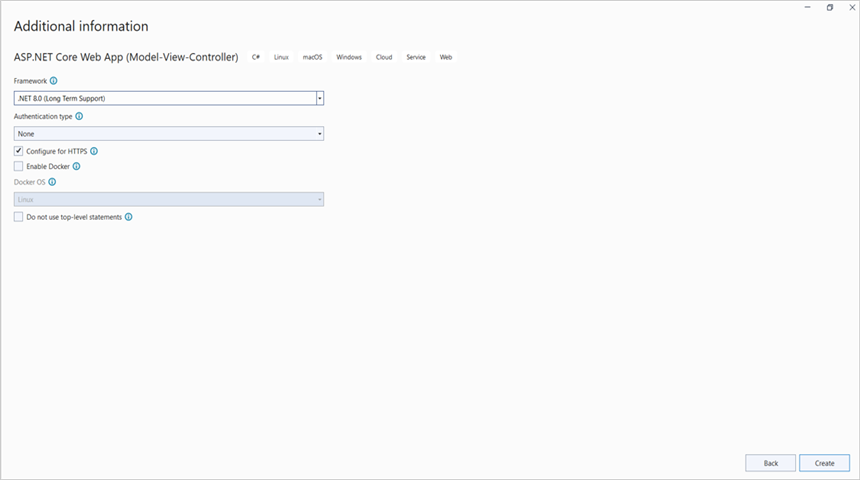
Step 3: Click Create button.
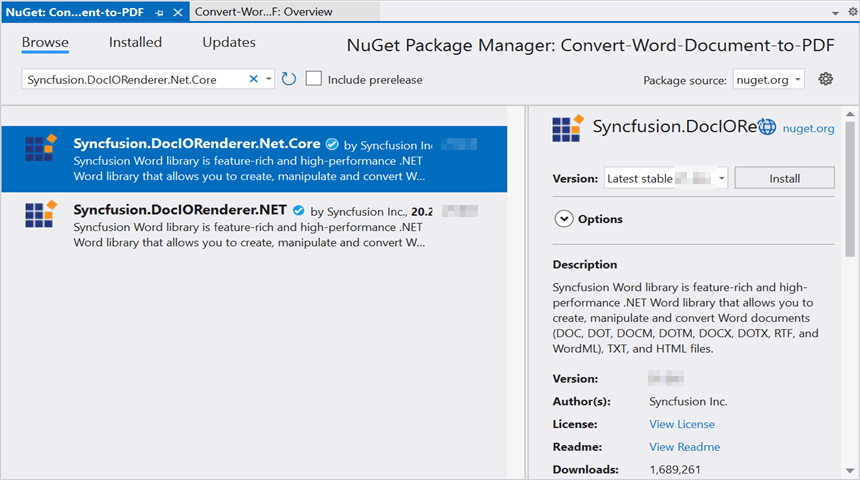
Step 4: Install the Syncfusion.DocIORenderer.Net.Core NuGet package as a reference to your project from NuGet.org.
Starting with v16.2.0.x, if you reference Syncfusion® assemblies from trial setup or from the NuGet feed, you also have to add “Syncfusion.Licensing” assembly reference and include a license key in your projects. Please refer to this link to know about registering Syncfusion® license key in your application to use our components.
Step 5: Add a new button to Index.cshtml as shown below.
@{Html.BeginForm("WordToPDF", "Home", FormMethod.Post, new { enctype = "multipart/form-data" });
{
<div class="Common">
<div class="tablediv">
<div class="rowdiv">
This sample illustrates how to convert Word document to PDF using .NET Word library (DocIO) and .NET PDF library (PDF).
</div>
<div class="rowdiv" style="border-width: 0.5px;border-style:solid; border-color: lightgray; padding: 1px 5px 7px 5px">
Click the button to view the resultant PDF document being converted from Word document using DocIO. Please note that PDF viewer is required to view the resultant PDF.
<div class="rowdiv" style="margin-top: 10px">
<div class="celldiv">
Select Document :
@Html.TextBox("file", "", new { type = "file", accept = ".docx" }) <br />
</div>
<div class="rowdiv" style="margin-top: 8px">
<input class="buttonStyle" type="submit" value="Convert to PDF" name="button" style="width:150px;height:27px" />
<br />
<div class="text-danger">
@ViewBag.Message
</div>
</div>
</div>
</div>
<br />
</div>
</div>
Html.EndForm();
}
}Step 6: Include the following namespaces in HomeController.cs.
using System.IO;
using Microsoft.AspNetCore.Mvc;
using Microsoft.AspNetCore.Hosting;
using Syncfusion.DocIO;
using Syncfusion.DocIO.DLS;
using Syncfusion.DocIORenderer;
using Syncfusion.Pdf;
Step 7: Inject IWebHostEnvironment into the controller and include the below code snippet in HomeController.cs to convert the Word document to PDF.
private Microsoft.AspNetCore.Hosting.IHostingEnvironment _env;
public HomeController(Microsoft.AspNetCore.Hosting.IHostingEnvironment env)
{
    _env = env;
}

/// <summary>
/// Convert Word document to PDF
/// </summary>
/// <param name="button">Submit-button value sent from the form (non-null only after a POST).</param>
/// <returns>Resulting PDF file or the Index view on validation failure.</returns>
public IActionResult WordToPDF(string button)
{

    if (button == null)
        return View("Index");

    if (Request.Form.Files != null)
    {
        if (Request.Form.Files.Count == 0)
        {
            ViewBag.Message = string.Format("Browse a Word document and then click the button to convert as a PDF document");
            return View("Index");
        }
        // Gets the extension from file.
        string extension = Path.GetExtension(Request.Form.Files[0].FileName).ToLower();
        // Compares extension with supported extensions. Only .docx is supported by this sample.
        if (extension == ".docx")
        {
            MemoryStream stream = new MemoryStream();
            Request.Form.Files[0].CopyTo(stream);
            try
            {
                //Open using Syncfusion
                using (WordDocument document = new WordDocument(stream, FormatType.Docx))
                {
                    stream.Dispose();

                    // Creates a new instance of DocIORenderer class.
                    using (DocIORenderer render = new DocIORenderer())
                    {
                        // Converts Word document into PDF document
                        using (PdfDocument pdf = render.ConvertToPDF(document))
                        {
                            MemoryStream memoryStream = new MemoryStream();
                            // Save the PDF document
                            pdf.Save(memoryStream);
                            memoryStream.Position = 0;
                            return File(memoryStream, "application/pdf", "WordToPDF.pdf");
                        }
                    }
                }
            }
            catch (Exception ex)
            {
                ViewBag.Message = ex.ToString();
            }
        }
        else
        {
            ViewBag.Message = string.Format("Please choose Word format document to convert to PDF");
        }
    }
    else
    {
        ViewBag.Message = string.Format("Browse a Word document and then click the button to convert as a PDF document");
    }
    return View("Index");
}
The sample supports only the .docx Word format. To convert legacy .doc files, save them as .docx in Microsoft Word first, or use the Syncfusion Word library’s FormatType.Automatic detection.
Steps to publish as Azure App Service on Windows
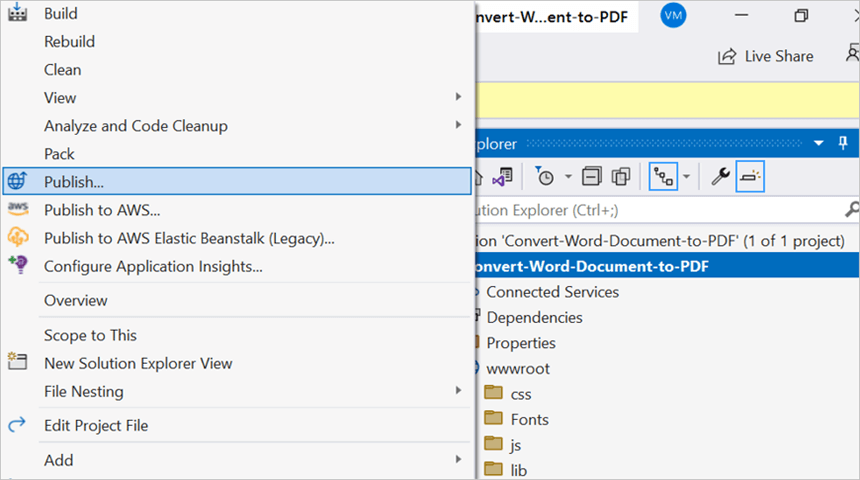
Step 1: Right-click the project and select Publish option.
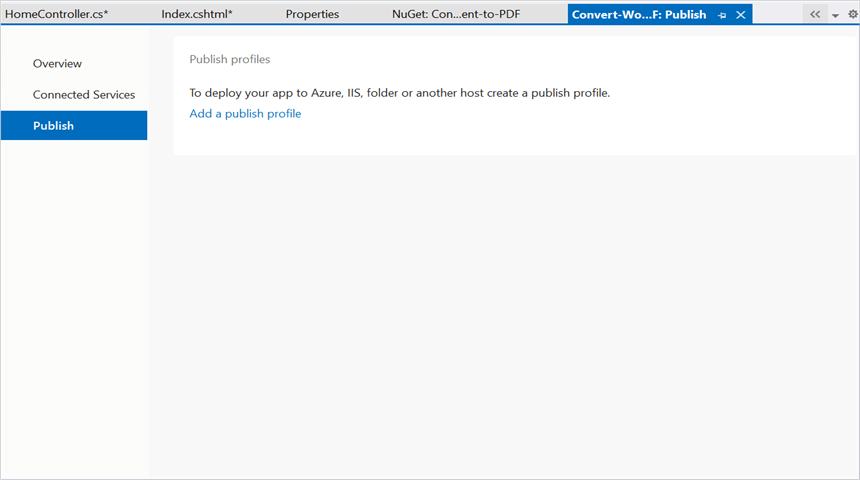
Step 2: Click the Add a Publish Profile button.
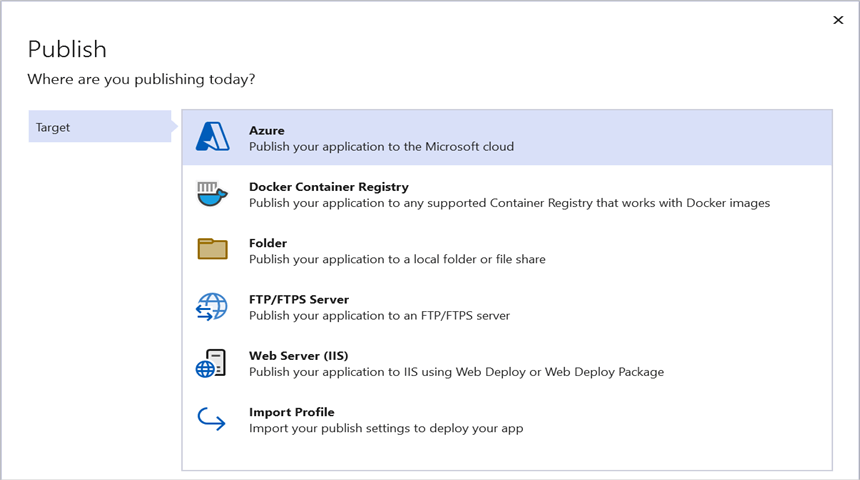
Step 3: Select the publish target as Azure.
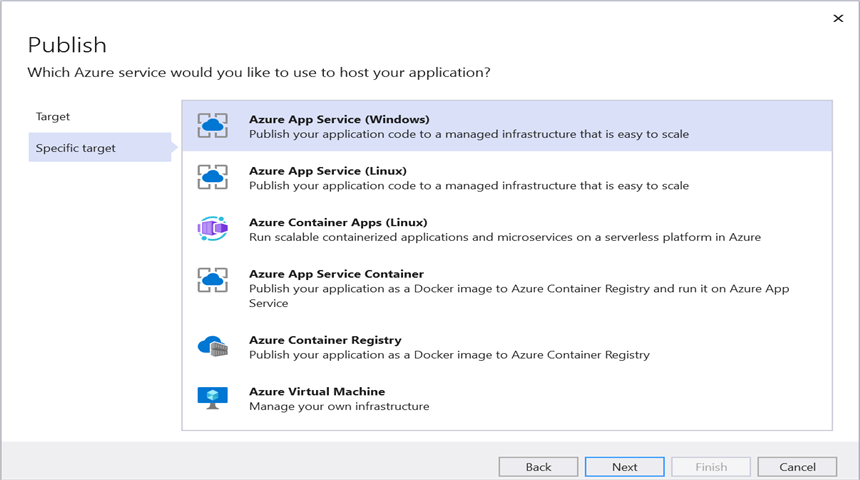
Step 4: Select the Specific target as Azure App Service (Windows).
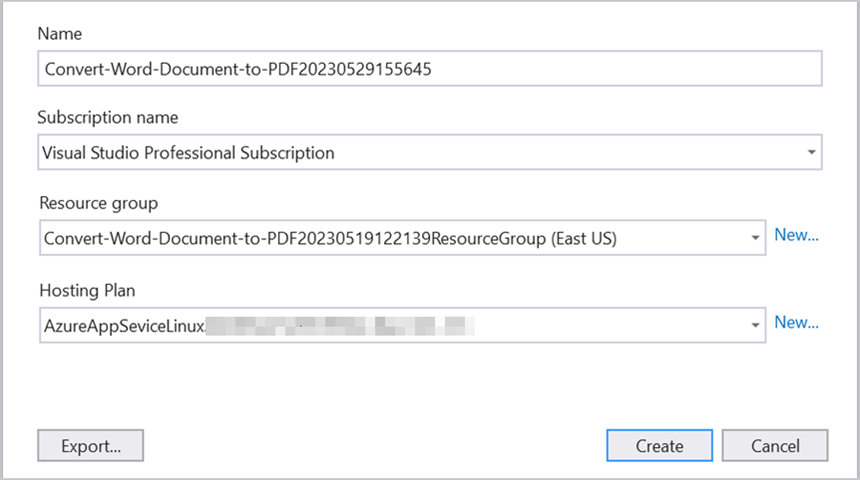
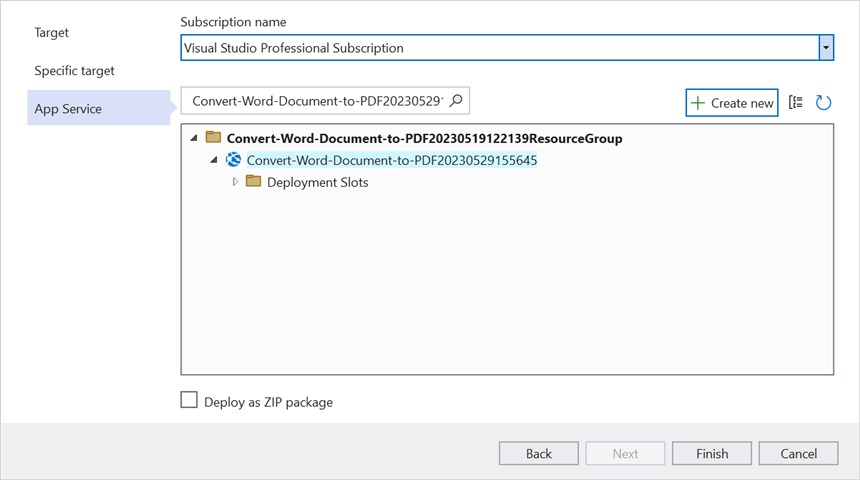
Step 5: To create a new app service, click Create new option.

Step 6: Click the Create button to proceed with App Service creation.
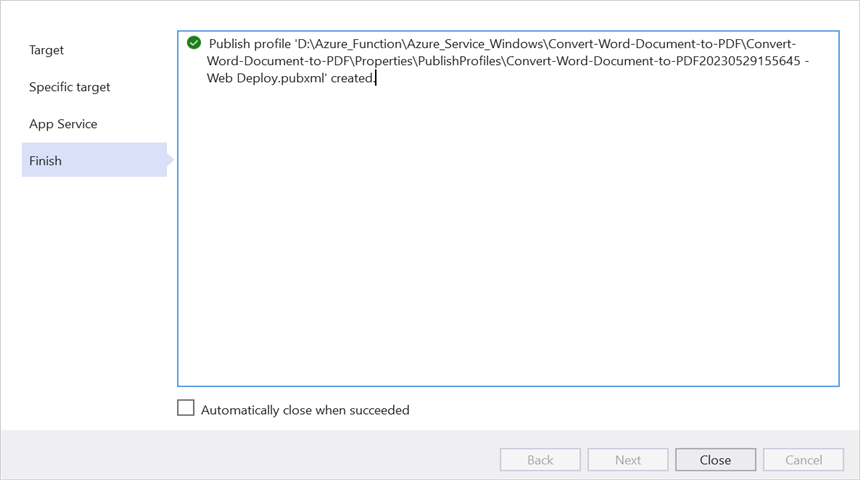
Step 7: Click the Finish button to finalize the App Service creation.
Step 8: Click Close button.
Step 9: Click the Publish button.
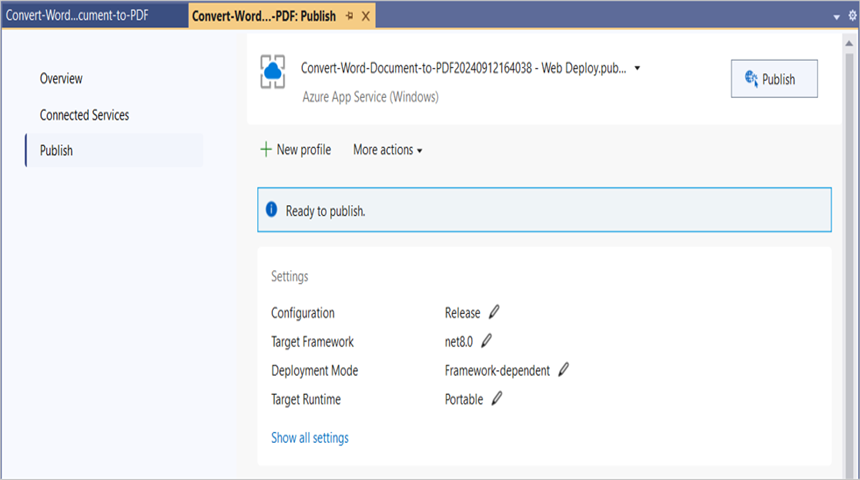
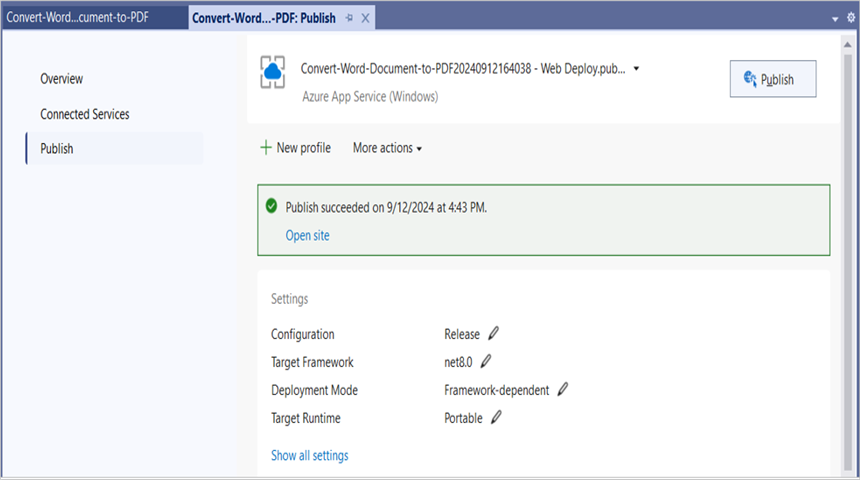
Step 10: Now, Publish has been succeeded.
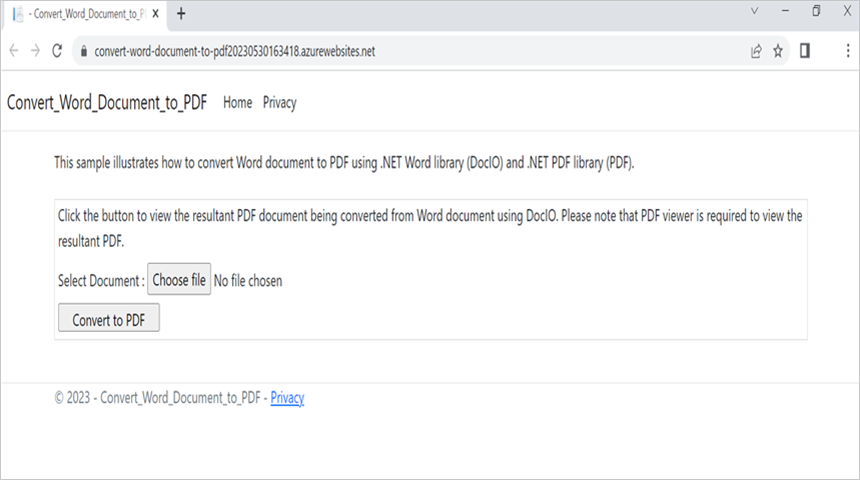
Step 11: Now, the published webpage will open in the browser.
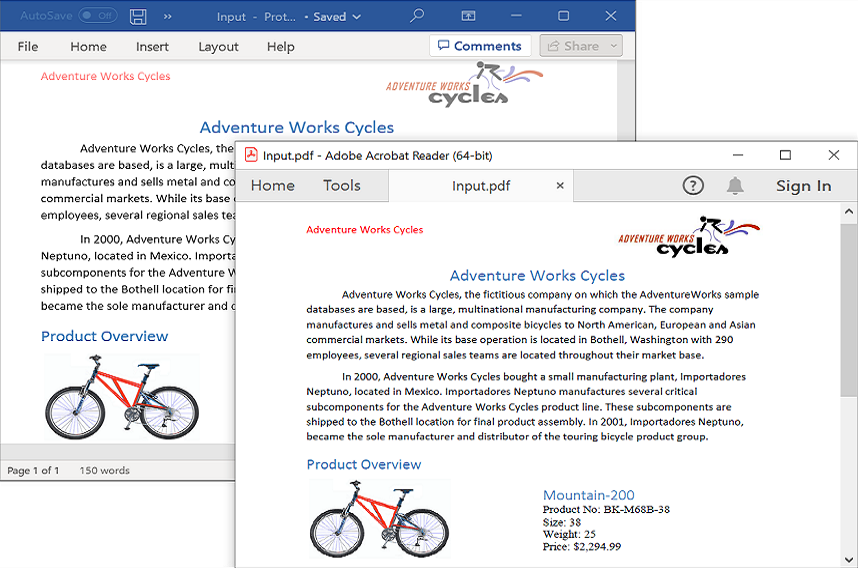
Step 12: Select the Word document and Click Convert to PDF to convert the given Word document to a PDF.You will get the output PDF document as follows.
You can download a complete working sample from GitHub.
Looking for the full .NET Word Library overview, features, pricing, and documentation? Visit the .NET Word Library page.
An online sample link to convert Word document to PDF in ASP.NET Core.