Getting Started with WinForms CheckBox
18 Nov 20182 minutes to read
This section gives detailed description on Getting Started of WinForms CheckBox control.
Assembly Deployment
Refer to the Control Dependencies section to get the list of assemblies or details of NuGet package that needs to be added as reference to use the control in any application.
Refer to NuGet Packages to learn how to install nuget packages in a Windows Forms application.
Adding WinForms CheckBox control via designer
The following steps explain how to create the WinForms CheckBox control via designer.
-
Create a new Windows Forms Project in Visual Studio.
-
Drag and drop the WinForms CheckBox from toolbox in Form designer window.
-
The dependent assemblies will be added automatically.
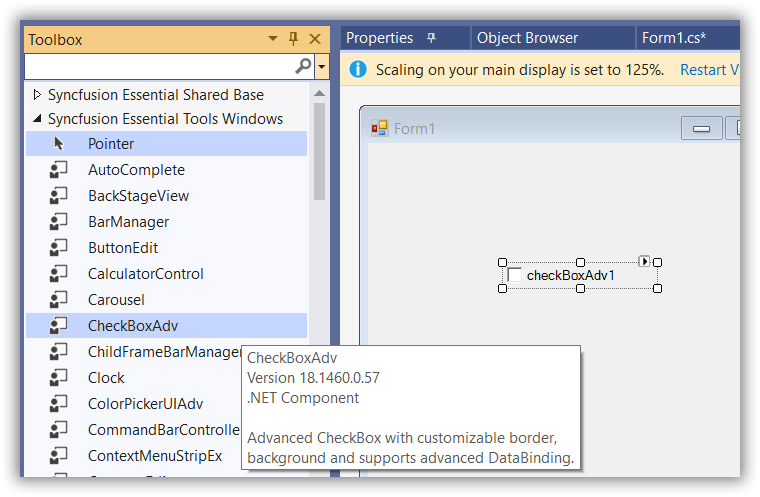
Adding WinForms CheckBox control via code
In order to add WinForms CheckBox control manually, do the below steps,
-
Add the required assembly references to the project.
-
Create the WinForms CheckBox control instance and add it to the Form.
-
Include the required namespace.
using Syncfusion.Windows.Forms.Tools;Imports Syncfusion.Windows.Forms.ToolsCheckBoxAdv checkBoxAdv = new CheckBoxAdv() {Text="CheckBoxAdv", Height = 25, Width = 200 }; this.Controls.Add(checkBoxAdv);Dim checkBoxAdv As CheckBoxAdv = New CheckBoxAdv() With {.Text="CheckBoxAdv", .Height = 25, .Width = 200} Me.Controls.Add(checkBoxAdv)
WinForms CheckBox State
You can get or set the current checked status of WinForms CheckBox using the Checked or CheckState property. The default value of Checked property is false and CheckState property is Unchecked.
this.checkBoxAdv1.Checked = true;
this.checkBoxAdv1.CheckState = System.Windows.Forms.CheckState.Checked;Me.checkBoxAdv1.Checked = True
Me.checkBoxAdv1.CheckState = System.Windows.Forms.CheckState.Checked
To learn more about the WinForms CheckBox states click here.