Getting Started with WinForms Context Menu Strip
18 Nov 20189 minutes to read
Important
Starting with v16.2.0.x, if you refer to Syncfusion assemblies from trial setup or from the NuGet feed, include a license key in your projects. Refer to this link to learn about registering Syncfusion license key in your Windows Forms application to use our components.
This section provides a quick overview for working with the WinForms Context Menu Strip control in a WinForms application.
Dependent Assemblies
The following assemblies need to be added as references to use the control in any application.
- Syncfusion.Tools.Windows
- Syncfusion.Grid.Base
- Syncfusion.Grid.Windows
- Syncfusion.Shared.Base
- Syncfusion.Shared.Windows
- Syncfusion.Tools.Base
- Syncfusion.Licensing (required for license validation starting with v16.2.0.x)
Adding a WinForms Context Menu Strip through designer
The WinForms Context Menu Strip (ContextMenuStripEx) control can be added through the designer by following the steps below.
-
Drag and drop the WinForms Context Menu Strip control from the toolbox (under the section Syncfusion® Windows Forms {Visual Studio Version} Toolbox {Essential Studio Version}) into the designer page. Replace
{Visual Studio Version}and{Essential Studio Version}with the versions installed on your machine (for example, Visual Studio 2022 Toolbox 22.1.36).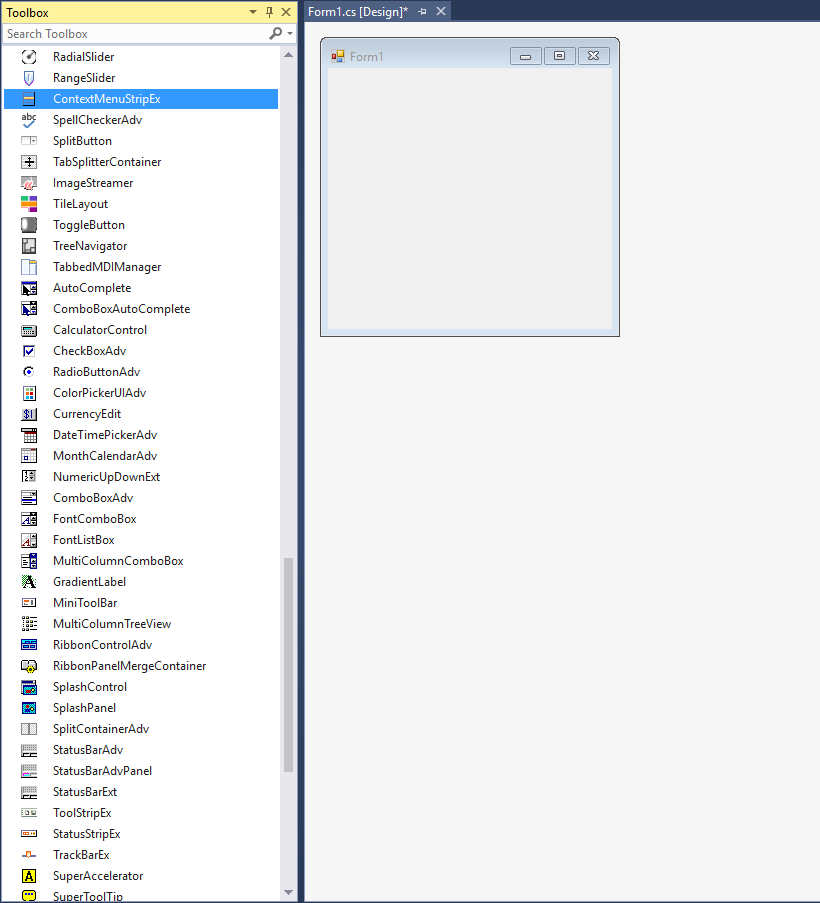
-
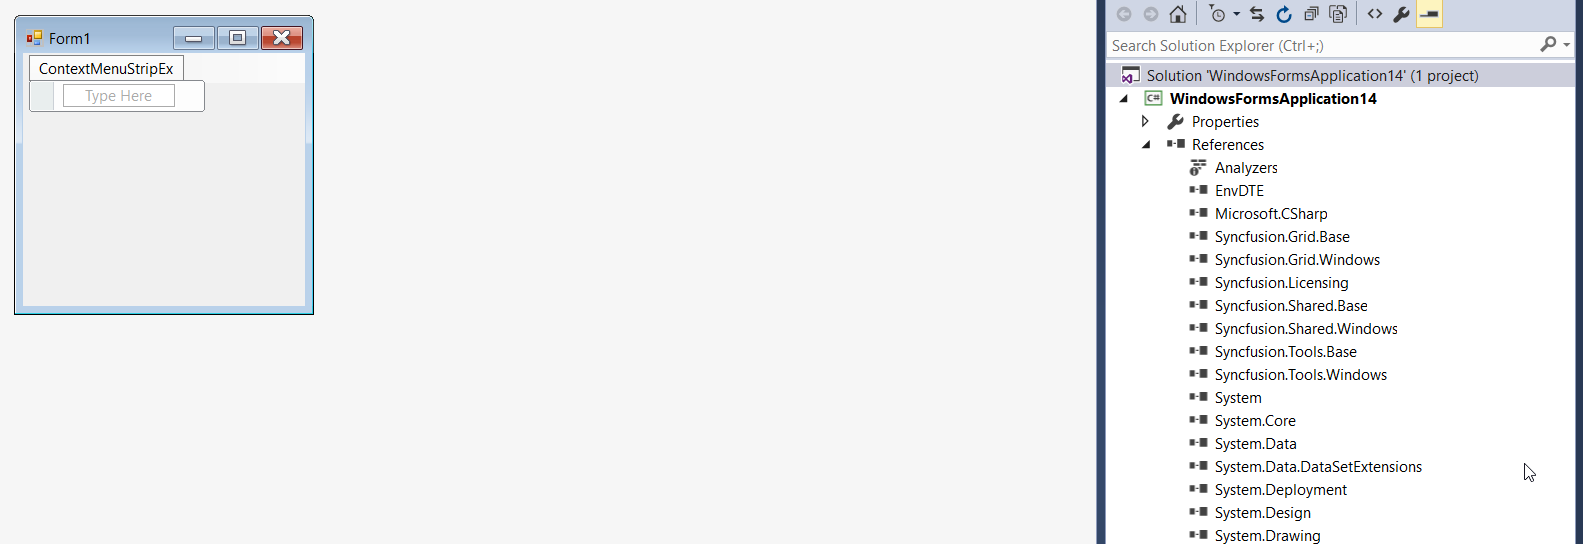
Now the WinForms Context Menu Strip control will be successfully added into the application along with the required dependent assemblies.
-
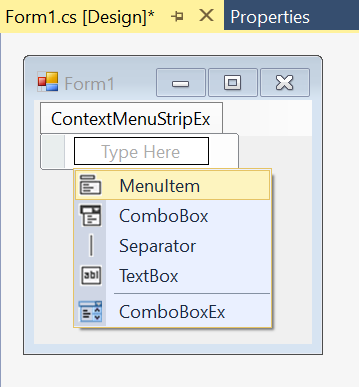
Click Type Here to add items. On clicking, it will display different types of ToolStripItems, using which the user can add items as per their need.
-
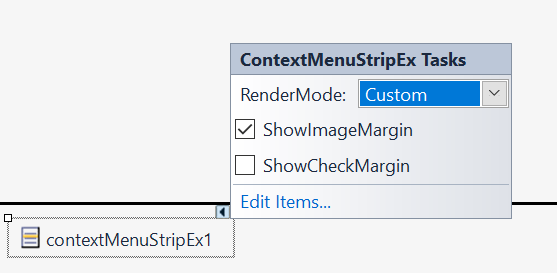
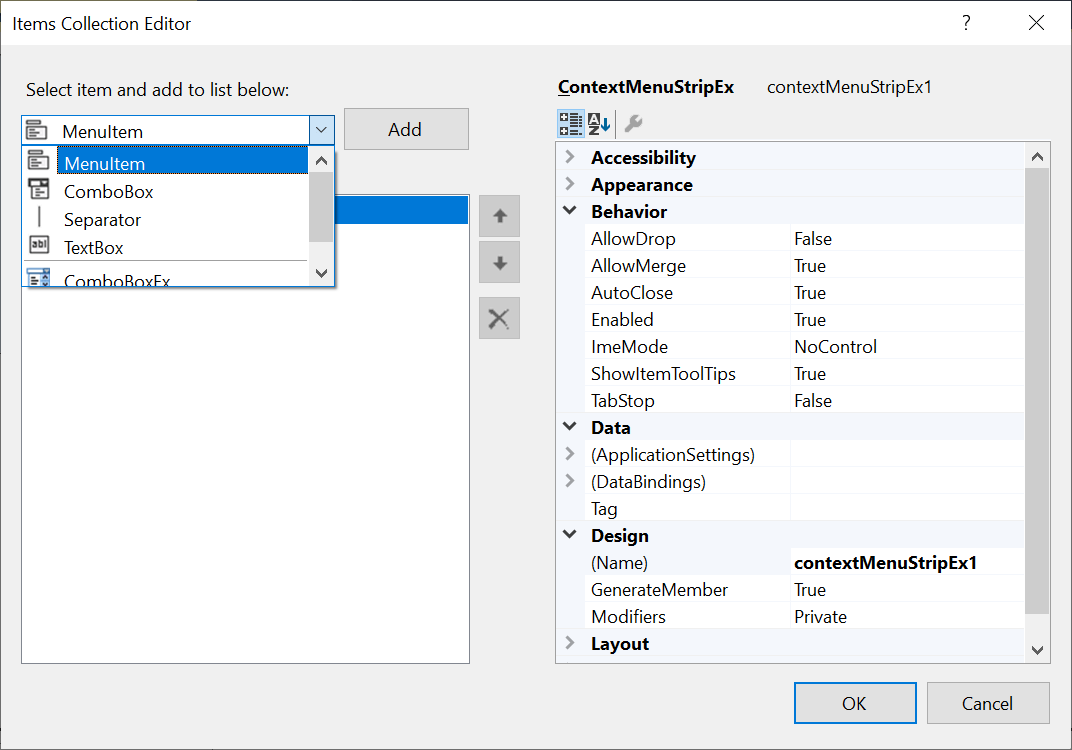
Items can also be added by choosing Edit Items under the Properties smart tag and then selecting the ToolStripItems from the Items Collection Editor.
-
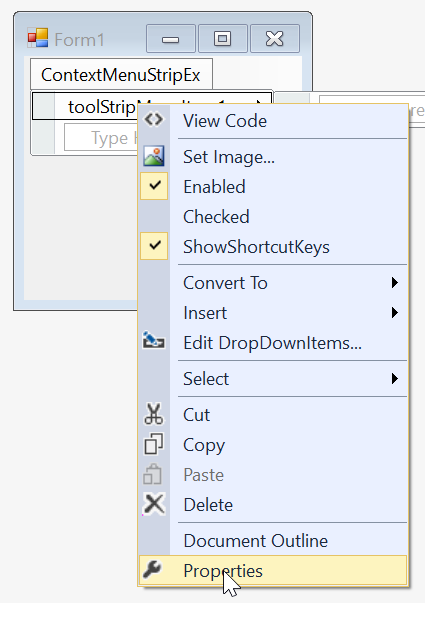
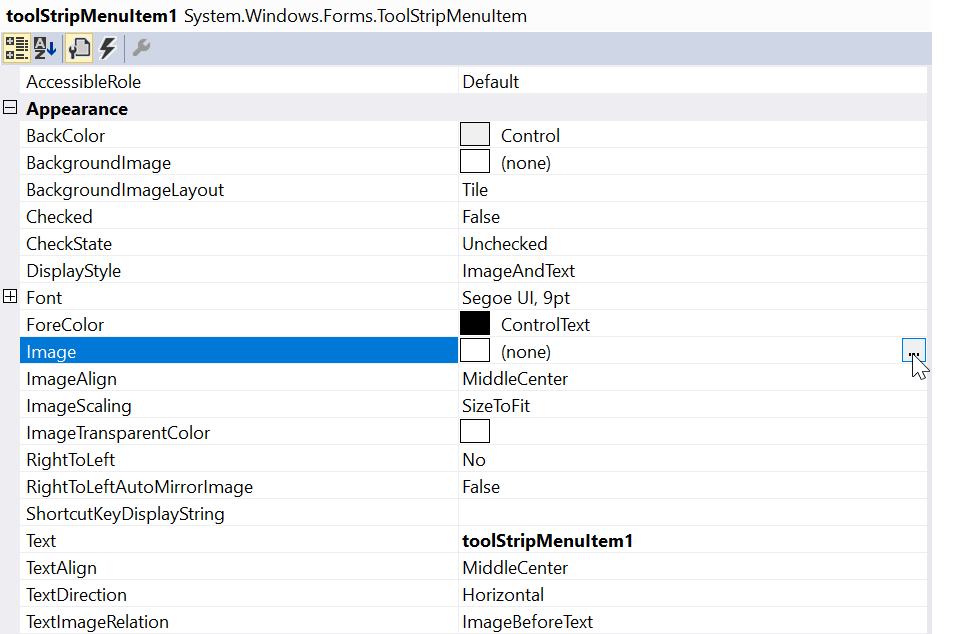
Once the item is added, we can set the image by right-clicking on the particular item in the designer and selecting Properties. Now, in the Properties panel, under Appearance > Image we can browse to the respective image.
-
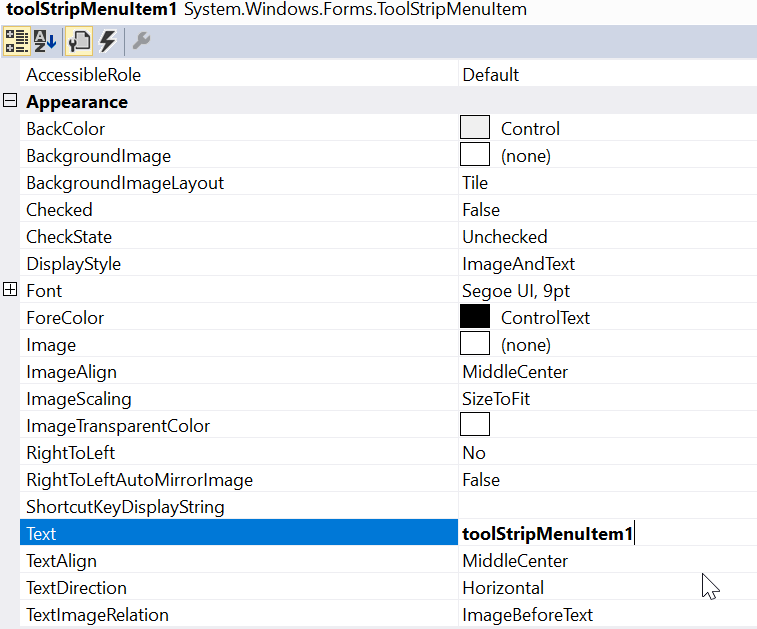
Similarly, we can set the text for a menu item in the Properties panel, under the Appearance > Text section.
-
To associate the WinForms Context Menu Strip to a control we need to drag and drop a control of your choice onto the form. In this illustration, we have used a RichTextBox.
NOTE:
To associate the WinForms Context Menu Strip control, you can choose any type of control like RichTextBox, Button, Label, TextBox, MaskedTextBox, etc.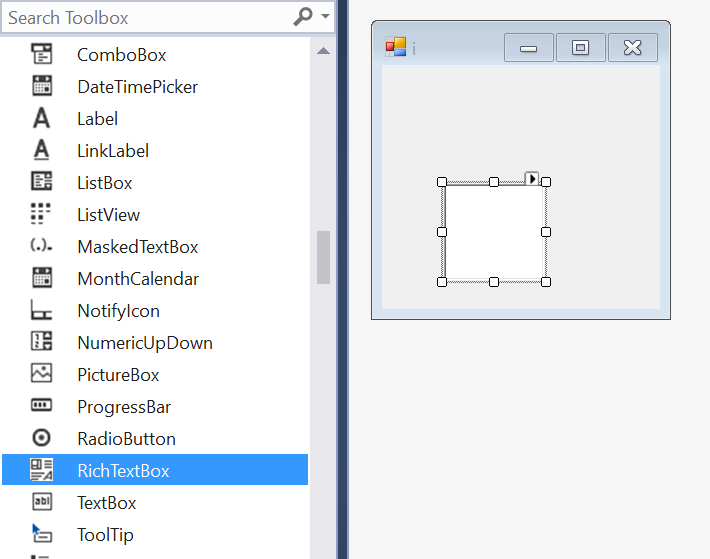
-
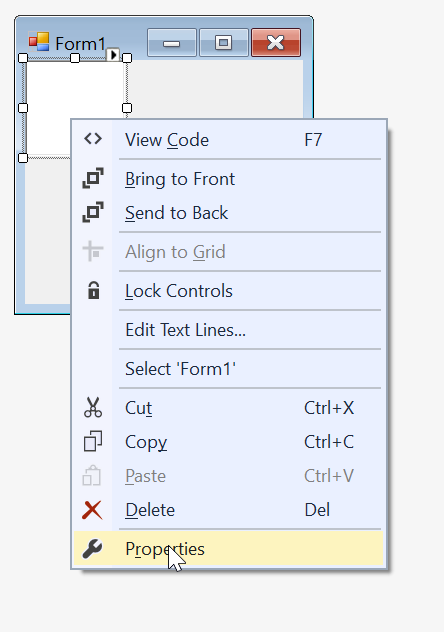
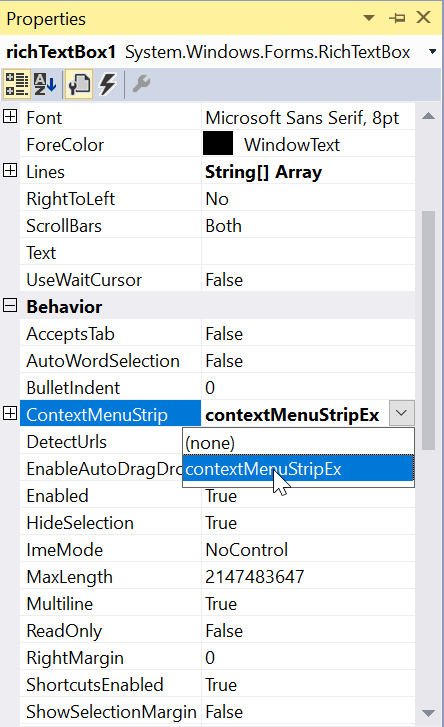
Right-click on the RichTextBox control in the designer and select Properties. Now, in the Properties panel, under Behavior > ContextMenuStrip we need to assign the respective context menu.
-
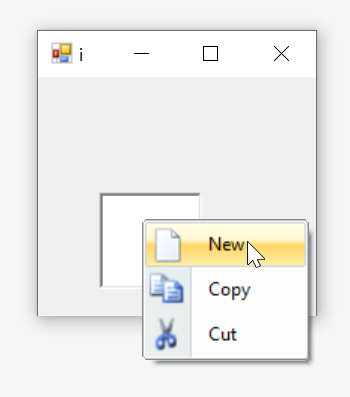
Finally, we have populated the WinForms Context Menu Strip control successfully.
Adding a context menu through code
The WinForms Context Menu Strip control can be added through code by following the steps below.
-
Add the following dependency assembly references to the project.
- Syncfusion.Tools.Windows.dll
- Syncfusion.Grid.Base.dll
- Syncfusion.Grid.Windows.dll
- Syncfusion.Shared.Base.dll
- Syncfusion.Shared.Windows.dll
- Syncfusion.Tools.Base.dll
- Syncfusion.Licensing.dll
You can get these assemblies by browsing to the default assembly location:
{System Drive}:\Program Files (x86)\Syncfusion\Essential Studio\{Platform}\{Build Version Number}\precompiledassemblies\{Framework Version Number}For example:
C:\Program Files (x86)\Syncfusion\Essential Studio\Windows\22.1.36\precompiledassemblies\net472 -
Add the following
using(C#) /Imports(VB) directive at the top of the code file:
using Syncfusion.Windows.Forms.Tools;Imports Syncfusion.Windows.Forms.Tools-
The below code snippets add a WinForms Context Menu Strip control to the application and wire up a
Clickhandler to one of the menu items.//Declaration private Syncfusion.Windows.Forms.Tools.ContextMenuStripEx contextMenuStripEx; private System.Windows.Forms.ToolStripMenuItem toolStripMenuItem1; private System.Windows.Forms.ToolStripMenuItem toolStripMenuItem2; private System.Windows.Forms.ToolStripMenuItem toolStripMenuItem3; private System.Windows.Forms.RichTextBox richTextBox1; //Initializing this.contextMenuStripEx = new Syncfusion.Windows.Forms.Tools.ContextMenuStripEx(); this.toolStripMenuItem1 = new System.Windows.Forms.ToolStripMenuItem(); this.toolStripMenuItem2 = new System.Windows.Forms.ToolStripMenuItem(); this.toolStripMenuItem3 = new System.Windows.Forms.ToolStripMenuItem(); this.richTextBox1 = new System.Windows.Forms.RichTextBox(); //Configure the menu items this.toolStripMenuItem1.Image = System.Drawing.Image.FromFile(@"..\..\..\new.png"); this.toolStripMenuItem2.Image = System.Drawing.Image.FromFile(@"..\..\..\copy.png"); this.toolStripMenuItem3.Image = System.Drawing.Image.FromFile(@"..\..\..\cut.png"); this.toolStripMenuItem1.Text = "New"; this.toolStripMenuItem2.Text = "Copy"; this.toolStripMenuItem3.Text = "Cut"; this.toolStripMenuItem1.Click += new System.EventHandler(this.toolStripMenuItem1_Click); //Populate the context menu and associate it with the RichTextBox this.contextMenuStripEx.Items.AddRange(new System.Windows.Forms.ToolStripItem[] { this.toolStripMenuItem1, this.toolStripMenuItem2, this.toolStripMenuItem3 }); this.richTextBox1.ContextMenuStrip = this.contextMenuStripEx; this.Controls.Add(this.richTextBox1); //Sample click handler private void toolStripMenuItem1_Click(object sender, System.EventArgs e) { MessageBox.Show("New was clicked."); }'Declaration Private contextMenuStripEx As Syncfusion.Windows.Forms.Tools.ContextMenuStripEx Private toolStripMenuItem1 As System.Windows.Forms.ToolStripMenuItem Private toolStripMenuItem2 As System.Windows.Forms.ToolStripMenuItem Private toolStripMenuItem3 As System.Windows.Forms.ToolStripMenuItem Private richTextBox1 As System.Windows.Forms.RichTextBox 'Initializing Me.contextMenuStripEx = New Syncfusion.Windows.Forms.Tools.ContextMenuStripEx() Me.toolStripMenuItem1 = New System.Windows.Forms.ToolStripMenuItem() Me.toolStripMenuItem2 = New System.Windows.Forms.ToolStripMenuItem() Me.toolStripMenuItem3 = New System.Windows.Forms.ToolStripMenuItem() Me.richTextBox1 = New System.Windows.Forms.RichTextBox() 'Configure the menu items Me.toolStripMenuItem1.Image = System.Drawing.Image.FromFile("..\..\..\new.png") Me.toolStripMenuItem2.Image = System.Drawing.Image.FromFile("..\..\..\copy.png") Me.toolStripMenuItem3.Image = System.Drawing.Image.FromFile("..\..\..\cut.png") Me.toolStripMenuItem1.Text = "New" Me.toolStripMenuItem2.Text = "Copy" Me.toolStripMenuItem3.Text = "Cut" AddHandler toolStripMenuItem1.Click, AddressOf toolStripMenuItem1_Click 'Populate the context menu and associate it with the RichTextBox Me.contextMenuStripEx.Items.AddRange(New System.Windows.Forms.ToolStripItem() { _ Me.toolStripMenuItem1, _ Me.toolStripMenuItem2, _ Me.toolStripMenuItem3 _ }) Me.richTextBox1.ContextMenuStrip = Me.contextMenuStripEx Me.Controls.Add(Me.richTextBox1) 'Sample click handler Private Sub toolStripMenuItem1_Click(ByVal sender As Object, ByVal e As System.EventArgs) MessageBox.Show("New was clicked.") End Sub
Adding a WinForms Context Menu Strip through NuGet package
- Right-click your project in Solution Explorer and choose Manage NuGet Packages….
- Search for the Syncfusion WinForms NuGet packages listed in the Control Dependencies section and install them. The required packages are:
Syncfusion.Tools.WindowsSyncfusion.Grid.BaseSyncfusion.Grid.WindowsSyncfusion.Shared.BaseSyncfusion.Shared.WindowsSyncfusion.Tools.Base-
Syncfusion.Licensing(for license validation starting with v16.2.0.x)
- Add the
using Syncfusion.Windows.Forms.Tools;/Imports Syncfusion.Windows.Forms.Toolsdirective and follow the code in the Adding a context menu through code section to instantiate and configure the control.
For more information on installing NuGet packages in a WinForms application, see Steps to install NuGet packages.