Headers in Xamarin Scheduler (SfSchedule)
8 Jan 20254 minutes to read
You can customize the header of the Schedule using HeaderStyle and HeaderHeight property in schedule.
Header Height
You can customize the height for the Header in Schedule using HeaderHeight in schedule.
<syncfusion:SfSchedule x:Name="schedule" HeaderHeight="50" />schedule.HeaderHeight = 50;Appearance
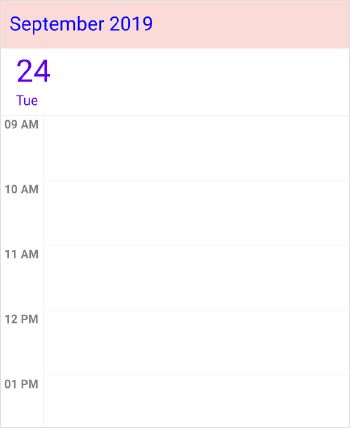
You can change the header format and style using HeaderStyle property in schedule.
You can change the background color, font family, font attributes and font size using properties such as BackgroundColor, FontFamily, FontAttributes, FontSize, TextColor, of Header using HeaderStyle property in schedule.
<syncfusion:SfSchedule x:Name="schedule" >
	<syncfusion:SfSchedule.HeaderStyle>
		<syncfusion:HeaderStyle
			BackgroundColor="#FADBD8"
			TextColor="Blue"
			FontFamily="Arial"/>
	</syncfusion:SfSchedule.HeaderStyle>
</syncfusion:SfSchedule>
HeaderStyle headerStyle = new HeaderStyle();
headerStyle.BackgroundColor = Color.FromRgb(250, 219, 216);
headerStyle.FontFamily = "Arial";
headerStyle.TextColor=Color.Blue;
schedule.HeaderStyle = headerStyle;
NOTE
FontAttributes and FontFamily are native to the platform. Custom font and the font which are not available in the specified platform will not be applied.
Customize Font Appearance
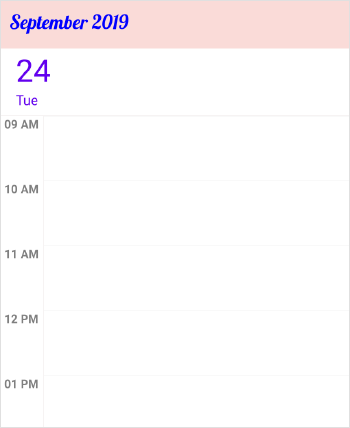
You can change the appearance of Font by setting the FontFamily property of HeaderStyle property in Schedule.
<schedule:HeaderStyle.FontFamily>
	<OnPlatform x:TypeArguments="x:String" iOS="Lobster-Regular" Android="Lobster-Regular.ttf" WinPhone="Assets/Lobster-Regular.ttf#Lobster" />
</schedule:HeaderStyle.FontFamily>headerStyle.FontFamily = Device.OnPlatform("Lobster-Regular", "Lobster-Regular.ttf", "Assets/Lobster-Regular.ttf#Lobster");
Refer this to configure the custom fonts in Xamarin.Forms.
Loading Custom Headers
You can collapse the default header of schedule by setting HeaderHeight property of SfSchedule as 0. Instead you can use your own custom header for it. While navigating views in schedule, text labels available in the header will be changed based on it visible dates, so while using custom header , respective text value can be obtained from the VisibleDatesChanged event of SfSchedule.
//triggering the visible dates changed event.
schedule.VisibleDatesChangedEvent += Schedule_VisibleDatesChangedEvent;

...

private void Schedule_VisibleDatesChangedEvent(object sender, VisibleDatesChangedEventArgs args)
{
	List<DateTime> dateList = new List<DateTime>();
	dateList = (args.visibleDates);
	var headerString = String.Empty;
	var item = dateList[0];
	if (Schedule.ScheduleView == ScheduleView.DayView)
	{
		item = dateList[0];
		headerString = item.Date.ToString("MMMM, yyyy");
	}
	else
	{
		item = dateList[dateList.Count / 2];
		headerString = item.Date.ToString("MMMM, yyyy");
	}
}
You can download the entire source code of this demo for Xamarin.Forms from here
Header Date Format
You can customize the date format of SfSchedule Header by using ScheduleHeaderDateFormat property of SfSchedule.
<schedule:SfSchedule x:Name="schedule" ScheduleHeaderDateFormat = "LLL yy" />//Creating instance of Schedule
SfSchedule schedule = new SfSchedule();
//Customizing date format
schedule.ScheduleHeaderDateFormat = "LLL yy";
Header Tapped Event
You can handle single tap action of Header by using HeaderTapped event of SfSchedule. This event will be triggered when the Header is Tapped. This event contains HeaderTappedEventArgs argument which holds DateTime details in it.
<schedule:SfSchedule x:Name="schedule" HeaderTapped="Handle_HeaderTapped" />//Creating new instance of Schedule
SfSchedule schedule = new SfSchedule();
schedule.HeaderTapped += Handle_HeaderTapped;private void Handle_HeaderTapped(object sender, HeaderTappedEventArgs e)
{
var dateTime = e.DateTime;
}NOTE
You can refer to our Xamarin Scheduler feature tour page for its groundbreaking feature representations. You can also explore our Xamarin Scheduler example to understand how to schedule and manage appointments.
See also
How to create custom header and view header in Xamarin.Forms Schedule?