Getting Started with WPF Scheduler (SfScheduler)
30 Jun 202624 minutes to read
This section provides an overview for working with SfScheduler for WPF and also provides a walk through to configure WPF Scheduler (SfScheduler) control in the real time scenario.
Assembly deployment
Refer to the section on control dependencies for a list of assemblies or NuGet Packages to be used as a guide for using control in any application. Further information on installing the NuGet package can be found in the following link in a WPF application: How to install nuget packages . Use Syncfusion Reference Manager to refer the scheduler’s dependent assemblies.
Create simple application with SfScheduler
In this section, create WPF application with WPF Scheduler (SfScheduler) control.
- Creating project
- Adding control via Designer
- Adding control manually in XAML
- Adding control manually in C#
Creating project
In Visual Studio, create a new WPF project to show the features of the WPF Scheduler (SfScheduler) control and add the following namespace to the added assemblies.
Assembly: Syncfusion.SfScheduler.WPF
Namespace: Syncfusion.UI.Xaml.Scheduler
Adding control via Designer
SfScheduler control can be added to the application by dragging it from Toolbox and dropping it in a Designer view. The required assembly references will be added automatically.
Adding control manually in XAML
To add the control manually in XAML page, follow the given steps:
- Add the
Syncfusion.SfScheduler.WPFassembly reference to the project. - Import WPF schema
http://schemas.syncfusion.com/wpfin the XAML page. -
Declare the
SfSchedulercontrol in XAML page.<Window x:Class="GettingStarted.MainWindow" xmlns="http://schemas.microsoft.com/winfx/2006/xaml/presentation" xmlns:x="http://schemas.microsoft.com/winfx/2006/xaml" xmlns:local="clr-namespace:GettingStarted" xmlns:syncfusion="http://schemas.syncfusion.com/wpf" xmlns:system="clr-namespace:System;assembly=mscorlib" WindowStartupLocation="CenterScreen"> <Grid> <syncfusion:SfScheduler x:Name="Schedule" ViewType="Month"/> </Grid> </Window>
Adding control manually in C#
To add the control manually in C# page, add the Syncfusion.SfScheduler.WPF assembly reference to the project.
using Syncfusion.UI.Xaml.Scheduler;
namespace GettingStarted
{
    public partial class MainWindow : Window
    {
       SfScheduler schedule = new SfScheduler();
       this.Content = schedule;
    }
}
Change different SfScheduler Views
The WPF Scheduler (SfScheduler) control provides five different types of views to display dates and it can be assigned to the control by using ViewType property. By default the control is assigned with MonthView. Current date will be displayed initially for all the Schedule views.
<syncfusion:SfScheduler x:Name="Schedule" ViewType="Month">Schedule.ViewType =SchedulerViewType.Month;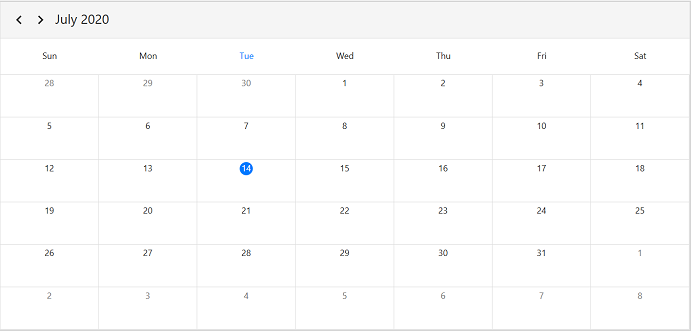
Appointments
SfScheduler has a built-in capability to handle the appointment arrangement internally based on the ScheduleAppointment collections. Allocate the collection generated to Appointments property.
Creating the schedule appointments
The ScheduleAppointment is a class that includes the specific scheduled appointment. It has some basic properties such as StartTime, EndTime, Subject, and some additional information about the appointment can be added with Notes, Location, and IsAllDay properties.
<schedule:SfSchedule x:Name="schedule" ViewType="Month"/>//Creating new event
ScheduleAppointmentCollection appointmentCollection = new ScheduleAppointmentCollection();
//Creating new event
ScheduleAppointment clientMeeting = new ScheduleAppointment();
DateTime currentDate = DateTime.Now;
DateTime startTime = new DateTime(currentDate.Year, currentDate.Month, currentDate.Day, 10, 0, 0);
DateTime endTime = new DateTime(currentDate.Year, currentDate.Month, currentDate.Day, 12, 0, 0);
clientMeeting.StartTime = startTime;
clientMeeting.EndTime = endTime;
clientMeeting.Subject = "ClientMeeting";
appointmentCollection.Add(clientMeeting);
Schedule.ItemsSource = appointmentCollection;Download the entire source code of this demo for WPF from
here SchedulerGettingStarted
Creating the custom Events/Appointments with data mapping
Map the custom appointments data to the scheduler.
Here are the steps to render meetings using SfScheduler control with respective custom data properties created in a class Meeting.
- Create an event Data Model
- Create view model
- Bind to SfScheduler appointment
- Bind item source for Scheduler
Create an event Data Model
Create a custom class Meeting with mandatory fields From, To and EventName that is used to map the information of the appointment.
public class Meeting : INotifyPropertyChanged
    {
        DateTime from, to;
        string eventName;
        bool isAllDay;
        string startTimeZone, endTimeZone;
        Brush color;
        public Meeting()
        {
        }

        public DateTime From
        {
            get { return from; }
            set
            {
                from = value;
                RaisePropertyChanged("From");
            }
        }

        public DateTime To
        {
            get { return to; }
            set
            {
                to = value;
                RaisePropertyChanged("To");
            }
        }

        public bool IsAllDay
        {
            get { return isAllDay; }
            set
            {
                isAllDay = value;
                RaisePropertyChanged("IsAllDay");
            }
        }
        public string EventName
        {
            get { return eventName; }
            set
            {
                eventName = value;
                RaisePropertyChanged("EventName");
            }
        }
        public string StartTimeZone
        {
            get { return startTimeZone; }
            set
            {
                startTimeZone = value;
                RaisePropertyChanged("StartTimeZone");
            }
        }
        public string EndTimeZone
        {
            get { return endTimeZone; }
            set
            {
                endTimeZone = value;
                RaisePropertyChanged("EndTimeZone");
            }
        }

        public Brush Color
        {
            get { return color; }
            set
            {
                color = value;
                RaisePropertyChanged("Color");
            }
        }

        public event PropertyChangedEventHandler PropertyChanged;
        protected virtual void RaisePropertyChanged(string propertyName, object oldValue = null)
        {
            this.PropertyChanged?.Invoke(this, new PropertyChangedEventArgs(propertyName));
        }

    }
Create view model
By setting From and To of the Meeting class, schedule the meetings for a specific day. Change the subject and color of the appointment using EventName and Color property. Define the list of custom appointments in a separate class of ViewModel.
public class ScheduleViewModel
    {
        private List<string> currentDayMeetings;
        private List<string> minTimeMeetings;
        private List<Brush> colorCollection;

        public ScheduleViewModel()
        {
            this.Events = new ObservableCollection<Meeting>();
            this.InitializeDataForBookings();
            this.IntializeAppoitments();
        }

        public ObservableCollection<Meeting> Events
        {
            get;
            set;
        }

        private List<Point> GettingTimeRanges()
        {
            List<Point> randomTimeCollection = new List<Point>();
            randomTimeCollection.Add(new Point(9, 11));
            randomTimeCollection.Add(new Point(12, 14));
            randomTimeCollection.Add(new Point(15, 17));

            return randomTimeCollection;
        }

        private void InitializeDataForBookings()
        {
            this.currentDayMeetings = new List<string>();
            this.currentDayMeetings.Add("General Meeting");
            this.currentDayMeetings.Add("Plan Execution");

            this.minTimeMeetings = new List<string>();
            this.minTimeMeetings.Add("Client Metting");
            this.minTimeMeetings.Add("Birthday wish alert");

            this.colorCollection = new List<Brush>();
            this.colorCollection.Add(new SolidColorBrush((Color)ColorConverter.ConvertFromString("#FF339933")));
            this.colorCollection.Add(new SolidColorBrush((Color)ColorConverter.ConvertFromString("#FF00ABA9")));
            this.colorCollection.Add(new SolidColorBrush((Color)ColorConverter.ConvertFromString("#FFE671B8")));
            this.colorCollection.Add(new SolidColorBrush((Color)ColorConverter.ConvertFromString("#FF1BA1E2")));
            this.colorCollection.Add(new SolidColorBrush((Color)ColorConverter.ConvertFromString("#FFD80073")));
        }
        private void IntializeAppoitments()
        {
            Random randomTime = new Random();
            List<Point> randomTimeCollection = this.GettingTimeRanges();

            DateTime date;
            DateTime dateFrom = DateTime.Now.AddDays(-100);
            DateTime dateTo = DateTime.Now.AddDays(100);
            var random = new Random();
            var dateCount = random.Next(4);
            DateTime dateRangeStart = DateTime.Now.AddDays(0);
            DateTime dateRangeEnd = DateTime.Now.AddDays(1);

            for (date = dateFrom; date < dateTo; date = date.AddDays(1))
            {
                if (date.Day % 7 != 0)
                {
                    for (int additionalAppointmentIndex = 0; additionalAppointmentIndex < 1; additionalAppointmentIndex++)
                    {
                        Meeting meeting = new Meeting();
                        int hour = randomTime.Next((int)randomTimeCollection[additionalAppointmentIndex].X, (int)randomTimeCollection[additionalAppointmentIndex].Y);
                        meeting.From = new DateTime(date.Year, date.Month, date.Day, hour, 0, 0);
                        meeting.To = meeting.From.AddHours(1);
                        meeting.EventName = this.currentDayMeetings[randomTime.Next(2)];
                        meeting.Color = this.colorCollection[randomTime.Next(2)];
                        meeting.IsAllDay = false;
                        meeting.StartTimeZone = string.Empty;
                        meeting.EndTimeZone = string.Empty;
                        this.Events.Add(meeting);
                    }
                }
                else
                {
                    Meeting meeting = new Meeting();
                    meeting.From = new DateTime(date.Year, date.Month, date.Day, randomTime.Next(9, 11), 0, 0);
                    meeting.To = meeting.From.AddDays(2).AddHours(1);
                    meeting.EventName = this.currentDayMeetings[randomTime.Next(2)];
                    meeting.Color = this.colorCollection[randomTime.Next(2)];
                    meeting.IsAllDay = true;
                    meeting.StartTimeZone = string.Empty;
                    meeting.EndTimeZone = string.Empty;
                    this.Events.Add(meeting);
                }
            }
            DateTime minDate;
            DateTime minDateFrom = DateTime.Now.AddDays(-2);
            DateTime minDateTo = DateTime.Now.AddDays(2);

            for (minDate = minDateFrom; minDate < minDateTo; minDate = minDate.AddDays(1))
            {
                Meeting meeting = new Meeting();
                meeting.From = new DateTime(minDate.Year, minDate.Month, minDate.Day, randomTime.Next(9, 18), 30, 0);
                meeting.To = meeting.From;
                meeting.EventName = this.minTimeMeetings[randomTime.Next(0, 1)];
                meeting.Color = this.colorCollection[randomTime.Next(0, 2)];
                meeting.StartTimeZone = string.Empty;
                meeting.EndTimeZone = string.Empty;

                this.Events.Add(meeting);
            }
        }
    }
}
Bind to SfScheduler appointment
Map those properties of the Meeting class with our WPF Scheduler (SfScheduler) control by using the AppointmentMapping property.
<syncfusion:SfScheduler x:Name="Schedule">
<syncfusion:SfScheduler.AppointmentMapping>
<syncfusion:AppointmentMapping
    Subject="EventName"
    StartTime="From"
    EndTime="To"
    AppointmentBackground="Color"
    IsAllDay="IsAllDay"
    StartTimeZone="StartTimeZone"
    EndTimeZone="EndTimeZone"/>
</syncfusion:SfScheduler.AppointmentMapping>
</syncfusion:SfScheduler>
AppointmentMapping appointmentMapping = new AppointmentMapping();
appointmentMapping.IsAllDay = "AllDay";
appointmentMapping.StartTime = "From";
appointmentMapping.EndTime = "To";
appointmentMapping.Subject = "Event name";
appointmentMapping.AppointmentBackground = "color";
appointmentMapping.StartTimeZone = "StartTimeZone";
appointmentMapping.EndTimeZone = "EndTimeZone";
Schedule.AppointmentMapping = appointmentMapping;Bind item source for SfScheduler
Create meetings of type ObservableCollection<Events> and assign those appointments collection Events to the ItemsSource property of SfScheduler.
<Window.DataContext>
        <local:ScheduleViewModel/>
    </Window.DataContext>
      <syncfusion:SfScheduler x:Name="Schedule"
                ItemsSource="{Binding Events}"
                ViewType="Month">
      </syncfusion:SfScheduler>
ScheduleViewModel viewModel = new ScheduleViewModel();
Schedule.ItemsSource = viewModel.Events;NOTE
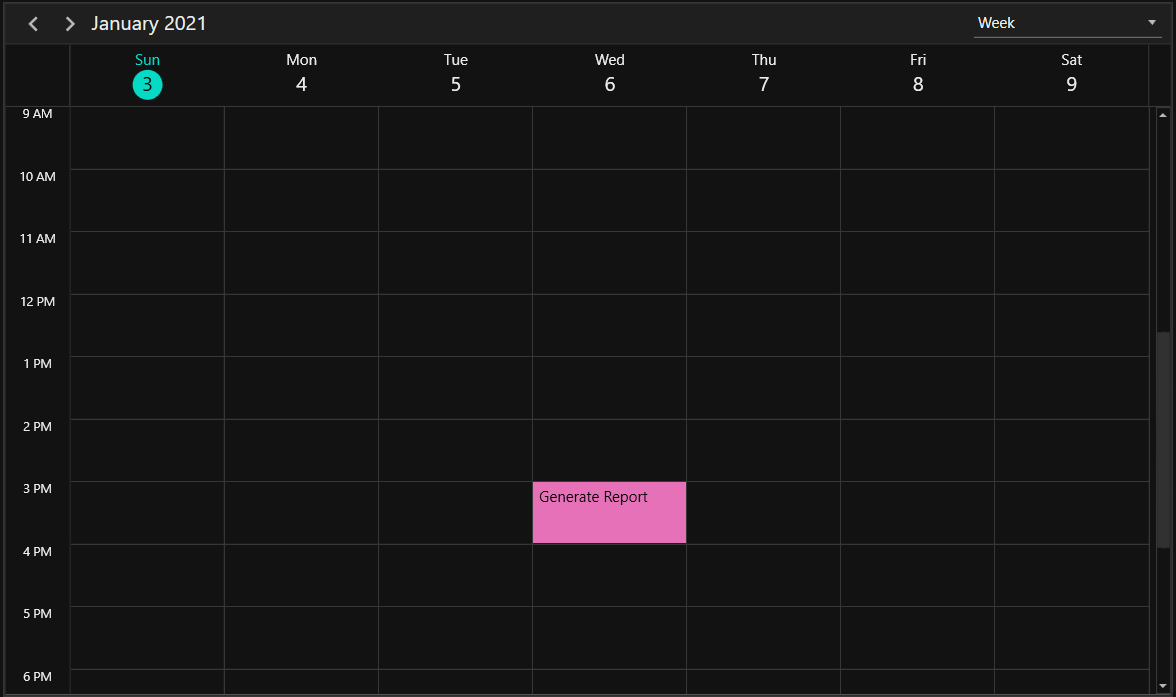
Change first day of week
WPF Scheduler (SfScheduler) control will be rendered with Sunday as the first day of the week, but it can be customized to any day by using FirstDayOfWeek property of SfScheduler.
<syncfusion:SfScheduler x:Name="Schedule" FirstDayOfWeek="Tuesday"/>//setting first day of the week
Schedule.FirstDayOfWeek = DayOfWeek.Tuesday;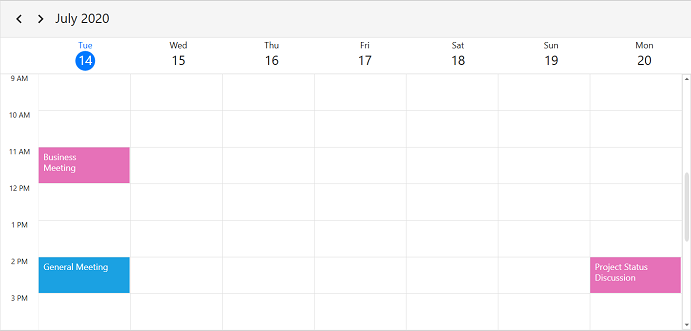
Show busy indicator
The Scheduler supports to show the busy indicator by using the ShowBusyIndicator property. The default value is set to false, if the value is set to true then the busy indicator will be loaded on view or visible date changed.
<syncfusion:SfScheduler x:Name="Schedule"
                ShowBusyIndicator="True"
                ViewType="Month">
        </syncfusion:SfScheduler>
Theme
WPF Scheduler (SfScheduler) supports various built-in themes. Refer to the below links to apply themes for the SfScheduler,
NOTE
You can refer to our WPF Scheduler feature tour page for its groundbreaking feature representations. You can also explore our WPF Scheduler example to knows how to schedule and manage appointments through an intuitive user interface, similar to the Outlook calendar.