How can I help you?
Getting Started with WPF Range Slider (SfRangeSlider)
6 Feb 20253 minutes to read
This section describes how to design a SfRangeSlider control in a WPF application and overview of its basic functionalities.
Assembly deployment
Namespace: Syncfusion.Windows.Controls.Input
Assembly: Syncfusion.SfInput.WPF (in Syncfusion.SfInput.WPF.dll)
Dependent assembly: Syncfusion.SfShared.WPF.dll
Creating a simple application with SfRangeSlider
The SfRangeSlider control can be added to an application using Visual Studio.
Create the WPF application with SfRangeSlider control as follows:
Creating the project
The steps to create a SfRangeSlider control by using Visual Studio in C# are as follows:
-
Open Visual Studio.
-
On the File menu, select New -> Project. This opens the New Project Dialog box.
Adding a control via designer
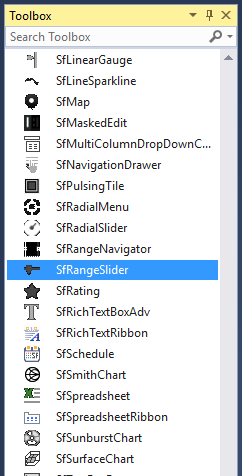
SfRangeSlider control can be added to the application by dragging it from the toolbox and dropping it in a designer view. The following required assembly references will be added automatically:
- Syncfusion.SfInput.WPF
- Syncfusion.SfShared.WPF

<editors:SfRangeSlider
                    Width="500"
                    HorizontalAlignment="Center"
                    VerticalAlignment="Center"
                    Maximum="100"
                    Minimum="0"
                    Value="50" />
Adding a control manually in code
The following code sample shows how to create the SfRangeSlider from code-behind.
SfRangeSlider rangeSlider = new SfRangeSlider()
            {
                Width = 500,
                HorizontalAlignment = HorizontalAlignment.Center,
                VerticalAlignment = VerticalAlignment.Center,
                Minimum = 0,
                Maximum = 100,
                Value = 60
            };
Theme
SfRangeSlider supports various built-in themes. Refer to the below links to apply themes for the SfRangeSlider,
