How can I help you?
Getting Started with Windows Forms Tooltip (SfToolTip)
21 Jan 20259 minutes to read
Assembly Deployment
The following list of assemblies should be added as reference to use the SfToolTip component in any application:
|
Required Assemblies |
Description |
|
Syncfusion.Core.WinForms |
Syncfusion.Core.WinForms assembly contains the theme related classes for the Syncfusion® controls and basic components like SfScrollFrame, SfButton, SfForm and SfSkinManager. |
Refer control dependencies section to get the list of assemblies or NuGet package needs to be added as reference to use the control in any application.
Setting the SfToolTip to a Control
This section describes how to add the SfToolTip to a Control.
Through Designer
Setting using Text
1) Drag and drop the SfToolTip to the form.
2) When the SfToolTip component is added to a form, an extended property will be added to the properties of the controls in the form.
3) Provide the ToolTip text in the extended property for text. (ToolTip on SfToolTip1)
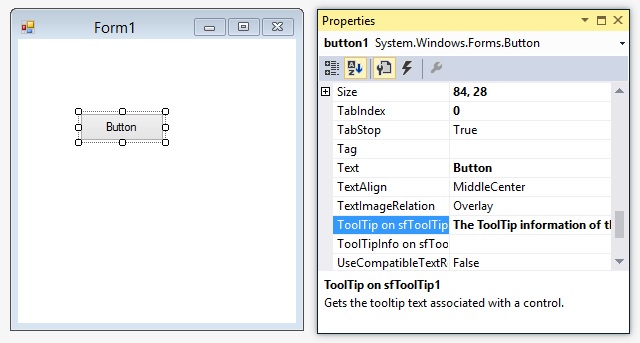
Designer Generated Code
SfToolTip sfToolTip1 = new SfToolTip(this.components);
Button button1 = new System.Windows.Forms.Button();

//

// button1

//
this.button1.Location = new System.Drawing.Point(62, 74);
this.button1.Name = "button1";
this.button1.Size = new System.Drawing.Size(84, 28);
this.button1.TabIndex = 0;
this.button1.Text = "Button";
this.sfToolTip1.SetToolTip(this.button1, "The ToolTip information of the Button control.");
this.button1.UseVisualStyleBackColor = true;
The provided ToolTip text will be configured for the control and will be shown when pausing the mouse cursor on the control.

Setting using ToolTipInfo
1) Drag and drop the SfToolTip to the form.
2) When the SfToolTip component is added to a form, an extended property will be added to the properties of the controls in the form. Clicking the Ellipse button in the ToolTipInfo on sfToolTip1 extended property will show the SfToolTip Editor dialog box.
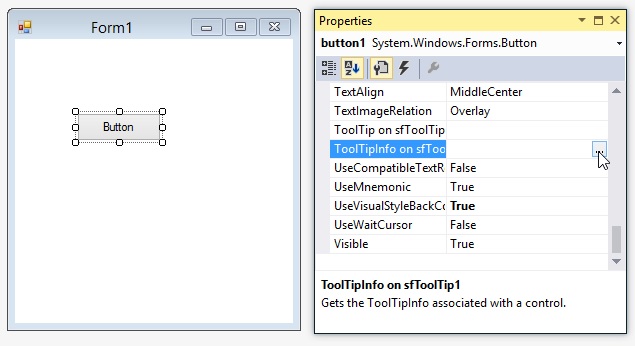
3) The SfToolTip editor lets customizing the ToolTipInfo for the control.
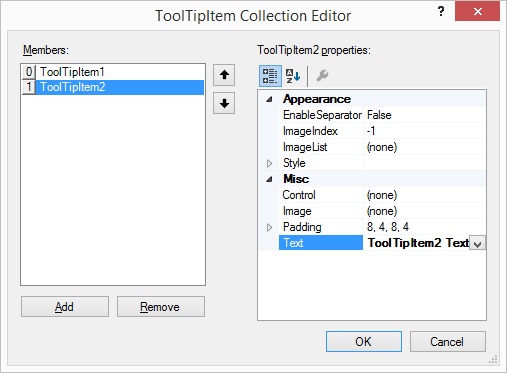
4) Click the Ellipse button in the Items property and you can view the ToolTipItem collection editor.
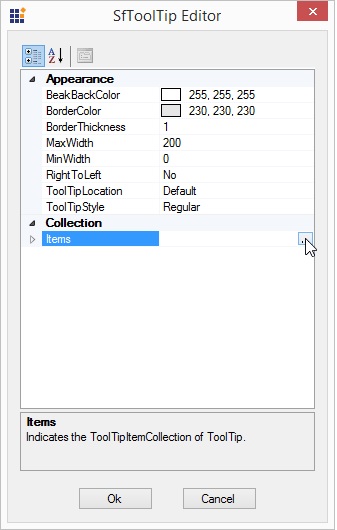
5) Add one or more ToolTipItem to the collection and customize the ToolTipItem if needed.
Designer Generated Code
ToolTipInfo toolTipInfo1 = new ToolTipInfo();
ToolTipItem toolTipItem1 = new ToolTipItem();
ToolTipItem toolTipItem2 = new ToolTipItem();
SfToolTip sfToolTip1 = new SfToolTip(this.components);
Button button1 = new System.Windows.Forms.Button();

//

// button1

//
this.button1.Location = new System.Drawing.Point(62, 74);
this.button1.Name = "button1";
this.button1.Size = new System.Drawing.Size(84, 28);
this.button1.TabIndex = 0;
this.button1.Text = "Button";
toolTipItem1.Text = "ToolTipItem1 Text";
toolTipItem2.Text = "ToolTipItem2 Text";
toolTipInfo1.Items.AddRange(new ToolTipItem[] {
toolTipItem1,
toolTipItem2});
this.sfToolTip1.SetToolTipInfo(this.button1, toolTipInfo1);
this.button1.UseVisualStyleBackColor = true;
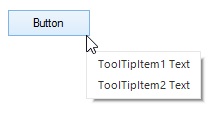
The provided ToolTipInfo will be configured for the control and will be shown when pausing the mouse cursor on the control.
Through Code
Setting using Text
The SfToolTip can be set to the control with tooltip text by using the SetToolTip method.
SfToolTip sfToolTip1 = new SfToolTip();
sfToolTip1.SetToolTip(this.button1, " The ToolTip information of the Button control.");
Setting using ToolTipInfo
The SfToolTip can be set to the control with set of tooltip information by using the SetToolTipInfo method.
SfToolTip sfToolTip1 = new SfToolTip();
ToolTipInfo toolTipInfo1 = new ToolTipInfo();
ToolTipItem toolTipItem1 = new ToolTipItem();

toolTipItem1.Text = "ToolTipItem 1 Text";
ToolTipItem toolTipItem2 = new ToolTipItem();

toolTipItem2.Text = "ToolTipItem 2 Text";
toolTipInfo1.Items.AddRange(new ToolTipItem[] { toolTipItem1, toolTipItem2 });
sfToolTip1.SetToolTipInfo(this.button1, toolTipInfo1);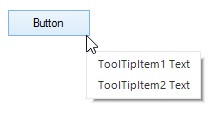
Displaying the SfToolTip Programmatically
Show Tooltip
The SfToolTip can be shown programmatically using the Show method. The various overloads provided to show the tooltip are documented in Show.
NOTE
If the position of tooltip to be shown is not mentioned, the tooltip will be shown in mouse cursor position.
Button button1 = new Button();
this.Controls.Add(button1);
button1.Click += Button1_Click;

Button button2 = new Button();
this.Controls.Add(button2);
button2.Click += Button2_Click;

Button button3 = new Button();
this.Controls.Add(button3);
button3.Click += Button3_Click;
private void Button1_Click(object sender, EventArgs e)
{

// Shows the text in the cursor position.
    this.sfToolTip1.Show("Programmatically showing the tooltip text");
}
private void Button2_Click(object sender, EventArgs e)
{

// Shows the text in the specified position.
    this.sfToolTip1.Show("Programmatically showing the tooltip in specified position", new Point(300, 300));
}
private void Button3_Click(object sender, EventArgs e)
{
    ToolTipInfo toolTipInfo = new ToolTipInfo();
    ToolTipItem toolTipItem = new ToolTipItem();
    toolTipItem.Text = "ToolTipItem text";
    toolTipInfo.Items.Add(toolTipItem);

// Shows the ToolTipInfo in  cursor position.
this.sfToolTip1.Show(toolTipInfo);
}
Hide Tooltip
The SfToolTip can be hidden using the Hide method.
this.sfToolTip1.Hide();Setting the ToolTip Delay
The following properties can be used to set the ToolTip delay time:
- InitialDelay
- AutoPopDelay.
InitialDelay
The InitialDelay property enables you to shorten or lengthen the time that the SfToolTip waits before displaying a ToolTip. Default value is 0.
SfToolTip sfToolTip1 = new SfToolTip();
sfToolTip1.InitialDelay = 1000;
AutoPopDelay
The AutoPopDelay property enables you to shorten or lengthen the time duration that the tooltip is displayed when the mouse pointer is on a control. Default value is 5000.
SfToolTip sfToolTip1 = new SfToolTip();
sfToolTip1.AutoPopDelay = 10000;
Showing ToolTip with Beak
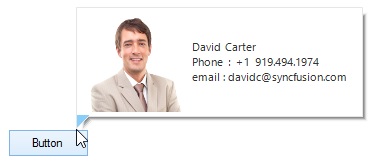
The SfToolTip can be shown with the beak by using the ToolTipStyle property.
ToolTipInfo toolTipInfo1 = new ToolTipInfo();
toolTipInfo1.ToolTipStyle = ToolTipStyle.Balloon;

ToolTipItem toolTipItem1 = new ToolTipItem();
toolTipItem1.Text = "David Carter\r\nPhone : +1 919.494.1974\r\nEmail : [email protected]";
toolTipItem1.Style.TextAlignment = ContentAlignment.MiddleLeft;
toolTipItem1.Image = global::GettingStarted.Properties.Resources.MORGK;
toolTipItem1.Style.ImageSize = new Size(100, 100);
toolTipInfo1.Items.AddRange(new ToolTipItem[] { toolTipItem1 });
sfToolTip1.SetToolTipInfo(this.button2, toolTipInfo1);
Setting the Beak Back Color
The back color of the balloon beak can be set using the BeakBackColor of ToolTipInfo property.
ToolTipInfo toolTipInfo1 = new ToolTipInfo();
toolTipInfo1.ToolTipStyle = ToolTipStyle.Balloon;
toolTipInfo1.BeakBackColor = Color.LightSkyBlue;
ToolTipItem toolTipItem1 = new ToolTipItem();
toolTipItem1.Text = "David Carter\r\nPhone : +1 919.494.1974\r\nEmail : [email protected]";
toolTipItem1.Style.TextAlignment = ContentAlignment.MiddleLeft;
toolTipItem1.Image = global::GettingStarted.Properties.Resources.MORGK;
toolTipItem1.Style.ImageSize = new Size(100, 100);
toolTipInfo1.Items.AddRange(new ToolTipItem[] { toolTipItem1 });
sfToolTip1.SetToolTipInfo(this.button2, toolTipInfo1);