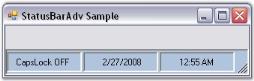
Getting Started with Windows Forms Status Bar
18 Nov 20186 minutes to read
This section explains how to get started with the Windows Forms Status Bar control using the designer and code.
Assembly Deployment
Refer to the Control Dependencies section for the list of assemblies and NuGet packages required to use the StatusBarAdv control.
Refer to NuGet Packages to learn how to install NuGet packages in a Windows Forms application.
To install the required NuGet package using the NuGet Package Manager Console, run the following command:
Install-Package Syncfusion.Tools.WindowsAdding Status Bar via Designer
The Status Bar control provides full support for the Windows Forms designer. When you drag the control from the Toolbox onto a form, the following required assembly references are added automatically:
- Syncfusion.Grid.Base.dll
- Syncfusion.Grid.Windows.dll
- Syncfusion.Shared.Base.dll
- Syncfusion.Shared.Windows.dll
- Syncfusion.Tools.Base.dll
- Syncfusion.Tools.Windows.dll
To create a StatusBarAdv control using the designer:
-
Drag the
StatusBarAdvcontrol from the Toolbox onto the form.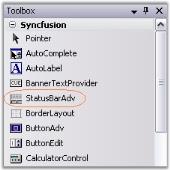
-
Configure the desired background appearance of the
StatusBarAdvcontrol using the background-related properties in the Properties window. -
Drag and drop a
StatusBarAdvPanelonto theStatusBarAdvcontrol. Set thePanelTypeproperty to the required value for eachStatusBarAdvPanel. -
Build and run the application.
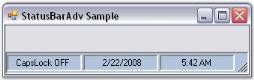
Note: In .NET Core, the Status Bar control’s Collection Editor displays the title “ControlProxy`1 CollectionEditor” instead of “StatusBarAdvPanel CollectionEditor”. This is a known issue and does not affect functionality. For more information, see GitHub issue #14049.
Adding Status Bar via Code
To create the StatusBarAdv control programmatically:
-
Create a new C# or VB.NET Windows Forms application in Visual Studio.
-
Add the following required assembly references to the project:
- Syncfusion.Grid.Base.dll
- Syncfusion.Grid.Windows.dll
- Syncfusion.Shared.Base.dll
- Syncfusion.Shared.Windows.dll
- Syncfusion.Tools.Base.dll
- Syncfusion.Tools.Windows.dll
Refer to the Assembly deployment section for details.
-
Add the required namespace to the form.
using Syncfusion.Windows.Forms.Tools;Imports Syncfusion.Windows.Forms.Tools -
Declare instances of the
StatusBarAdvandStatusBarAdvPanelcontrols.
private StatusBarAdv statusBarAdv1;
   private StatusBarAdvPanel statusBarAdvPanel1;
   private StatusBarAdvPanel statusBarAdvPanel2;
   private StatusBarAdvPanel statusBarAdvPanel3;
Private statusBarAdv1 As StatusBarAdv
Private statusBarAdvPanel1 As StatusBarAdvPanel
Private statusBarAdvPanel2 As StatusBarAdvPanel
Private statusBarAdvPanel3 As StatusBarAdvPanel-
Initialize the controls.
this.statusBarAdv1 = new StatusBarAdv(); this.statusBarAdvPanel1 = new StatusBarAdvPanel(); this.statusBarAdvPanel2 = new StatusBarAdvPanel(); this.statusBarAdvPanel3 = new StatusBarAdvPanel();Me.statusBarAdv1 = New StatusBarAdv() Me.statusBarAdvPanel1 = New StatusBarAdvPanel() Me.statusBarAdvPanel2 = New StatusBarAdvPanel() Me.statusBarAdvPanel3 = New StatusBarAdvPanel() -
Configure the required properties and add the
StatusBarAdvcontrol to the form.this.statusBarAdv1.BackColor = System.Drawing.Color.LightSteelBlue; this.statusBarAdv1.BorderColor = System.Drawing.Color.Black; this.statusBarAdv1.Dock = System.Windows.Forms.DockStyle.Bottom; this.statusBarAdv1.Name = "statusBarAdv1"; this.statusBarAdv1.Controls.Add(this.statusBarAdvPanel1); this.statusBarAdv1.Controls.Add(this.statusBarAdvPanel2); this.statusBarAdv1.Controls.Add(this.statusBarAdvPanel3); this.statusBarAdvPanel1.PanelType = StatusBarAdvPanelType.CurrentCulture; this.statusBarAdvPanel2.PanelType = StatusBarAdvPanelType.ShortDate; this.statusBarAdvPanel3.PanelType = StatusBarAdvPanelType.ShortTime; this.statusBarAdvPanel1.Size = new System.Drawing.Size(100, 27); this.statusBarAdvPanel2.Size = new System.Drawing.Size(100, 27); this.statusBarAdvPanel3.Size = new System.Drawing.Size(100, 27); this.Controls.Add(this.statusBarAdv1);Me.statusBarAdv1.BackColor = System.Drawing.Color.LightSteelBlue Me.statusBarAdv1.BorderColor = System.Drawing.Color.Black Me.statusBarAdv1.Dock = System.Windows.Forms.DockStyle.Bottom Me.statusBarAdv1.Name = "statusBarAdv1" Me.statusBarAdv1.Controls.Add(Me.statusBarAdvPanel1) Me.statusBarAdv1.Controls.Add(Me.statusBarAdvPanel2) Me.statusBarAdv1.Controls.Add(Me.statusBarAdvPanel3) Me.statusBarAdvPanel1.PanelType = StatusBarAdvPanelType.CurrentCulture Me.statusBarAdvPanel2.PanelType = StatusBarAdvPanelType.ShortDate Me.statusBarAdvPanel3.PanelType = StatusBarAdvPanelType.ShortTime Me.statusBarAdvPanel1.Size = New System.Drawing.Size(100, 27) Me.statusBarAdvPanel2.Size = New System.Drawing.Size(100, 27) Me.statusBarAdvPanel3.Size = New System.Drawing.Size(100, 27) Me.Controls.Add(Me.statusBarAdv1) -
Run the application. By default, the
StatusBarAdvcontrol is docked to the bottom of the form.