Getting Started with WPF CheckedListBox (CheckListBox)
18 Oct 202210 minutes to read
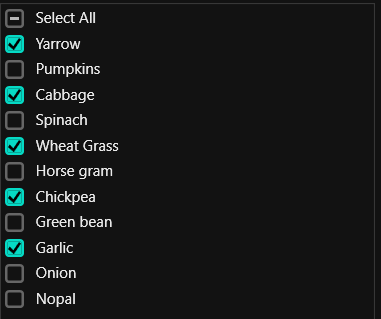
This section explains how to display and select the required items using the WPF CheckListBox control.
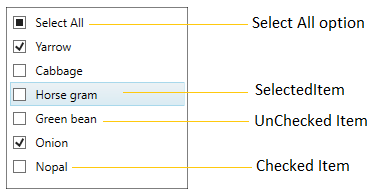
Control Structure
Assembly deployment
Refer to the control dependencies section to get the list of assemblies or NuGet package that needs to be added as reference to use the control in any application.
Further information on installing the NuGet package can be found in the following link: How to install nuget packages.
You can also use the Syncfusion Reference Manager to refer the CheckListBox’s dependent assemblies.
Creating simple application with CheckListBox control
In this walk through, the user will create a WPF application that contains the CheckListBox control.
Creating project
In Visual Studio, create a new WPF project to show the features of the CheckListBox control and add the following namespace to the added assemblies.
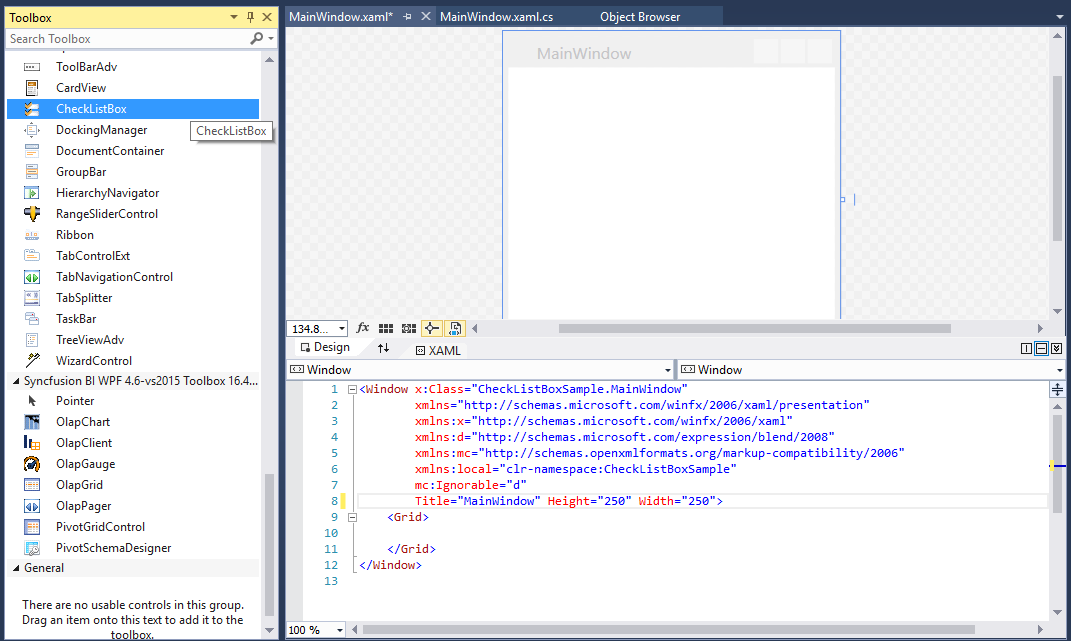
Adding control via designer
The WPF CheckListBox control can be added to the application by dragging it from Toolbox and dropping it in the designer. The required assemblies will be added automatically.
Adding control manually in XAML
To add the WPF CheckListBox control manually in XAML, follow these steps,
-
Add the following assembly references to the project.
- Syncfusion.Shared.WPF
- Syncfusion.Tools.WPF
-
Import Syncfusion WPF schema http://schemas.syncfusion.com/wpf in the XAML page.
-
Declare the
CheckListBoxcontrol in XAML page.<Window xmlns="http://schemas.microsoft.com/winfx/2006/xaml/presentation" xmlns:x="http://schemas.microsoft.com/winfx/2006/xaml" xmlns:d="http://schemas.microsoft.com/expression/blend/2008" xmlns:mc="http://schemas.openxmlformats.org/markup-compatibility/2006" xmlns:local="clr-namespace:GettingStartedComboBox" xmlns:syncfusion="http://schemas.syncfusion.com/wpf" x:Class="GettingStarted.MainWindow" mc:Ignorable="d" Title="MainWindow" Height="450" Width="800"> <Grid> <syncfusion:CheckListBox x:Name="checkListBox" Width="200" Height="300"/> </Grid> </Window>
Adding control manually in C#
To add the CheckListBox control manually in C#, follow these steps,
-
Add the following assembly references to the project.
- Syncfusion.Shared.WPF
- Syncfusion.Tools.WPF
-
Import CheckListBox namespace Syncfusion.Windows.Tools.Controls.
-
Create the
CheckListBoxcontrol instance and add it to the window.using System.Windows; using Syncfusion.Windows.Tools.Controls; namespace ComboBox { /// <summary> /// Interaction logic for MainWindow.xaml /// </summary> public partial class MainWindow : Window { public MainWindow() { InitializeComponent(); //Creating an instance of CheckListBox control. CheckListBox checkListBox = new CheckListBox(); //Adding CheckListBox as window content. this.Content = checkListBox; } } }
Populating items using CheckListBoxItem
You can add the items inside the WPF CheckListBox control using the CheckListBoxItem.
<syncfusion:CheckListBox Height="200" Width="200">
    <syncfusion:CheckListBoxItem Content="Austria" />
    <syncfusion:CheckListBoxItem Content="Australia"/>
    <syncfusion:CheckListBoxItem Content="Canada"/>
    <syncfusion:CheckListBoxItem Content="Finland"/>
    <syncfusion:CheckListBoxItem Content="NewZealand"/>
</syncfusion:CheckListBox>
CheckListBox checkListBox = new CheckListBox();
checkListBox.Height = 200;
checkListBox.Width = 200;
CheckListBoxItem item1 = new CheckListBoxItem() { Content = "Austria" };
CheckListBoxItem item2 = new CheckListBoxItem() { Content = "Australia" };
CheckListBoxItem item3 = new CheckListBoxItem() { Content = "Canada" };
CheckListBoxItem item4 = new CheckListBoxItem() { Content = "Finland" };
CheckListBoxItem item5 = new CheckListBoxItem() { Content = "NewZealand" };
checkListBox.Items.Add(item1);
checkListBox.Items.Add(item2);
checkListBox.Items.Add(item3);
checkListBox.Items.Add(item4);
checkListBox.Items.Add(item5);
this.Content = checkListBox;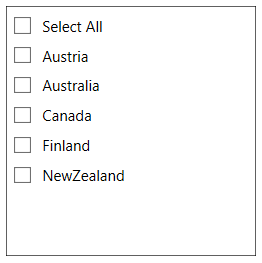
Populating items by DataBinding
You can populate the items to the WPF CheckListBox control by using the ItemsSource property. The DisplayMemberPath property is used to the name or path of the property displayed for each data item in the control.
-
Create Model and populate it with required properties. Create the ViewModel class and populate ObservableCollection object with the Model objects.
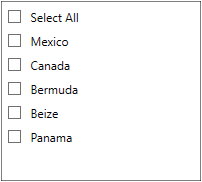
//Model.cs public class Model { public string Name { get; set; } public string Description { get; set; } } //ViewModel.cs public class ViewModel { private ObservableCollection<Model> checkList; public ObservableCollection<Model> CheckListItems { get { return checkList; } set { checkList = value; } } public ViewModel() { CheckListItems = new ObservableCollection<Model>(); populateItem(); } private void populateItem() { CheckListItems.Add(new Model() { Name="Mexico", Description="Mexico"}); CheckListItems.Add(new Model() { Name="Canada", Description="Canada"}); CheckListItems.Add(new Model() { Name="Bermuda", Description="Bermuda"}); CheckListItems.Add(new Model() { Name="Beize", Description="Beize"}); CheckListItems.Add(new Model() { Name="Panama", Description="Panama"}); } } -
Now create an instance of ViewModel in DataContext property of the CheckListBox control in MainWindow.xaml and bind the collection property from ViewModel to the
ItemSourceproperty of CheckListBox. Set the property from Model class to be displayed in theDisplayMemberPathproperty.<!--Adding CheckListBox control --> <syncfusion:CheckListBox ItemsSource="{Binding CheckListItems}" DisplayMemberPath="Name" x:Name="checkListBox"> <syncfusion:CheckListBox.DataContext> <local:ViewModel /> </syncfusion:CheckListBox.DataContext> </syncfusion:CheckListBox>CheckListBox checkListBox = new CheckListBox(); checkListBox.DataContext = new ViewModel(); checkListBox.ItemsSource = (checkListBox.DataContext as ViewModel).CheckListItems; checkListBox.DisplayMemberPath = "Name";
Check or Uncheck items
You can check or uncheck the items in the CheckListBox by clicking on the CheckBox or the content of the item. You can use Space key to uncheck or check the previously selected item.
You can programmatically check the items in CheckListBox by adding the items in the SelectedItems property.
Checked event notification
When the checked state of an item is changed, it will be notified by using the ItemChecked event. You can get the details about the checked item in the ItemCheckedEventArgs.
<!--Adding CheckListBox control -->
<syncfusion:CheckListBox ItemChecked="CheckListBox_ItemChecked"
                         x:Name="checkListBox">
</syncfusion:CheckListBox>
CheckListBox checkListBox = new CheckListBox();
checkListBox.ItemChecked += CheckListBox_ItemChecked;You can handle the event as follows:
private void CheckListBox_ItemChecked(object sender, ItemCheckedEventArgs e)
{
    MessageBox.Show((e.Item as CheckListBoxItem).Content.ToString() + " is checked ");
}
Get list of checked items
The CheckListBox control gets all the checked items using the SelectedItems property. You can also get the currently selected item which is in either checked or unchecked state by using the SelectedItem property.
Localization support
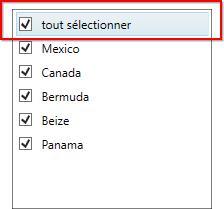
Localization is the process of translating the application resources into different language for the specific cultures. You can localize the Select All CheckListBoxItem in CheckListBox control by adding resource file for each language.
To localize the CheckListBox based on culture using resource files, follow the below steps.
- Change application culture and create
.resxfiles.
NOTE
Refer Localization of Syncfusion WPF Controls page to know more about how to Change application culture and create
.resxfiles into a application.
- After creating
.resxfile, add the Name/Value pair in Resource Designer of created.resxfile and change its corresponding value to corresponding culture.
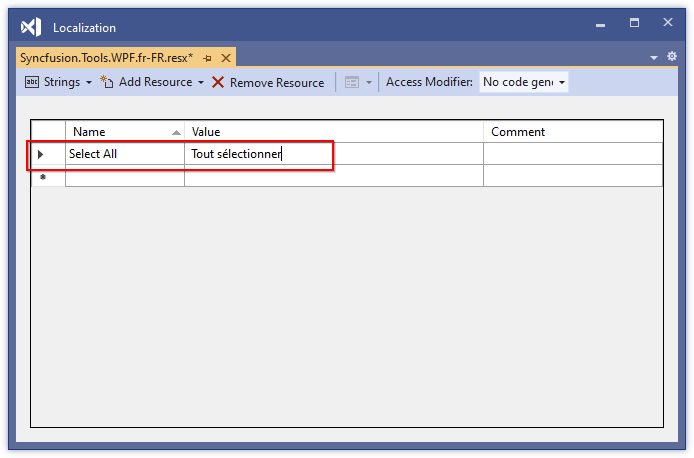
The following screenshot shows the localized CheckListBox control.
Theme
CheckListBox supports various built-in themes. Refer to the below links to apply themes for the CheckListBox,