How can I help you?
Getting Started with WPF Calendar (CalendarEdit)
18 Feb 202517 minutes to read
This section explains how to create a WPF CalendarEdit and explains about its structure.
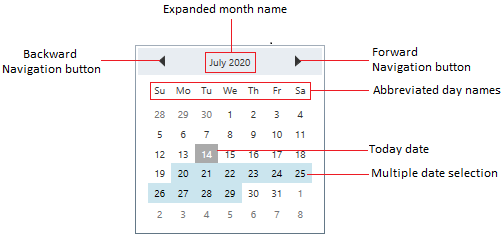
Structure of CalendarEdit
The various elements of CalendarEdit are illustrated in the following screenshot.
Assembly deployment
Refer to the Control Dependencies section to get the list of assemblies or NuGet package that needs to be added as a reference to use the control in any application.
Refer to this documentation to find more details about installing nuget packages in a WPF application.
Adding WPF CalendarEdit via designer
-
The
CalendarEditcan be added to an application by dragging it from the toolbox to a designer view. The following dependent assemblies will be added automatically:- Syncfusion.Shared.WPF
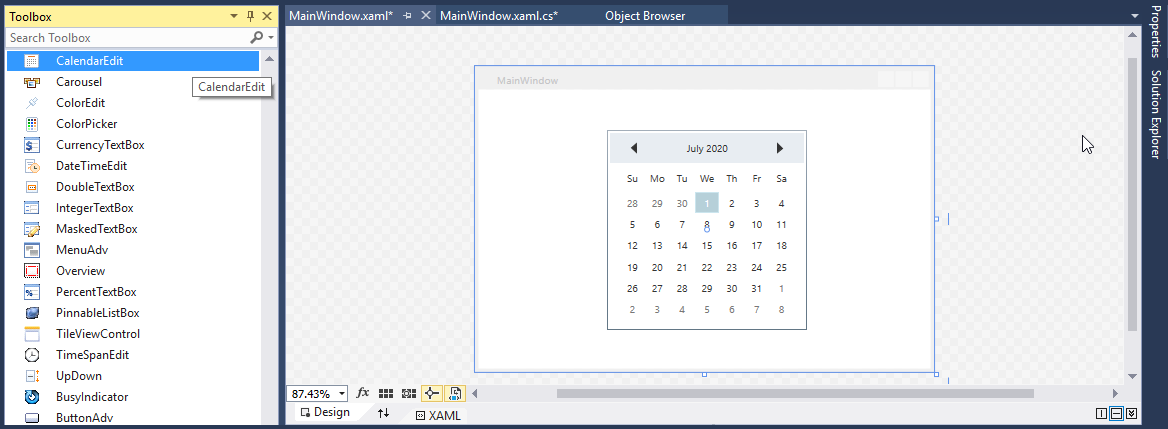
- Set the properties for
CalendarEditin design mode using the SmartTag feature.
Adding WPF CalendarEdit via XAML
To add the CalendarEdit manually in XAML, follow these steps:
-
Create a new WPF project in Visual Studio.
-
Add the following required assembly references to the project:
- Syncfusion.Shared.WPF
-
Import Syncfusion® WPF schema http://schemas.syncfusion.com/wpf, and declare the CalendarEdit in XAML page.
<Window x:Class="CalendarEdit_sample.MainWindow"
        xmlns="http://schemas.microsoft.com/winfx/2006/xaml/presentation"
        xmlns:x="http://schemas.microsoft.com/winfx/2006/xaml"
        xmlns:d="http://schemas.microsoft.com/expression/blend/2008"
        xmlns:mc="http://schemas.openxmlformats.org/markup-compatibility/2006"
        xmlns:local="clr-namespace:CalendarEdit_sample"
        xmlns:syncfusion="http://schemas.syncfusion.com/wpf"
        mc:Ignorable="d"
        Title="MainWindow" Height="450" Width="800">

    <Grid Name="grid">
        <syncfusion:CalendarEdit Name="calendarEdit"
                                 Height="200"
                                 Width="200"/>
    </Grid>
</Window>
Adding WPF CalendarEdit via C#
To add the CalendarEdit manually in C#, follow these steps:
-
Create a new WPF application via Visual Studio.
-
Add the following required assembly references to the project:
- Syncfusion.Shared.WPF
-
Include the required namespace.
using Syncfusion.Windows.Shared; -
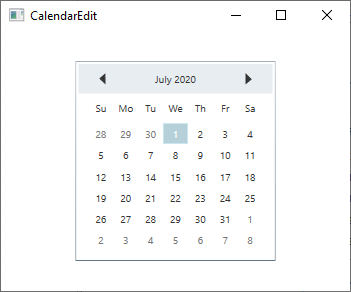
Create an instance of
CalendarEdit, and add it to the window.// Creating an instance of the CalendarEdit CalendarEdit calendarEdit = new CalendarEdit(); // Setting height and width to CalendarEdit calendarEdit.Height = 200; calendarEdit.Width = 200;
NOTE
Select a date
You can select a date in the CalendarEdit control by mouse click on the specific date. You can get the selected date by using the Date property.
<!-- Selecting date -->
<syncfusion:CalendarEdit Name="calendarEdit" />
CalendarEdit calendarEdit = new CalendarEdit();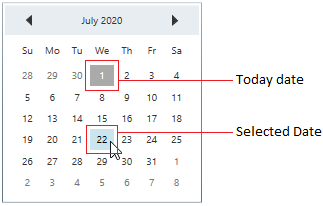
NOTE
Select a date programmatically
You can set selected date programmatically by setting the date value to the Date property.
<!-- Selecting date programmatically -->
<syncfusion:CalendarEdit Date="25/08/2020"
                         Name="calendarEdit"/>
//Selecting date programmatically
calendarEdit.Date = new DateTime(2020, 08, 25);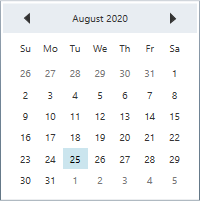
NOTE
Select multiple dates
You can select a multiple dates by drag and move the mouse from required start date to end date.
You can get the selected dates from the SelectedDates property. You can restrict the multiple date selection by setting AllowMultiplySelection property as false. The default value of AllowMultiplySelection property is true.
<!-- Selecting multiple dates-->
<syncfusion:CalendarEdit Name="calendarEdit"
                         AllowMultiplySelection="True"/>
//Selecting multiple dates
calendarEdit.AllowMultiplySelection = true;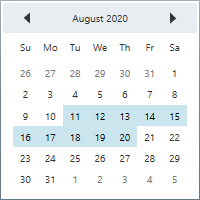
NOTE
Select a multiple dates programmatically
You can select a multiple dates programmatically by setting the dates to the SelectedDatesList property.
<!-- Selecting date -->
<syncfusion:CalendarEdit Date="08/25/2020"
                         AllowMultiplySelection="True"
                         Name="calendarEdit"/>
//Selecting multiple date programmatically
calendarEdit.AllowMultiplySelection = true;
calendarEdit.SelectedDatesList = new List<Date>();
calendarEdit.SelectedDatesList.Add(new Date(2020, 08, 01));
calendarEdit.SelectedDatesList.Add(new Date(2020, 08, 05));
calendarEdit.SelectedDatesList.Add(new Date(2020, 08, 10));
calendarEdit.SelectedDatesList.Add(new Date(2020, 08, 15));
calendarEdit.SelectedDatesList.Add(new Date(2020, 08, 20));
calendarEdit.SelectedDatesList.Add(new Date(2020, 08, 29));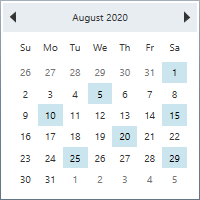
Restrict date selection
You can restrict the users from selecting a date within the particular range by specifying MinDate and MaxDate in CalendarEdit control.
<!--Setting date range -->
<syncfusion:CalendarEdit MinDate="05/1/2020"
                         MaxDate="05/10/2020"
                         Name="calendarEdit"/>
CalendarEdit calendarEdit = new CalendarEdit();
calendarEdit.MinDate = new DateTime(2020, 05, 01);
calendarEdit.MaxDate = new DateTime(2020, 05, 10);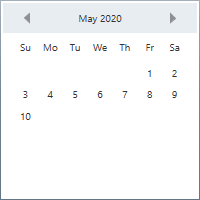
NOTE
Block dates
If you want to block particular dates from the date selection, add that date ranges to the BlackoutDates collection. You can add more block out date ranges to the BlackoutDates collection.
calendarEdit.BlackoutDates.Add(new BlackoutDatesRange() {
    StartDate = new DateTime(2020, 08, 03),
    EndDate = new DateTime(2020, 08, 07)});
calendarEdit.BlackoutDates.Add(new BlackoutDatesRange() {
    StartDate = new DateTime(2020, 08, 22),
    EndDate = new DateTime(2020, 08, 25)});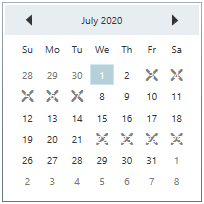
NOTE
Special days
You can differentiate the special day from other days by setting that date value to the SpecialDate.Date property and adding SpecialDate.Date into the SpecialDates collection. You can use the SpecialDate.CellTemplate property to customize the SpecialDate day cell appearance.
//ViewModel.cs
public class ViewModel {
	private SpecialDatesCollection specialDates;
	public SpecialDatesCollection SpecialDates {
		get { return specialDates; }
		set { specialDates = value; }
	}
	public ViewModel() {
		SpecialDates = new SpecialDatesCollection();
	}
}<Window.Resources>
<DataTemplate x:Key="WorldEnvironmentDay" >
<Image Source="Resources\Icon_Environmental day.png" />
</DataTemplate>
<DataTemplate x:Key="EngineersDay" >
<Image Source="Resources\Icon_Engineer day.png" />
</DataTemplate>
<DataTemplate x:Key="PollutionPreventionDay" >
<Image Source="Resources\Icon_Pollution day.png" />
</DataTemplate>
<DataTemplate x:Key="NationalMathematicsDay" >
<Image Source="Resources\Icon_Mathematics day.png" />
</DataTemplate>
<DataTemplate x:Key="Christmas" >
<Image Source="Resources\Christmas.png" />
</DataTemplate>
<local:ViewModel x:Key="viewModel">
<local:ViewModel.SpecialDates>
<syncfusion:SpecialDate Date="06/05/2020" CellTemplate="{StaticResource WorldEnvironmentDay }"/>
<syncfusion:SpecialDate Date="09/15/2020" CellTemplate="{StaticResource EngineersDay }"/>
<syncfusion:SpecialDate Date="12/02/2020" CellTemplate="{StaticResource PollutionPreventionDay }"/>
<syncfusion:SpecialDate Date="12/22/2020" CellTemplate="{StaticResource NationalMathematicsDay }"/>
<syncfusion:SpecialDate Date="12/25/2020" CellTemplate="{StaticResource Christmas }"/>
</local:ViewModel.SpecialDates>
</local:ViewModel>
</Window.Resources>
<Grid>
<syncfusion:CalendarEdit DataContext="{StaticResource viewModel}"
SpecialDates="{Binding SpecialDates}"
Name="calendarEdit" />
</Grid>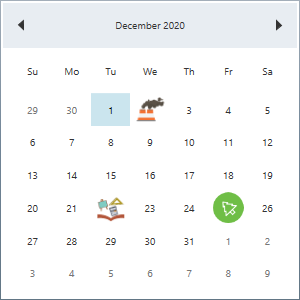
NOTE
Display week numbers
If you want to know the week number of the currently displayed dates, use the ShowWeekNumbers property as true. The default value of ShowWeekNumbers property is false.
<!--Showing Week number-->
<syncfusion:CalendarEdit Name="calendarEdit"
                         ShowWeekNumbers="True"/>
//Shows week numbers
calendarEdit.ShowWeekNumbers = true;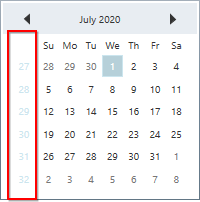
NOTE
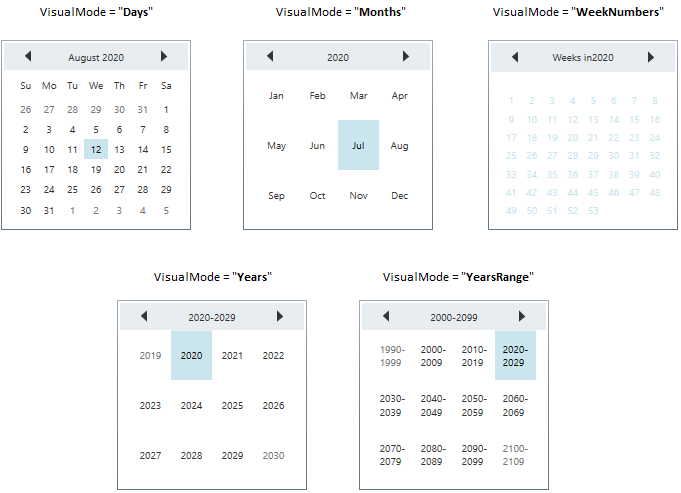
Change default view (Month, Year, Decade)
By default, the days are displayed in the CalendarEdit.
You can change the default calendar view as week numbers, month, years or years range mode by setting the respective value to the VisualMode property. The default value of VisualMode property is Days.
<syncfusion:CalendarEdit Name="calendarEdit"
VisualMode="YearsRange"/>calendarEdit.VisualMode = CalendarVisualMode.YearsRange;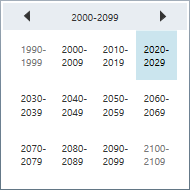
NOTE
Setting Culture
You can change the culture for CalendarEdit control by setting the required culture to the Culture property.
<!--Setting french culture-->
<syncfusion:CalendarEdit Name="calendarEdit"
                         Culture="fr-FR"/>
//Setting french culture
calendarEdit.Culture = new CultureInfo("fr-FR");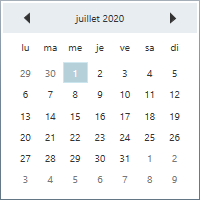
Show full month and week name
You can display full month names and week day names by setting the ShowAbbreviatedDayNames and ShowAbbreviatedDayNames properties as false. The default value of ShowAbbreviatedDayNames and ShowAbbreviatedDayNames property is true.
<syncfusion:CalendarEdit ShowAbbreviatedDayNames="False"
                         ShowAbbreviatedMonthNames="False"
                         Name="calendarEdit"/>
CalendarEdit calendarEdit = new CalendarEdit();
calendarEdit.ShowAbbreviatedDayNames = false;
calendarEdit.ShowAbbreviatedMonthNames = false;
NOTE
Tooltip for particular days
You can set tooltip for particular days in the CalendarEdit control by using the SetToolTip(Date,ToolTip) method. You can pass the specific date and tooltip to the SetToolTip(Date,ToolTip) method.
Date yesterday = new Date(DateTime.Now.Year, DateTime.Now.Month, DateTime.Now.Day-1);
Date today = new Date(DateTime.Now.Year, DateTime.Now.Month, DateTime.Now.Day);
CalendarEdit calendarEdit = new CalendarEdit();

//Setting tooltip for yesterday and today dates
calendarEdit.SetToolTip(yesterday, new ToolTip() { Content = "Yesterday" });
calendarEdit.SetToolTip(today, new ToolTip() { Content = "Today" });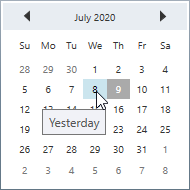
Selected date changed notification
The selected date changed in CalendarEdit can be examined using DateChanged event. The DateChanged event contains the old and newly selected date time values in the OldValue and NewValue properties.
<syncfusion:CalendarEdit DateChanged="CalendarEdit_DateChanged"
                          Name="calendarEdit"/>
CalendarEdit calendarEdit = new CalendarEdit();
calendarEdit.DateChanged += CalendarEdit_DateChanged;You can handle the event as follows,
private void CalendarEdit_DateChanged(DependencyObject d, DependencyPropertyChangedEventArgs e) {
    //Get old and new selected date values
    var oldValue = e.OldValue;
    var newValue = e.NewValue;
}
Theme
CalendarEdit supports various built-in themes. Refer to the below links to apply themes for the CalendarEdit,
