Getting Started with Windows Forms Splash Screen (Splash)
29 May 20233 minutes to read
This section explains how to add the SplashControl in a Windows Forms application and overview of its basic functionalities.
Assembly deployment
Refer to the control dependencies section to get the assemblies or NuGet package needs to be added as reference to use the control in any application.
Find more details about installing the nuget packages in a Windows Forms application in the following link How to install nuget packages.
Creating the project
Create a new Windows Forms project in Visual Studio to display the SplashControl with basic functionalities.
Through designer
The SplashControl provides full support for the Windows Forms designer.
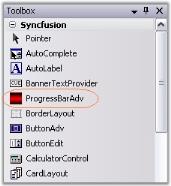
Step 1: Drag and drop the SplashControl from the toolbox onto the form. The SplashControl will be created in the components area of the form. The following required assembly reference will be added automatically.
     * Syncfusion.Shared.Base.dll
     * Syncfusion.Tools.Windows.dll
Step 2: Set the SplashImage and the TimerInterval properties through the property grid.
Step 3: Set the AutoMode property. This property controls how the SplashControl will be invoked. If the AutoMode property is set to ‘True’, the SplashControl will automatically launch itself during the parent form’s load event.
Step 4: The SplashPanel can also be viewed at design time using the Preview Splash option by clicking the smart tag as shown below.
Step 5: Now run the application.
Step 6: If the AutoMode property is set to ‘False’, the splash screen will have to be invoked explicitly by calling the ShowSplash() method.
Step 7: Handle the SplashClosed event to do your processing after the splash screen is closed.
Step 8: You can cancel the SplashControl while it is displaying the splash screen by calling the HideSplash() method.
Through code
A SplashControl can be created through code by following the below steps.
Step 1: Create a C# or VB.NET application though Visual Studio.
Step 2: Add the required assembly references.
   1. Syncfusion.Shared.Base.dll

   2. Syncfusion.Tools.Windows.dll
Step 3: Declare and initialize a SplashControl using the below code.
private Syncfusion.Windows.Forms.Tools.SplashControl splashControl1;
   this.splashControl1 = new Syncfusion.Windows.Forms.Tools.SplashControl();
   this.SuspendLayout();
Friend WithEvents SplashControl1 As Syncfusion.Windows.Forms.Tools.SplashControl
Me.splashControl1 = New Syncfusion.Windows.Forms.Tools.SplashControl()
Me.SuspendLayout()Step 4: Set the following properties.
this.splashControl1.CustomSplashPanel = null;
   this.splashControl1.HostForm = this;
   this.splashControl1.HostFormWindowState = System.Windows.Forms.FormWindowState.Normal;
this.splashControl1.TimerInterval = 3000;Me.SplashControl1.CustomSplashPanel = Nothing
Me.SplashControl1.HostForm = Me
Me.SplashControl1.HostFormWindowState = System.Windows.Forms.FormWindowState.Normal
Me.SplashControl1.TimerInterval = 3000Step 5: Run the application.