How can I help you?
Digital Clock in Windows Forms Clock
6 Oct 202210 minutes to read
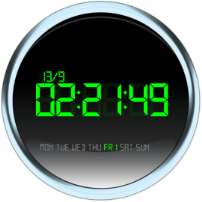
The DigitalClock is implemented as an extension to the existing Windows Forms Clock control in the UI controls, but offers a richer UI experience than the existing clock and is capable of displaying the time as digital text.
You can use the DigitalClock in your application by simply switching the ClockType of the existing Clock control as described in the following sample code:
this.clock1.ClockType = Syncfusion.Windows.Forms.Tools.ClockTypes.Digital;Me.clock1.ClockType = Syncfusion.Windows.Forms.Tools.ClockTypes.DigitalAppearance
The DigitalClock offers a wide range of options to customize its appearance. It provides three built-in frames and five background shapes. Users can also use their own frames for the DigitalClock through the renderer.
Frames
To enable the background frames, the DigitalClock should be enabled with the property ShowClockFrame set to true.
Rectangular frame
this.clock1.ShowClockFrame = true;

this.clock1.ClockFrame = Syncfusion.Windows.Forms.Tools.ClockFrames.RectangularFrame;Me.clock1.ShowClockFrame = true
Me.clock1.ClockFrame = Syncfusion.Windows.Forms.Tools.ClockFrames.RectangularFrame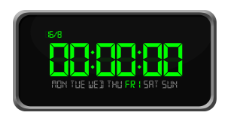
Circular frame
this.clock1.ShowClockFrame = true;

this.clock1.ClockFrame = Syncfusion.Windows.Forms.Tools.ClockFrames.CircularFrame;Me.clock1.ShowClockFrame = true
Me.clock1.ClockFrame = Syncfusion.Windows.Forms.Tools.ClockFrames.CircularFrame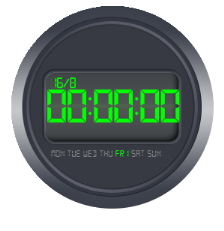
Square frame
this.clock1.ShowClockFrame = true;

this.clock1.ClockFrame = Syncfusion.Windows.Forms.Tools.ClockFrames.SquareFrame;Me.clock1.ShowClockFrame = true
Me.clock1.ClockFrame = Syncfusion.Windows.Forms.Tools.ClockFrames.SquareFrame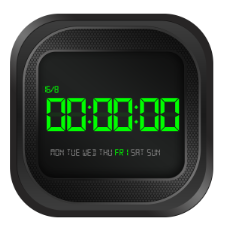
Shapes
To enable background shapes in the Clock control, the ShowClockFrame property should be disabled so that the control can support rendering the background shapes.
Rectangular shape
this.clock1.ShowClockFrame = false;

this.clock1.ClockShape = Syncfusion.Windows.Forms.Tools.ClockShapes.Rectangle;Me.clock1.ShowClockFrame = False
Me.clock1.ClockFrame = Syncfusion.Windows.Forms.Tools.ClockFrames.CircularFrame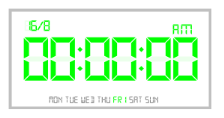
RoundedRectangular shape
this.clock1.ShowClockFrame = false;

this.clock2.ClockShape = Syncfusion.Windows.Forms.Tools.ClockShapes.RoundedRectangle;Me.clock1.ShowClockFrame = False
Me.clock1.ClockFrame = Syncfusion.Windows.Forms.Tools.ClockShapes.CircularFrame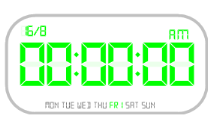
Circular shape
this.clock1.ShowClockFrame = false;

this.clock2.ClockShape = Syncfusion.Windows.Forms.Tools.ClockShapes.Circle;Me.clock1.ShowClockFrame = false
Me.clock1.ClockShape = Syncfusion.Windows.Forms.Tools.ClockShapes.Circle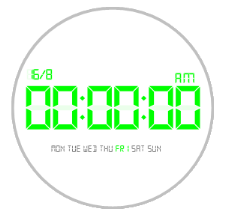
Square shape
this.clock1.ShowClockFrame = false;

this.clock1.ClockShape = Syncfusion.Windows.Forms.Tools.ClockShapes.Square;Me.clock1.ShowClockFrame = false
Me.clock1.ClockShape = Syncfusion.Windows.Forms.Tools.ClockShapes.Square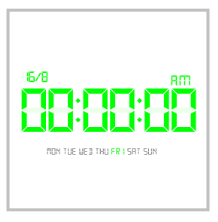
RoundedSquare shape
this.clock1.ShowClockFrame = false;

this.clock1.ClockShape = Syncfusion.Windows.Forms.Tools.ClockShapes.RoundedSquare;Me.clock1.ShowClockFrame = false
Me.clock1.ClockShape = Syncfusion.Windows.Forms.Tools.ClockShapes.RoundedSquare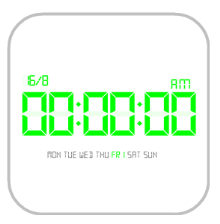
Color customizations
Foreground color
The foreground color for the DigitalClock can be changed using the ForeColor property. This color will be reflected in the text of the control.
this.clock1.ForeColor = System.Drawing.Color.Yellow;Me.clock1.ForeColor = System.Drawing.Color.Yellow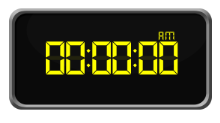
Background color
The background color for the DigitalClock can be changed using the BackgroundColor property. This color will be reflected in the background of the control.
this.clock1.BackgroundColor = System.Drawing.SystemColors.ActiveCaption;

this.clock1.ForeColor = System.Drawing.Color.Yellow;Me.clock1.BackgroundColor = System.Drawing.SystemColors.ActiveCaption
Me.clock1.ForeColor = System.Drawing.Color.Yellow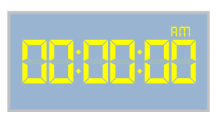
Border color
The border color for the control will be reflected only when the control is assigned with the background shapes as follows:
this.clock1.BorderColor = System.Drawing.Color.Yellow;
this.clock1.BackgroundColor = System.Drawing.SystemColors.ActiveCaption;
this.clock1.ForeColor = System.Drawing.Color.Yellow;Me.clock1.BorderColor = System.Drawing.Color.Yellow
Me.clock1.BackgroundColor = System.Drawing.SystemColors.ActiveCaption

   Me.clock1.ForeColor = System.Drawing.Color.Yellow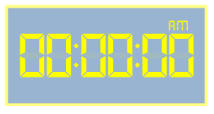
Behavior
Show or hide days of the week
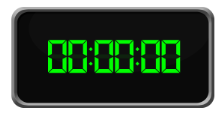
To display or hide the week days and current date in the DigitalClock, the DisplayDates property can be used.
this.clock1.DisplayDates = true;Me.clock1.DisplayDates = True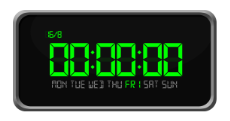
Show or hide the hour designator
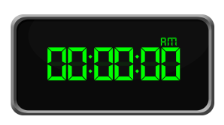
To display or hide the hour designator (AM and PM) in the DigitalClock, the ShowHourDesignator property can be used.
this.clock1.ShowHourDesignator = false;Me.clock1.ShowHourDesignator = false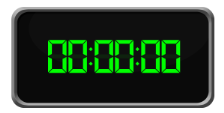
Custom time Clock
To enable the custom time, the DigitalClock should be enabled with the property ShowCustomTimeClock set as true.
Input formats
To enable the custom time, the clock control should be enabled with the ShowCustomTimeClock property set as true, and the custom time should be in DateTime format.
this.clock1.ShowCustomTimeClock = true;

this.clock1.CustomTime = new System.DateTime(2013, 9, 14, 10, 10, 15, 0);Me.clock1.ShowCustomTimeClock = true
Me.clock1.CustomTime = New Date(2013, 9, 14, 10, 10, 15, 0)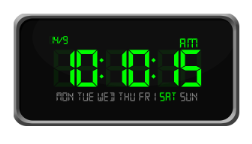
Applying custom renderer to the DigitalClock control
The following code sample can be utilized for applying a custom renderer to the DigitalClock.
DigitalRenderer render = new DigitalRenderer();

  this.clock1.DigitalRenderer = render;

   public class DigitalRenderer : DigitalClockRenderer

    {

        public override void DrawDigitalClockFrame(Graphics g, Image newImage, Clock clock)

        {

            Image image =Image.FromFile(@"D:\CustomClock.PNG");

            base.DrawDigitalClockFrame(g, image, clock);

        }

    }
Dim render As DigitalRenderer = New DigitalRenderer
Me.clock1.DigitalRenderer = render
Public Class DigitalRenderer
Inherits DigitalClockRenderer
Public Overrides Sub DrawDigitalClockFrame(ByVal g As Graphics, ByVal newImage As Image, ByVal clock As Clock)
Dim image As Image = Image.FromFile("G:\CustomClock.PNG")
MyBase.DrawDigitalClockFrame(g, image, clock)
End Sub
End Class