How can I help you?
Getting Started with WPF Step ProgressBar (SfStepProgressBar)
8 May 20267 minutes to read
You can create a WPF application with the SfStepProgressBar control using the following steps:
Assembly deployment
Refer to the control dependencies section to get the list of assemblies or NuGet package that needs to be added as a reference to use the control in any application.
You can find more details about installing the NuGet package in a WPF application in the following link: How to install NuGet packages
Adding control through designer
The SfStepProgressBar control can be added to a WPF application by dragging it from the toolbox to a designer view. The following assembly reference will be added automatically:
- Syncfusion.SfProgressBar.WPF
Adding control manually in XAML
To add control manually in the XAML, follow the given steps:
- Add the following required assembly reference to the project:
- Syncfusion.SfProgressBar.WPF
- Import the Syncfusion® WPF schema http://schemas.syncfusion.com/wpf in the XAML page.
- Declare the SfStepProgressBar control in the XAML page.
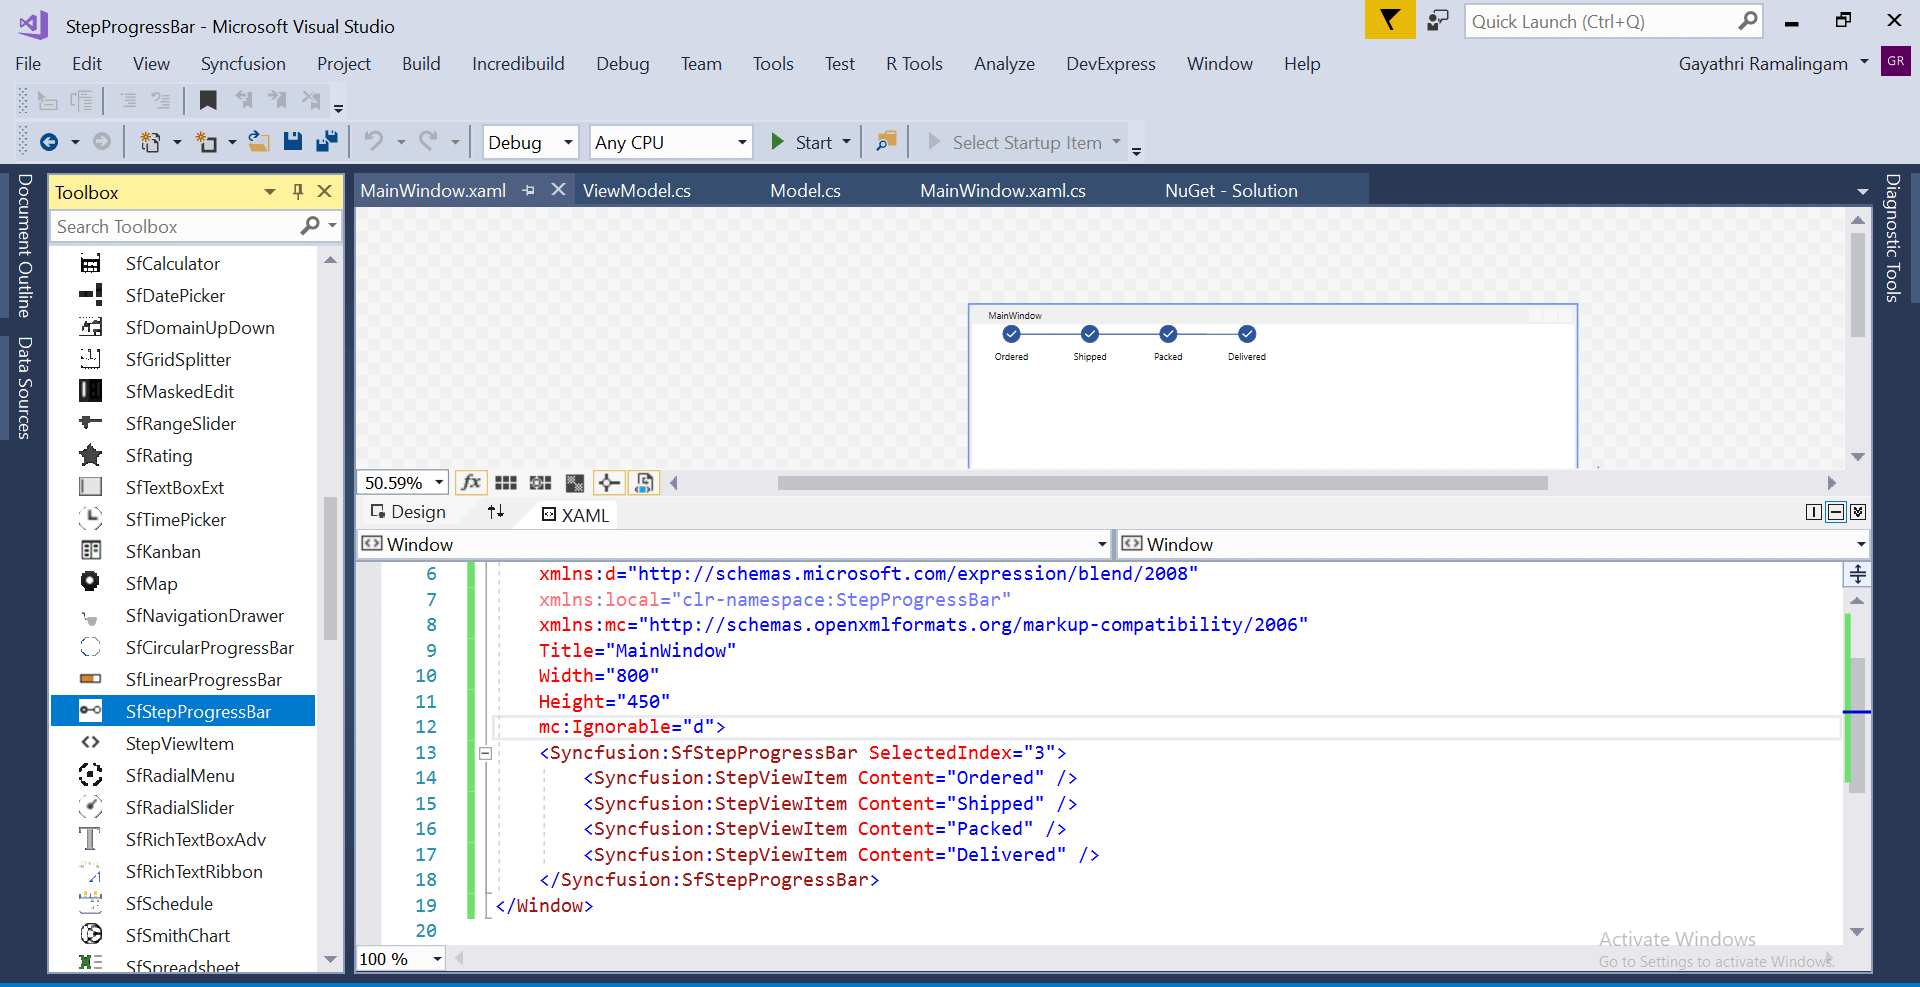
Select item using Selected Index
You can change the index of the last active (selected) item where items before this index will move to the active status by using the SelectedIndex property.
<Grid x:Name="grid">
    <syncfusion:SfStepProgressBar SelectedIndex="3">
        <syncfusion:StepViewItem Content="Ordered" />
        <syncfusion:StepViewItem Content="Shipped" />
        <syncfusion:StepViewItem Content="Packed" />
        <syncfusion:StepViewItem Content="Delivered" />
    </syncfusion:SfStepProgressBar>
</Grid>
public partial class MainWindow : Window
{
public MainWindow()
{
InitializeComponent();
SfStepProgressBar stepProgressBar = new SfStepProgressBar();
StepViewItem orderedStepViewItem = new StepViewItem();
StepViewItem shippedStepViewItem = new StepViewItem();
StepViewItem packedStepViewItem = new StepViewItem();
StepViewItem deliveredStepViewItem = new StepViewItem();
orderedStepViewItem.Content = "Ordered";
shippedStepViewItem.Content = "Shipped";
packedStepViewItem.Content = "Packed";
deliveredStepViewItem.Content = "Delivered";
stepProgressBar.Items.Add(orderedStepViewItem);
stepProgressBar.Items.Add(shippedStepViewItem);
stepProgressBar.Items.Add(packedStepViewItem);
stepProgressBar.Items.Add(deliveredStepViewItem);
stepProgressBar.SelectedIndex = 3;
grid.Children.Add(stepProgressBar);
}
}
<Window
xmlns="http://schemas.microsoft.com/winfx/2006/xaml/presentation"
xmlns:x="http://schemas.microsoft.com/winfx/2006/xaml"
xmlns:d="http://schemas.microsoft.com/expression/blend/2008"
xmlns:mc="http://schemas.openxmlformats.org/markup-compatibility/2006"
xmlns:local="clr-namespace:WpfApp4"
xmlns:Syncfusion="http://schemas.syncfusion.com/wpf" x:Class="StepProgressBar.MainWindow"
mc:Ignorable="d"
Title="MainWindow" Height="450" Width="800">
<Grid x:Name="grid">
<Syncfusion:SfStepProgressBar SelectedIndex="3">
<Syncfusion:StepViewItem Content="Ordered" />
<Syncfusion:StepViewItem Content="Shipped" />
<Syncfusion:StepViewItem Content="Packed" />
<Syncfusion:StepViewItem Content="Delivered" />
</Syncfusion:SfStepProgressBar>
</Grid>
</Window>Adding control through code behind
To add control manually using the code behind, follow the given steps:
- Add the following required assembly reference to the project:
- Syncfusion.SfProgressBar.WPF
- Import the ProgressBar namespace
using Syncfusion.UI.Xaml.ProgressBar; - Create a Step Progressbar instance, and add it to the window.
using Syncfusion.UI.Xaml.ProgressBar;
namespace SfProgressBar
{
/// <summary>
/// Interaction logic for MainWindow.xaml
/// </summary>
public partial class MainWindow : Window
{
    public MainWindow()
    {
        InitializeComponent();
        SfStepProgressBar stepProgressBar = new SfStepProgressBar();
        StepViewItem orderedStepViewItem = new StepViewItem();
        StepViewItem shippedStepViewItem = new StepViewItem();
        StepViewItem packedStepViewItem = new StepViewItem();
        StepViewItem deliveredStepViewItem = new StepViewItem();

        orderedStepViewItem.Content = "Ordered";
        shippedStepViewItem.Content = "Shipped";
        packedStepViewItem.Content = "Packed";
        deliveredStepViewItem.Content = "Delivered";

        stepProgressBar.Items.Add(orderedStepViewItem);
        stepProgressBar.Items.Add(shippedStepViewItem);
        stepProgressBar.Items.Add(packedStepViewItem);
        stepProgressBar.Items.Add(deliveredStepViewItem);

        stepProgressBar.SelectedIndex = 3;

        grid.Children.Add(stepProgressBar);
    }
}
}Download demo from GitHub.
Theme
SfStepProgressBar supports various built-in themes. Refer to the below links to apply themes for the SfStepProgressBar,
