Getting Started with WPF Integer TextBox
18 Nov 201810 minutes to read
This section explains how to create a WPF Integer TextBox control and its features.
Assembly deployment
Refer to the control dependencies section to get the list of assemblies or NuGet package that needs to be added as a reference to use the control in any application.
You can find more details about installing the NuGet packages in a WPF application in the following link:
Adding WPF Integer TextBox via designer
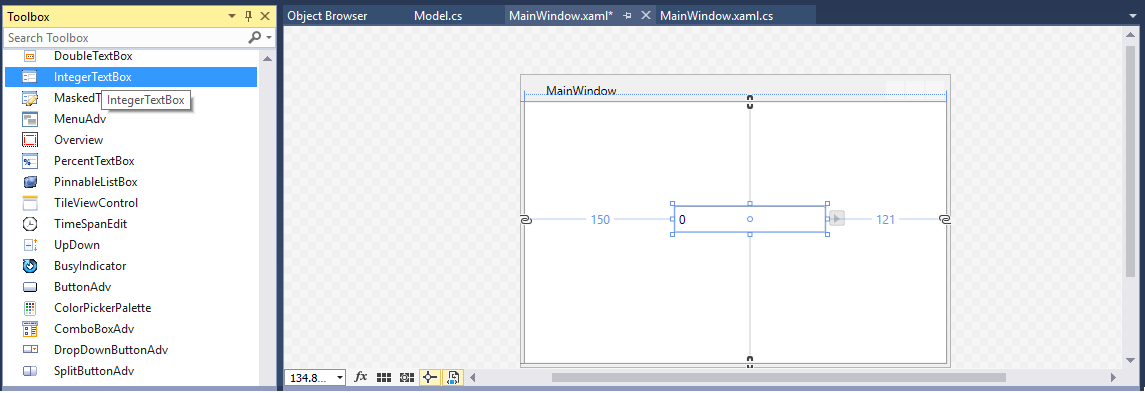
You can add the WPF Integer TextBox control to an application by dragging it from the toolbox to a view of the designer. The following dependent assembly will be added automatically:
- Syncfusion.Shared.WPF
Adding WPF Integer TextBox via XAML
To add the WPF Integer TextBox control manually in XAML, follow these steps:
-
Create a new WPF project in Visual Studio.
-
Add the Syncfusion.Shared.WPF assembly reference to the project.
-
Import the Syncfusion® WPF schema with the
xmlns:syncfusion="http://schemas.syncfusion.com/wpf"namespace mapping. -
Declare the
WPF Integer TextBoxcontrol in the XAML page.<Window xmlns="http://schemas.microsoft.com/winfx/2006/xaml/presentation" xmlns:x="http://schemas.microsoft.com/winfx/2006/xaml" xmlns:syncfusion="http://schemas.syncfusion.com/wpf" x:Class="IntegerTextBoxSample.MainWindow" Title="IntegerTextBox Sample" Height="350" Width="525"> <Grid> <!--Adding IntegerTextBox control --> <syncfusion:IntegerTextBox x:Name="integerTextBox" Width="100" Height="20" VerticalAlignment="Center" HorizontalAlignment="Center"/> </Grid> </Window>
Adding WPF Integer TextBox via C#
To add the WPF Integer TextBox control manually in C#, follow these steps:
-
Create a new WPF application via Visual Studio.
-
Add the Syncfusion.Shared.WPF assembly references to the project.
-
Include the required namespace.
using Syncfusion.Windows.Shared; -
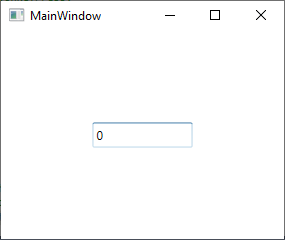
Create an instance of WPF Integer TextBox and add it to the window.
//Creating an instance of IntegerTextBox control

IntegerTextBox integerTextBox = new IntegerTextBox();

// Setting height and width to IntegerTextBox

integerTextBox.Height = 25;
integerTextBox.Width = 100;

//Adding IntegerTextBox as window content

this.Content = integerTextBox;
Setting Value
The value of the WPF Integer TextBox can be set by using the Value property.
<syncfusion:IntegerTextBox x:Name="integerTextBox" Width="100" Height="23" Value="100"/>IntegerTextBox integerTextBox = new IntegerTextBox();
integerTextBox.Width = 100;
integerTextBox.Height = 23;
integerTextBox.Value = 100;
Do not use the Text property to set the value for the IntegerTextBox. Use only the
Valueproperty.
Binding Value
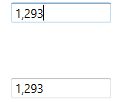
Data binding establishes a connection between the application UI and business logic. Data binding can be unidirectional (source -> target or target <- source) or bidirectional (source <-> target). You can bind data to the WPF Integer TextBox using the Value property.
The following code snippets illustrate the value binding from one WPF Integer TextBox to another.
<StackPanel>
<syncfusion:IntegerTextBox x:Name="integerTextBox1" Height="25" Width="100" Value="{Binding MyValue,UpdateSourceTrigger=PropertyChanged}"/>
<syncfusion:IntegerTextBox x:Name="integerTextBox2" Width="100" Height="25" Value="{Binding MyValue,UpdateSourceTrigger=PropertyChanged}" />
</StackPanel>using Syncfusion.Windows.Shared;
class ViewModel : NotificationObject
{
private int myValue;
public int MyValue
{
get
{
return myValue;
}
set
{
myValue = value;
RaisePropertyChanged("MyValue");
}
}
}
Value Changed Notification
The WPF Integer TextBox control can notify value changes through the ValueChanged event. You can get the old value and new value from the OldValue and NewValue properties of the ValueChanged event.
<syncfusion:IntegerTextBox ValueChanged="IntegerTextBox_ValueChanged"/>using Syncfusion.Windows.Shared;
IntegerTextBox integerTextBox = new IntegerTextBox();
integerTextBox.ValueChanged += new PropertyChangedCallbackHandler(IntegerTextBox_ValueChanged);You can handle the event as follows:
using System.Windows;

private void IntegerTextBox_ValueChanged(DependencyObject d, DependencyPropertyChangedEventArgs e)
{
    // Get old and new value
    var newValue = e.NewValue;
    var oldValue = e.OldValue;
}
Min Max Value Restriction
The Value of WPF Integer TextBox can be restricted within a maximum and minimum limit. You can define the minimum and maximum values by setting the MinValue and MaxValue properties. It allows the user to enter a value between MinValue and MaxValue.
<syncfusion:IntegerTextBox x:Name="integerTextBox" Width="100" Height="25" Value="100" MaxValue="999" MinValue="-999"/>using Syncfusion.Windows.Shared;
IntegerTextBox integerTextBox = new IntegerTextBox();
integerTextBox.Width = 100;
integerTextBox.Height = 25;
//Setting minimum value
integerTextBox.MinValue = -999;
//Setting maximum value
integerTextBox.MaxValue = 999;
integerTextBox.Value = 100;
Step Interval for incrementing or decrementing the value
The WPF Integer TextBox control allows you to increase or decrease the value by pressing the up and down arrow keys on the keyboard or by scrolling the mouse wheel over the control. The ScrollInterval property specifies the increment or decrement intervals. The default value of ScrollInterval is 1. The default value of IsScrollingOnCircle is true.
<syncfusion:IntegerTextBox x:Name="integerTextBox" Width="150" Height="25" Value="8"
                          IsScrollingOnCircle="True" ScrollInterval="4"/>
using Syncfusion.Windows.Shared;
IntegerTextBox integerTextBox = new IntegerTextBox();
integerTextBox.Width = 150;
integerTextBox.Height = 25;
integerTextBox.MinValue = 0;
integerTextBox.MaxValue = 100;
integerTextBox.Value = 8;
integerTextBox.IsScrollingOnCircle = true;
integerTextBox.ScrollInterval = 4;
Formatting the Value
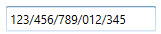
You can customize the number format by either setting the NumberFormat property or the NumberGroupSeparator and the NumberGroupSizes properties of WPF Integer TextBox. Decimal properties (NumberDecimalDigits and NumberDecimalSeparator) are not applicable to integer values.
<syncfusion:IntegerTextBox x:Name="integerTextBox" Height="25" Width="150" Culture="en-US" Value="123456789012345" NumberGroupSeparator="/"/>using Syncfusion.Windows.Shared;
using System.Globalization;
IntegerTextBox integerTextBox = new IntegerTextBox();
integerTextBox.Width = 150;
integerTextBox.Height = 25;
integerTextBox.Value = 123456789012345;
integerTextBox.Culture = new CultureInfo("en-US");
integerTextBox.NumberFormat = new NumberFormatInfo()
{
NumberGroupSeparator = "/"
};
Setting the Culture
The WPF Integer TextBox provides support for globalization by using the Culture property. The Culture is used to format the group separator of the WPF Integer TextBox value based on the respective culture.
<syncfusion:IntegerTextBox x:Name="integerTextBox" Height="25" Width="100" Culture="en-US" Value="1234567"/>using Syncfusion.Windows.Shared;
using System.Globalization;
IntegerTextBox integerTextBox = new IntegerTextBox();
integerTextBox.Width = 100;
integerTextBox.Height = 25;
integerTextBox.Value = 1234567;
integerTextBox.Culture = new CultureInfo("en-US");
When you use both
NumberFormatandCulture, theNumberFormatwill have a higher priority.
Theme
The WPF Integer TextBox supports various built-in themes. Refer to the links below to apply themes,
