Shape pointer in WinUI Radial Gauge
9 Jul 20269 minutes to read
The ShapePointer in SfRadialGauge allows you to use any built-in shapes as a pointer to mark a specified value. The default type is InvertedTriangle.
<gauge:SfRadialGauge>
    <gauge:SfRadialGauge.Axes>
        <gauge:RadialAxis>
            <gauge:RadialAxis.Pointers>
                <gauge:ShapePointer Value="60" />
            </gauge:RadialAxis.Pointers>
        </gauge:RadialAxis>
    </gauge:SfRadialGauge.Axes>
</gauge:SfRadialGauge>
SfRadialGauge sfRadialGauge = new SfRadialGauge();
RadialAxis radialAxis = new RadialAxis();
sfRadialGauge.Axes.Add(radialAxis);
ShapePointer shapePointer = new ShapePointer();
shapePointer.Value = 60;
radialAxis.Pointers.Add(shapePointer);
this.Content = sfRadialGauge;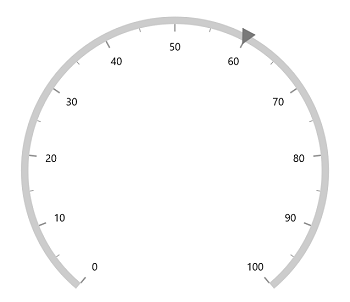
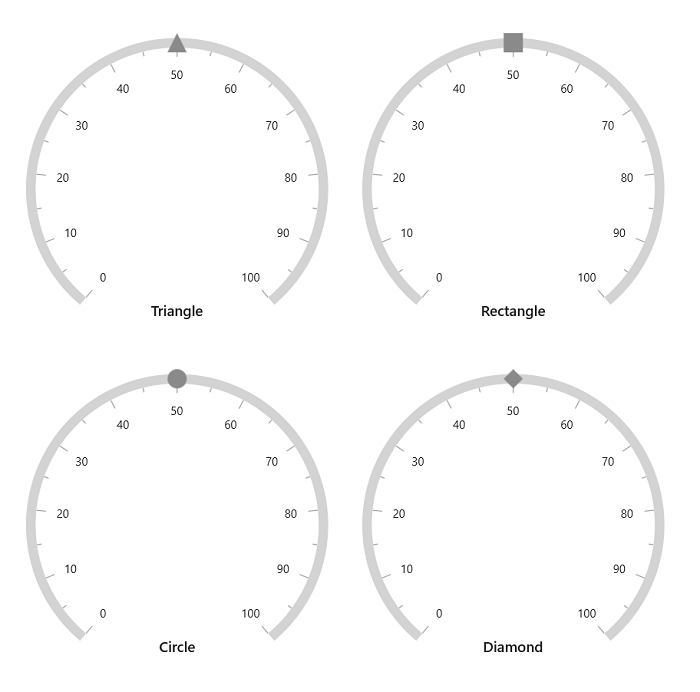
Gauge supports the following types of shapes:
Shape customization
The shape pointer can be customized using the following properties:
-
Fill– Allows you to customize the shape color. -
ShapeHeight– Allows you to specify the shape height. -
ShapeWidth– Allows you to specify the shape width. -
Stroke– Allows you to specify the border color for the shape. -
StrokeThickness– Allows you to specify the border width of the shape.
<gauge:SfRadialGauge>
    <gauge:SfRadialGauge.Axes>
        <gauge:RadialAxis>
            <gauge:RadialAxis.Pointers>
                <gauge:ShapePointer Value="60"
                                    ShapeHeight="30"
                                    ShapeWidth="30"
                                    Stroke="Black"
                                    StrokeThickness="3"
                                    ShapeType="Circle"
                                    Fill="LightBlue"/>
            </gauge:RadialAxis.Pointers>
        </gauge:RadialAxis>
    </gauge:SfRadialGauge.Axes>
</gauge:SfRadialGauge>
SfRadialGauge sfRadialGauge = new SfRadialGauge();
RadialAxis radialAxis = new RadialAxis();
sfRadialGauge.Axes.Add(radialAxis);
ShapePointer shapePointer = new ShapePointer();
shapePointer.Value = 60;
shapePointer.ShapeHeight = 30;
shapePointer.ShapeWidth = 30;
shapePointer.Stroke = new SolidColorBrush(Colors.Black);
shapePointer.StrokeThickness = 3;
shapePointer.ShapeType = Syncfusion.UI.Xaml.Gauges.GaugeShapeType.Circle;
shapePointer.Fill = new SolidColorBrush(Colors.LightBlue);
radialAxis.Pointers.Add(shapePointer);
this.Content = sfRadialGauge;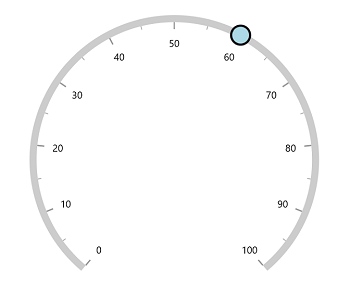
Shadow support
The shadow can be applied by using the HasShadow property.
<gauge:SfRadialGauge>
    <gauge:SfRadialGauge.Axes>
        <gauge:RadialAxis>
            <gauge:RadialAxis.Pointers>
                <gauge:ShapePointer Value="60"
                                    ShapeType="Circle"
                                    HasShadow="True"/>
            </gauge:RadialAxis.Pointers>
        </gauge:RadialAxis>
    </gauge:SfRadialGauge.Axes>
</gauge:SfRadialGauge>
SfRadialGauge sfRadialGauge = new SfRadialGauge();
RadialAxis radialAxis = new RadialAxis();
sfRadialGauge.Axes.Add(radialAxis);
ShapePointer pointer = new ShapePointer();
pointer.Value = 60;
pointer.ShapeType = GaugeShapeType.Circle;
pointer.HasShadow = true;
radialAxis.Pointers.Add(pointer);
this.Content = sfRadialGauge;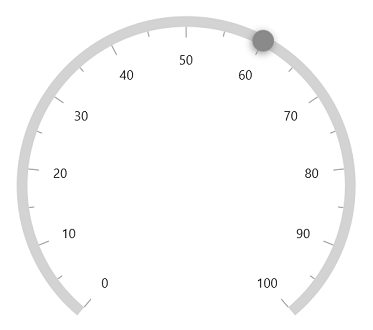
Shape pointer overlay
The shape pointer overlay is rendered around the shape when the cursor is on the shape’s area. When the IsInteractive property is set to true and when the cursor is on the shape pointer’s area, the overlay will be displayed around the shape pointer.
The shape pointer overlay can be customized using the following properties:
-
OverlayFill- Allows you to specify the shape pointer overlay’s color. -
OverlayRadius- Allows you to specify the shape pointer overlay’s radius.
<gauge:SfRadialGauge>
    <gauge:SfRadialGauge.Axes>
        <gauge:RadialAxis>
            <gauge:RadialAxis.Pointers>
                <gauge:ShapePointer Value="60"
                                    ShapeType="Circle"
                                    IsInteractive="True"
                                    OverlayRadius="20"/>
            </gauge:RadialAxis.Pointers>
        </gauge:RadialAxis>
    </gauge:SfRadialGauge.Axes>
</gauge:SfRadialGauge>
SfRadialGauge sfRadialGauge = new SfRadialGauge();
RadialAxis radialAxis = new RadialAxis();
sfRadialGauge.Axes.Add(radialAxis);
ShapePointer pointer = new ShapePointer();
pointer.Value = 60;
pointer.ShapeType = GaugeShapeType.Circle;
pointer.OverlayRadius = 20;
pointer.IsInteractive = true;
radialAxis.Pointers.Add(pointer);
this.Content = sfRadialGauge;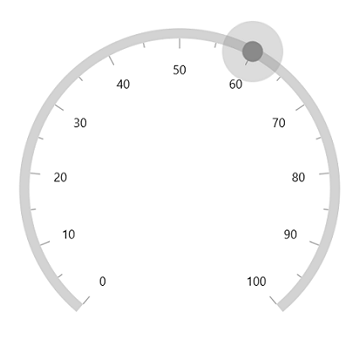
Shape position customization
The shape pointer can be moved near or far from its actual position using the MarkerOffset and OffsetUnit properties.
When you set the OffsetUnit to pixel, the shape pointer will be moved based on the pixel value. If you set the OffsetUnit to factor, then the provided factor will be multiplied with the axis radius value, and then the pointer will be moved to the corresponding value. The default value of OffsetUnit is SizeUnit.Pixel.
<gauge:SfRadialGauge>
    <gauge:SfRadialGauge.Axes>
        <gauge:RadialAxis>
            <gauge:RadialAxis.Pointers>
                <gauge:ShapePointer Value="60"
                                     MarkerOffset="-18"/>
            </gauge:RadialAxis.Pointers>
        </gauge:RadialAxis>
    </gauge:SfRadialGauge.Axes>
</gauge:SfRadialGauge>
SfRadialGauge sfRadialGauge = new SfRadialGauge();
RadialAxis radialAxis = new RadialAxis();
sfRadialGauge.Axes.Add(radialAxis);
ShapePointer shapePointer = new ShapePointer();
shapePointer.Value = 60;
shapePointer.MarkerOffset = -18;
radialAxis.Pointers.Add(shapePointer);
this.Content = sfRadialGauge;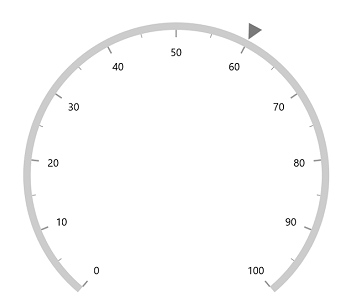
NOTE
Provide a positive value to
MarkerOffsetto move the pointer inside the axis and a negative value to move the pointer outside the axis.