Toolbar in .NET MAUI Image Editor (SfImageEditor)
1 Apr 202624 minutes to read
Customize the built-in toolbar appearance, visibility, position, and orientation of each toolbar and add new toolbars.
Show or hide toolbar
To show or hide the toolbar, set the ShowToolbar property to either true or false. By default, the ShowToolbar property is set to true.
<ContentPage
            . . .
            <imageEditor:SfImageEditor Source="image.jpeg" ShowToolbar="True" />

</ContentPage>
using Syncfusion.Maui.ImageEditor;
namespace SyncfusionImageEditor;
public partial class MainPage : ContentPage
{
public MainPage()
{
InitializeComponent();
SfImageEditor imageEditor = new SfImageEditor();
imageEditor.Source = "image.jpeg";
imageEditor.ShowToolbar = true;
this.content = imageEditor;
}
}Built-in Toolbar
Customize each toolbar item using the Name. Get or set the names of the built-in toolbar and dynamically add toolbar items using the Name property.
NOTE
The following built-in toolbar item names are available in image editor:
Browse,Undo,Redo,ZoomOut,ZoomIn,Reset,Save,SaveEdit,Crop,Shape,Text,Pen,Effects,Rotate,FlipHorizontal,FlipVertical,custom,original,ellipse,circle,square,3:1,3:2,4:3,5:4,7:5,16:9,Rectangle,Circle,Arrow,Line,Dotted,DoubleArrow,DottedArrow,DottedDoubleArrow,ShapeStrokeThickness,ShapeStrokeColor,ShapeFill,ShapeStroke,AddText,StrokeThickness,Delete,FontFamily,TextAlignment,FontAttributes,TextColor,Start,Center,End,DefaultText,Handlee,PinyonScript,KaushanScript,Boogaloo,Bold,Italic,Color,ShapeStrokeOpacity,PenStrokeOpacity,TextColorOpacity,PenStrokeThickness,PenStrokeColor,Back,Blur,Contrast,Sharpen,Brightness,Saturation,Hue,Opacity, andExposure.
NOTE
You cannot modify the names of existing built-in toolbar items or create toolbar items with this list.
Get an item from the default top toolbar
The default top toolbar contains three groups, each containing its items. Get the ImageEditorToolbarItem and customize the properties.
SfImageEditor imageEditor = new SfImageEditor();
imageEditor.Source = ImageSource.FromFile("image.png");

ImageEditorToolbar headerToolbar = imageEditor.Toolbars[0];
ImageEditorToolbarGroupItem browseGroup = (ImageEditorToolbarGroupItem) headerToolbar.ToolbarItems[0];
ImageEditorToolbarItem browseItem = browseGroup.Items.FirstOrDefault();
ImageEditorToolbarGroupItem saveGroup = (ImageEditorToolbarGroupItem) headerToolbar.ToolbarItems[2];
ImageEditorToolbarItem saveItem = saveGroup.Items.FirstOrDefault(i => i.Name == "Save");
Get an item from the default bottom toolbar
The default bottom toolbar contains ToolbarItems, and each item has SubToolbars. Get the required ImageEditorToolbarItem using the Name and customize the default settings.
Refer to the following code sample to customize the footer toolbar item.
Get an item from the sub-toolbar
The sub-toolbars contain their own items, and they can be retried as follows.
Refer to the following code snippet to customize sub items of bottom toolbar item.
SfImageEditor imageEditor = new SfImageEditor();
imageEditor.Source = ImageSource.FromFile("image.png");
ImageEditorToolbar footerToolbar = imageEditor.Toolbars[1];
ImageEditorToolbarItem shapeItem = (ImageEditorToolbarItem)footerToolbar.ToolbarItems.FirstOrDefault(i => i.Name == "Shape");
ImageEditorToolbar subtoolbar = shapeItem.SubToolbars[0];
ImageEditorToolbarItem arrowItem = (ImageEditorToolbarItem)subtoolbar.ToolbarItems.FirstOrDefault(i => i.Name == "Arrow");
NOTE
Remove the existing toolbar items
Namefrom the image editor toolbarItems collection based on the index value. Change the icon and text values dynamically for any already added toolbar items based on the index.
Change the crop toolbar options
Show the required crop types alone in the crop types toolbar by using the CropTypes property in the ImageEditorToolbarSettings class.
<imageEditor:SfImageEditor Source="image.png">
    <imageEditor:SfImageEditor.ToolbarSettings>
        <imageEditor:ImageEditorToolbarSettings CropTypes="Circle, Square, Free" />
    </imageEditor:SfImageEditor.ToolbarSettings>
</imageEditor:SfImageEditor>
SfImageEditor imageEditor = new SfImageEditor();
imageEditor.Source = ImageSource.FromFile("image.png");
imageEditor.ToolbarSettings.CropTypes = ImageCropType.Circle | ImageCropType.Square | ImageCropType.Free;
Change the effect toolbar options
Show the required effect types alone in the effects toolbar by using the EffectTypes property in the ImageEditorToolbarSettings class.
<imageEditor:SfImageEditor Source="image.png">
    <imageEditor:SfImageEditor.ToolbarSettings>
        <imageEditor:ImageEditorToolbarSettings EffectTypes="Hue, Blur, Brightness" />
    </imageEditor:SfImageEditor.ToolbarSettings>
</imageEditor:SfImageEditor>
SfImageEditor imageEditor = new SfImageEditor();
imageEditor.Source = ImageSource.FromFile("image.png");
imageEditor.ToolbarSettings.EffectTypes = ImageEffect.Hue | ImageEffect.Blur | ImageEffect.Brightness;
Change the shapes toolbar options
Show the required shape types alone in the shapes toolbar by using the Shapes property in the ImageEditorToolbarSettings class.
<imageEditor:SfImageEditor Source="image.png">
    <imageEditor:SfImageEditor.ToolbarSettings>
        <imageEditor:ImageEditorToolbarSettings Shapes="Circle, Line, DottedArrow, DoubleArrow" />
    </imageEditor:SfImageEditor.ToolbarSettings>
</imageEditor:SfImageEditor>
SfImageEditor imageEditor = new SfImageEditor();
imageEditor.Source = ImageSource.FromFile("image.png");
imageEditor.ToolbarSettings.Shapes = AnnotationShape.Circle | AnnotationShape.Line | AnnotationShape.DottedArrow | AnnotationShape.DoubleArrow;
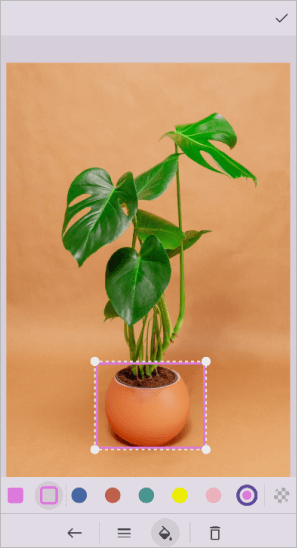
Change the color palette toolbar options
Change the default colors of the ColorPalette in the toolbar.
<imageEditor:SfImageEditor Source="image.png">
    <imageEditor:SfImageEditor.ToolbarSettings>
        <imageEditor:ImageEditorToolbarSettings>
            <imageEditor:ImageEditorToolbarSettings.ColorPalette>
                <Color>Yellow</Color>
                <Color>Pink</Color>
                <Color>Violet</Color>
            </imageEditor:ImageEditorToolbarSettings.ColorPalette>
        </imageEditor:ImageEditorToolbarSettings>
    </imageEditor:SfImageEditor.ToolbarSettings>
</imageEditor:SfImageEditor>
SfImageEditor imageEditor = new SfImageEditor();
imageEditor.Source = ImageSource.FromFile("image.png");
imageEditor.ToolbarSettings.ColorPalette.Add(Colors.Yellow);
imageEditor.ToolbarSettings.ColorPalette.Add(Colors.Pink);
imageEditor.ToolbarSettings.ColorPalette.Add(Colors.Violet);NOTE
Color palette colors are common for Text, Shape and Pen.
Change the Toolbar Item to Enable or Disable State
Enable or disable the toolbar items by using the IsEnabled property in the ImageEditorToolbarItem class.
SfImageEditor imageEditor = new SfImageEditor();
imageEditor.Source = ImageSource.FromFile("image.png");

ImageEditorToolbar headerToolbar = imageEditor.Toolbars[0];
ImageEditorToolbarGroupItem browseGroup = (ImageEditorToolbarGroupItem) headerToolbar.ToolbarItems[0];
ImageEditorToolbarItem browseItem = browseGroup.Items.FirstOrDefault();
browseItem.IsEnabled = false;

ImageEditorToolbarGroupItem saveGroup = (ImageEditorToolbarGroupItem) headerToolbar.ToolbarItems[2];
ImageEditorToolbarItem saveItem = saveGroup.Items.FirstOrDefault(i => i.Name == "Save");
saveItem.IsEnabled = false;
Customize the Toolbar Item View
To customize the view of toolbar items, specify their icon names and set the view using the View property in the ImageEditorToolbarItem.
SfImageEditor imageEditor = new SfImageEditor();
imageEditor.Source = ImageSource.FromFile("image.png");

ImageEditorToolbar headerToolbar = imageEditor.Toolbars[0];
ImageEditorToolbarGroupItem saveGroup = (ImageEditorToolbarGroupItem)headerToolbar.ToolbarItems[2];
ImageEditorToolbarItem saveItem = saveGroup.Items.FirstOrDefault(i => i.Name == "Save");

Image image = new Image();
image.Source = ImageSource.FromFile("save.jpg");
saveItem.View = image;
Add the SubToolbar
Create SubToolbars within your toolbar items to organize related actions.
SfImageEditor imageEditor = new SfImageEditor();
imageEditor.Source = ImageSource.FromFile("image.png");
ImageEditorToolbar footerToolbar = imageEditor.Toolbars[1];
ImageEditorToolbarItem cropItem = (ImageEditorToolbarItem)footerToolbar.ToolbarItems.FirstOrDefault(i => i.Name == "Crop");
cropItem.SubToolbarOverlay = false;
cropItem.SubToolbars = new List<ImageEditorToolbar>()
{
    new ImageEditorToolbar()
    {
        ToolbarItems = new List<IImageEditorToolbarItem>()
        {
           new ImageEditorToolbarItem(){ Name = "original"},
           new ImageEditorToolbarItem(){ Name = "circle"},
           new ImageEditorToolbarItem(){ Name = "square"}
        },
    }
};
Add a Toolbar Item with the Existing Toolbar
Explicitly add the ImageEditorToolbarItem to the ImageEditorToolbar manually.
SfImageEditor imageEditor = new SfImageEditor();
imageEditor.Source = ImageSource.FromFile("image.png");
Image image = new Image();
image.Source = ImageSource.FromResource("MyProject.Resources.Images.share.png");
image.WidthRequest = 48;
image.HeightRequest = 48;
ImageEditorToolbar headerToolbar = imageEditor.Toolbars[0];
ImageEditorToolbarGroupItem saveGroup = (ImageEditorToolbarGroupItem)headerToolbar.ToolbarItems[2];
saveGroup.Items.Add(new ImageEditorToolbarItem() { Name = "Share", View = image });
Add a Toolbar Item with the Text
Users can customize each toolbar item and its appearance, including the option to display text alongside icons for enhanced usability.
Add the text to the ImageEditorToolbar manually.
ImageEditorToolbarGroupItem browseGroup = (ImageEditorToolbarGroupItem)headerToolbar.ToolbarItems[0];
ImageEditorToolbarItem browseItem = browseGroup.Items.FirstOrDefault();
browseItem.Text = "Browse";
imageEditor.ToolbarSettings.TextStyle = new ImageEditorTextStyle()
{
    FontAttributes = FontAttributes.Bold,
    FontFamily = "Handlee",
    FontSize = 20,
    TextColor = Colors.Red,
};
Explicitly Create Toolbars
The ImageEditor automatically generates the toolbars. To add the toolbars manually, you need to explicitly add them and change the AutoGenerateToolbarItems property to false.
NOTE
When you create a new toolbar item, you can use the pre-existing built-in names for the item, which will automatically generate the icon view. If you want to introduce a new item view or modify the current one, you can use the
Viewproperty of theImageEditorToolbarItemclass to define the item view.
<imageEditor:SfImageEditor Source="image.png"
                           AutoGenerateToolbarItems="False">
    <imageEditor:SfImageEditor.Toolbars>
        <imageEditor:ImageEditorToolbar Position="End">
            <imageEditor:ImageEditorToolbar.ToolbarItems>
                <imageEditor:ImageEditorToolbarGroupItem Alignment="Start">
                    <imageEditor:ImageEditorToolbarGroupItem.Items>
                        <imageEditor:ImageEditorToolbarItem Name="Browse" />
                        <imageEditor:ImageEditorToolbarItem Name="Reset" />
                    </imageEditor:ImageEditorToolbarGroupItem.Items>
                </imageEditor:ImageEditorToolbarGroupItem>
                <imageEditor:ImageEditorToolbarGroupItem Alignment="End">
                    <imageEditor:ImageEditorToolbarGroupItem.Items>
                        <imageEditor:ImageEditorToolbarItem Name="Save" />
                        <imageEditor:ImageEditorToolbarItem Name="SaveEdit" />
                    </imageEditor:ImageEditorToolbarGroupItem.Items>
                </imageEditor:ImageEditorToolbarGroupItem>
            </imageEditor:ImageEditorToolbar.ToolbarItems>
        </imageEditor:ImageEditorToolbar>
    </imageEditor:SfImageEditor.Toolbars>
</imageEditor:SfImageEditor>
SfImageEditor imageEditor = new SfImageEditor();
imageEditor.Source = ImageSource.FromFile("image.png");
imageEditor.AutoGenerateToolbarItems = false;
ImageEditorToolbar editorToolbar = new ();
editorToolbar.Position = ToolbarPosition.End;
ImageEditorToolbarGroupItem browseGroup = new ()
{
Alignment = ToolbarGroupItemAlignment.Start,
Items = new List<ImageEditorToolbarItem>()
{
new ImageEditorToolbarItem(){ Name ="Browse"},
new ImageEditorToolbarItem(){ Name ="Reset" }
}
};
ImageEditorToolbarGroupItem saveGroup = new ()
{
Alignment = ToolbarGroupItemAlignment.End,
Items = new List<ImageEditorToolbarItem>()
{
new ImageEditorToolbarItem(){ Name ="Save"},
new ImageEditorToolbarItem(){ Name ="SaveEdit"}
}
};
editorToolbar.ToolbarItems.Add(browseGroup);
editorToolbar.ToolbarItems.Add(saveGroup);
imageEditor.Toolbars.Add(editorToolbar);
Create the sub-toolbar explicitly
Create SubToolbars within our default toolbar items to organize related actions.
<imageEditor:SfImageEditor Source="image.png"
                           AutoGenerateToolbarItems="False">
    <imageEditor:SfImageEditor.Toolbars>
        <imageEditor:ImageEditorToolbar Orientation="Vertical"
                                        Position="End">
            <imageEditor:ImageEditorToolbar.ToolbarItems>
                <imageEditor:ImageEditorToolbarItem Name="Text">
                    <imageEditor:ImageEditorToolbarItem.SubToolbars>
                        <imageEditor:ImageEditorToolbar>
                            <imageEditor:ImageEditorToolbar.ToolbarItems>
                                <imageEditor:ImageEditorToolbarItem Name="AddText" />
                                <imageEditor:ImageEditorToolbarItem Name="TextColor" />
                                <imageEditor:ImageEditorToolbarItem Name="Delete" />
                            </imageEditor:ImageEditorToolbar.ToolbarItems>
                        </imageEditor:ImageEditorToolbar>
                    </imageEditor:ImageEditorToolbarItem.SubToolbars>
                </imageEditor:ImageEditorToolbarItem>
                <imageEditor:ImageEditorToolbarItem Name="Shape" />
                <imageEditor:ImageEditorToolbarItem Name="Pen" />
            </imageEditor:ImageEditorToolbar.ToolbarItems>
        </imageEditor:ImageEditorToolbar>
    </imageEditor:SfImageEditor.Toolbars>
</imageEditor:SfImageEditor>
SfImageEditor imageEditor = new SfImageEditor();
imageEditor.Source = ImageSource.FromFile("image.png");
imageEditor.AutoGenerateToolbarItems = false;
ImageEditorToolbar editorToolbar = new ();
editorToolbar.Orientation = ToolbarOrientation.Vertical;
editorToolbar.Position = ToolbarPosition.End;
editorToolbar.ToolbarItems = new List<IImageEditorToolbarItem>()
{
new ImageEditorToolbarItem(){ Name = "Text",
SubToolbars = new List<ImageEditorToolbar>()
{
new ImageEditorToolbar()
{
ToolbarItems = new List<IImageEditorToolbarItem>()
{
new ImageEditorToolbarItem(){ Name = "AddText"},
new ImageEditorToolbarItem(){ Name = "TextColor"},
new ImageEditorToolbarItem(){ Name = "Delete"}
},
}
}
},
new ImageEditorToolbarItem(){ Name = "Shape"},
new ImageEditorToolbarItem(){ Name = "Pen"}
};
imageEditor.Toolbars.Add(editorToolbar);NOTE
Change the Toolbar Item Visibility
Hide or show the toolbar items by specifying their icon names and setting the boolean values to true or false.
NOTE
Customize an icon by specifying its
Name.
SfImageEditor imageEditor = new SfImageEditor();
        imageEditor.Source = ImageSource.FromFile("image.png");
        imageEditor.SetToolbarItemVisibility("Shape", false);
Toolbar Orientation
The toolbar orientation can be changed to achieve the desired design by using the Orientation property in the ImageEditorToolbar class. The default value is ToolbarOrientation.Horizontal.
For example, set the toolbar to a vertical orientation:
SfImageEditor imageEditor = new SfImageEditor();
imageEditor.Source = ImageSource.FromFile("image.png");
ImageEditorToolbar footerToolbar = imageEditor.Toolbars[1];
footerToolbar.Orientation = ToolbarOrientation.Vertical;
Toolbar Position
The toolbar can be positioned before or after the image of the ImageEditor by using the Position property in the ImageEditorToolbar class. The default value is ToolbarPosition.Start.
SfImageEditor imageEditor = new SfImageEditor();
imageEditor.Source = ImageSource.FromFile("image.png");
ImageEditorToolbar footerToolbar = imageEditor.Toolbars[1];
footerToolbar.Position = ToolbarPosition.Start;
Change the Toolbar Size
The size of the toolbar can be adjusted by using the Size property in the ImageEditorToolbar class.
For horizontal orientation, the size will be considered as width, and for vertical orientation, it will be considered as height.
SfImageEditor imageEditor = new SfImageEditor();
    imageEditor.Source = ImageSource.FromFile("image.png");
    imageEditor.ToolbarSettings.Background = Brush.LightGreen;
    imageEditor.Toolbars[0].Size = 80;
    imageEditor.Toolbars[1].Size = 50;
Appearance Customization
Customize the appearance of the toolbar by using the ToolbarSettings property. The following are some of the properties you can customize:
-
Background: Specifies the background color of the toolbar. -
IconColor: Specifies the color of the icons in the toolbar. -
IconSize: Specifies the size of the icons in the toolbar. The default value is 48. -
DisabledColor: Specifies the color of the disabled icons in the toolbar.
<imageEditor:SfImageEditor Source="image.png">
    <imageEditor:SfImageEditor.ToolbarSettings>
        <imageEditor:ImageEditorToolbarSettings Background="Pink"
                                                IconColor="Black"
                                                DisabledColor="Grey"
                                                IconSize="50, 50" />
    </imageEditor:SfImageEditor.ToolbarSettings>
</imageEditor:SfImageEditor>
SfImageEditor imageEditor = new SfImageEditor();
imageEditor.Source = ImageSource.FromFile("image.png");
imageEditor.ToolbarSettings.Background = Brush.pink;
imageEditor.ToolbarSettings.IconColor = Colors.Black;
imageEditor.ToolbarSettings.DisabledColor = Colors.Grey;
imageEditor.ToolbarSettings.IconSize = new Size(50, 50);NOTE

Notifying the Toolbar Item Selected
Whenever you tap the toolbar menu item, the ToolbarItemSelected event will be triggered, and you’ll get the respective tapped toolbar item as an argument as shown in the following code sample.
The default toolbar item action can be restricted by setting the e.cancel to true.
<imageEditor:SfImageEditor Source="image.png" ToolbarItemSelected = "OnImageEditorToolbarItemSelected" />private void OnImageEditorToolbarItemSelected(object sender, ToolbarItemSelectedEventArgs e)
{
DisplayAlert("Selected ToolbarItem is " + e.ToolbarItem.Name, "Ok", "Cancel");
}Show or hide the tooltip
To show or hide the tooltip, set the [ShowTooltip] property to either true or false. By default, the [ShowTooltip] property is set to true.
SfImageEditor imageEditor = new SfImageEditor();
imageEditor.Source = ImageSource.FromFile("image.png");

ImageEditorToolbar headerToolbar = imageEditor.Toolbars[0];
if (headerToolbar.ToolbarItems.FirstOrDefault() is ImageEditorToolbarGroupItem browseGroup)
{
    ImageEditorToolbarItem? browseItem = browseGroup.Items.FirstOrDefault();
    if (browseItem != null)
    {
        browseItem.ShowTooltip = false;
    }
}