Convert PowerPoint to PDF in Linux
8 Jul 20268 minutes to read
Syncfusion® PowerPoint is a .NET Core PowerPoint library used to create, read, edit and convert PowerPoint presentation programmatically without Microsoft PowerPoint or interop dependencies. Using this library, you can convert a PowerPoint to PDF in .NET Core application on Linux.
Steps to convert PowerPoint to PDF in .NET Core application on Linux
Prerequisites:
- Visual Studio 2022.
- Install .NET 8 SDK or later.
Step 1: Execute the following command in Linux terminal to create a new .NET Core Console application.
dotnet new console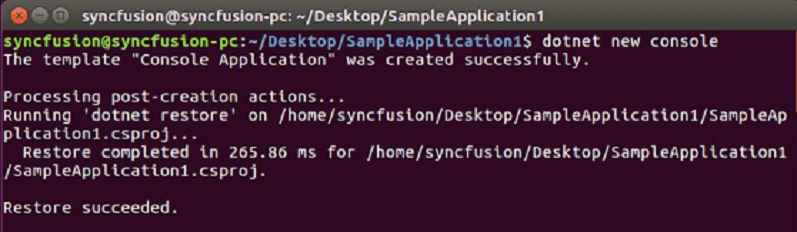
Step 2: Install the following Nuget packages in your application from Nuget.org by execute the following command.
- Syncfusion.PresentationRenderer.Net.Core
- SkiaSharp.NativeAssets.Linux v3.119.1
- HarfBuzzSharp.NativeAssets.Linux v8.3.1.2
dotnet add package Syncfusion.PresentationRenderer.Net.Core -v 22.1.38 -s https://www.nuget.org/
dotnet add package SkiaSharp.NativeAssets.Linux -v 3.119.1 -s https://www.nuget.org/
dotnet add package HarfBuzzSharp.NativeAssets.Linux -v 8.3.1.2 -s https://www.nuget.org/
NOTE
- For other Linux environments, refer to the documentation for detailed information on the additional NuGet packages required.
- Starting with v16.2.0.x, if you reference Syncfusion® assemblies from trial setup or from the NuGet feed, you also have to add “Syncfusion.Licensing” assembly reference and include a license key in your projects. Please refer to this link to know about registering Syncfusion® license key in your applications to use our components.
- If you are using prior to v23.1.40 release, please refer here to know about how to perform Word to PDF conversion in Linux.
Step 3: Add the following Namespaces in Program.cs file.
using Syncfusion.Presentation;
using Syncfusion.PresentationRenderer;
using Syncfusion.Pdf;
Step 4: Add the following code snippet in Program.cs file.
//Open the file as Stream
using (FileStream fileStreamInput = new FileStream(Path.GetFullPath(@"../../../Data/Input.pptx"), FileMode.Open, FileAccess.Read))
{
    //Open the existing PowerPoint presentation with loaded stream.
    using (IPresentation pptxDoc = Presentation.Open(fileStreamInput))
    {
        //Convert the PowerPoint presentation to PDF document.
        using (PdfDocument pdfDocument = PresentationToPdfConverter.Convert(pptxDoc))
        {
            //Save the converted PDF document to MemoryStream.
            MemoryStream pdfStream = new MemoryStream();
            pdfDocument.Save(pdfStream);
            pdfStream.Position = 0;
            //Create FileStream to save the PDF file.
            using (FileStream outputStream = new FileStream("Sample.pdf", FileMode.Create, FileAccess.ReadWrite, FileShare.ReadWrite))
            {
                //Saves the PDF file.
                pdfDocument.Save(outputStream);
            }
        }
    }
}
Step 5: Execute the following command to restore the NuGet packages.
dotnet restore
Step 6: Execute the following command in terminal to run the application.
dotnet run
You can download a complete working sample from GitHub.
By executing the program, you will get the PDF as follows. The output will be saved in bin folder.

Prerequisites:
- JetBrains Rider.
- Install .NET 8 SDK or later.
Step 1: Open JetBrains Rider and create a new .NET Core console application project.
- Launch JetBrains Rider.
- Click New solution on the welcome screen.

- In the New Solution dialog, select Project Type as Console.
- Select the target framework (e.g., .NET 8.0, .NET 9.0).
- Enter a project name and specify the location.
- Click create.

Step 2: Install the NuGet package from NuGet.org.
- Click the NuGet icon in the Rider toolbar and type Syncfusion.PresentationRenderer.Net.Core in the search bar.
- Ensure that nuget.org is selected as the package source.
- Select the latest Syncfusion.PresentationRenderer.Net.Core NuGet package from the list.
- Click the + (Add) button to add the package.

- Click the Install button to complete the installation.

NOTE
- For other Linux environments, refer to the documentation for detailed information on the additional NuGet packages required.
- Starting with v16.2.0.x, if you reference Syncfusion assemblies from trial setup or from the NuGet feed, you also have to add “Syncfusion.Licensing” assembly reference and include a license key in your projects. Please refer to this link to know about registering Syncfusion license key in your application to use our components.
Step 3: Add the following Namespaces in Program.cs file.
using Syncfusion.Presentation;
using Syncfusion.PresentationRenderer;
using Syncfusion.Pdf;
Step 4: Add the following code snippet in Program.cs file.
//Open the file as Stream
using (FileStream fileStreamInput = new FileStream(Path.GetFullPath(@"../../../Data/Input.pptx"), FileMode.Open, FileAccess.Read))
{
    //Open the existing PowerPoint presentation with loaded stream.
    using (IPresentation pptxDoc = Presentation.Open(fileStreamInput))
    {
        //Convert the PowerPoint presentation to PDF document.
        using (PdfDocument pdfDocument = PresentationToPdfConverter.Convert(pptxDoc))
        {
            //Save the converted PDF document to MemoryStream.
            MemoryStream pdfStream = new MemoryStream();
            pdfDocument.Save(pdfStream);
            pdfStream.Position = 0;
            //Create FileStream to save the PDF file.
            using (FileStream outputStream = new FileStream("Sample.pdf", FileMode.Create, FileAccess.ReadWrite, FileShare.ReadWrite))
            {
                //Saves the PDF file.
                pdfDocument.Save(outputStream);
            }
        }
    }
}
Step 5: Build the project.
Click the Build button in the toolbar or press Ctrl+Shift+B to build the project.
Step 6: Run the project.
Click the Run button (green arrow) in the toolbar or press F5 to run the app.
You can download a complete working sample from GitHub.
By executing the program, you will get the PDF as follows. The output will be saved in bin folder.
Looking for the full .NET PowerPoint Library component overview, features, pricing, and documentation? Visit the .NET PowerPoint Library page.
An online sample link to convert PowerPoint Presentation to PDF in ASP.NET Core.