Getting Started with WPF Domain Updown (SfDomainUpDown)
5 May 20257 minutes to read
This section provides you an overview of working with SfDomainUpDown for WPF and provides a walk through to configure the SfDomainUpDown control in a real time scenario.
Assembly deployment
Refer to the control dependencies section to get the list of assemblies or NuGet package needs to be added as a reference to use the control in any application.
Further information on installing the NuGet package can be found in the following link. How to install nuget packages. You can also use the Syncfusion Reference Manager to refer to the SfDomainUpDown’s dependent assemblies.
Creating Application with SfDomainUpDown control
In this walk through, you will create a WPF application that contains the SfDomainUpDown control.
Creating project
Create a new WPF project to show the SfDomainUpDown control in Visual Studio.
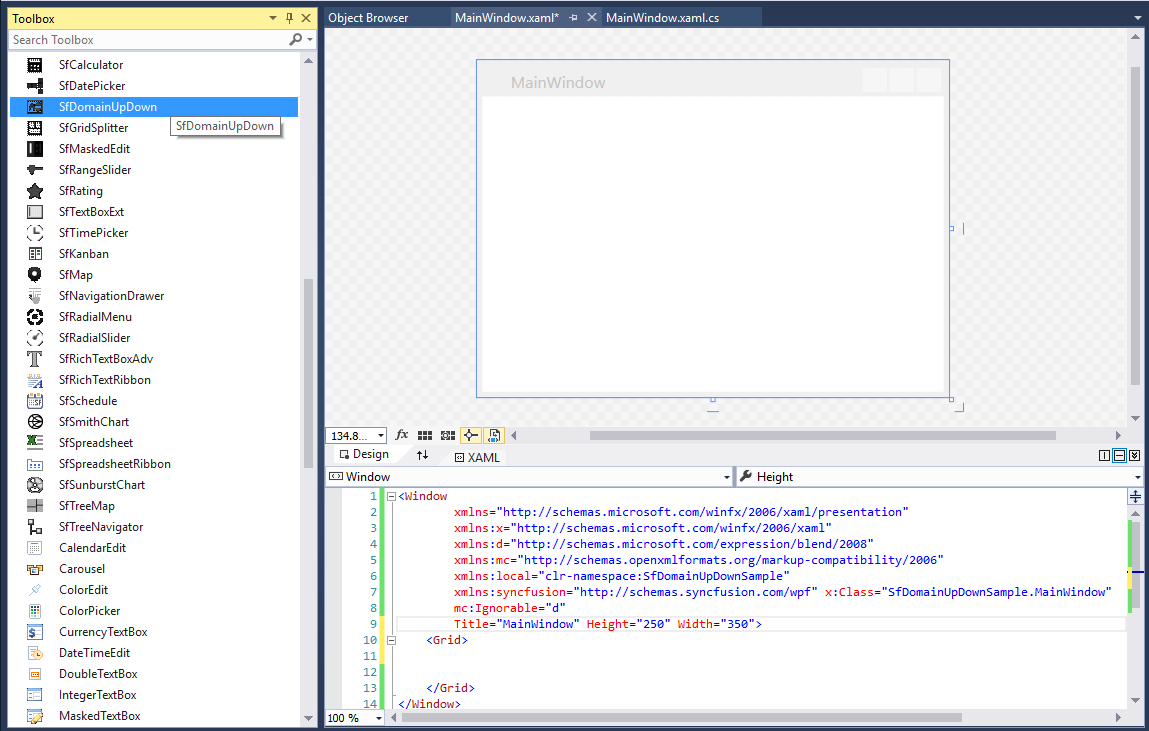
Adding control via designer
The SfDomainUpDown control can be added to the application by dragging it from Toolbox and dropping it in the designer. The required assemblies will be added automatically.
Adding control manually in XAML
To add the control manually in XAML page, follow the given steps:
-
Add the following required assembly references to the project,
- Syncfusion.SfInput.WPF
- Syncfusion.SfShared.WPF
-
Import Syncfusion WPF schema http://schemas.syncfusion.com/wpf in the XAML page or Syncfusion.Windows.Tools.Controls namespace.
-
Declare SfDomainUpDown in XAML page.
<Window
        xmlns="http://schemas.microsoft.com/winfx/2006/xaml/presentation"
        xmlns:x="http://schemas.microsoft.com/winfx/2006/xaml"
        xmlns:d="http://schemas.microsoft.com/expression/blend/2008"
        xmlns:mc="http://schemas.openxmlformats.org/markup-compatibility/2006"
        xmlns:local="clr-namespace:GettingStartedComboBox"
        xmlns:syncfusion="http://schemas.syncfusion.com/wpf" x:Class="GettingStartedComboBox.MainWindow"
        mc:Ignorable="d"
        Title="MainWindow" Height="450" Width="800">
    <Grid>
        <syncfusion:SfDomainUpDown Height="30" Width="150" Value="40" />
    </Grid>
</Window>
Adding control manually in C#
To add the control manually in C#, follow the given steps:
-
Add the following required assembly references to the project,
- Syncfusion.SfInput.WPF
- Syncfusion.SfShared.WPF
-
Import the
SfDomainUpDownnamespace Syncfusion.Windows.Controls.Input. -
Create the
SfDomainUpDowncontrol instance and add it to the page.using System.Windows; using Syncfusion.Windows.Controls.Input; namespace ComboBox { /// <summary> /// Interaction logic for MainWindow.xaml /// </summary> public partial class MainWindow : Window { public MainWindow() { InitializeComponent(); SfDomainUpDown sfDomainUpDown1 = new SfDomainUpDown(); this.Content = sfDomainUpDown1; sfDomainUpDown1.Height = 30; sfDomainUpDown1.Width = 150; sfDomainUpDown1.Value = 40; } } }

Populating by DataBinding
You can populate the SfDomainUpDown control using the ItemsSource property.
-
You can create a data object class named Employee as Model and declare properties as shown below,
public class Employee { private string name; private string email; public string Email { get { return email; } set { email = value; } } public string Name { get { return name; } set { name = value; } } } -
You can create a ViewModel class with several data objects in constructor.
public class ViewModel { private List<Employee> employees; public List<Employee> Employees { get { return employees; } set { employees = value; } } public ViewModel() { Employees = new List<Employee>(); populateItem(); } private void populateItem() { Employees.Add(new Employee { Name = "Lucas", Email = "[email protected]" }); Employees.Add(new Employee { Name = "James", Email = "[email protected]" }); Employees.Add(new Employee { Name = "Jacob", Email = "[email protected]" }); } } -
You can bind the Employees property from the ViewModel class to the ItemSource property of
SfDomainUpDowncontrol and the control is set to display content based on the Name inside the ContentTemplate property.<syncfusion:SfDomainUpDown x:Name="domainUpDown" HorizontalAlignment="Center" VerticalAlignment="Center" Width="200" ItemsSource="{Binding Employees}"> <syncfusion:SfDomainUpDown.ContentTemplate> <DataTemplate> <StackPanel Orientation="Horizontal"> <TextBlock Text="{Binding Name}"/> </StackPanel> </DataTemplate> </syncfusion:SfDomainUpDown.ContentTemplate> </syncfusion:SfDomainUpDown>

NOTE
Spin button alignment
You can customize the position of the spin button in the SfDomainUpDown control using the SpinButtonsAlignment property.
<syncfusion:SfDomainUpDown x:Name="domainUpDown" Height="35" Width="150" SpinButtonsAlignment="Right" Value="James" />SfDomainUpDown domainUpDown1 = new SfDomainUpDown();
domainUpDown1.Height = 30;
domainUpDown1.Width = 150;
domainUpDown1.SpinButtonsAlignment = Syncfusion.Windows.Controls.SpinButtonsAlignment.Right;1.Right

2.Left

3.Both