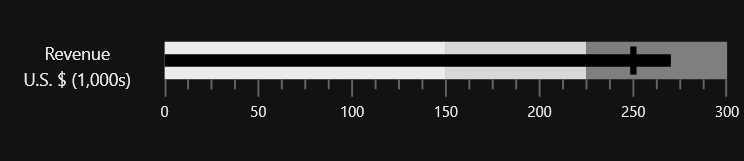
Getting Started with WPF Bullet Graph
18 Nov 201813 minutes to read
This section explains the steps required to configure the SfBulletGraph and to add the basic elements of WPF Bullet Graph using the various APIs available within it.
Configuring WPF Bullet Graph using Syncfusion Reference Manager
The Syncfusion Reference Manager is used to add Syncfusion tools.
Follow these steps to add the SfBulletGraph control using the Syncfusion Reference Manager.
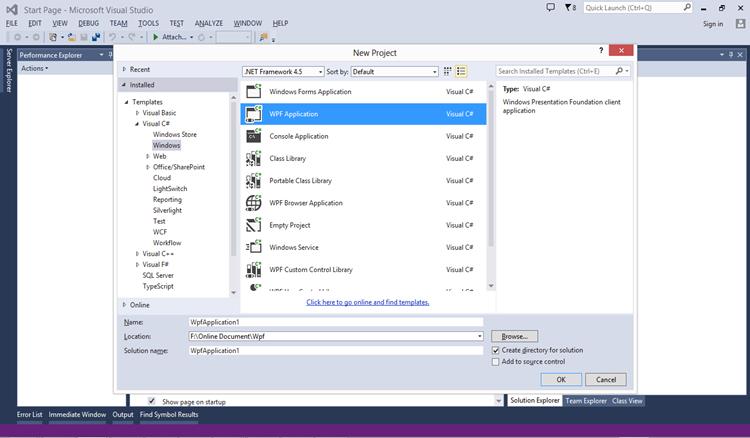
Create a simple WPF application using Visual Studio.
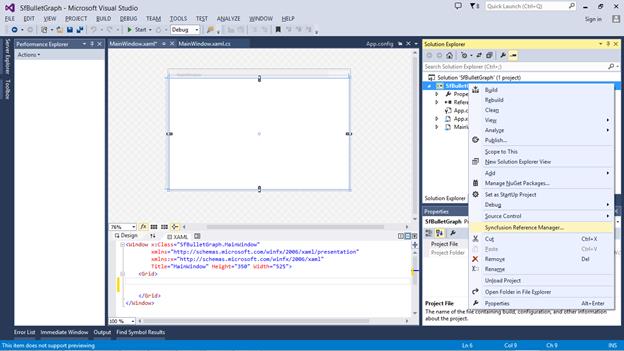
Right-click the project and select the Syncfusion Reference Manager.
The Syncfusion Reference Manager wizard opens as shown in the figure below.
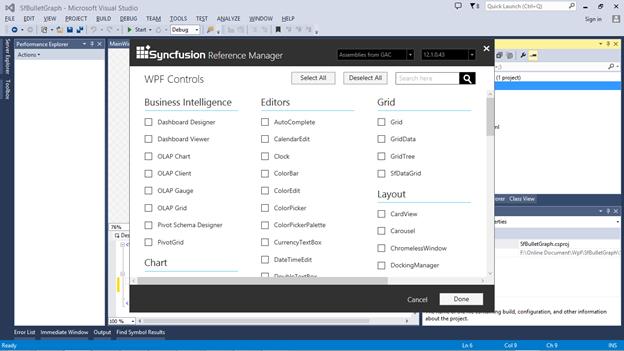
Search for WPF Bullet Graph using the search box and select the SfBulletGraph control. Click Done to add the selected SfBulletGraph control.
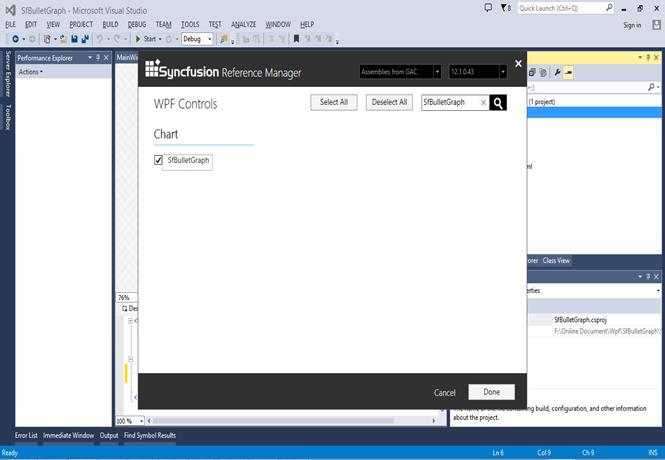
The WPF Bullet Graph assemblies will be automatically added to the project after clicking Done.
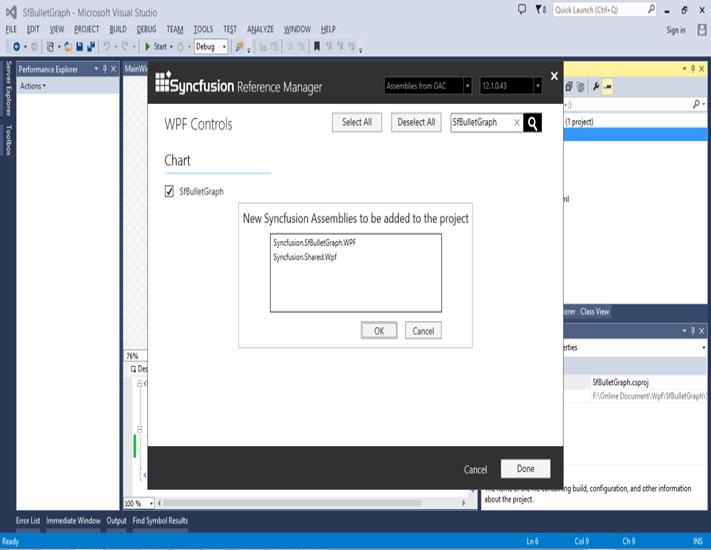
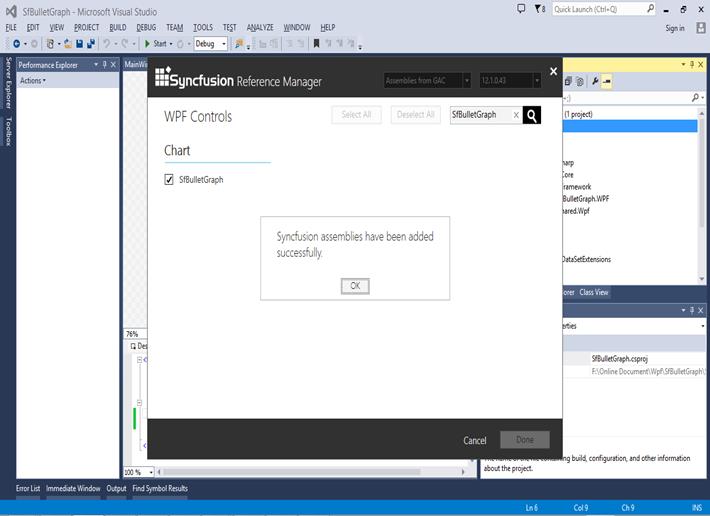
Create a namespace reference to the SfBulletGraph control using Syncfusion’s global namespace reference schemas.Syncfusion.com or the SfBulletGraph control’s namespace reference using Syncfusion.UI.Xaml.BulletGraph available in the Syncfusion.SfBulletGraph.WPF assembly.
xmlns:bulletgraph="http://schemas.syncfusion.com/wpf"
    (or)
    xmlns:bulletgraph ="clr-namespace:Syncfusion.UI.Xaml.BulletGraph;assembly=Syncfusion.SfBulletGraph.WPF"
Add the following code to create a simple SfBulletGraph control.
<Window x:Class="SfBulletGraph.MainWindow"
    xmlns="http://schemas.microsoft.com/winfx/2006/xaml/presentation"
    xmlns:x="http://schemas.microsoft.com/winfx/2006/xaml"
    xmlns:syncfusion ="http://schemas.syncfusion.com/wpf"
    Title="MainWindow" Height="350" Width="525">
    <Grid x:Name="LayoutRoot">
    <syncfusion:SfBulletGraph/>
    </Grid>
    </Window>
SfBulletGraph bulletgraph = new SfBulletGraph();
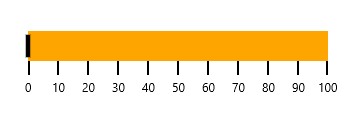
this.Grid.Children.Add(bulletgraph);The SfBulletGraph control will be created as shown in the figure below.
Note: The Syncfusion Reference Manager is available in versions 11.3.0.30 and later. It supports referencing assemblies from version 10.4.0.71 to the current version, and the Syncfusion Reference Manager can be used only in Visual Studio 2015.
Configuring WPF Bullet Graph
WPF Bullet Graph is available in the following assembly and namespace:
Assembly: Syncfusion.SfBulletGraph.Wpf
Namespace: Syncfusion.UI.Xaml.BulletGraph
Create a namespace reference to the SfBulletGraph control using Syncfusion’s global namespace reference schemas.Syncfusion.com or the SfBulletGraph control’s namespace reference using Syncfusion.UI.Xaml.BulletGraph available in the Syncfusion.SfBulletGraph.WPF assembly.
xmlns:bulletgraph="http://schemas.syncfusion.com/wpf"
    (or)
xmlns:bulletgraph ="clr-namespace:Syncfusion.UI.Xaml.BulletGraph;assembly=Syncfusion.SfBulletGraph.WPF"<syncfusion:SfBulletGraph/>SfBulletGraph bulletgraph = new SfBulletGraph();
grid.Children.Add(bulletgraph);
As shown in the image above, the WPF Bullet Graph displays its default elements. To customize them, add the required elements as needed. The following section explains how to add the basic elements.
Adding Caption
You can assign a caption to the bullet graph by using the Caption property, and you can position it either near or far using the CaptionPosition property.
<syncfusion:SfBulletGraph CaptionPosition="Far">
        <syncfusion:SfBulletGraph.Caption>
            <StackPanel Margin="0,0,10,0">
                <TextBlock Text="Revenue YTD" Foreground="Black"
                            FontSize="13" HorizontalAlignment="Center"/>
                <TextBlock Text="$ in Thousands" Foreground="Black"
                            FontSize="13" HorizontalAlignment="Center"/>
            </StackPanel>
        </syncfusion:SfBulletGraph.Caption>
    </syncfusion:SfBulletGraph>
SfBulletGraph bulletgraph = new SfBulletGraph();
bulletgraph.CaptionPosition = BulletGraphCaptionPosition.Far;
TextBlock textBlock = new TextBlock() { Text = "Revenue YTD" };
TextBlock textBlock1 = new TextBlock() { Text = "$ in Thousands" };
StackPanel stackPanel = new StackPanel();
stackPanel.Children.Add(textBlock);
stackPanel.Children.Add(textBlock1);
bulletgraph.Caption = stackPanel;
grid.Children.Add(bulletgraph);
Configuring Ticks and Labels
You can configure the ticks and labels of the quantitative scale by using the following APIs available in WPF Bullet Graph:
They are:
- Minimum
- Maximum
- Interval
- MinorTicksPerInterval
- MajorTickSize
- MinorTickSize
- MajorTickStroke
- LabelStroke
- MinorTickStroke
<syncfusion:SfBulletGraph Orientation="Horizontal" Minimum="0" Maximum="10" Interval="2"
                                  ComparativeMeasure="7" FeaturedMeasure="5" FeaturedMeasureBarStroke="Black" MajorTickStroke="Red"
                                  MinorTickStroke="Green" MinorTicksPerInterval="3"
                                    MajorTickSize="15" MinorTickSize="10">
        <syncfusion:SfBulletGraph.QualitativeRanges>
            <syncfusion:QualitativeRange RangeEnd="4.5" RangeStroke="#EBEBEB"></syncfusion:QualitativeRange>
            <syncfusion:QualitativeRange RangeEnd="10" RangeStroke="#7F7F7F"></syncfusion:QualitativeRange>
            <syncfusion:QualitativeRange RangeEnd="7.5" RangeStroke="#D8D8D8"></syncfusion:QualitativeRange>
        </syncfusion:SfBulletGraph.QualitativeRanges>
     </syncfusion:SfBulletGraph>
SfBulletGraph bulletgraph = new SfBulletGraph();
bulletgraph.Minimum = 0;
bulletgraph.Maximum = 10;
bulletgraph.Interval = 2;
bulletgraph.FeaturedMeasure = 5;
bulletgraph.ComparativeMeasure = 7;
bulletgraph.MajorTickStroke = new SolidColorBrush(Colors.Red);
bulletgraph.MinorTickStroke = new SolidColorBrush(Colors.Green);
bulletgraph.FeaturedMeasureBarStroke = new SolidColorBrush(Colors.Black);
bulletgraph.MinorTicksPerInterval = 3;
bulletgraph.MinorTickSize = 10;
bulletgraph.MajorTickSize = 15;
bulletgraph.Orientation = Orientation.Horizontal;
QualitativeRange range1 = new QualitativeRange();
range1.RangeEnd = 4.5;
range1.RangeStroke = (Brush)new BrushConverter().ConvertFrom("#EBEBEB");
QualitativeRange range2 = new QualitativeRange();
range2.RangeEnd = 10;
range2.RangeStroke = (Brush)new BrushConverter().ConvertFrom("#7F7F7F");
QualitativeRange range3 = new QualitativeRange();
range3.RangeEnd = 7.5;
range3.RangeStroke = (Brush)new BrushConverter().ConvertFrom("#D8D8D8");
bulletgraph.QualitativeRanges.Add(range1);
bulletgraph.QualitativeRanges.Add(range2);
bulletgraph.QualitativeRanges.Add(range3);
grid.Children.Add(bulletgraph);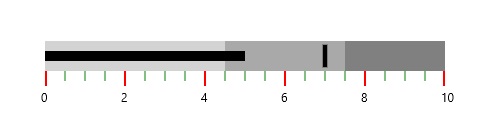
Adding Ranges
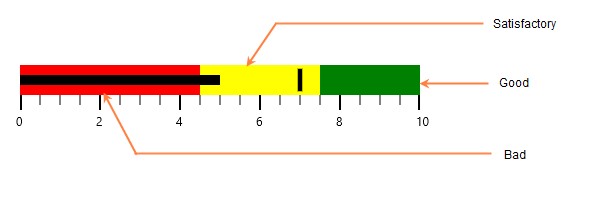
You can add ranges to bullet graph by creating ranges collection using QualitativeRanges.
<syncfusion:SfBulletGraph Orientation="Horizontal" Minimum="0" Maximum="10" Interval="2"
                                  QualitativeRangesSize="30"  MinorTicksPerInterval="3" ComparativeMeasure="7" FeaturedMeasure="5"
                                  QuantitativeScaleLength="300" FeaturedMeasureBarStroke="Black"  MinorTickSize="10" MajorTickSize="14">
        <syncfusion:SfBulletGraph.QualitativeRanges>
            <syncfusion:QualitativeRange RangeEnd="4.5" RangeCaption="Bad"
                                            RangeStroke="Red"
                                            RangeOpacity="1">
            </syncfusion:QualitativeRange>
            <syncfusion:QualitativeRange RangeEnd="7.5"
                                            RangeStroke="Yellow"
                                            RangeOpacity="1">
            </syncfusion:QualitativeRange>
            <syncfusion:QualitativeRange RangeEnd="10"
                                            RangeStroke="Green"
                                            RangeOpacity="1">
            </syncfusion:QualitativeRange>
        </syncfusion:SfBulletGraph.QualitativeRanges>
    </syncfusion:SfBulletGraph>
SfBulletGraph bulletgraph = new SfBulletGraph();
bulletgraph.Minimum = 0;
bulletgraph.Maximum = 10;
bulletgraph.FeaturedMeasure = 5;
bulletgraph.ComparativeMeasure = 7;
bulletgraph.Interval = 2;
bulletgraph.MinorTickSize = 8;
bulletgraph.MinorTicksPerInterval = 3;
bulletgraph.QualitativeRangesSize = 30;
bulletgraph.QuantitativeScaleLength = 300;
bulletgraph.FeaturedMeasureBarStroke = new SolidColorBrush(Colors.Black);
bulletgraph.QualitativeRanges.Add(new QualitativeRange()
{
RangeEnd = 4.5,
RangeOpacity = 1,
RangeStroke = new SolidColorBrush(Colors.Red)
});
bulletgraph.QualitativeRanges.Add(new QualitativeRange()
{
RangeEnd = 7.5,
RangeOpacity = 1,
RangeStroke = new SolidColorBrush(Colors.Yellow)
});
bulletgraph.QualitativeRanges.Add(new QualitativeRange()
{
RangeEnd = 10,
RangeOpacity = 1,
RangeStroke = new SolidColorBrush(Colors.Green)
});
grid.Children.Add(bulletgraph);WPF Bullet Graph ranges are displayed as follows.
You can get the complete getting started sample here.
Theme
Bullet Graph supports various built-in themes. Refer to the below links to apply themes for the Bullet Graph,