Backstage in WinUI Ribbon
18 Nov 201824 minutes to read
Refer to the Getting Started documentation for information on installing the NuGet package, adding namespace references, and adding the
SfRibboncontrol to your application.
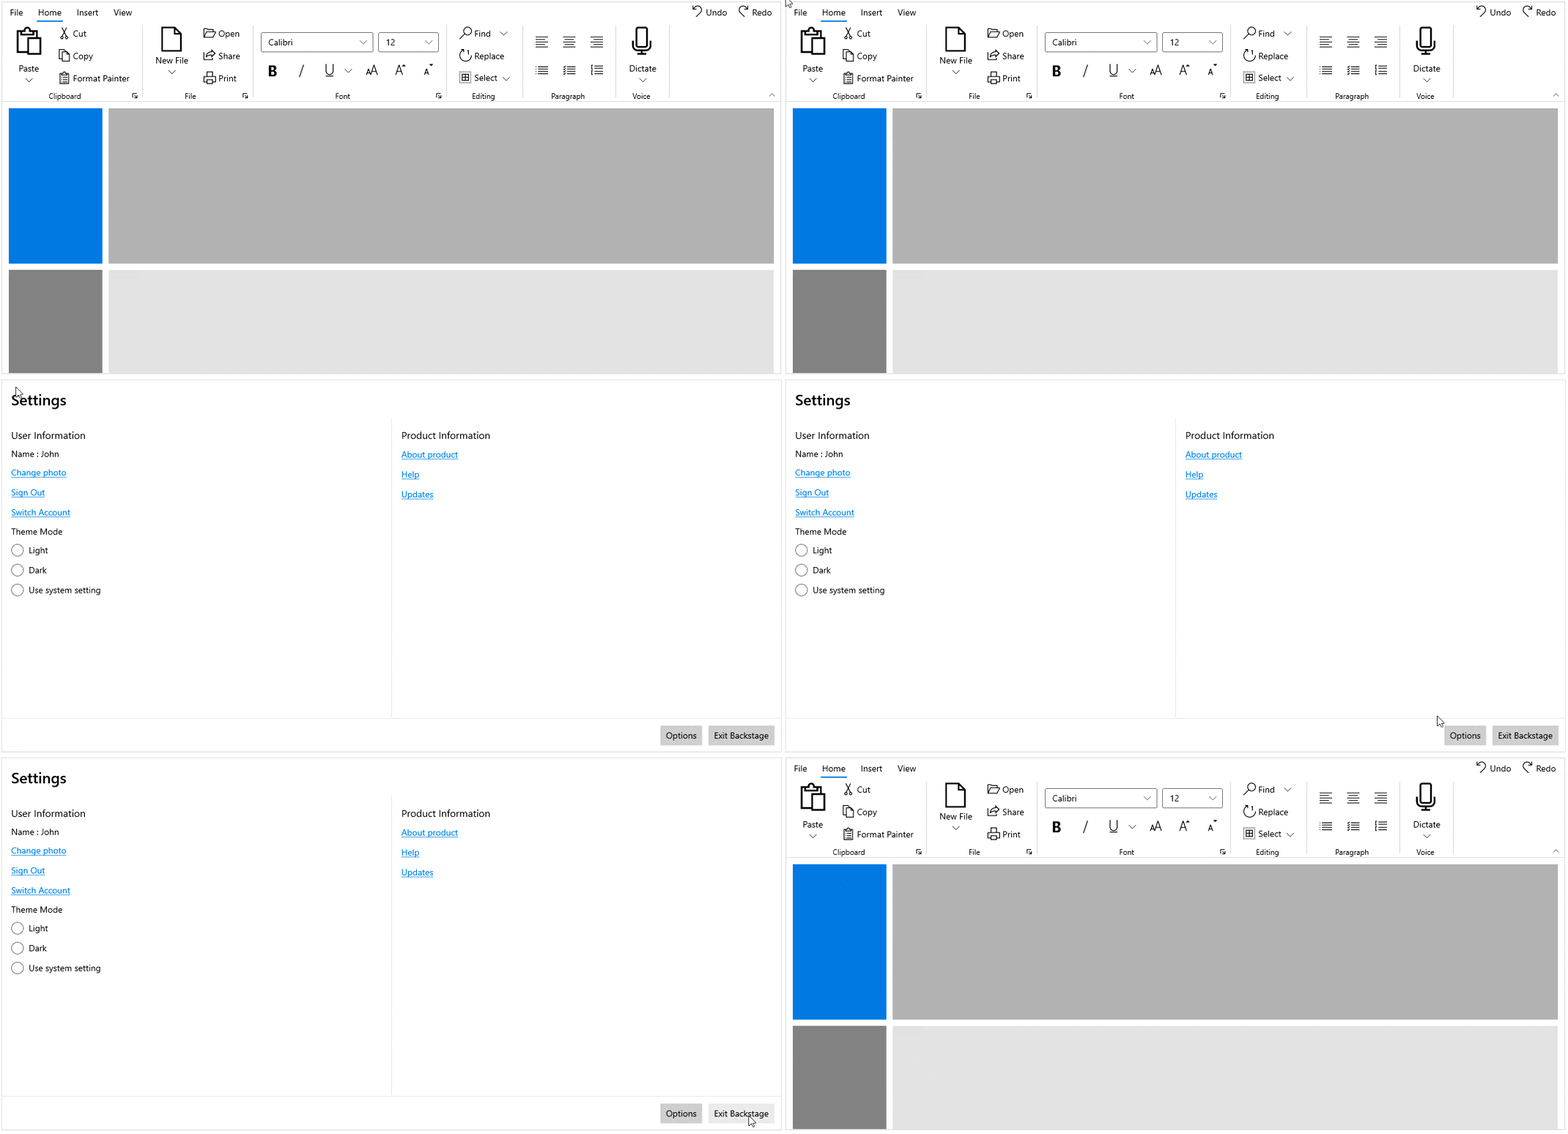
The RibbonBackstage allows you to host controls to create a custom view based on the requirements of the application, and it can be added by using the Backstage property. Backstage appears as the first tab in the top left corner named File and opens a backstage view when the File menu button is clicked. The backstage view’s open/close state can be controlled programmatically through the IsBackstageOpen property of the Ribbon.
If you want backstage to overlay a specific element (for example, the main content area), set the Target property of RibbonBackstage to that element. When Target is set, the backstage view is rendered over the targeted element; otherwise it overlays the Ribbon’s host.
<ribbon:SfRibbon x:Name="ribbon" BackstageMenuButtonContent="File">
    <ribbon:SfRibbon.Tabs>
        <!-- Add ribbon tabs here... -->
    </ribbon:SfRibbon.Tabs>
    <ribbon:SfRibbon.Backstage>
        <ribbon:RibbonBackstage Target="{Binding ElementName=rootGrid}">
            <Grid>
                <Grid.RowDefinitions>
                    <RowDefinition Height="*" />
                    <RowDefinition Height="Auto" />
                </Grid.RowDefinitions>
                <Grid
                    Grid.Row="0"
                    Padding="0,0,0,1"
                    VerticalAlignment="Top"
                    BorderBrush="LightGray"
                    BorderThickness="0,0,0,1">
                    <Grid.RowDefinitions>
                        <RowDefinition Height="Auto" />
                        <RowDefinition Height="481" />
                    </Grid.RowDefinitions>
                    <Grid.ColumnDefinitions>
                        <ColumnDefinition />
                        <ColumnDefinition />
                    </Grid.ColumnDefinitions>
                    <TextBlock
                        Grid.Row="0"
                        Padding="15"
                        FontSize="24"
                        FontWeight="SemiBold"
                        Text="Settings" />
                    <StackPanel
                        Grid.Row="1"
                        Margin="15,15,15,0"
                        BorderBrush="LightGray"
                        BorderThickness="0,0,0,0">
                        <TextBlock
                            Padding="0,0,0,5"
                            FontSize="16"
                            Text="User Information" />
                        <TextBlock
                            Padding="0,5,0,5"
                            FontSize="14"
                            Text="Name : John" />
                        <HyperlinkButton Content="Change photo" />
                        <HyperlinkButton Content="Sign Out" />
                        <HyperlinkButton Content="Switch Account" />
                        <TextBlock Padding="0,5,0,5" Text="Theme Mode" />
                        <RadioButton Content="Light" />
                        <RadioButton Content="Dark" />
                        <RadioButton Content="Use system setting" />
                    </StackPanel>
                    <StackPanel
                        Grid.Row="1"
                        Grid.Column="1"
                        Padding="15,15,15,0"
                        BorderBrush="LightGray"
                        BorderThickness="1,0,0,0">
                        <TextBlock
                            Padding="0,0,0,5"
                            FontSize="16"
                            Text="Product Information" />
                        <HyperlinkButton Content="About product" />
                        <HyperlinkButton Content="Help" />
                        <HyperlinkButton Content="Updates" />
                    </StackPanel>
                </Grid>
                <StackPanel
                    Grid.Row="1"
                    Grid.ColumnSpan="2"
                    Padding="120,0,5,5"
                    HorizontalAlignment="Right"
                    BorderBrush="LightGray"
                    BorderThickness="0,0,0,0"
                    Orientation="Horizontal">
                    <Button
                        Margin="5"
                        Content="Options"
                        CornerRadius="0" />
                    <Button
                        Margin="5"
                        Content="Exit Backstage"
                        Click="Button_Click"
                        CornerRadius="0" />
                </StackPanel>
            </Grid>
        </ribbon:RibbonBackstage>
    </ribbon:SfRibbon.Backstage>
</ribbon:SfRibbon>
private void Button_Click(object sender, RoutedEventArgs e)
{
this.ribbon.IsBackstageOpen = false;
}
File menu (Backstage button) visibility
The Ribbon allows you to show or hide a Backstage menu button using the ShowBackstageMenuButton property.
<ribbon:SfRibbon ShowBackstageMenuButton="False">
    <ribbon:SfRibbon.Tabs>
        <ribbon:RibbonTab Header="Home" />
        <ribbon:RibbonTab Header="Insert" />
        <ribbon:RibbonTab Header="View" />
    </ribbon:SfRibbon.Tabs>
    <ribbon:SfRibbon.Backstage>
        <ribbon:RibbonBackstage>
            <ribbon:BackstageView />
        </ribbon:RibbonBackstage>
    </ribbon:SfRibbon.Backstage>
</ribbon:SfRibbon>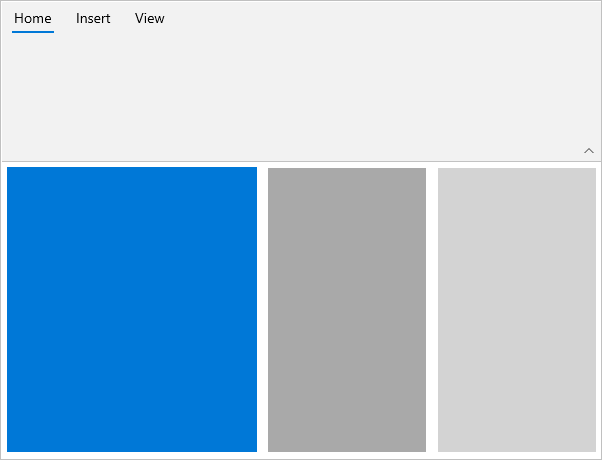
File menu (Backstage button) text
The BackstageMenuButtonContent property allows you to set the content of the Backstage menu button in the Ribbon. The content of the property is specified as File by default.
<ribbon:SfRibbon BackstageMenuButtonContent="File">
    <ribbon:SfRibbon.Backstage>
        <ribbon:RibbonBackstage>
            <ribbon:BackstageView />
        </ribbon:RibbonBackstage>
    </ribbon:SfRibbon.Backstage>
</ribbon:SfRibbon>
Backstage view
The Ribbon provides the BackstageView as a separate view, similar to Microsoft Outlook and Word applications, that can be hosted inside the Ribbon backstage. The backstage view contains tabs and buttons. Separators are placed between backstage view items to create groups, and they can be added using the Items property. The view can be placed at the top or bottom of the application via the Placement property of BackstageView.
Supported BackstageView properties and events
The following members are commonly used when working with BackstageView:
| Member | Type | Description |
|---|---|---|
Items |
Property | Collection of items shown in the main backstage list. |
FooterItems |
Property | Collection of items rendered at the bottom (footer) of the backstage view. |
ShowBackButton |
Property | Gets or sets a value indicating whether the back button is shown. |
BackButtonClick |
Event | Raised when the back button is clicked. |
<ribbon:SfRibbon>
    <ribbon:SfRibbon.Tabs>
        <ribbon:RibbonTab Header="Home" />
        <ribbon:RibbonTab Header="Insert" />
        <ribbon:RibbonTab Header="View" />
        <ribbon:RibbonTab Header="Layout" />
    </ribbon:SfRibbon.Tabs>
    <ribbon:SfRibbon.Backstage>
        <ribbon:RibbonBackstage>
            <ribbon:BackstageView>
                <ribbon:BackstageView.Items>
                    <ribbon:BackstageViewTabItem Header="New" />
                    <ribbon:BackstageViewTabItem Header="Open" />
                    <ribbon:BackstageViewItemSeparator />
                    <ribbon:BackstageViewTabItem Header="Info" />
                    <ribbon:BackstageViewButtonItem Header="Save" />
                    <ribbon:BackstageViewButtonItem Header="Close" />
                </ribbon:BackstageView.Items>
            </ribbon:BackstageView>
        </ribbon:RibbonBackstage>
    </ribbon:SfRibbon.Backstage>
</ribbon:SfRibbon>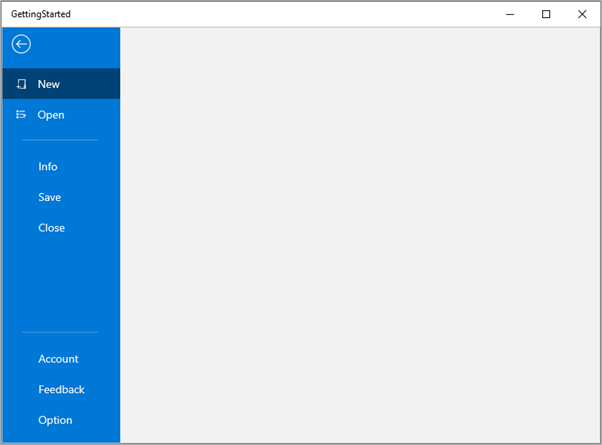
Backstage view visibility
The Ribbon allows you to show or hide the backstage view using the IsBackstageOpen property.
- Through property
The visibility of the backstage view can be directly enabled or disabled by setting a value to the IsBackstageOpen property of the Ribbon.
<ribbon:SfRibbon x:Name="ribbon"
                    IsBackstageOpen="True">
       <ribbon:SfRibbon.Backstage>
           <ribbon:RibbonBackstage>
               <ribbon:BackstageView/>
           </ribbon:RibbonBackstage>
       </ribbon:SfRibbon.Backstage>
</ribbon:SfRibbon>- Through back button click event
The backstage view can be opened or closed dynamically using BackButtonClick event.
<ribbon:SfRibbon x:Name="ribbon">
       <ribbon:SfRibbon.Backstage>
           <ribbon:RibbonBackstage>
               <ribbon:BackstageView x:Name="backstageview"
                                     BackButtonClick="BackstageView_BackButtonClick">
               </ribbon:BackstageView>
           </ribbon:RibbonBackstage>
       </ribbon:SfRibbon.Backstage>
   </ribbon:SfRibbon>
private void BackstageView_BackButtonClick(BackstageView sender, object args)
{
this.ribbon.IsBackstageOpen = false;
}- Through Back button command
The backstage view can be opened or closed dynamically using the BackButtonCommand property. The BackButtonCommandParameter value is passed to the command when the back button is clicked; in the example below, "false" indicates the backstage should close.
<ribbon:SfRibbon x:Name="ribbon">
       <ribbon:SfRibbon.Backstage>
           <ribbon:RibbonBackstage>
               <ribbon:BackstageView x:Name="backstageview"
                                     BackButtonCommand="{x:Bind ButtonCommand}"
                                     BackButtonCommandParameter="false" />
           </ribbon:RibbonBackstage>
       </ribbon:SfRibbon.Backstage>
   </ribbon:SfRibbon>
public ICommand ButtonCommand { get; set; }
this.ButtonCommand = new DelegateCommand(ExecuteButtonCommand, CanExecuteCommand);
private bool CanExecuteCommand(object obj)
{
return true;
}
private void ExecuteButtonCommand(object obj)
{
this.ribbon.IsBackstageOpen = bool.Parse(obj.ToString());
}Back button visibility
The BackstageView allows you to show or hide the back button using the ShowBackButton property.
<ribbon:SfRibbon x:Name="ribbon">
    <ribbon:SfRibbon.Backstage>
        <ribbon:RibbonBackstage>
            <ribbon:BackstageView ShowBackButton="False" />
        </ribbon:RibbonBackstage>
    </ribbon:SfRibbon.Backstage>
</ribbon:SfRibbon>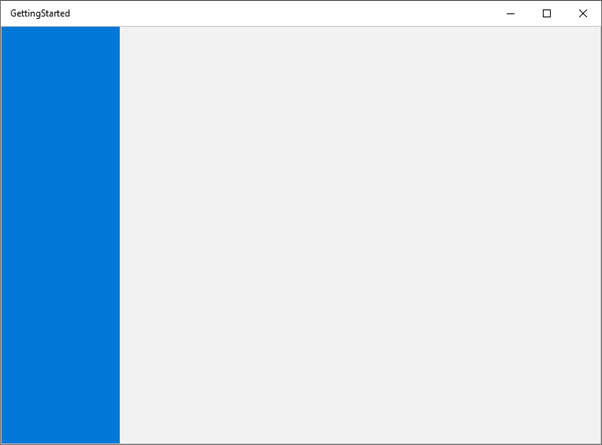
Backstage items
The backstage items such as BackstageViewTabItem, BackstageViewButtonItem and BackstageViewItemSeparator can be added to the backstage view using the Items or FooterItems property. See the following sections for details on each item type.
Backstage tab item
The BackstageViewTabItem can be added to the backstage view and provides a separate view of the backstage when clicking the tab item. Use the Header property to provide a name to the tab. Define the content of the tab by adding child elements directly inside the BackstageViewTabItem.
<ribbon:SfRibbon>
    <ribbon:SfRibbon.Backstage>
        <ribbon:RibbonBackstage>
            <ribbon:BackstageView>
                <ribbon:BackstageView.Items>
                    <ribbon:BackstageViewTabItem Header="New" />
                    <ribbon:BackstageViewTabItem Header="Open" />
                </ribbon:BackstageView.Items>
            </ribbon:BackstageView>
        </ribbon:RibbonBackstage>
    </ribbon:SfRibbon.Backstage>
</ribbon:SfRibbon>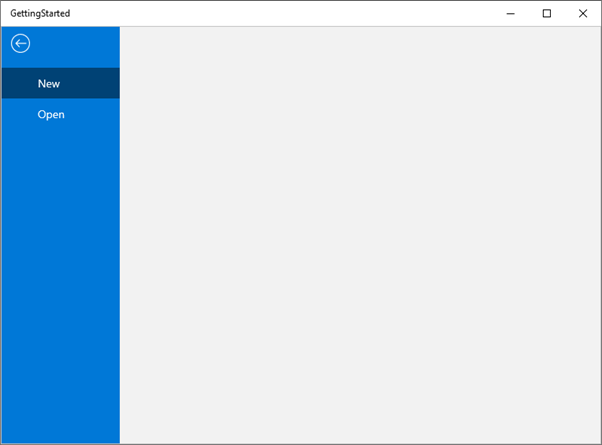
Backstage button item
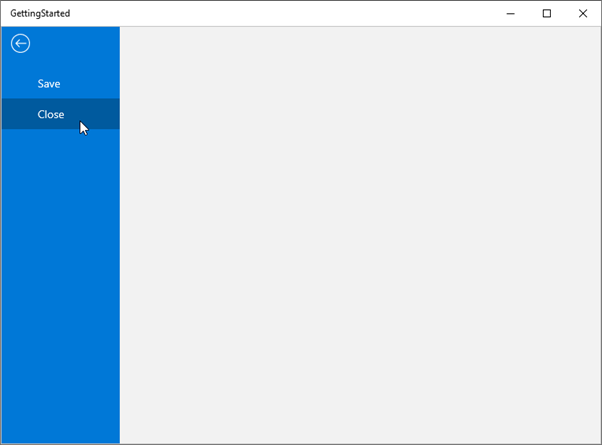
The BackstageViewButtonItem can be added to the backstage view, and it performs actions through the Click event. A Command (with CommandParameter) can be used instead of the Click event for MVVM scenarios. The display text for the button (such as “Save” and “Close”) is set using the Header property.
<ribbon:SfRibbon x:Name="ribbon">
    <ribbon:SfRibbon.Backstage>
        <ribbon:RibbonBackstage>
            <ribbon:BackstageView>
                <ribbon:BackstageView.Items>
                    <ribbon:BackstageViewButtonItem Header="Save" />
                    <ribbon:BackstageViewButtonItem Header="Close"
                                                    Click="BackstageViewButtonItem_Click" />
                </ribbon:BackstageView.Items>
            </ribbon:BackstageView>
        </ribbon:RibbonBackstage>
    </ribbon:SfRibbon.Backstage>
</ribbon:SfRibbon>
private async void BackstageViewButtonItem_Click(object sender, RoutedEventArgs e)
{
this.ribbon.IsBackstageOpen = false;
ContentDialog contentDialog1 = new ContentDialog();
contentDialog1.Title = "Backstage closed";
contentDialog1.PrimaryButtonText = "Close";
await contentDialog1.ShowAsync();
}
Backstage separator item
The BackstageViewItemSeparator displays a line that is used to separate the backstage view items such as tabs and buttons. The separator can be added to the backstage view by the following code snippet.
<ribbon:SfRibbon x:Name="ribbon">
    <ribbon:SfRibbon.Backstage>
        <ribbon:RibbonBackstage>
            <ribbon:BackstageView>
                <ribbon:BackstageView.Items>
                    <ribbon:BackstageViewTabItem Header="New" />
                    <ribbon:BackstageViewTabItem Header="Open" />
                    <ribbon:BackstageViewItemSeparator />
                    <ribbon:BackstageViewTabItem Header="Info" />
                    <ribbon:BackstageViewButtonItem Header="Save" />
                    <ribbon:BackstageViewButtonItem Header="Close" />
                </ribbon:BackstageView.Items>
            </ribbon:BackstageView>
        </ribbon:RibbonBackstage>
    </ribbon:SfRibbon.Backstage>
</ribbon:SfRibbon>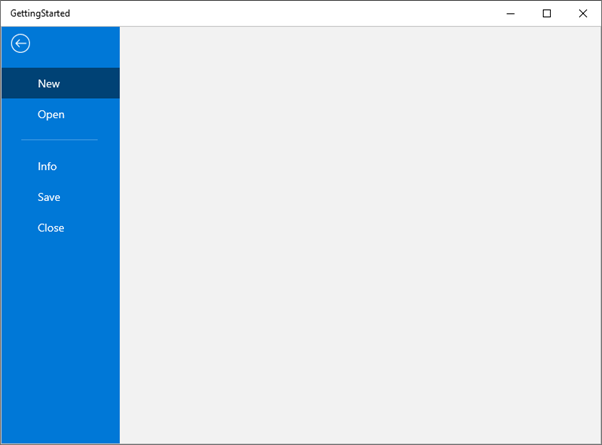
Footer items in backstage view
The BackstageView allows you to add footer items using the FooterItems property, and the backstage items can be added to the footer of the backstage view by the following code snippet.
<ribbon:SfRibbon x:Name="ribbon">
    <ribbon:SfRibbon.Backstage>
        <ribbon:RibbonBackstage>
            <ribbon:BackstageView>
                <ribbon:BackstageView.Items>
                    <ribbon:BackstageViewTabItem Header="New" />
                    <ribbon:BackstageViewTabItem Header="Open" />
                </ribbon:BackstageView.Items>
                <ribbon:BackstageView.FooterItems>
                    <ribbon:BackstageViewItemSeparator />
                    <ribbon:BackstageViewTabItem Header="Account" />
                    <ribbon:BackstageViewTabItem Header="Feedback" />
                    <ribbon:BackstageViewButtonItem  Header="Option" />
                </ribbon:BackstageView.FooterItems>
            </ribbon:BackstageView>
        </ribbon:RibbonBackstage>
    </ribbon:SfRibbon.Backstage>
</ribbon:SfRibbon>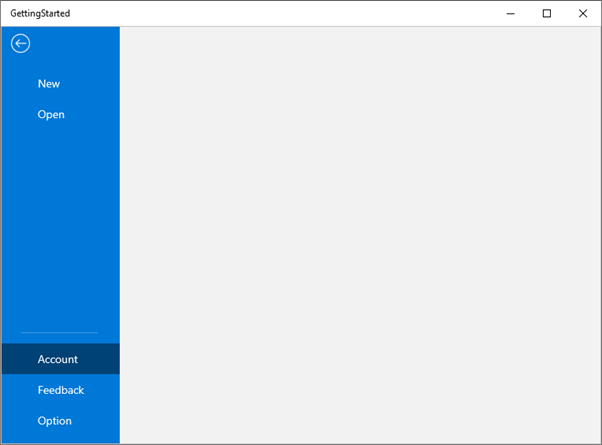
Icons for backstage view items
BackstageView items such as BackstageViewTabItem and BackstageViewButtonItem can display an icon as graphical content using the Icon property.
<ribbon:SfRibbon x:Name="ribbon">
    <ribbon:SfRibbon.Backstage>
        <ribbon:RibbonBackstage>
            <ribbon:BackstageView>
                <ribbon:BackstageView.Items>
                    <ribbon:BackstageViewTabItem Header="New"
                                                 Icon="NewFolder" />
                    <ribbon:BackstageViewTabItem Header="Open"
                                                 Icon="OpenWith" />
                    <ribbon:BackstageViewItemSeparator />
                    <ribbon:BackstageViewButtonItem Header="Save"
                                                    Icon="Save" />
                    <ribbon:BackstageViewButtonItem Header="Close"
                                                    Icon="Cancel" />
                </ribbon:BackstageView.Items>
                <ribbon:BackstageView.FooterItems>
                    <ribbon:BackstageViewItemSeparator />
                    <ribbon:BackstageViewTabItem Header="Account" />
                    <ribbon:BackstageViewTabItem Header="Feedback" />
                    <ribbon:BackstageViewButtonItem Header="Option" />
                </ribbon:BackstageView.FooterItems>
            </ribbon:BackstageView>
        </ribbon:RibbonBackstage>
    </ribbon:SfRibbon.Backstage>
</ribbon:SfRibbon>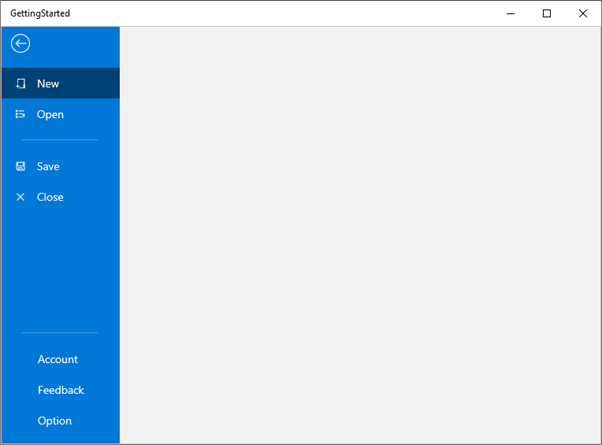
Other icon element types, such as BitmapIcon, FontIcon, PathIcon, and SymbolIcon, can also be assigned to the
Iconproperty of the backstage view items.