Month View in UWP Scheduler
MonthView of SfSchedule used to display entire dates of the specific month, current month will be displayed by default initially. Current date color is differentiated with other dates of the current month, also the color differentiation for dates will be applicable for previous and next month dates. Single notation will be displayed in the cell to indicate the appointment availability in the specific cell.
<schedule:SfSchedule
				x:Name="schedule"
				ScheduleType="Month">
		</schedule:SfSchedule>
//setting schedule type
schedule.ScheduleType = ScheduleType.Month;
Month Navigation direction
MonthView of Schedule can be navigated to both horizontal and vertical direction. You can change the direction of navigation by using the MonthNavigationDirection property of SfSchedule, by default Month navigation direction is Horizontal.
<schedule:SfSchedule
                x:Name="schedule"
                MonthNavigationDirection="Vertical"
			    ScheduleType="Month">
        </schedule:SfSchedule>
//To navigate vertically
schedule.MonthNavigationDirection = MonthNavigationDirections.Vertical;Restricted days in Month
You can disable the interaction for certain date in Month view by using MonthBlockOutDates of SfSchedule, using this you can allocate / restrict the specific date for predefined events.
schedule.MonthBlockOutDates.Add(DateTime.Now.Date.AddDays(1));
            schedule.MonthBlockOutDates.Add(DateTime.Now.Date.AddDays(2));
            schedule.MonthBlockOutDates.Add(DateTime.Now.Date.AddDays(3));
First day of Week in Month
You can change the first day of week by using the FirstDayOfWeek property of SfSchedule, by default schedule control will rendered with Sunday as the first day of the week.
<schedule:SfSchedule
                x:Name="schedule"
                FirstDayOfWeek="Monday"
			    ScheduleType="Month">
        </schedule:SfSchedule>
//setting FirstDayOfWeek
schedule.FirstDayOfWeek = DayOfWeek.Monday;
Week Number of the Year in Month
You can display the Week Number of the year in MonthView by setting ShowWeekNumber property of SfSchedule as true, by default it is false.
<schedule:SfSchedule
                x:Name="schedule"
                ShowWeekNumber="True"
			    ScheduleType="Month">
</schedule:SfSchedule>schedule.ShowWeekNumber = true;
Week Number Appearance
You can customize the Week Number appearance by using WeekNumberStyle property of SfSchedule. Week number Background, Foreground, FontFamily, FontSize and FontWeight can be customized using WeekNumberStyle properties.
<schedule:SfSchedule
                x:Name="schedule"
                ShowWeekNumber="True"
			    ScheduleType="Month">
            <schedule:SfSchedule.WeekNumberStyle>
                <schedule:WeekNumberStyle
                    Background="Blue"
                    Foreground ="White"
                    FontSize="15"
                    FontFamily="Times New Roman"
                    FontWeight="Bold">
                </schedule:WeekNumberStyle>
            </schedule:SfSchedule.WeekNumberStyle>
        </schedule:SfSchedule>
//creating new instance for WeekNumberStyle
WeekNumberStyle weekNumberStyle = new WeekNumberStyle();
weekNumberStyle.FontFamily = new FontFamily("Times New Roman");
weekNumberStyle.Background = new SolidColorBrush(Colors.Blue);
weekNumberStyle.Foreground = new SolidColorBrush(Colors.White);
weekNumberStyle.FontSize = 15;
weekNumberStyle.FontWeight = FontWeights.Bold;
schedule.WeekNumberStyle = weekNumberStyle;
View Header Appearance
You can customize the Month View Header appearance by using MonthViewHeaderStyle property of SfSchedule. Month View Header MonthViewHeaderBackground, MonthViewHeaderTextColor, MonthViewHeaderTextSize, MonthViewHeaderHeight, MonthViewHeaderTextStyle, MonthViewHeaderTextHorizontalAlignment, MonthViewHeaderTextMargin and MonthViewHeaderTextVerticalAlignment can be customized using ScheduleMonthViewHeaderStyle properties.
<schedule:SfSchedule
                x:Name="schedule"
                ScheduleType="Month">
            <schedule:SfSchedule.MonthViewHeaderStyle>
                <schedule:ScheduleMonthViewHeaderStyle
                    MonthViewHeaderBackground="Blue"
                    MonthViewHeaderTextColor ="White"
                    MonthViewHeaderTextSize="15"
                    MonthViewHeaderHeight="15"
                    MonthViewHeaderTextStyle="Bold"
                    MonthViewHeaderTextHorizontalAlignment ="Center"
                    MonthViewHeaderTextVerticalAlignment ="Center"
                    MonthViewHeaderTextMargin="2,2,2,2">
                </schedule:ScheduleMonthViewHeaderStyle>
            </schedule:SfSchedule.MonthViewHeaderStyle>
        </schedule:SfSchedule>
//creating new instance for ScheduleMonthViewHeaderStyle
ScheduleMonthViewHeaderStyle scheduleMonthViewHeaderStyle = new ScheduleMonthViewHeaderStyle();
scheduleMonthViewHeaderStyle.MonthViewHeaderBackground = new SolidColorBrush(Colors.Blue);
scheduleMonthViewHeaderStyle.MonthViewHeaderTextColor = new SolidColorBrush(Colors.White);
scheduleMonthViewHeaderStyle.MonthViewHeaderTextSize = 15;
scheduleMonthViewHeaderStyle.MonthViewHeaderHeight = 25;
scheduleMonthViewHeaderStyle.MonthViewHeaderTextStyle = FontWeights.Bold;
scheduleMonthViewHeaderStyle.MonthViewHeaderTextHorizontalAlignment = HorizontalAlignment.Center;
scheduleMonthViewHeaderStyle.MonthViewHeaderTextMargin = new Thickness(2, 2, 2, 2);
scheduleMonthViewHeaderStyle.MonthViewHeaderTextVerticalAlignment = VerticalAlignment.Center;
schedule.MonthViewHeaderStyle = scheduleMonthViewHeaderStyle;
MonthCell Appearance
You can customize the Month view cell in three ways,
- Customize month cell using style
- Customize month cell using event
- Customize month cell with custom UI
Customize month cell using style
By using MonthCellStyle of SfSchedule you can customize the month cell properties such as MonthCellTextSize, MonthCellTextFontFamily, CurrentDateCellBackground, CurrentDateTextForeground, CurrentMonthCellBackground, CurrentMonthTextForeground, CurrentDateHighlight, NextMonthCellBackground, NextMonthTextForeground, PreviousMonthCellBackground, PreviousMonthTextForeground, CellTextHorizontalAlignment, CellTextVerticalAlignment and MonthCellTextFontWeight.
<schedule:SfSchedule
                x:Name="schedule"
			    ScheduleType="Month">
            <schedule:SfSchedule.ScheduleMonthCellStyle>
                <schedule:MonthCellStyle
                    MonthCellTextSize ="20"
                    MonthCellTextFontFamily ="Times New Roman"
                    CurrentDateCellBackground ="Red"
                    CurrentDateTextForeground="SkyBlue"
                    CurrentMonthCellBackground="Blue"
                    CurrentMonthTextForeground="White"
                    CurrentDateHighlight ="LightSkyBlue"
                    NextMonthCellBackground ="LightGray"
                    NextMonthTextForeground ="Black"
                    PreviousMonthCellBackground ="LightGray"
                    PreviousMonthTextForeground ="Black"
                    CellTextHorizontalAlignment="Center"
                    CellTextVerticalAlignment="Center"
                    MonthCellTextFontWeight="Bold">
                </schedule:MonthCellStyle>
            </schedule:SfSchedule.ScheduleMonthCellStyle>
        </schedule:SfSchedule>
//creating new instance for MonthCellStyle
MonthCellStyle monthCellStyle = new MonthCellStyle();
monthCellStyle.MonthCellTextSize = 20;
monthCellStyle.MonthCellTextFontFamily = new FontFamily("Times New Roman");
monthCellStyle.CurrentDateCellBackground = new SolidColorBrush(Colors.Red);
monthCellStyle.CurrentDateTextForeground = new SolidColorBrush(Colors.SkyBlue);
monthCellStyle.CurrentMonthCellBackground = new SolidColorBrush(Colors.Blue);
monthCellStyle.CurrentMonthTextForeground = new SolidColorBrush(Colors.White);
monthCellStyle.CurrentDateHighlight = new SolidColorBrush(Colors.LightSkyBlue);
monthCellStyle.NextMonthCellBackground = new SolidColorBrush(Colors.LightGray);
monthCellStyle.NextMonthTextForeground = new SolidColorBrush(Colors.Black);
monthCellStyle.PreviousMonthCellBackground = new SolidColorBrush(Colors.LightGray);
monthCellStyle.PreviousMonthTextForeground = new SolidColorBrush(Colors.Black);
monthCellStyle.CellTextHorizontalAlignment = HorizontalAlignment.Center;
monthCellStyle.CellTextVerticalAlignment = VerticalAlignment.Center;
monthCellStyle.MonthCellTextFontWeight = FontWeights.Bold;
schedule.ScheduleMonthCellStyle = monthCellStyle;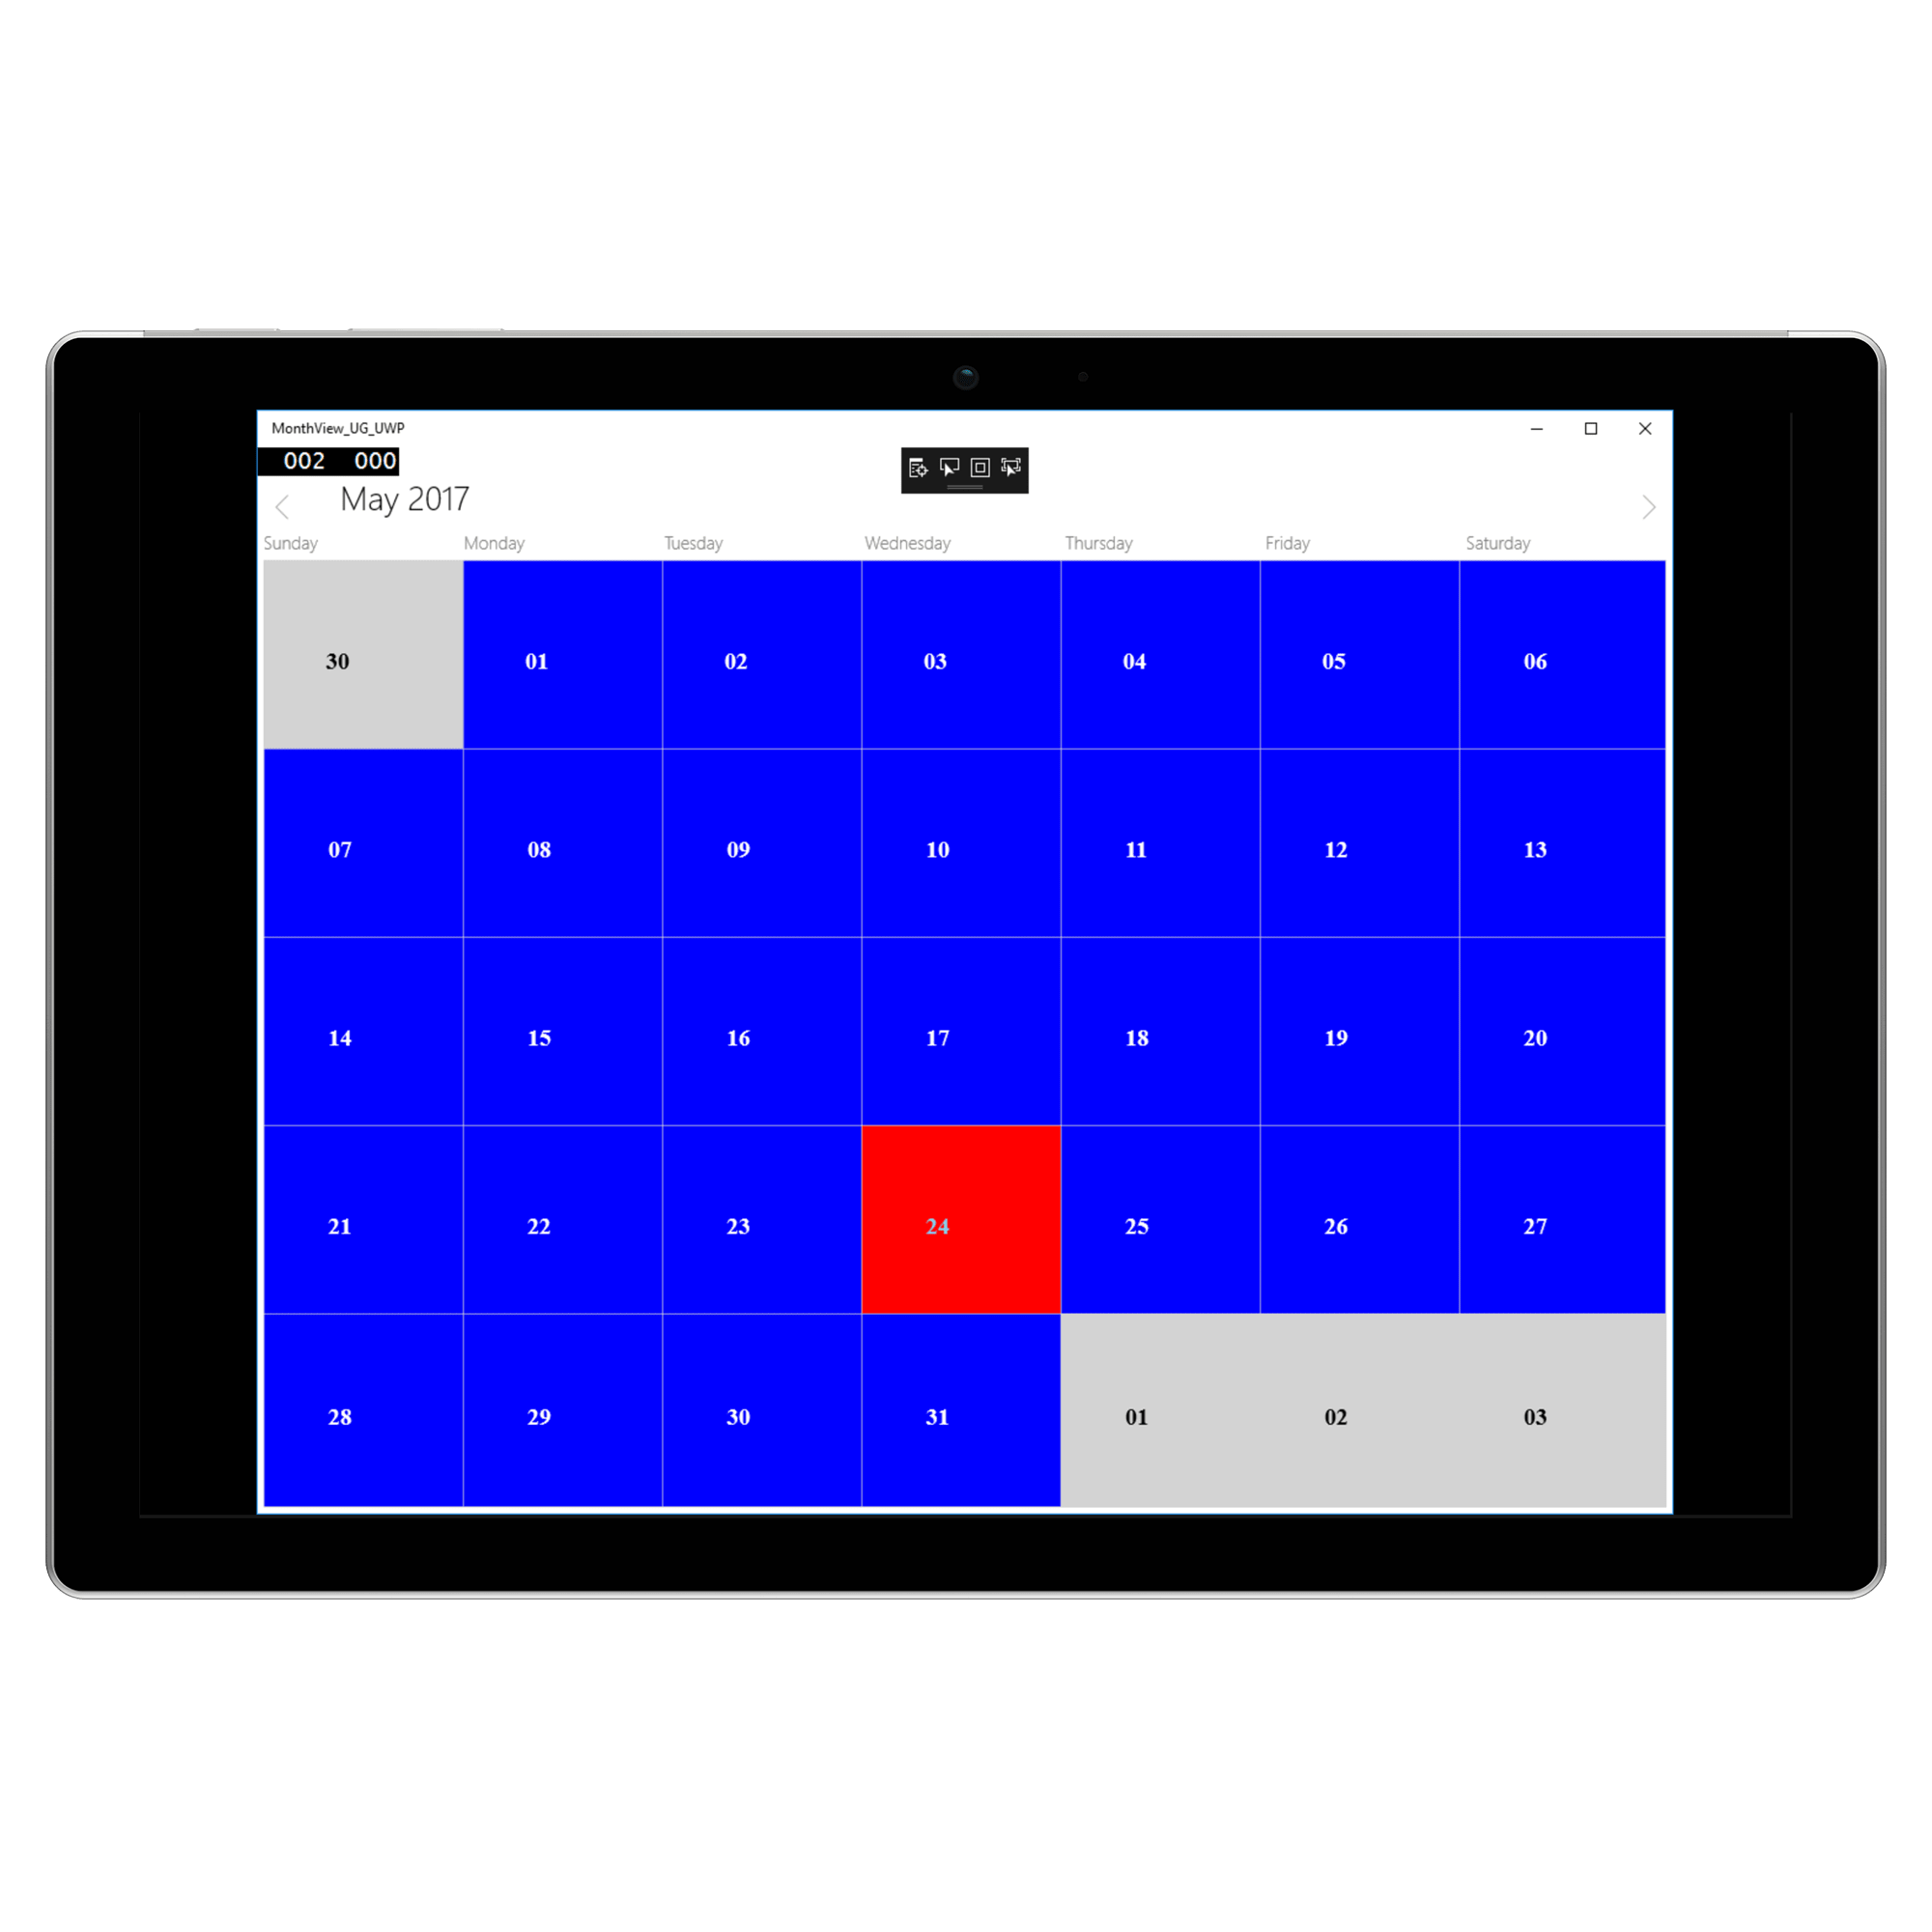
Customize month cell using event
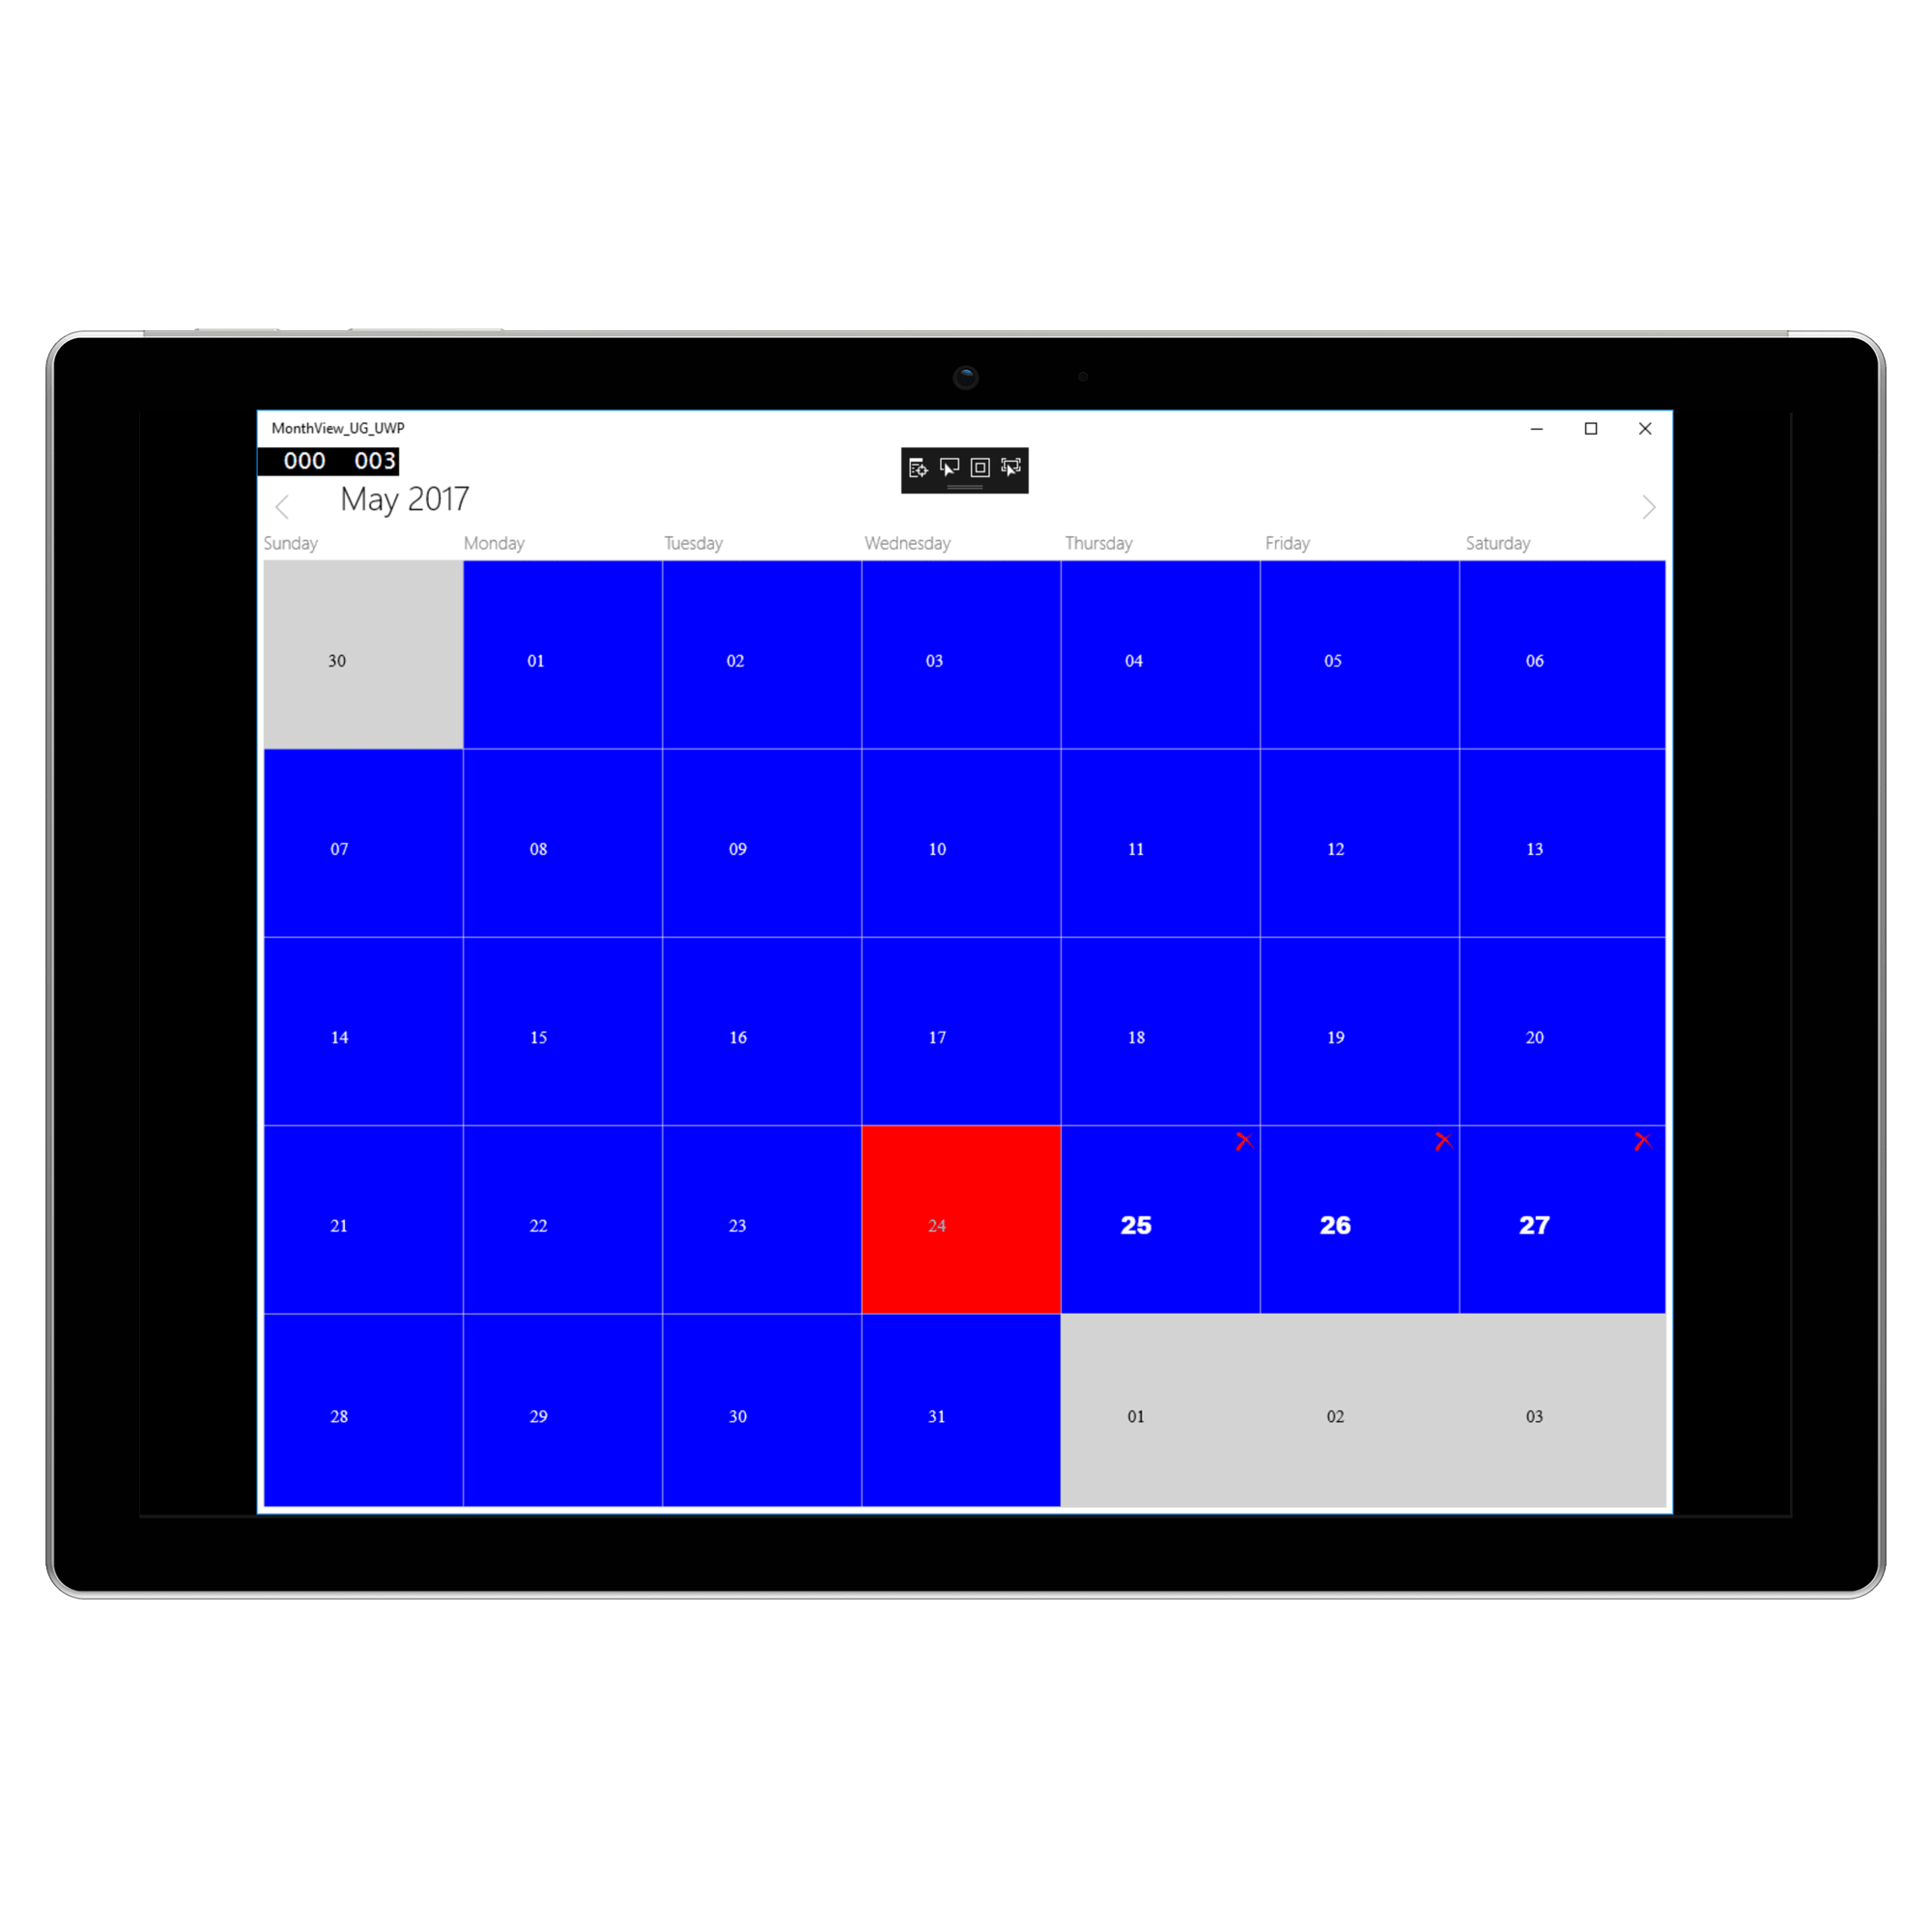
By using MonthCellLoaded event of SfSchedule, you can customize the month cell properties in the run time. In MonthCellLoaded, arguments such as MonthCellStyle, MonthCellDate, View and boolean properties such as IsToday, IsNextMonth, IsPreviousMonth and IsBlackOutDay are in the MonthCellLoadedEventArgs.
schedule.MonthCellLoaded += Schedule_MonthCellLoaded;
			...
			 private void Schedule_MonthCellLoaded(object sender, MonthCellLoadedEventArgs e)
        {
            if (e.IsBlackOutDay)
            {
                e.MonthCellStyle.MonthCellTextSize = 20;
                e.MonthCellStyle.MonthCellTextFontFamily = new FontFamily("Arial");
                e.MonthCellStyle.MonthCellTextFontWeight = FontWeights.ExtraBold;
            }
            else
            {
                e.MonthCellStyle.MonthCellTextSize = 15;
                e.MonthCellStyle.MonthCellTextFontFamily = new FontFamily("Times New Roman");
                e.MonthCellStyle.CurrentDateCellBackground = new SolidColorBrush(Colors.Red);
                e.MonthCellStyle.CurrentDateTextForeground = new SolidColorBrush(Colors.SkyBlue);
                e.MonthCellStyle.CurrentMonthCellBackground = new SolidColorBrush(Colors.Blue);
                e.MonthCellStyle.CurrentMonthTextForeground = new SolidColorBrush(Colors.White);
                e.MonthCellStyle.CurrentDateHighlight = new SolidColorBrush(Colors.LightSkyBlue);
                e.MonthCellStyle.NextMonthCellBackground = new SolidColorBrush(Colors.LightGray);
                e.MonthCellStyle.NextMonthTextForeground = new SolidColorBrush(Colors.Black);
                e.MonthCellStyle.PreviousMonthCellBackground = new SolidColorBrush(Colors.LightGray);
                e.MonthCellStyle.PreviousMonthTextForeground = new SolidColorBrush(Colors.Black);
                e.MonthCellStyle.CellTextHorizontalAlignment = HorizontalAlignment.Center;
                e.MonthCellStyle.CellTextVerticalAlignment = VerticalAlignment.Center;
                e.MonthCellStyle.MonthCellTextFontWeight = FontWeights.Normal;
            }
        }
Customize month cell with custom UI
You can set the Custom UI for the month cell using View property of MonthCellLoadedEventArgs in the OnMonthCellLoadedEvent.
schedule.MonthCellLoaded += Schedule_MonthCellLoaded;
			...
			private void Schedule_MonthCellLoaded(object sender, MonthCellLoadedEventArgs e)
        {
            Button button = new Button();
            button.Content = e.MonthCellDate.Day.ToString();
            button.Background = new SolidColorBrush(Colors.Blue);
            button.Foreground = new SolidColorBrush(Colors.White);
            e.View = button;
            if (e.IsToday)
            {
                button.Background = new SolidColorBrush(Colors.Red);
            }
        }
Month InlineView
Month Inline view is not applicable for desktop, applicable only for mobile by default.
Notes: If appointments not there in the selected day, Inline view displays the text as “No Events”.
InlineView Appearance
By using InlineLoaded event of SfSchedule, you can customize the month inline view properties in the run time. In InlineLoaded, arguments such as ScheduleExpandedAppointments, ScheduleExpandedAppointmentStyle, Calendar are in the InLineLoadedEventArgs.
schedule.InlineLoaded += Schedule_InlineLoaded;
			...
			private void Schedule_InlineLoaded(object sender, InLineLoadedEventArgs e)
        {
            e.ScheduleExpandedAppointmentStyle.ExpandedAppointmentBackground = new SolidColorBrush(Colors.Blue);
            e.ScheduleExpandedAppointmentStyle.ExpandedAppointmentFontFamily = new FontFamily("Times New Roman");
            e.ScheduleExpandedAppointmentStyle.ExpandedAppointmentFontStyle = FontStyle.Italic;
            e.ScheduleExpandedAppointmentStyle.ExpandedAppointmentFontWeight = FontWeights.SemiBold;
            e.ScheduleExpandedAppointmentStyle.ExpandedAppointmentTextColor = new SolidColorBrush(Colors.White);
            e.ScheduleExpandedAppointmentStyle.ExpandedAppointmentTextHorizontalAlignment = HorizontalAlignment.Center;
            e.ScheduleExpandedAppointmentStyle.ExpandedAppointmentTextSize = 20;
            e.ScheduleExpandedAppointmentStyle.ExpandedAppointmentTextVerticalAlignment = VerticalAlignment.Center;
            e.ScheduleExpandedAppointmentStyle.ExpandedAppointmentTimeFontFamily = new FontFamily("Arial");
            e.ScheduleExpandedAppointmentStyle.ExpandedAppointmentTimeForeground = new SolidColorBrush(Colors.Green);
            e.ScheduleExpandedAppointmentStyle.ExpandedAppointmentTimeTextSize = 15;
        }
Configuration Resources
The Schedule control allows you to define Resource that can be assigned to appointments. Resources let you associate additional information with your appointments. The schedule can group appointments based on the resources associated with them.
Adding resources
Resource can be added to the schedule control by setting Resource and ScheduleResourceTypeCollection of SfSchedule. After that add the ResourceType for ScheduleResourceTypeCollection and assign Resource to ResourceType.
<schedule:SfSchedule Name="schedule"
                             ScheduleType="Month"
                             Resource="Doctors">
            <schedule:SfSchedule.ScheduleResourceTypeCollection>
                <schedule:ResourceType TypeName="Doctors">
                    <schedule:Resource
                        DisplayName="Dr.Jacob John, M.D "
                        ResourceName="Dr.Jacob" />
                    <schedule:Resource
                        DisplayName="Dr.Darsy Mascio, M.D"
                        ResourceName="Dr.Darsy" />
                </schedule:ResourceType>
            </schedule:SfSchedule.ScheduleResourceTypeCollection>
        </schedule:SfSchedule>
//setting resource for schedule
schedule.Resource = "Doctor";
//Creating Appointment style
ResourceType resourceType = new ResourceType { TypeName = "Doctor" };
resourceType.ResourceCollection.Add(new Resource { DisplayName = "Dr.Jacob", ResourceName = "Dr.Jacob", });
resourceType.ResourceCollection.Add(new Resource { DisplayName = "Dr.Darsy", ResourceName = "Dr.Darsy" });
schedule.DayHeaderOrder = DayHeaderOrder.OrderByDate;
//setting resource type
schedule.ScheduleResourceTypeCollection = new ObservableCollection<ResourceType> { resourceType };
Notes: Sub resource support is not available for
MonthView.