Getting Started with .NET MAUI Rotator
10 Jul 20268 minutes to read
This section guides you through setting up and configuring a Rotator in your .NET MAUI application. Follow the steps below to add a basic Rotator to your project.
To quickly get started with the .NET MAUI Rotator, watch this video.
Prerequisites
Before proceeding, ensure the following are in place:
- Install .NET 9 SDK or later.
- Set up a .NET MAUI environment with Visual Studio 2022 v17.12 or later.
Step 1: Create a new .NET MAUI project
- Go to File > New > Project and choose the .NET MAUI App template.
- Name the project and choose a location. Then, click Next.
- Select the .NET framework version and click Create.
Step 2: Install the Syncfusion® MAUI Rotator NuGet package
- In Solution Explorer, right-click the project and choose Manage NuGet Packages.
- Search for Syncfusion.Maui.Rotator and install the latest version.
- Ensure the necessary dependencies are installed correctly, and the project is restored.
Prerequisites
Before proceeding, ensure the following are set up:
- Install .NET 9 SDK or later.
- Set up a .NET MAUI environment with Visual Studio Code.
- Ensure that the .NET MAUI workloads are installed and configured as described here.
Step 1: Create a new .NET MAUI project
- Open the Command Palette by pressing Ctrl+Shift+P and type .NET:New Project and press Enter.
- Choose the .NET MAUI App template.
- Select the project location, type the project name and press Enter.
- Then choose Create project
Step 2: Install the Syncfusion® MAUI Rotator NuGet package
- Press Ctrl + ` (backtick) to open the integrated terminal in Visual Studio Code.
- Ensure you’re in the project root directory where your .csproj file is located.
- Run the command
dotnet add package Syncfusion.Maui.Rotatorto install the Syncfusion® .NET MAUI Rotator package. - To ensure all dependencies are installed, run
dotnet restore.
Prerequisites
Before proceeding, ensure the following are set up:
- Ensure you have the latest version of JetBrains Rider.
- Install .NET 9 SDK or later is installed.
- Make sure the MAUI workloads are installed and configured as described here.
Step 1: Create a new .NET MAUI project
- Go to File > New Solution, Select .NET (C#) and choose the .NET MAUI App template.
- Enter the Project Name, Solution Name, and Location.
- Select the .NET framework version and click Create.
Step 2: Install the Syncfusion® MAUI Rotator NuGet package
- In Solution Explorer, right-click the project and choose Manage NuGet Packages.
- Search for Syncfusion.Maui.Rotator and install the latest version.
- Ensure the necessary dependencies are installed correctly, and the project is restored. If not, Open the Terminal in Rider and manually run:
dotnet restore
Step 3: Register Syncfusion handler
Make sure to add the namespace.
using Syncfusion.Maui.Core.Hosting;Register the Syncfusion core handler in your CreateMauiApp method of MauiProgram.cs file to use Syncfusion controls.
builder.ConfigureSyncfusionCore();Step 4: Import Rotator namespace
Add the following namespace in your XAML or C#.
xmlns:syncfusion="clr-namespace:Syncfusion.Maui.Rotator;assembly=Syncfusion.Maui.Rotator"using Syncfusion.Maui.Rotator;Step 5: Add the Rotator component
Initialize the Rotator control and we can populate the rotator’s items by using any one of the following ways,
-
Through SfRotatorItem
-
Through ItemTemplate
Below is a simple example for adding rotator items using SfRotatorItem. For more details on populating data, click Here
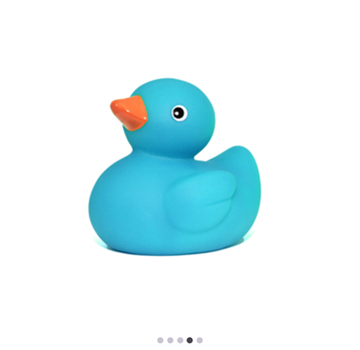
The following code example illustrates how to add a list of Images in a Rotator ,
NOTE
Ensure that the images mentioned in the code snippets are located in the Resources folder of your sample project.
<syncfusion:SfRotator x:Name="rotator"
                    ItemsSource="{Binding ImageCollection}" >
    <syncfusion:SfRotator.BindingContext>
        <local:RotatorViewModel />
    </syncfusion:SfRotator.BindingContext>
    <syncfusion:SfRotator.ItemTemplate>
        <DataTemplate>
            <Image Source="{Binding Image}"/>
        </DataTemplate>
    </syncfusion:SfRotator.ItemTemplate>
</syncfusion:SfRotator>
SfRotator rotator = new SfRotator();
public Rotator()
{
List<SfRotatorItem> collectionOfItems = new List<SfRotatorItem>();
collectionOfItems.Add(new SfRotatorItem() { Image = "image1.png" });
collectionOfItems.Add(new SfRotatorItem() { Image = "image2.png" });
collectionOfItems.Add(new SfRotatorItem() { Image = "image3.png" });
collectionOfItems.Add(new SfRotatorItem() { Image = "image4.png" });
collectionOfItems.Add(new SfRotatorItem() { Image = "image5.png" });
rotator.ItemsSource = collectionOfItems;
this.Content = rotator;
}// Model Class for Rotator.
public class RotatorModel
{
public RotatorModel(string imageString)
{
Image = imageString;
}
private string _image;
public string Image
{
get { return _image; }
set { _image = value; }
}
}
// ViewModel class for Rotator.
public class RotatorViewModel
{
public RotatorViewModel()
{
imageCollection = new List<RotatorModel>
{
new RotatorModel("image1.png"),
new RotatorModel("image2.png"),
new RotatorModel("image3.png"),
new RotatorModel("image4.png"),
new RotatorModel("image5.png")
};
}
private List<RotatorModel> imageCollection;
public List<RotatorModel> ImageCollection
{
get { return imageCollection; }
set { imageCollection = value; }
}
}
You can download the Rotator Getting Started sample from GitHub.