Getting Started with UWP DatePicker
18 Nov 20184 minutes to read
This section provides a quick overview of working with the SfDatePicker control.
Assembly deployment
Refer to the control dependencies section to get the list of assemblies or NuGet packages that need to be added as a reference to use the SfDatePicker control in any application.
You can refer to this documentation to find more details about installing the NuGet package in a UWP application.
Creating Application with SfDatePicker control
In this walkthrough, you will create a UWP application that contains the SfDatePicker control.
- Creating project
- Adding control via designer
- Adding control manually in XAML
- Adding control manually in C#
Creating project
The following section provides detailed information to create a new project in Visual Studio to display the SfDatePicker control.
Adding control via designer
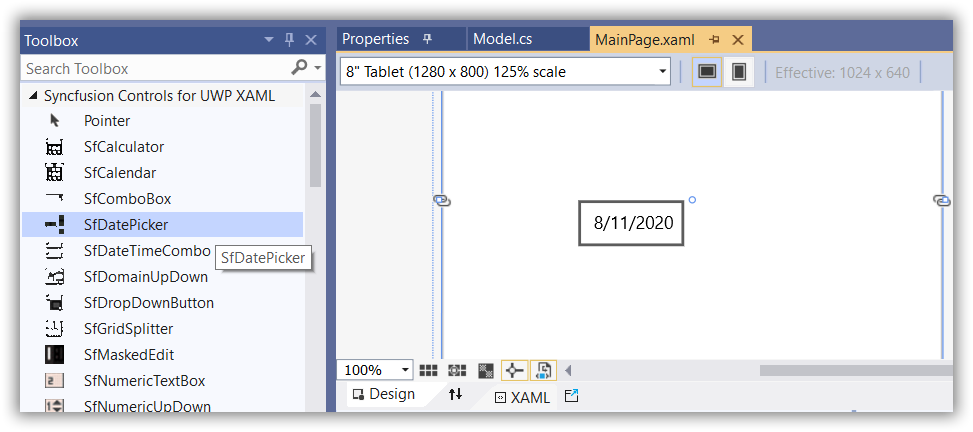
The SfDatePicker control can be added to the application by dragging it from the Toolbox and dropping it in the designer. The required assemblies will be added automatically.
Adding control manually in XAML
To add the SfDatePicker control manually in XAML, follow the below steps:
-
Add the below required assembly references to the project:
- Syncfusion.SfInput.UWP
- Syncfusion.SfShared.UWP
-
Include the namespace for the Syncfusion.SfInput.UWP assembly in MainPage.XAML.
<Page xmlns="http://schemas.microsoft.com/winfx/2006/xaml/presentation"

xmlns:x="http://schemas.microsoft.com/winfx/2006/xaml"

xmlns:syncfusion="using:Syncfusion.UI.Xaml.Controls.Input">- Now add the SfDatePicker control in MainPage.XAML.
<Page
   ...
   xmlns:input="using:Syncfusion.UI.Xaml.Controls.Input">

    <syncfusion:SfDatePicker Name="datePicker1" HorizontalAlignment="Center"  Height="30" Width="150" />

</Page>
Adding control manually in C#
To add the SfDatePicker control manually in C#, follow the below steps:
-
Add the below required assembly references to the project:
- Syncfusion.SfInput.UWP
- Syncfusion.SfShared.UWP
-
Import the SfDatePicker namespace Syncfusion.UI.Xaml.Controls.Input.
-
Create an SfDatePicker control instance and add it to the page.
using Syncfusion.UI.Xaml.Controls.Input;
using Windows.UI.Xaml;

SfDatePicker datePicker1 = new SfDatePicker()
{
    Height = 30,
    Width = 150,
    HorizontalAlignment = HorizontalAlignment.Center
};
Imports Syncfusion.UI.Xaml.Controls.Input
Imports Windows.UI.Xaml
Dim datePicker1 As SfDatePicker = New SfDatePicker() With {
.Height = 30,
.Width = 150,
.HorizontalAlignment = HorizontalAlignment.Center
}
Customizing the date format
The format of the date in SfDatePicker can be customized by using the FormatString property. For example, the format of the date can be changed to the yyyy-dd-MM format.
<Page
   ...
   xmlns:input="using:Syncfusion.UI.Xaml.Controls.Input">

    <syncfusion:SfDatePicker HorizontalAlignment="Center" VerticalAlignment="Center" FormatString="yyyy-dd-MM"  Width="125" />

</Page>datePicker1.FormatString = "yyyy-dd-MM";Imports Syncfusion.UI.Xaml.Controls.Input;
datePicker1.FormatString = "yyyy-dd-MM"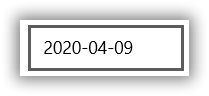
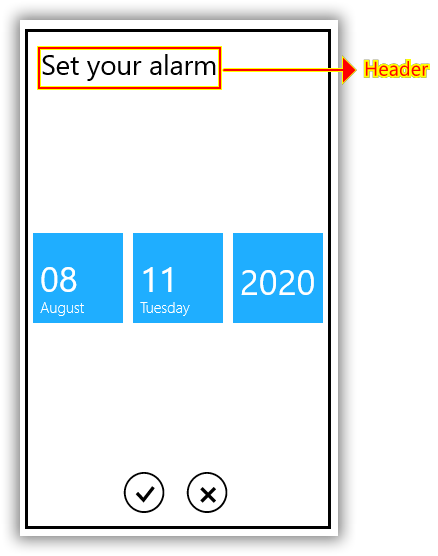
Customize SfDateSelector Header
You can customize the SfDateSelector in the SfDatePicker control using the SelectorStyle property.
<Page
   ...
   xmlns:input="using:Syncfusion.UI.Xaml.Controls.Input">

    <syncfusion:SfDatePicker HorizontalAlignment="Center" VerticalAlignment="Center" FormatString="M"  Width="125">
        <syncfusion:SfDatePicker.SelectorStyle>
            <Style TargetType="syncfusion:SfDateSelector">
                <Setter Property="Header" Value="Set your alarm" />
            </Style>
        </syncfusion:SfDatePicker.SelectorStyle>
    </syncfusion:SfDatePicker>

</Page>