Xamarin Application
Overview
The Syncfusion Dashboard Platform SDK includes a Dashboard Viewer control that can be embedded within your Xamarin application.
System Requirements:
To work with Xamarin, the following IDE can be used for development that are compatible with Microsoft Windows, both 32bit and 64bit Operating System in Windows 10
- Microsoft Visual Studio 2017 or higher with .NET Mobile development.

Supported Platforms
-
Android 4.1 or later.
-
iOS 9.0 or later.
Getting Started
Configure Syncfusion Dashboard Viewer Component in Xamarin Application using Visual Studio:
The following steps helps to create a Xamarin application by embed the Dashboard Viewer component.
Visual Studio 2017
-
Open Visual Studio 2017, Create a new project and select Cross-Platform Template under Visual C# category, here you need to choose the Cross Platform App (Xamarin Forms or Native), which includes the Android, iOS and Windows
-
Type your application name and Click OK

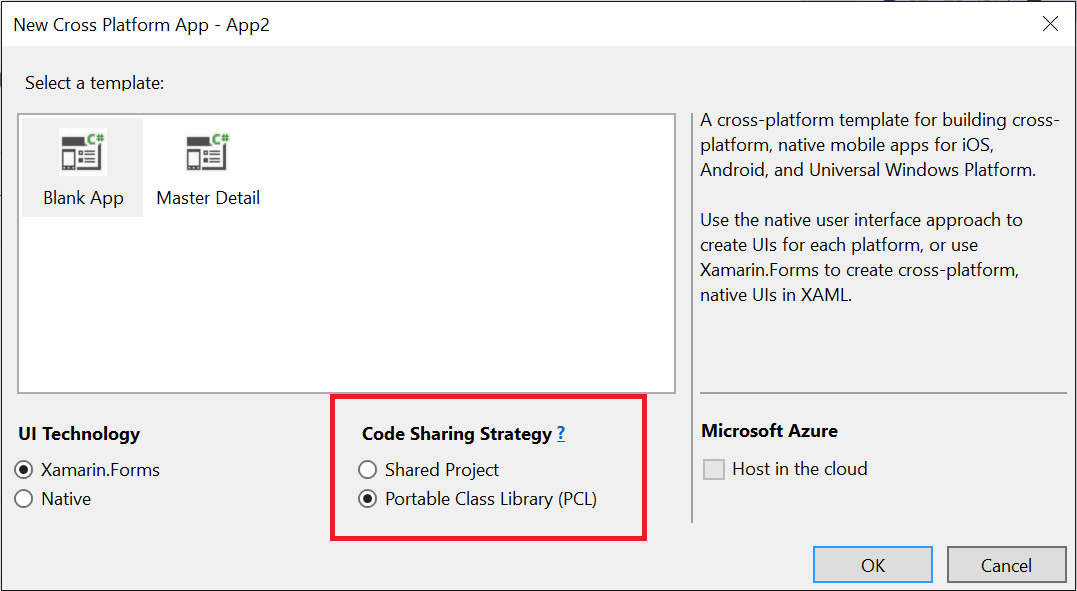
- For a New Cross Platform App, you need to choose the Blank App under the Portable Class Library (PCL) of Code Sharing Strategy
Visual Studio 2019
-
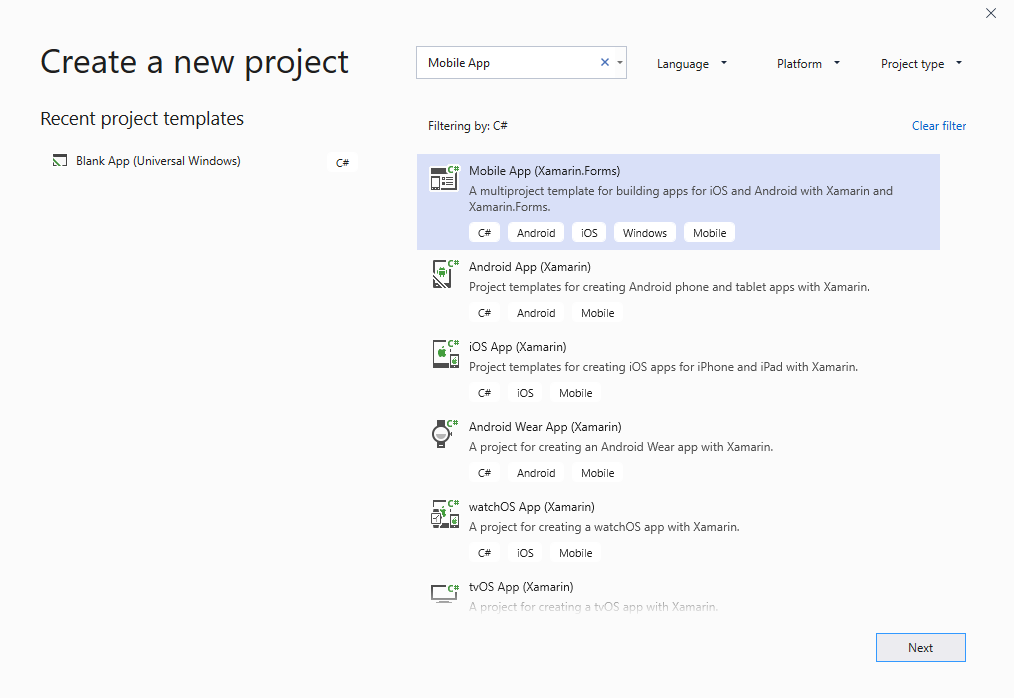
Open Visual Studio 2019, Create a new project and select C# under the Language category, here you need to choose the Mobile App (Xamarin.Forms), which includes the Android, iOS and Windows
-
Select the template then Click Next
- Type your application name and Click Create

- For a New Mobile App(Xamarin.Forms), you need to choose the Blank App

-
Create a new folder say, dashboard under
%projectname%.Android\Assetsand%projectname%.iOS\Resource -
Copy the required scripts, themes and fonts into
%projectname%.Android\Assets\dashboardand%projectname%.iOS\Resource\dashboardfolder in your new Xamarin application for rendering the ejDashboardViewer. -
These can be availed from the Dashboard Platform SDK build installed location mentioned below:
%localappdata%\Syncfusion\Dashboard Platform SDK\Getting Started Samples\Common\Html -
Go to MainPage.xaml and add a WebView and provide suitable name.
<ContentPage xmlns="http://xamarin.com/schemas/2014/forms"
             xmlns:x="http://schemas.microsoft.com/winfx/2009/xaml"
             xmlns:local="clr-namespace:App2"
             x:Class="App2.MainPage">
    <WebView x:Name="webView" HorizontalOptions="FillAndExpand" VerticalOptions="FillAndExpand"/>
</ContentPage>- Create an Interface
IResourceSettingsin the portable project, and add a method to get the base (or common) folder path of the resource files like scripts, fonts and themes reference for Android and iOS projects
public interface IResourceSettings
    {
       string GetResourcePath();
}- Define the above interface on Android and iOS projects by generating new classes for the base (or common) resource path.
For Android, Navigate to Android project and define the below class by using following code snippet.
public class ResourceSettingsDroid : IResourceSettings
    {
        public string GetResourcePath()
      	   {
            return "file:///android_asset/";
           }
    }
For iOS, Navigate to iOS project and define the below class by using following code snippet.
public class ResourceSettingsiOS : IResourceSettings
    {
        public string GetResourcePath()
           {
             return NSBundle.MainBundle.BundlePath;
           }
}- Then configure the MainPageXaml.cs with HtmlWebViewSource class by assign the HTML, which contains the dashboard information, to the ‘webView’ declared in MainPage.Xaml using following code snippet:
public partial class MainPage : ContentPage
    {
        public MainPage()
        {
            InitializeComponent();
            var htmlSource = new HtmlWebViewSource();
            htmlSource.BaseUrl = DependencyService.Get< IResourceSettings >().GetResourcePath();
            StringBuilder htmlString = new StringBuilder();
            htmlString.Append("<html><head><meta charset = 'utf-8' /><meta name = 'viewport' content = 'width=device-width, initial-scale=1.0' /><title>Dashboard Viewer Embedding Demo through Xamarin Application</title>");
			htmlString.Append("<link rel = 'stylesheet' href = 'dashboard/themes/default-theme/ej.dashboardViewer.all.min.css' />");
            htmlString.Append("<script src = 'dashboard/scripts/jquery-1.10.2.min.js'></script >");
            htmlString.Append("<script src = 'dashboard/scripts/jquery.easing.1.3.min.js'></script>");
            htmlString.Append("<script src = 'dashboard/scripts/ej.dashboardViewer.all.min.js'></script>");
            htmlString.Append("</head><body style = 'height:100%;width:100%;padding:0;'><div id = 'dashboard' style = 'width: 100%; height: 100%'></div>");
            htmlString.Append("<script type = 'text/javascript'>$(function(e) { $('#dashboard').ejDashboardViewer({serviceUrl: 'https://dashboardsdk.syncfusion.com/DashboardService/DashboardService.svc',dashboardPath: 'https://dashboardsdk.syncfusion.com//Dashboards//WorldWideCarSalesDashboard.sydx'});});</script></body></html>");
            htmlSource.Html = htmlString.ToString();
            webView.Source = htmlSource; //Bind the HTML Web View source after configuration to web view.
        }
    }
NOTE
The provided serviceUrl and dashboardPath are demo links for Dashboard Service and Dashboard file respectively. Use your valid URL of Dashboard Service, and Dashboard (SYDX) file path for your dashboard configuration.
-
Finally compile your project, after successful compilation run the project via the Android emulator if we deploy the android project or else connecting a mac machine on remote to deploy the iOS project.
-
Refer here for connecting a mac machine on remote.
Binding Dashboard Service
To initiate the dashboard service instance you can follow anyone of the below methods
IMPORTANT
Hosting dashboard service at IIS is recommended for the production environment for object management and other memory management features.
