- System Requirements
- Creating a Simple PHP Application with PHP Wrapper for Dashboard Viewer
- DashboardViewer Initialization
- Binding Dashboard Service
- Running the Application
Contact Support
Getting Started with PHP Application
This section describes how to create a PHP Application with an embedded dashboard viewer through a PHP wrapper.
System Requirements
-
Extract the downloaded file content and move to the desired drive.
Creating a Simple PHP Application with PHP Wrapper for Dashboard Viewer
Create a new folder, say PHP.
Copy the fonts, scripts, themes from Dashboard Platform SDK build installed location mentioned below.
%localappdata%\Syncfusion\Dashboard Platform SDK\Getting Started Samples\Common\Html
copy the EJ folder from Dashboard Platform SDK build installed location mentioned below.
%localappdata%\Syncfusion\Dashboard Platform SDK\Getting Started Samples\PHP
Paste them under the newly created PHP folder.
Create a new PHP file, say index.php and place it under the PHP folder.
Add the required script and theme references in this file, and refer AutoLoad.php file from the EJ folder as shown below.
<!DOCTYPE html>
<html>
<head>
  <!--stylesheet reference-->
  <link href="themes/default-theme/ej.dashboardViewer.all.min.css" rel="stylesheet">
  <!--script reference-->
  <script src="scripts/jquery-1.10.2.min.js" ></script>
  <script src="scripts/jquery.easing.1.3.min.js" ></script>
  <script src="scripts/ej.dashboardViewer.all.min.js" ></script>
</head>
 <body>
   <!--Refer AutoLoad.php common source to render the DashboardViewer-->
     <?php require_once '../EJ/AutoLoad.php'; ?>
   <!--DashboardViewer Initialization-->
</body>
</html>
DashboardViewer Initialization
Add the following code in the index.php file to initialize the Dashboard Viewer.
<?php
    $dashboardviewer= new EJ\DashboardViewer ("dashboard");
    $size= new EJ\DashboardViewer\Size ();
    $size->width ("100 %")->height ("100 %");
    echo $dashboardviewer->serviceUrl("https://dashboardsdk.syncfusion.com/DashboardService/DashboardService.svc")->dashboardPath("https://dashboardsdk.syncfusion.com//Dashboards//WorldWideCarSalesDashboard.sydx")->size($size)->render();
    ?>
NOTE
Make sure the given dashboard path should be accessible with the given Dashboard Service URL.
Provided online Dashboard Service URL above, only for demo purpose.
Finally, the index.php page looks like below:
<!DOCTYPE html>
<html>
<head>
  <title>PHP - DashboardViewer</title>
  <meta name="viewport" content="width=device-width, initial-scale=1.0" charset="utf-8" />
  <link href="themes/default-theme/ej.dashboardViewer.all.min.css" rel="stylesheet">
  <script src="scripts/jquery-1.10.2.min.js" ></script>
  <script src="scripts/jquery.easing.1.3.min.js" ></script>
  <script src="scripts/ej.dashboardViewer.all.min.js" ></script>
  <style>

     body,html,#dashboard {
            overflow: hidden !important;
            height: 100%;
            width: 100%;
     }

  </style>
</head>
 <body>

    <?php
    $dashboardviewer= new EJ\DashboardViewer ("dashboard");
    $size= new EJ\DashboardViewer\Size ();
    $size->width ("100 %")->height ("100 %");
    echo $dashboardviewer->serviceUrl("https://dashboardsdk.syncfusion.com/DashboardService/DashboardService.svc")->dashboardPath("https://dashboardsdk.syncfusion.com//Dashboards//WorldWideCarSalesDashboard.sydx")->size($size)->render();
    ?>

</body>
</html>
NOTE
Provided online Dashboard Service URL and Dashboard Path are for demo purpose.
Make sure the given dashboard path should be accessible with the given Dashboard Service URL.
Binding Dashboard Service
To initiate the dashboard service instance you can follow anyone of the below methods
IMPORTANT
Hosting dashboard service at IIS is recommended for the production environment for object management and other memory management features.
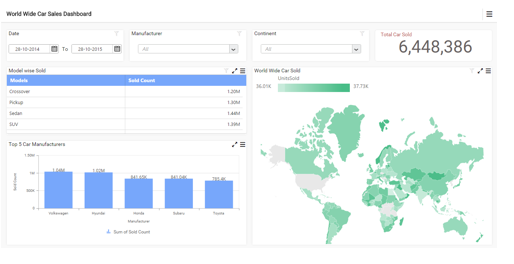
Running the Application
To run the application, kindly refer the ReadMe.html file deployed in the following location on Dashboard Platform SDK installation.
%localappdata%\Syncfusion\Dashboard Platform SDK\Getting Started Samples\PHP