How can I help you?
Getting Started with ASP.NET MVC DateRangePicker
This section explains briefly about how to render a DateRangePicker in your application with ASP.NET MVC.
Create your first DateRangePicker in MVC
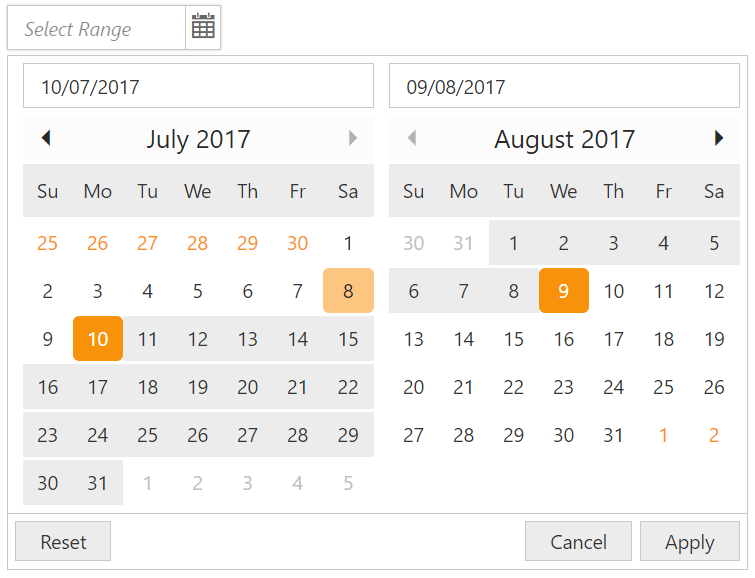
The Essential ASP.NET MVC DateRangePicker supports to display two calendars in the webpage and allows you pick date range from the calendars. Refer the following guidelines to customize the DateRangePicker. The following screenshot illustrates the functionality of DateRangePicker.
DateRangePicker
In the above screenshot, you can see the start date and end date selection of a date range in DateRangePicker. This control offers easy way to navigate and select desired date range from one month as start date to other month as end date or we can pick both the start date and end date from the same month.
Create a DateRangePicker
ASP.NET MVC DateRangePicker widget basically renders with built-in features like navigation between two calendars in popup with animations and flexible APIs. You can easily create the DateRangePicker widget using simple DateRangePicker elements as follows.
-
Create an MVC Project, add necessary assemblies and scripts.
-
Refer [MVC-Getting Started] (https://help.syncfusion.com/aspnetmvc/getting-started).
-
Add the following code to the corresponding view page to render DateRangePicker.
 @*Add the following code example to the corresponding CSHTML page to render DateRangePicker widget*@

 @Html.EJ().DateRangePicker("DateRangePick").Value("05/28/2017-06/27/2017").DateFormat("dd/MM/yyyy").Width("200px")
Execute the above code to render the following output.
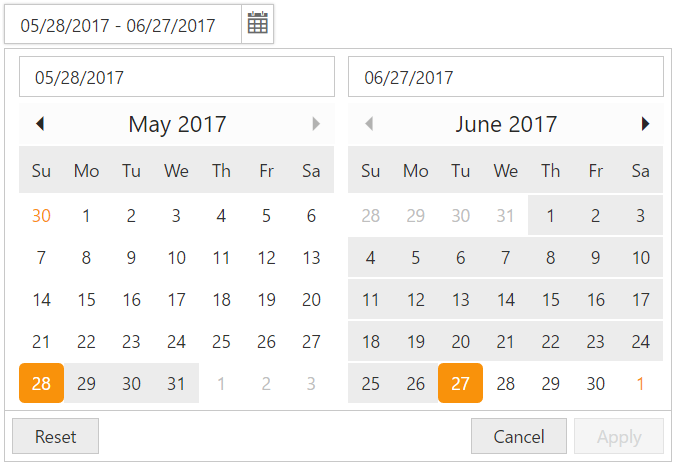
DateRangePicker
Start Date
Start Date can be selected from any calendar in the popup of DateRangePicker. The date which is selected in the calendar in any following cases will be considered as StartDate of a date range,
-
Click on any date in an calendar of dateRange popup where there is no selection in calendars.
-
Click on date which is lesser than existing start date
-
Click on calendar when already there is start date and end date is updated.In this case exiting selection will be cleared fully and clicked date will be set as StartDate to form new range.
Start Date of range can be set using API called StartDate, please refer the below code example:
@*Add the following code example to the corresponding CSHTML page to render DateRangePicker widget with start date *@

        @Html.EJ().DateRangePicker("DateRangePick").StartDate("5/1/2017")
And also, StartDate can be set to popup, by entering the date value into first input box in popup.
End Date
End Date of the date range can be selected from popup directly. Else this can be also updated by using the API called EndDate.
The Selection next to the StartDate will be considered as end date. This selected date should be higher or equal date than the existing start date. Else this selection will be considered StartDate as we have mentioned in StartDate section above.
Below code will explain to use the EndDate API to set the end Date in popup.
@*Add the following code example to the corresponding CSHTML page to render DateRangePicker widget with customized Start Date and  End Date*@

        @Html.EJ().DateRangePicker("DateRangePick").Width("25%").StartDate("5/1/2017").EndDate("6/17/2017")
Execute the above code to render the following output.
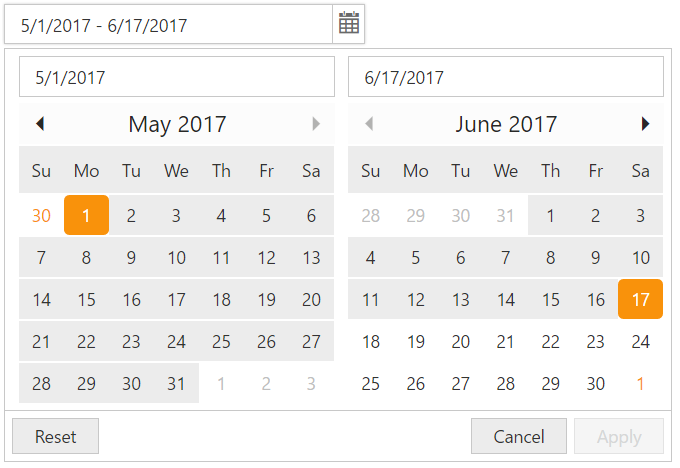
DateRangePicker with StartDate and EndDate
End Date can be set to popup by entering the date into the second input box in popup.