- Script/CSS reference
- Create ListBox
- Data binding
- Selection
Contact Support
Getting Started
14 Dec 20177 minutes to read
This section helps to understand the getting started of the ListBox widget with the step-by-step instructions.
Script/CSS reference
Create a new HTML file and include the below code
<!DOCTYPE html>

<html lang="en" xmlns="http://www.w3.org/1999/xhtml">
<head>
    <meta charset="utf-8"/>
    <title></title>
</head>
<body>

</body>
</html>
Add link to the CSS file from the specific theme folder to your HTML file within the head section. Refer the built-in theme which is mentioned here.
    <meta charset="utf-8" />
    <title>Getting Started - ListBox </title>
    <link href="http://cdn.syncfusion.com/28.1.33/js/web/flat-azure/ej.web.all.min.css" rel="stylesheet" />
Add links to the CDN Script files with dependencies to the head section.
    <script src="http://cdn.syncfusion.com/js/assets/external/jquery-1.10.2.min.js"></script>
    <script src="http://cdn.syncfusion.com/js/assets/external/jquery.easing.1.3.min.js"></script>
    <script src="http://cdn.syncfusion.com/js/assets/external/jsrender.min.js"></script>
    <script src="http://cdn.syncfusion.com/28.1.33/js/web/ej.web.all.min.js"></script>
See Also
NOTE
To reduce the file size further please use GZip compression in your server.
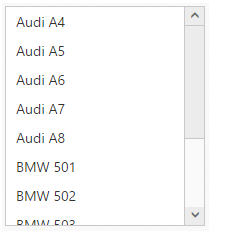
Create ListBox
Create UL and LI elements and add in the <body> tag.
Initialize the ListBox widget as below.
<div>
                    <ul id="listbox">
                        <li>Audi A4</li>
                        <li>Audi A5</li>
                        <li>Audi A6</li>
                        <li>Audi A7</li>
                        <li>Audi A8</li>
                        <li>BMW 501</li>
                        <li>BMW 502</li>
                        <li>BMW 503</li>
                        <li>Batch</li>
                        <li>BMW 507</li>
                        <li>BMW 3200</li>
                        <li>Cut</li>
                    </ul>
</div>$(function () {
$("#listbox").ejListBox();
});
Data binding
We can populate data in the ListBox widget using dataSource and fields properties.
See Also
<ul id="listbox"></ul>

    <script type="text/javascript">
        jQuery(function ($) {


            bikeList = [
                { bikeId: "bk1", bikeName: "Apache RTR" },
                { bikeId: "bk2", bikeName: "CBR 150-R" },
                { bikeId: "bk3", bikeName: "CBZ Xtreme" },
                { bikeId: "bk4", bikeName: "Discover" },
                { bikeId: "bk5", bikeName: "Dazzler" },
                { bikeId: "bk6", bikeName: "Flame" },
                { bikeId: "bk7", bikeName: "Fazer" },
                { bikeId: "bk8", bikeName: "FZ-S" },
                { bikeId: "bk9", bikeName: "Pulsar" },
                { bikeId: "bk10", bikeName: "Shine" },
                { bikeId: "bk11", bikeName: "R15" },
                { bikeId: "bk12", bikeName: "Unicorn" }
            ];
            $("#listbox").ejListBox({
                dataSource: bikeList,
                fields: {
                     id: "bikeId",
                     text: "bikeName"
                }
            });
        });

    </script>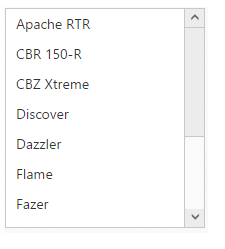
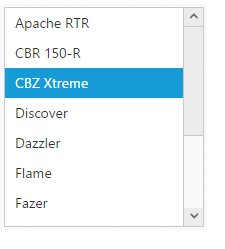
Selection
The ListBox widget supports item selection using selectedIndex and selectedIndices property.
See Also
jQuery(function ($) {

            $("#listbox").ejListBox(
                {
                    selectedIndex: 2
                });
        });