How to Upgrade the Project into a New Syncfusion® Version?
28 Jan 20252 minutes to read
Upgrade the Project Using Project Migration Tool
Syncfusion® provides project migration tool for the platforms listed below.
| Platform | Guidelines for migrating the projects to latest Syncfusion® version |
|---|---|
| Blazor |
Blazor Migration using Visual Studio Blazor Migration using Visual Studio Code |
| ASP.NET Core (Essential® JS 2) | ASP.NET Core - JS 2 Migration |
| ASP.NET MVC (Essential® JS 2) | ASP.NET MVC - JS 2 Migration |
| Windows Forms | Windows Forms Migration |
| WPF | WPF Migration |
| Universal Windows | Universal Windows Migration |
Upgrading the Projects Manually
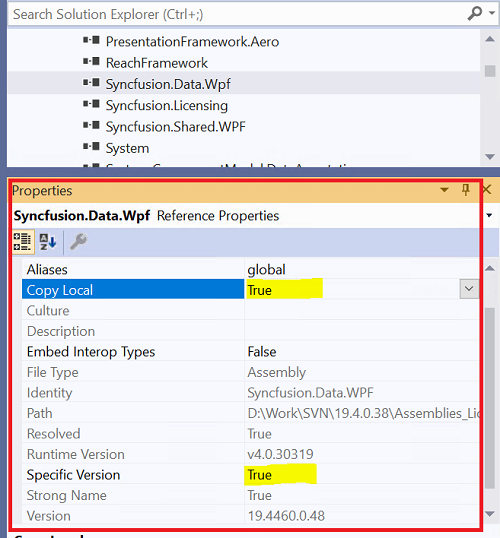
You can upgrade the project in two methods, based on the procedure used in your project, to reference the Syncfusion® assemblies. They are:
CopyLocal=True
- Set the SpecificVersion to False.
- Remove the bin and obj folders in your local project directory.
- Replace the latest assemblies with the upgraded assemblies in the local folder of your project.
- Recompile the project.
CopyLocal=False
- Ensure that the old Syncfusion® assemblies are removed from GAC.
- For 2.0 and 3.5 assemblies: (C:\windows\assembly)
- For 4.0, 4.5, and 4.5.1 assemblies: (C:\Windows\Microsoft.NET\assembly\GAC_MSIL)
- Install the latest Syncfusion® assemblies on your machine using the Syncfusion® Assembly Manager.
- Set the SpecificVersion to False.
-
Recompile your project; the latest assemblies from GAC refer to your project automatically.

NOTE
This method is only applicable to the platforms listed below, for which the Syncfusion® assemblies will be installed in GAC.
- WPF
- Windows Forms
Switching the Framework Version While Upgrading the Project
When you want to switch the Framework version while upgrading the project, use the Multi-Target Manager from the Syncfusion® Dashboard.
After switching the Framework version using Multi-Target Manager, remove the bin and obj folders from your local project directory, and then recompile your project.
For more details about Multi-Target Manager, refer to Multi-Target Manager.
Migrating the Resource Files
Follow the given steps to move the resource files (.resx) of your project to the newer version:
- Open Start > Syncfusion® > Essential® Studio x.x.x.x > Utilities > Migration > ConvertResx(Framework 2.0,3.5 or 4.0).
- Click the Choose ResX Files to convert.
- Select the Resx files you want to convert.
- Click Start Converting Files.
- After the conversion, the new Resx files should have the same name as the original files. Copies of the original files have the old suffix added to their names.