Quick Start
15 Jun 20265 minutes to read
Syncfusion Code Studio is an intelligent, AI‑powered coding companion designed to make your development process faster and easier. Instead of writing every line manually or searching for solutions, Code Studio works alongside you—understanding your intent, offering meaningful suggestions, and helping you learn as you build.
Prerequisites
Before getting started, make sure that:
-
Syncfusion Code Studio is installed
If it’s not installed, refer to the installation guide to set it up properly. -
A local project folder is ready
Code Studio works best with an existing project or a fresh folder for coding. -
Basic familiarity with writing code
You don’t need to be an expert—just comfortable editing files and understanding simple programming concepts.
What You’ll Learn
By the end of this quick start guide, you’ll learn how to:
- Load a workspace into your development environment to access its files and resources
- Access and use the core AI-powered coding features: Autocomplete, Ask, Edit, Agent, and Plan
- Generate, explain, refactor, and fix code using natural language instructions
- Perform targeted code improvements with Inline Chat directly in the editor
- Add necessary files or folders from your workspace as context to make AI suggestions more accurate and project-aware
Step 1: Open a Project in Code Studio
Follow the steps below to open your project and start working inside the Code Studio environment.
-
Open the application based on your OS
- Windows: Go to the Start Menu, search for Syncfusion Code Studio, and launch it.
- macOS: Open Applications or Launchpad, find Syncfusion Code Studio, and open it.
-
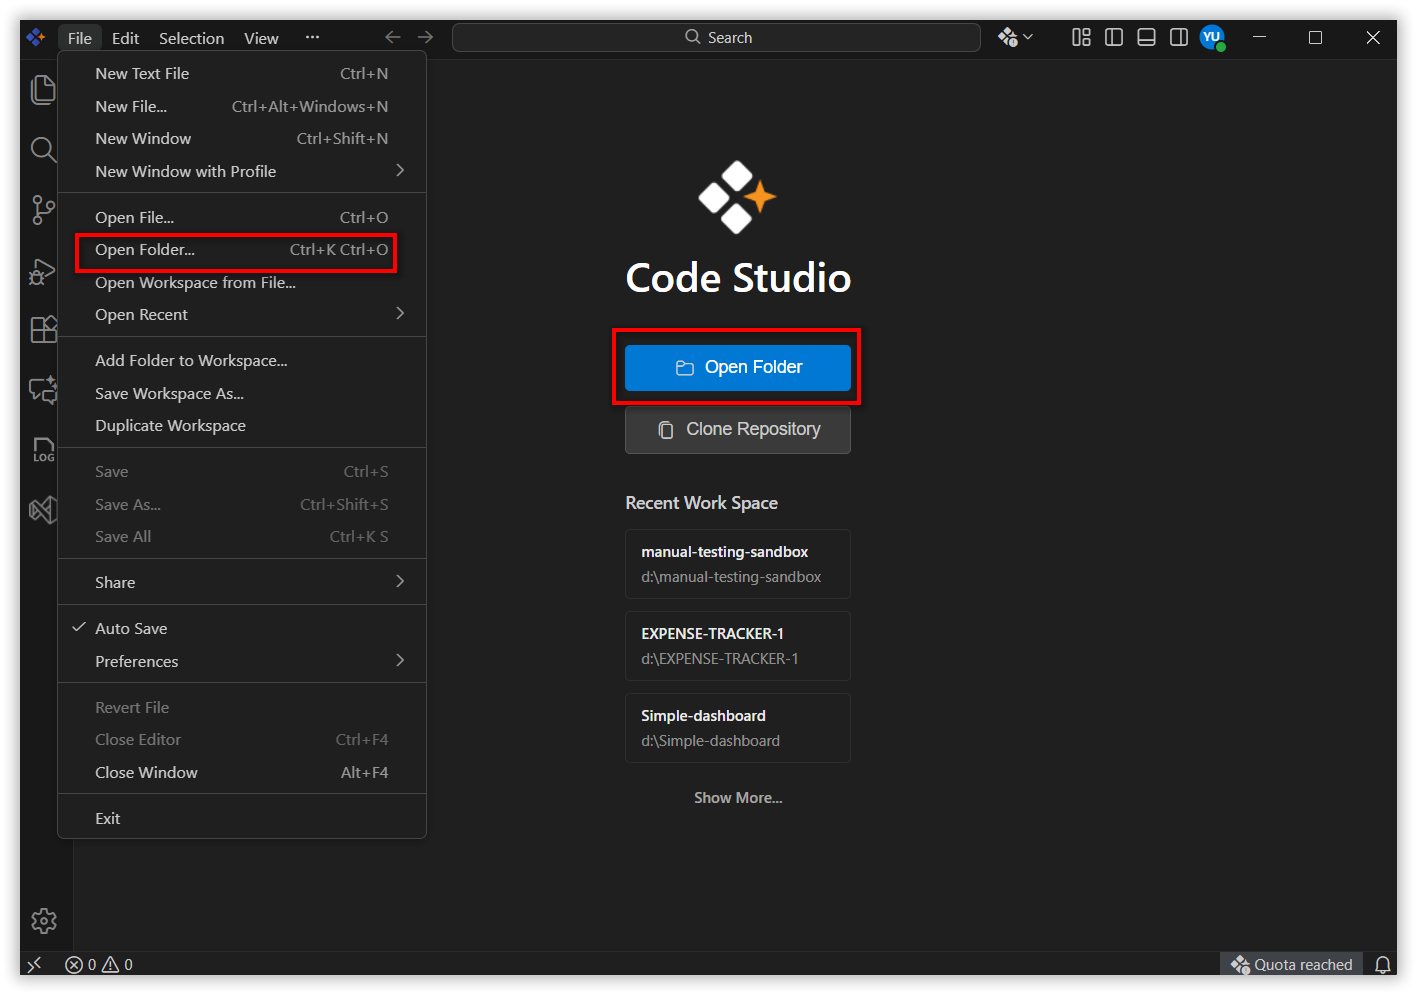
Access the File Menu - At the top menu bar, click “File”.
-
Select “Open Folder”
-
Choose your project folder
- Or you can directly open your project folder using ‘Open Folder’ button under the Code Studio logo
Note: Open folder directly from File Explorer / Finder using terminal
- Windows
In File Explorer → typecmdin the address bar → Enter → then run:sfcode .- macOS
Right-click inside folder → Services → New Terminal at Folder → then run:sfcode .
Result:
Your selected project will open in the editor where you can:
- Browse files in the Explorer sidebar
- Edit and create source files
- Use AI-powered features like Chat, Autocomplete, Agent, Edit, and Quick Fix
Step 2: Explore Core Features
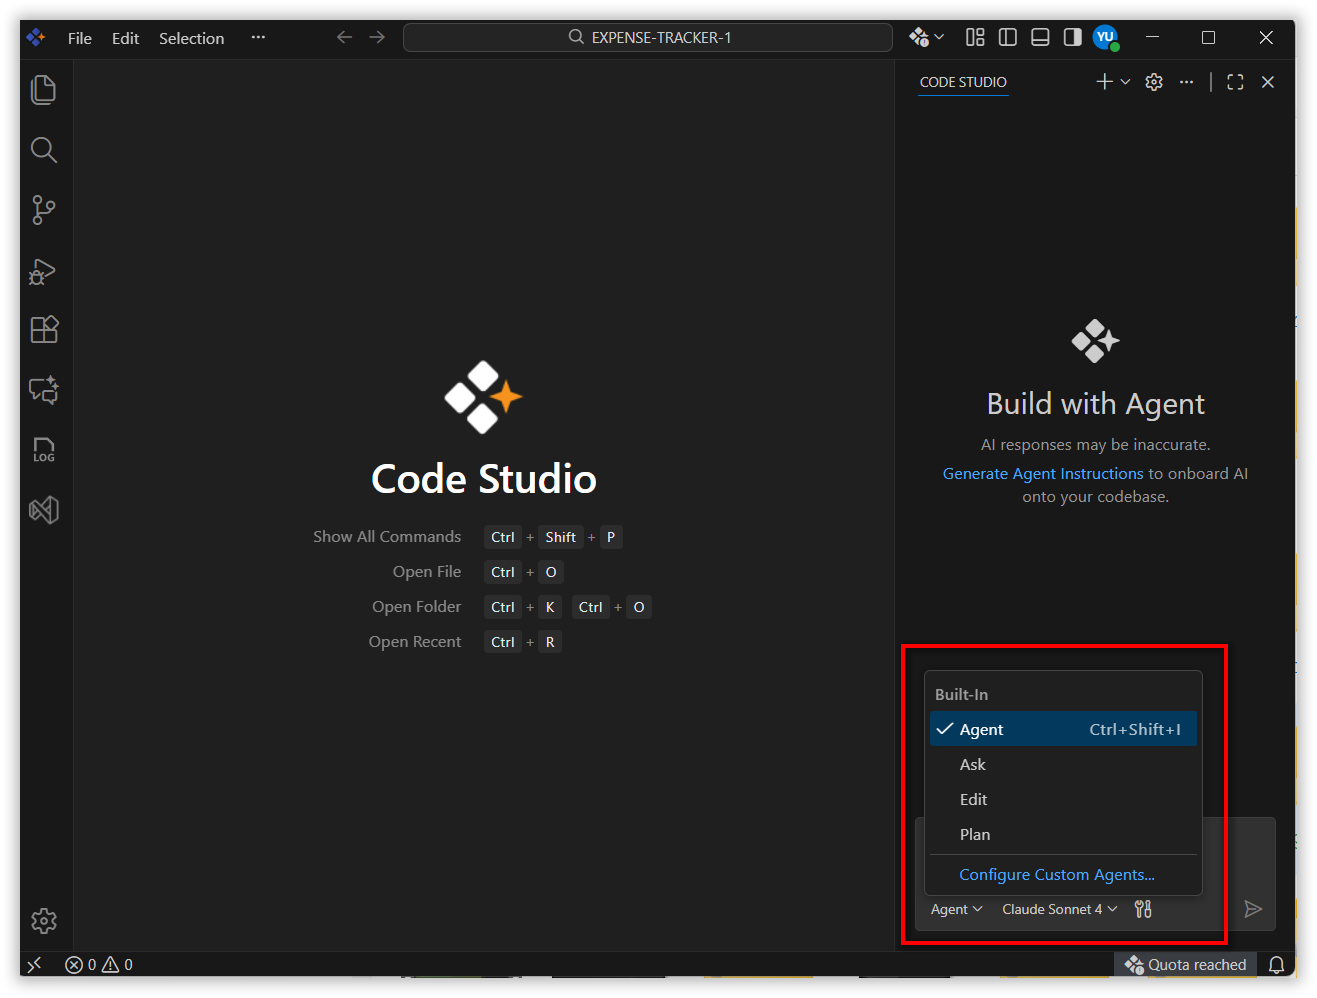
Built-in Agent Modes
Code Studio provides five built‑in agents Autocomplete, Ask, Edit, Agent, Plan .
You can also create custom agents for specialized workflows.
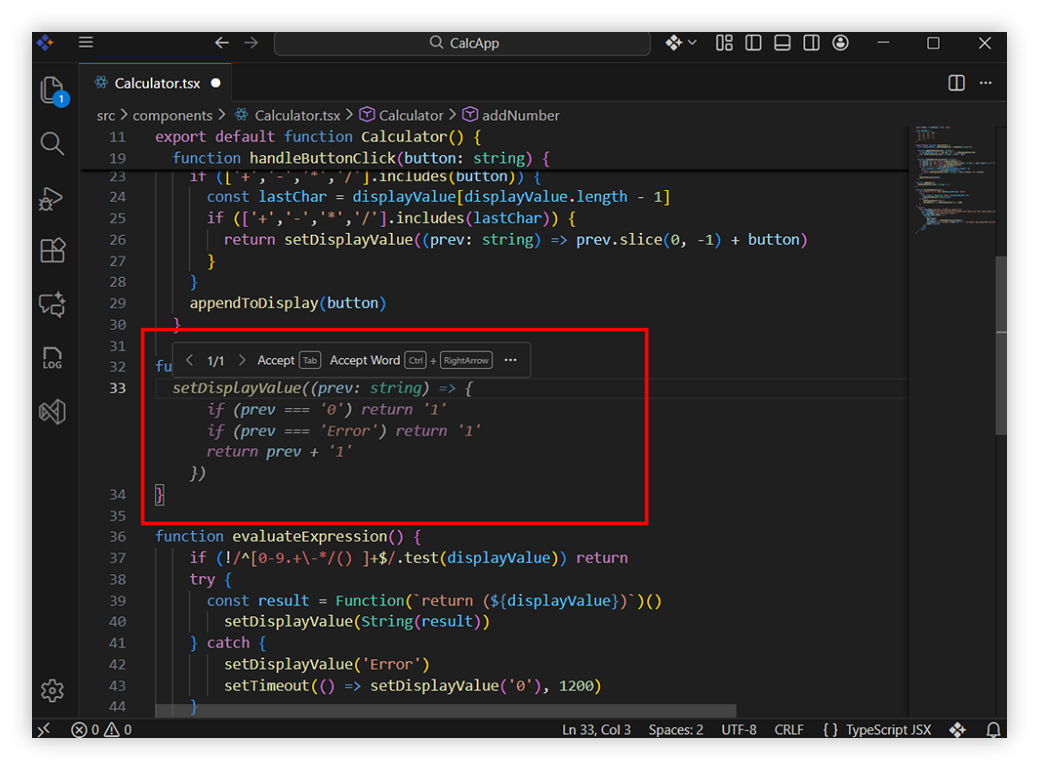
1. Autocomplete
-
Autocomplete helps you write code faster by predicting the next part of your logic as you type.
-
It analyzes the structure of your file, understands your coding patterns, and suggests additions that match the flow of your project.
This reduces typing effort and ensures consistency.
For Example: “When you begin typing a function call”, Autocomplete may fill in arguments, return handling, or common patterns automatically.
Learn more about Autocomplete
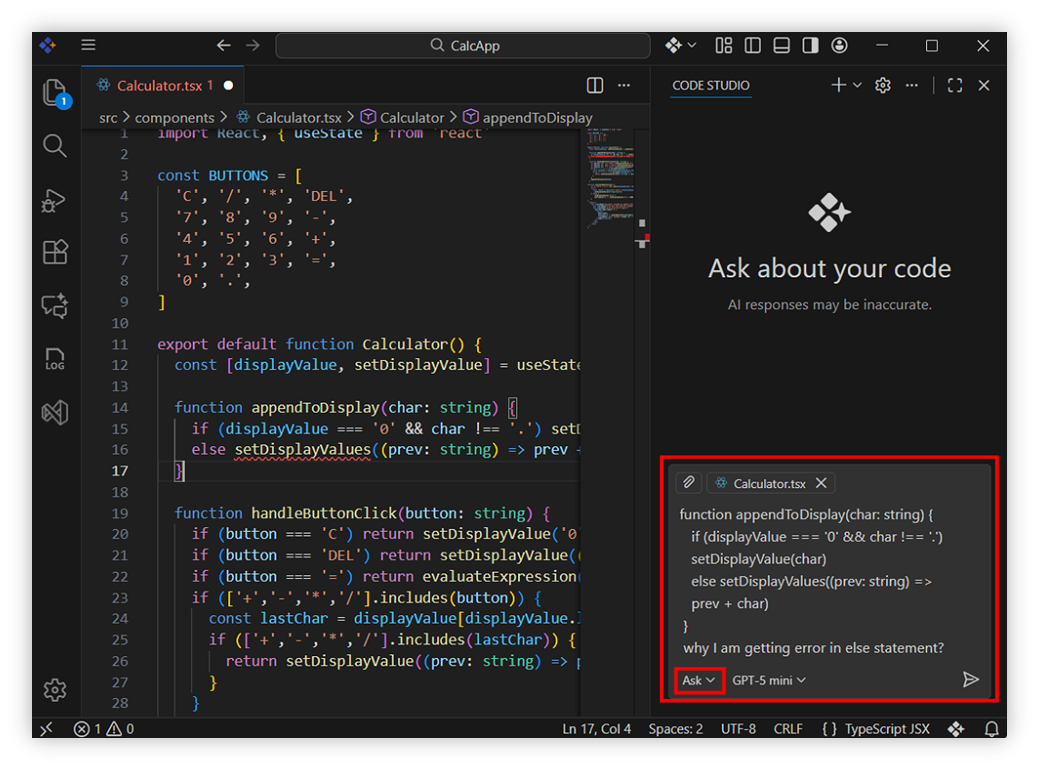
2. Ask Mode
-
Ask mode allows you to communicate with the AI using natural language and receive accurate, context‑aware help.
-
You can request explanations, code examples, best practices, or clarifications for unfamiliar concepts.
For Example: Ask, “Why am I getting an error here?” and the AI will inspect your code, explain the cause, and propose a fix.
Learn more about Ask
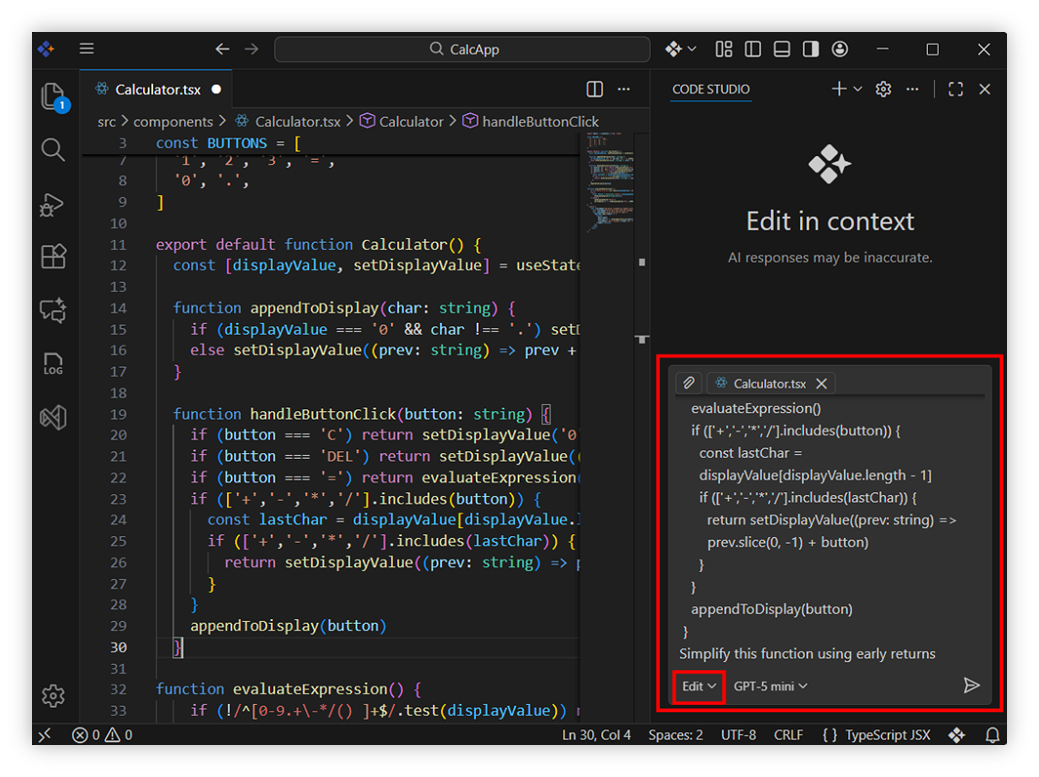
3. Edit Mode
-
Edit Mode allows you to modify existing code simply by describing the changes.
-
You can update logic, restructure components, clean up syntax, or improve performance without editing manually.
Code Studio shows suggested changes clearly, letting you apply or undo them step by step.
For Example: Give, “Improve the performance of this” as prompt, Edit Mode rewrites it neatly while preserving behavior.
Learn more about Edit
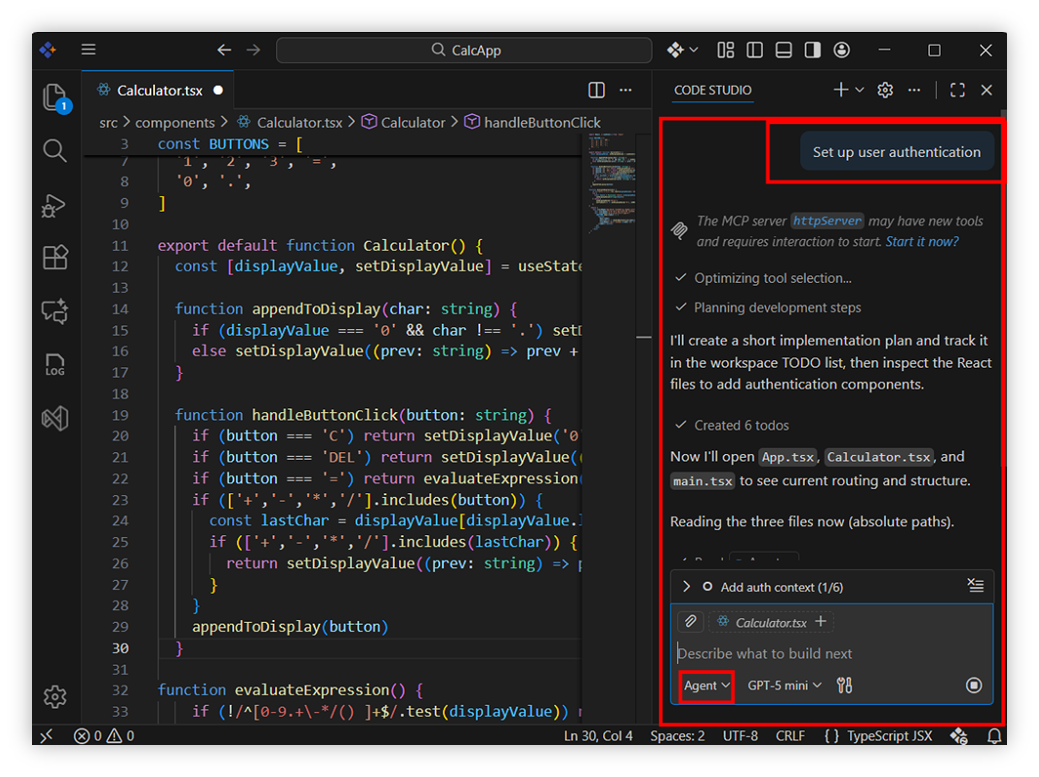
4. Agent Mode
-
Agent Mode handles larger tasks that span multiple files.
-
It can plan, update, and refine complex project structures while giving you full control over the process.
Ideal for scaffolding features, refactoring modules, or managing structured workflows.
For Example: “Refactor the [function name] function to be more maintainable and add proper TypeScript types for all parameters.” The Agent will outline steps, update backend routes, create frontend components, and explain changes.
Learn more about Agent
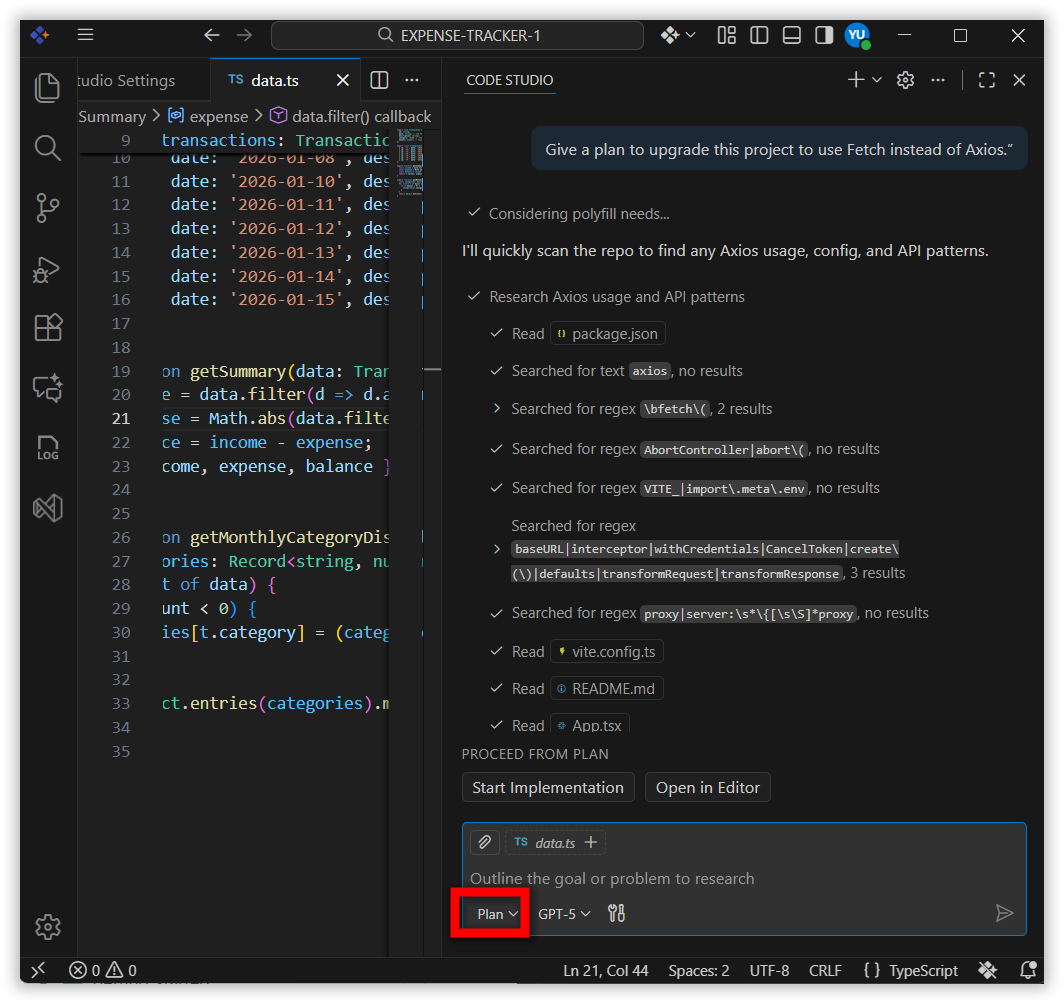
5. Plan Mode
-
Use Plan Mode when you want full visibility before making changes.
-
Plan Mode creates a clear sequence of steps the AI will follow—helping you understand scope and reduce surprises.
For Example: “Give a plan to upgrade this project to use Fetch instead of Axios.” The AI will generate an ordered list of required updates across files.
Learn more about Plan
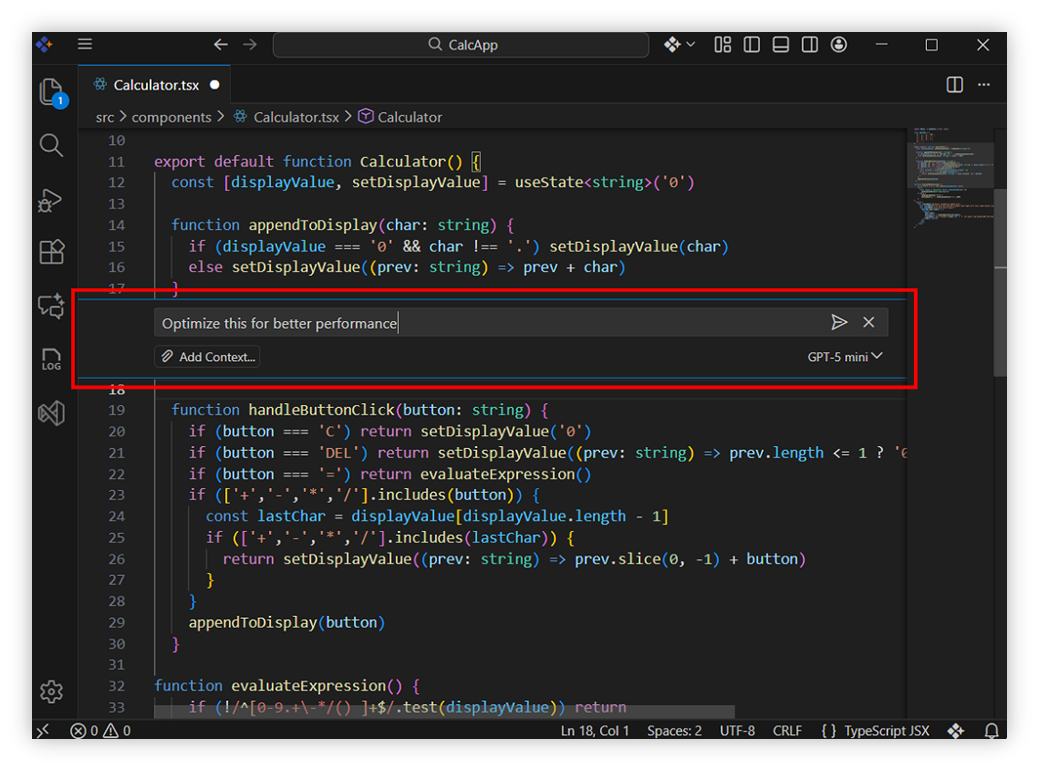
Inline Chat
- Inline Chat allows localized edits directly next to your code.
- Highlight text and ask for improvements, optimizations, or rewrites without switching views.
For Example: Select the code and ask, “Optimize this for better performance.”
You’ll see improved code inline with Accept and Dismiss options.
Learn more about Inline Chat
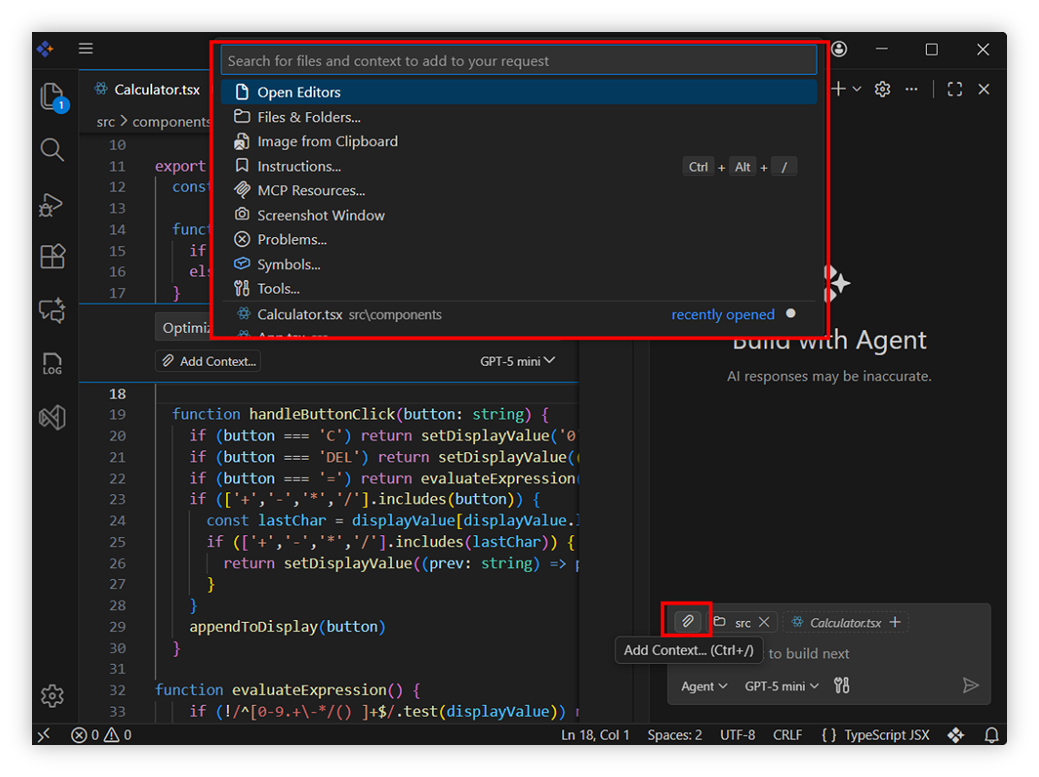
Add Context
-
Add Context lets Code Studio understand more of your project by including additional files or folders from your workspace in the request.
-
This leads to smarter, interconnected suggestions.
For Example: While editing a UI component, you may add related API client and type definition files so the AI produces improvements fitting your entire structure.
Learn more about Add Context
Next Steps
Now that you’ve explored the basics:
- Learn how to create your first automated change with Agent.