Agent Mode
15 Jun 20263 minutes to read
Overview
Agent Mode is an autonomous AI that plans and executes multi-step coding tasks across your project. It explores your codebase, makes changes with workspace tools, and adapts to errors—while you review and approve each step. Enable it in Settings > Agents, switch to Agent mode in chat, then describe your goal.
Use Cases
- Scaffold new apps or components
- Refactor across files (rename, move, split)
- Generate or fix unit tests
- Update docs and README from code
- Configure scripts, tasks, and settings
- Prototype simple UIs and pages
Agent Capabilities
Autonomous Operation - Agents can independently explore your codebase, identify the files related to your request, and determine what needs to be changed. Instead of requiring detailed, step-by-step instructions, they plan the workflow automatically and execute tasks in a structured sequence. This allows them to handle complex operations with minimal user input.
Tool Access - Agents can use all available workspace tools — including file search, editors, and integrated terminals — to complete tasks end to-end. They can open files, apply modifications, generate new code, run commands, and orchestrate multi-step actions by leveraging your existing development environment.
Contextual Understanding - Agents analyze surrounding code, project structure, naming conventions, and dependencies to understand how different parts of your project relate to each other. This awareness helps them make changes that fit your code style, avoid breaking existing logic, and maintain consistency across modules.
Error Handling & Adjustment - If the agent encounters issues like missing dependencies or conflicting code, it adjusts its plan and continues working toward your goal. It can retry steps, fix errors, or adapt its approach based on what it observes in your project. This flexibility helps maintain smooth execution, even in complex codebases.
Cross-File Reasoning - Unlike simple editing tools, agents can work across your entire project rather than just the active file. They identify every file impacted by your instruction, update them consistently, and ensure that changes in one part of the codebase do not break another. This makes them ideal for large-scale refactoring or feature upgrades.
Workflow of Agent
1.Understand Request - Read the user’s prompt and current project context to identify goals, constraints, and acceptance criteria. Clarify ambiguities or required outputs before making changes.
2.Explore Codebase - Scan open files and repository structure to find relevant code, dependencies, and tests. Note entry points, state flows, and places likely to require edits.
3.Plan Changes - Break the task into discrete steps (edits, new files, tests, commands) with an order and minimal risk strategy. Estimate impacts and list required tools or permissions.
4.Execute Changes - Apply the edits, create files, or run commands in the workspace; update code and tests as planned. Use the IDE/terminal to implement changes and commit or stage them if appropriate.
5.Verify Results - Run the application and unit tests, inspect logs/output, and fix runtime or lint errors found. Confirm the behavior matches requirements and edge cases are handled.
6.Task Complete - Summarize what was changed, why, and how to reproduce or undo it; provide next steps or follow-ups if needed. Hand control back to the user for review or further instructions.
How to Enable Agent mode?
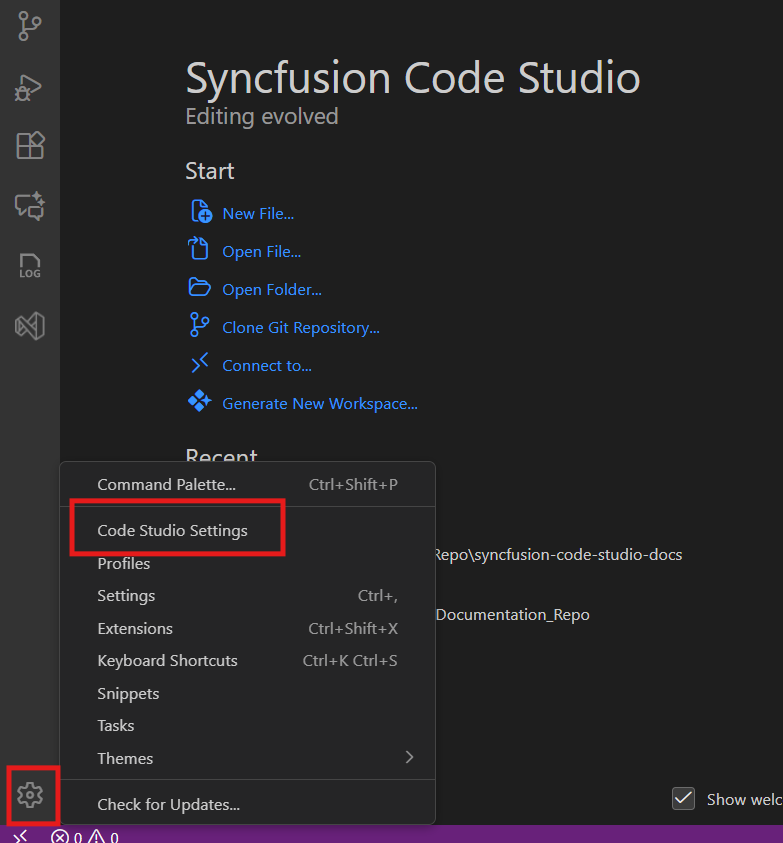
Step 1 : Open settings and select Code Studio settings.
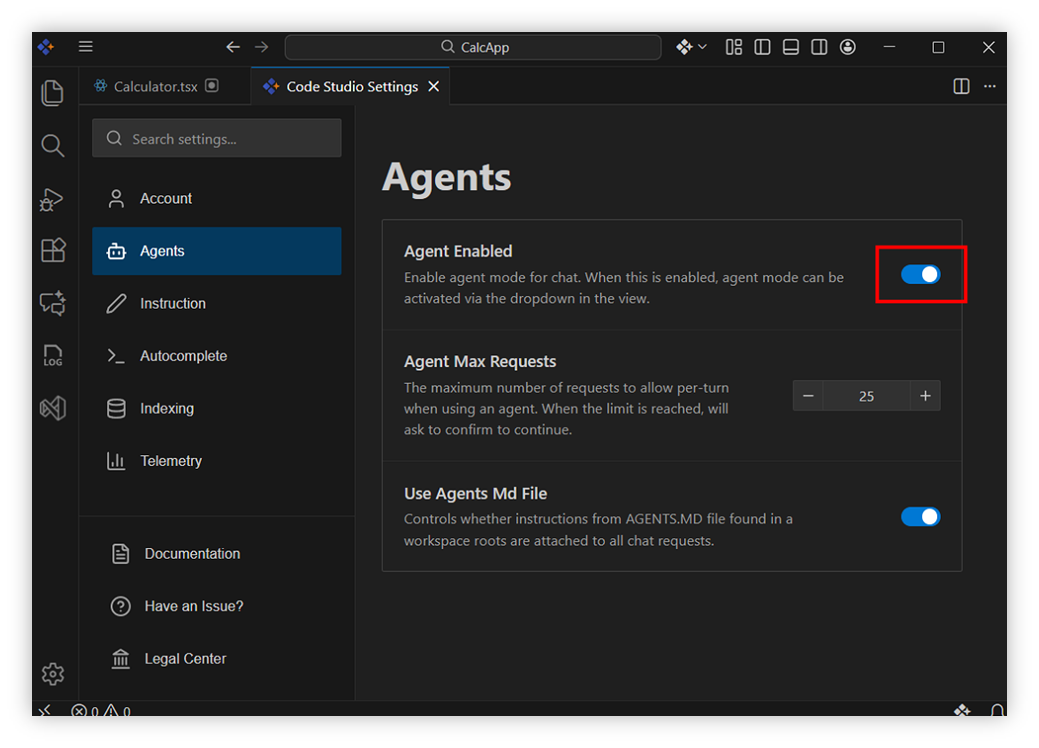
Step 2 : Select Agents in sidebar list items and Enable agent mode.
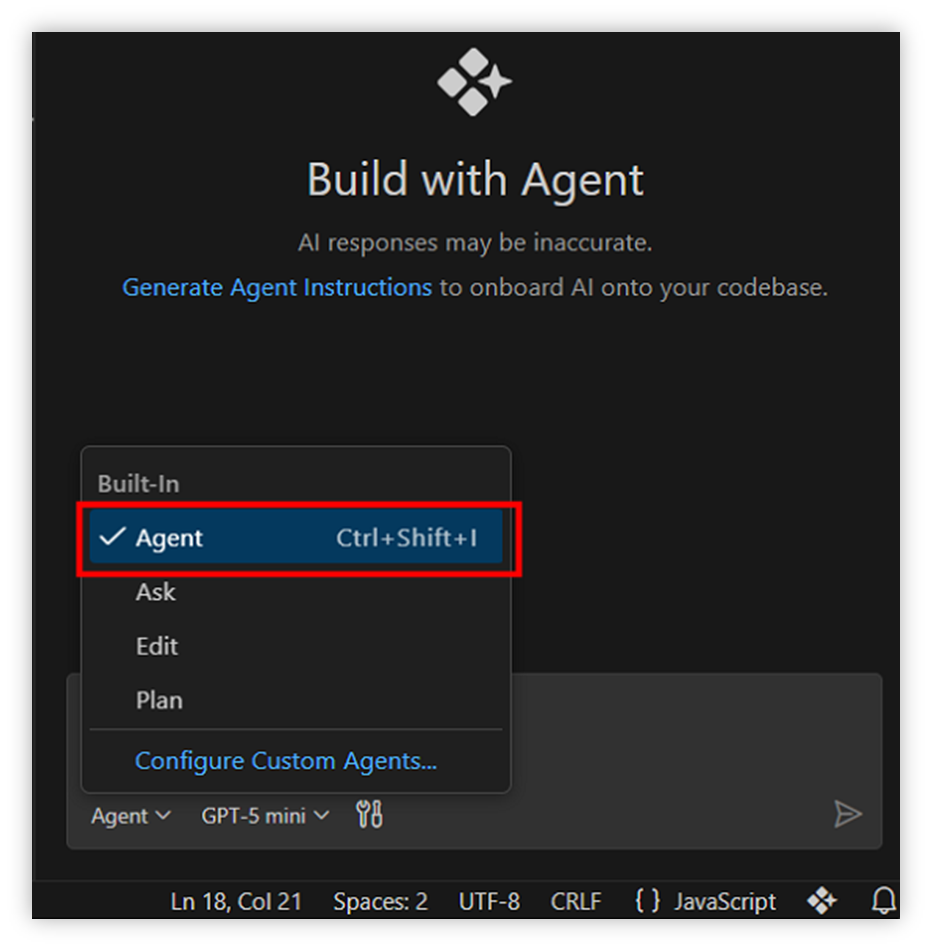
Step 3 : Switch to Agent mode in chat panel.
How to Use Agent?
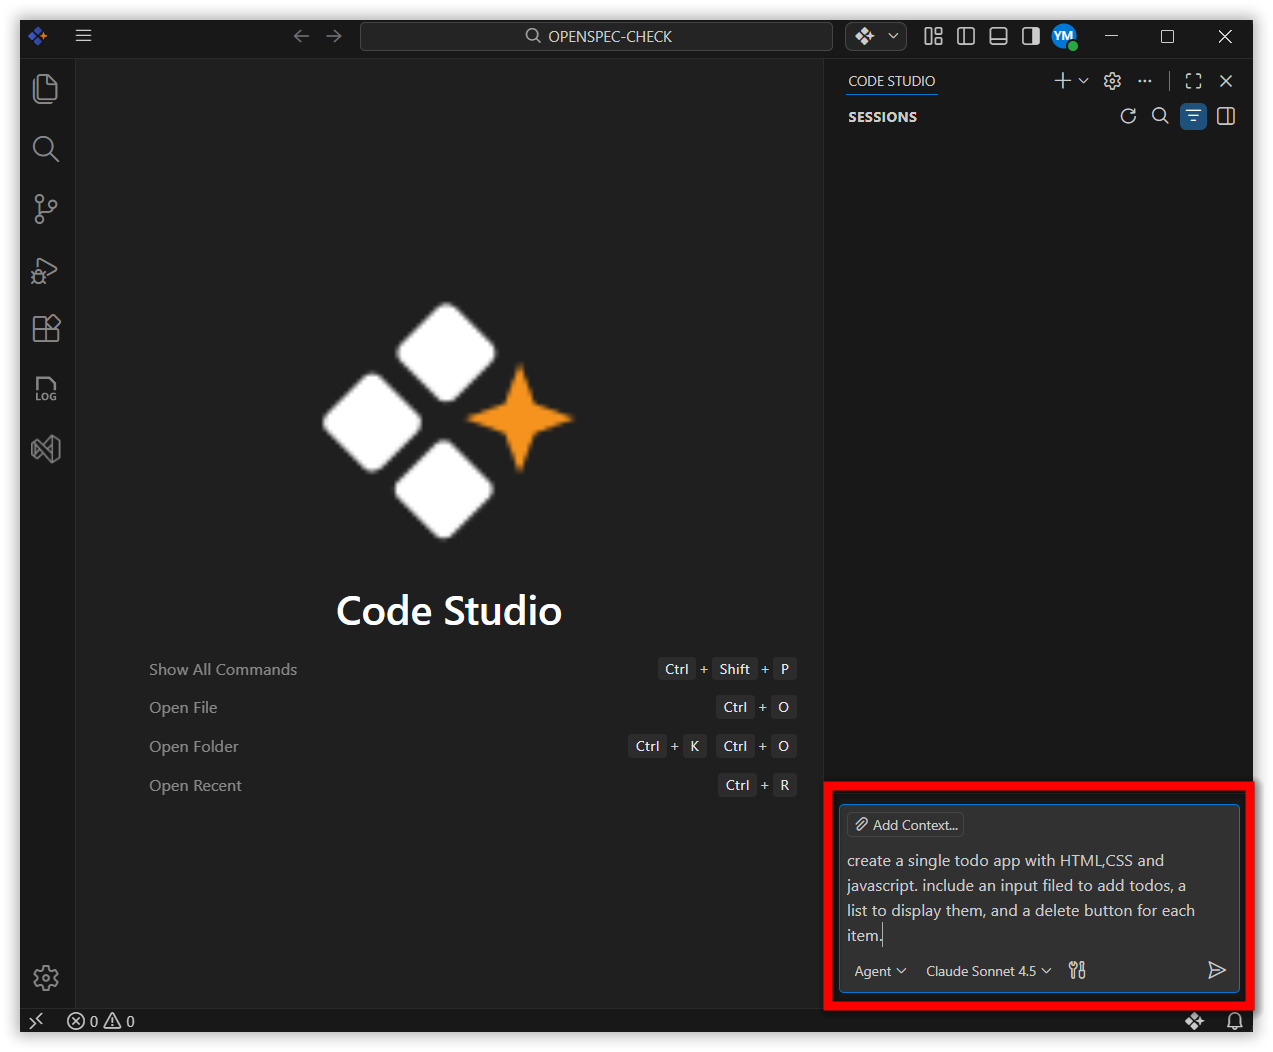
Consider creating the ToDo application,
- Create a new project folder.
- Open the project folder in Code Studio.
- Enter the prompt in the chat input field to scaffold the todo app. For example:
“Create a simple todo app with HTML, CSS and JavaScript. Include an input field to add todos, a list to display them, and a delete button for each item” and Click “Send”.
Note: Make sure agents are enabled in your Code Studio settings.
-
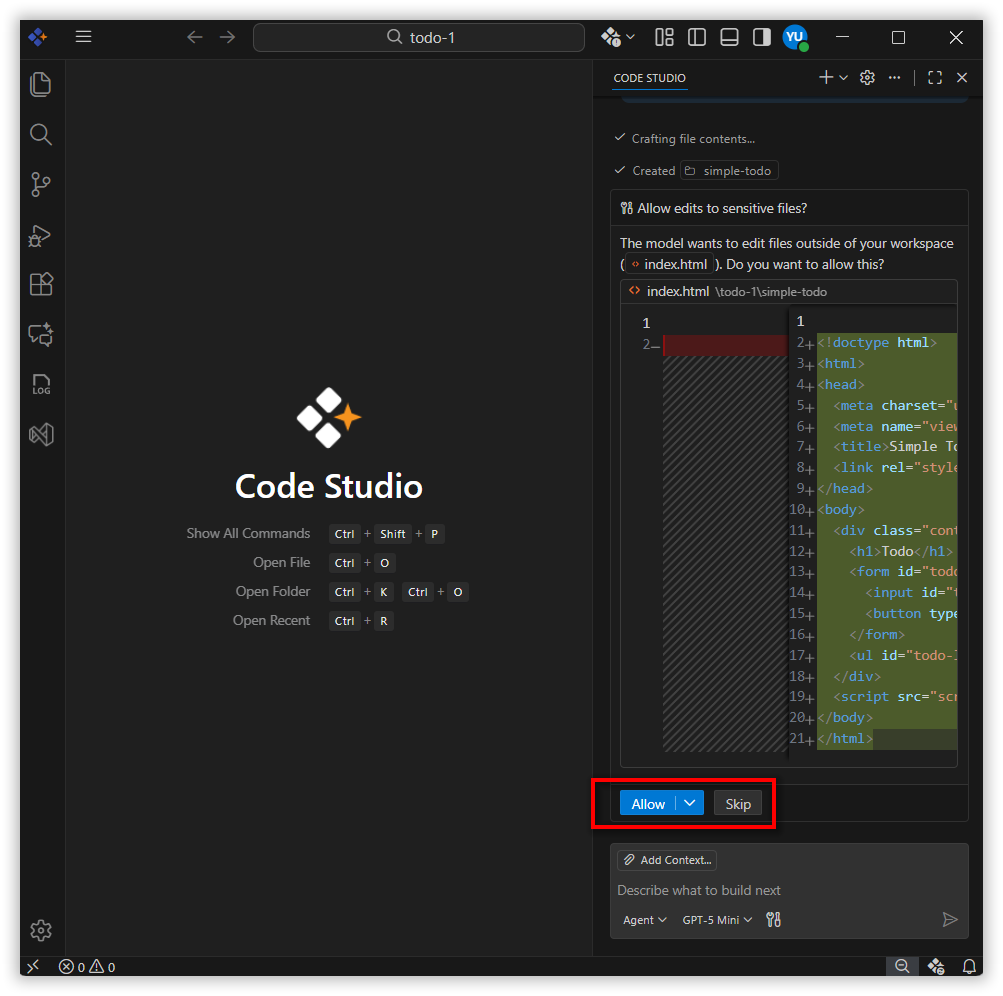
By default, Agent mode will ask for your permission before using any tool. Click “Allow” to approve the action, or “Skip” to deny it.
-
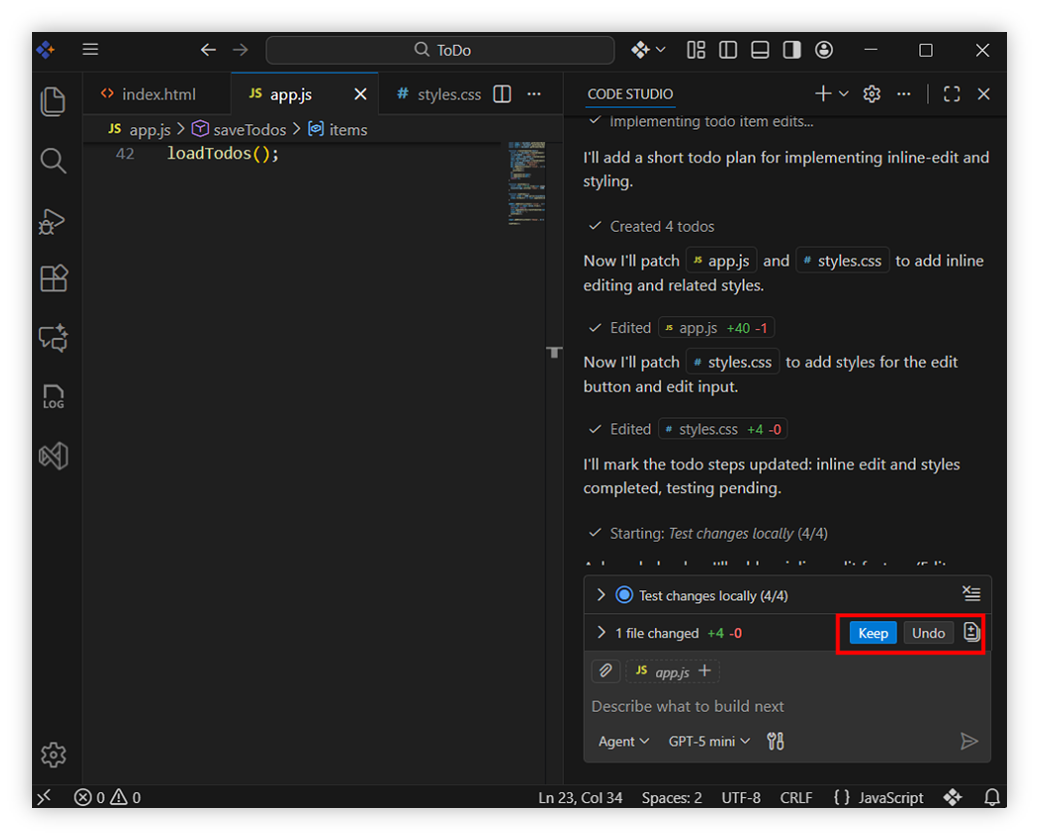
Review the agent generated files for the app. Use Keep or Undo to accept or reject changes as needed.
-
Run your application in terminal; now you have a working ToDo app. By using an agent, you can interactively generate and refine your code in real-time.
Note: Projects created in Code Studio are compatible with other IDEs (for example, Visual Studio and VS Code), allowing you to open and work on the same project across different development environments.
Related Features
- Custom Agent: Define rules/instructions for consistent, constrained behavior.