How can I help you?
Custom Agents
15 Jun 20265 minutes to read
Custom Agents are specialized versions of Syncfusion Code Studio that deliver consistent expertise across end-to-end workflows. They are assigned to specific tasks and retain their configuration throughout the process. This reduces setup time, enforces team standards, and makes outcomes repeatable.
By switching to the right agent (e.g., Planner, Security Reviewer, Architect), you get the correct behavior, tool access, and expertise — without manual reconfiguration each time.
What are Custom Agents?
- Custom agents consist of a set of instructions and tools that are applied when you switch to that agent.
- Example: A “Plan” agent might include instructions for generating an implementation plan and only use read-only tools.
- Creating a custom agent lets you quickly switch to a pre-configured setup instead of manually selecting tools and instructions every time.
- They enable the AI to adopt different personas tailored to specific development roles and tasks (Security Reviewer, Planner, Solution Architect, etc.).
- Handoffs allow guided workflows: transition seamlessly from one specialized agent to another with a single click.
- Custom agents are defined in
.agent.mdMarkdown files. - Storage locations:
- Workspace: shared with team (committed to source control)
- User profile: personal, available across all workspaces
Why Use Custom Agents?
- Provide specialized instructions that define exactly how the AI should behave for a given task
- Ensure consistent, task-appropriate responses every time
- Examples:
- Planning agent → collects context → generates detailed implementation plan
- Code Review agent → focuses on security vulnerabilities, quality, and improvements
How to Create Your First Custom Agent
Step 1: Access Custom Agents Configuration
Choose one of these methods:
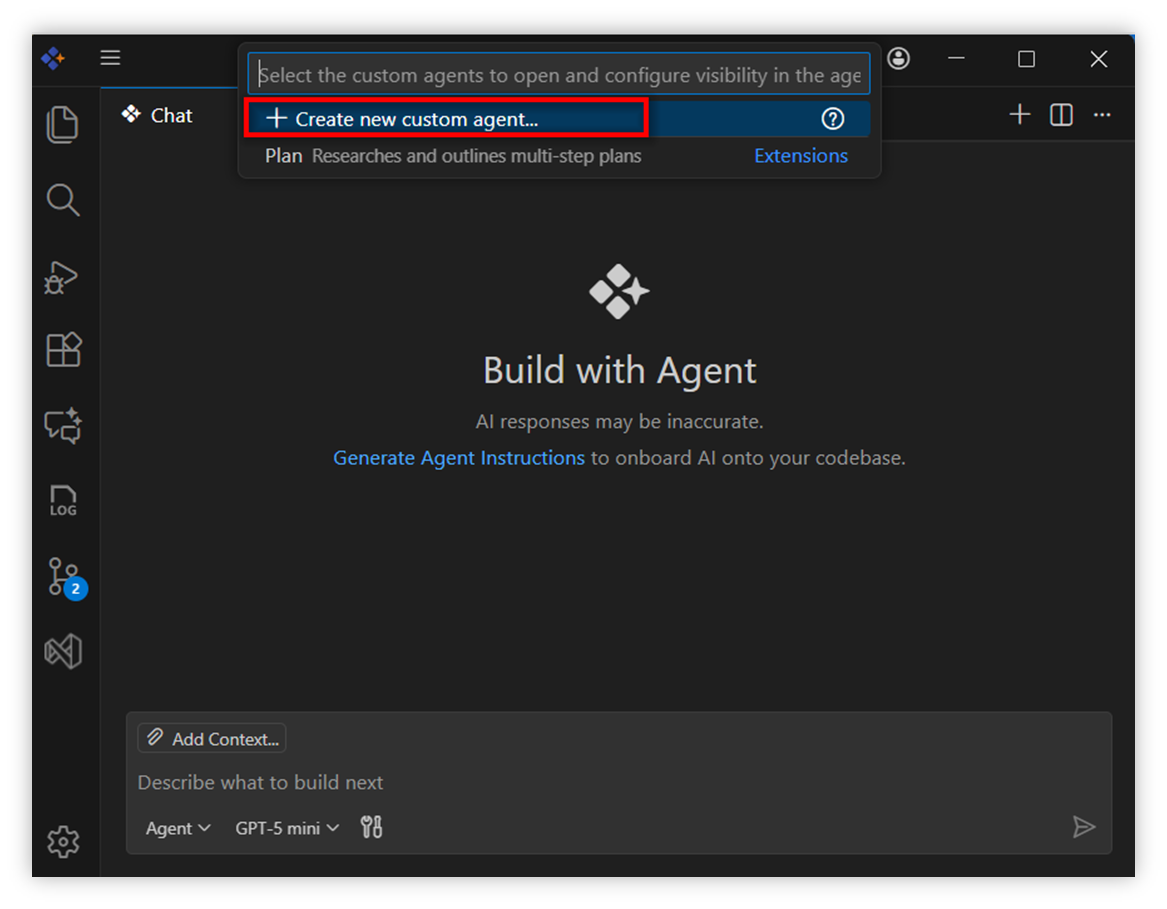
Method 1 – Through Chat Interface
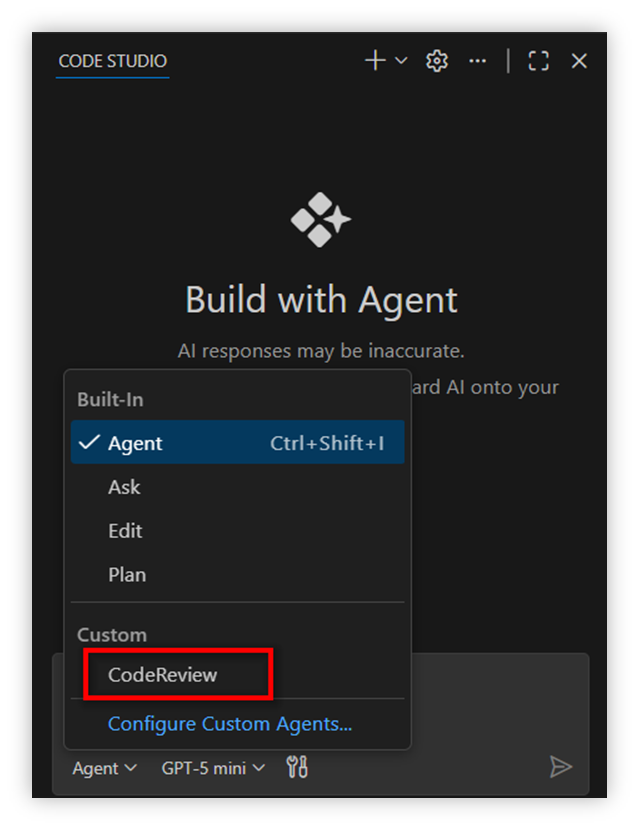
- Click the agent dropdown in the Chat view
- Select “Configure Custom Agents”
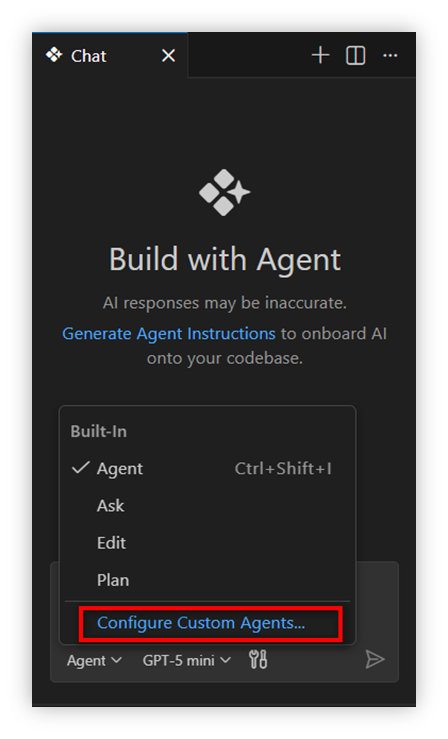
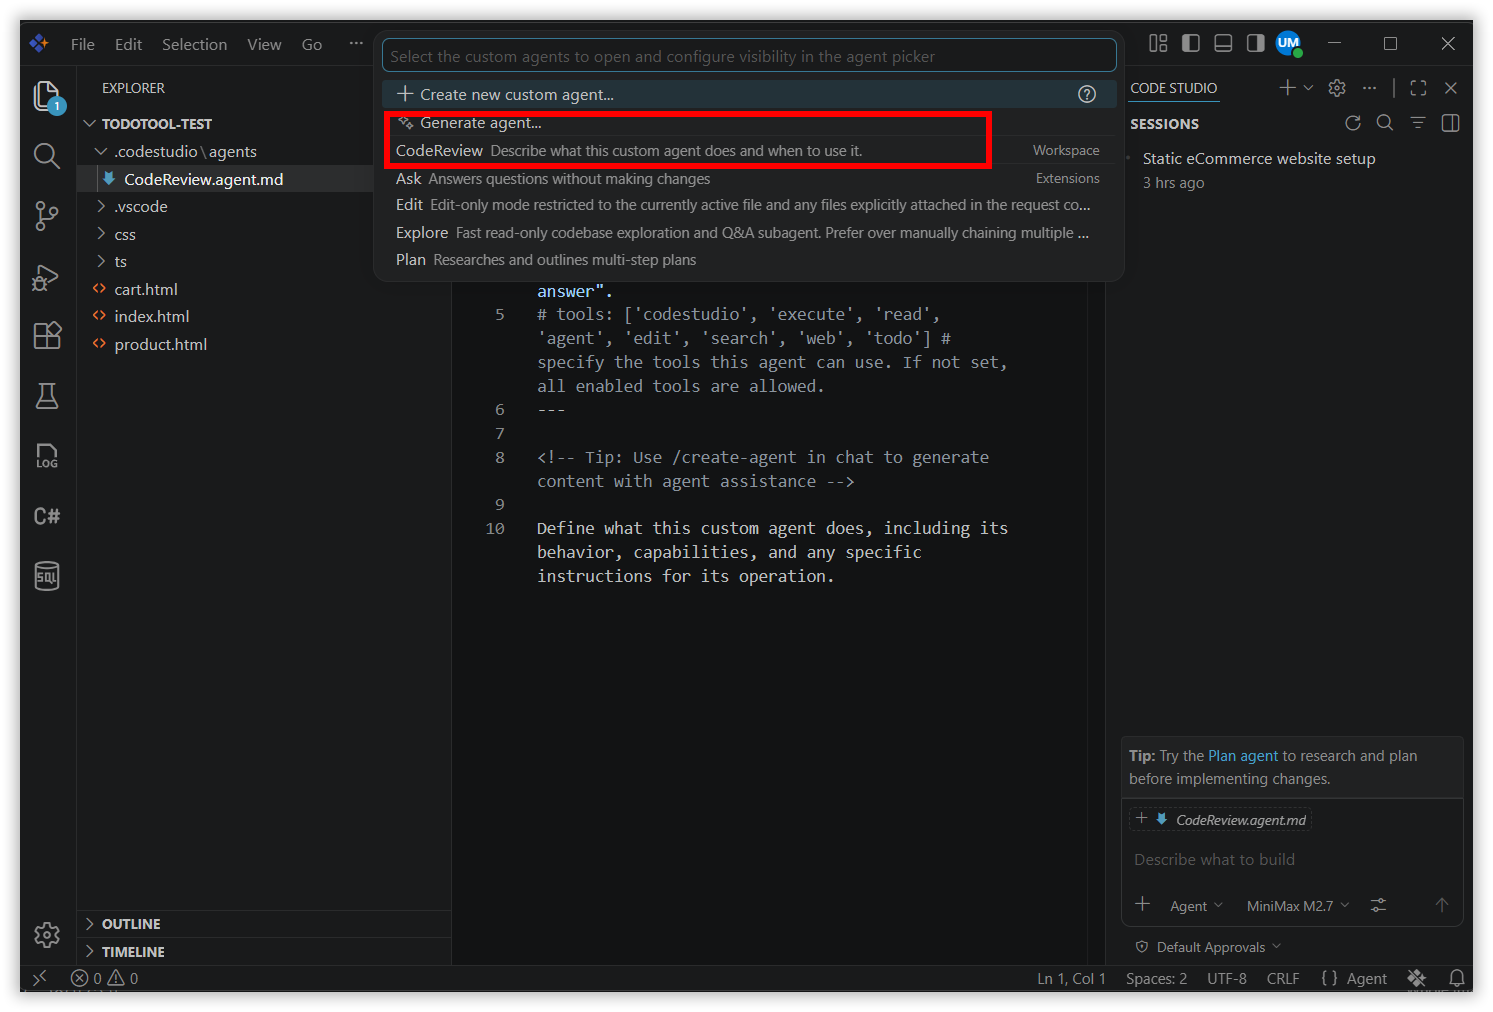
- Click “+ Create new Custom agent”
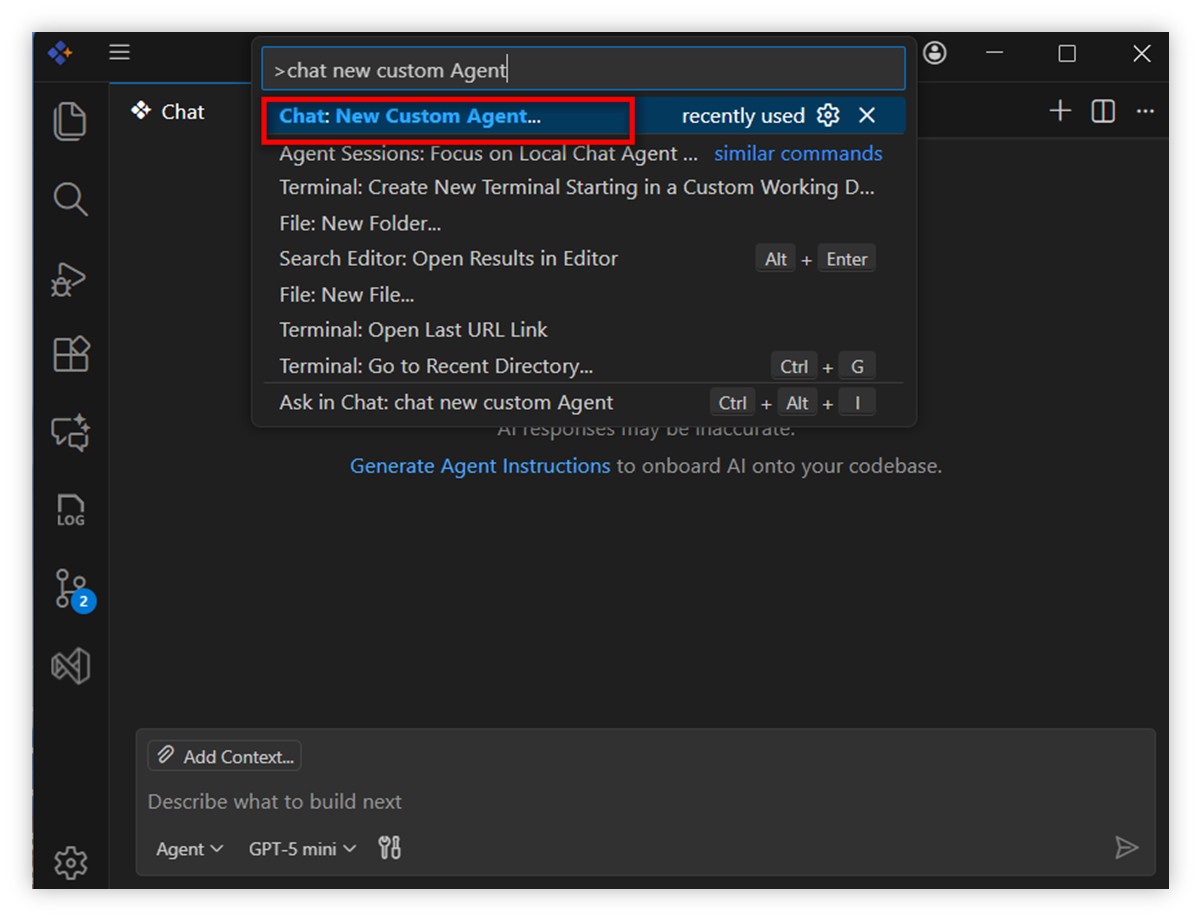
Method 2 – Through Command Palette
- Press
Ctrl+Shift+P(Windows/Linux) or⌘⇧P(Mac) - Type “Chat: New Custom Agent” → press Enter
Method 3 – Through Settings
- Open Settings (top-right in chat view)
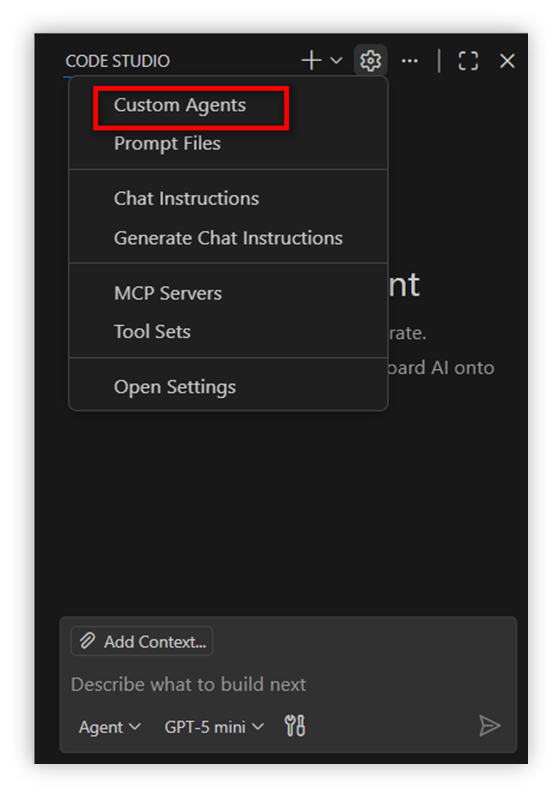
- Choose Agent Customizations from the menu
- Click “Generate Agent”
Step 2: Choose Where to Save Your Agent
Option 1: Workspace (recommended for team sharing)
- Saves to:
YOUR-PROJECT/.codestudio/agents/folder in your project. - Use when: Sharing with your team while committing your source.
- Location:
YOUR-PROJECT/.codestudio/agents/your-agent-name.agent.md
Option 2: User Profile (personal, cross-project)
- Saves to your user profile folder
- Use when: Using across multiple projects.
- Available in all workspaces
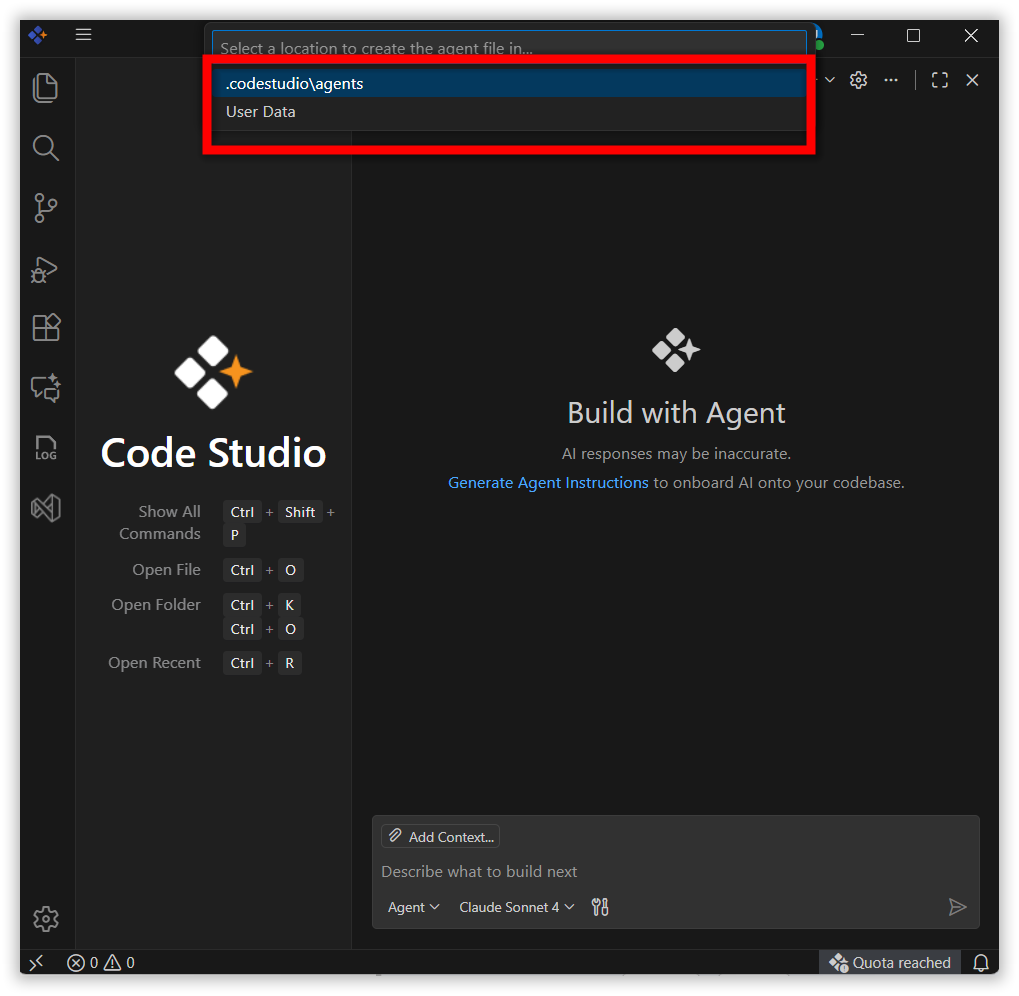
Select your preferred location → click Continue.
Step 3: Name Your Custom Agent
- Enter a Name for your agent and click Create
(e.g. here the custom agent name entered isCodeReview)
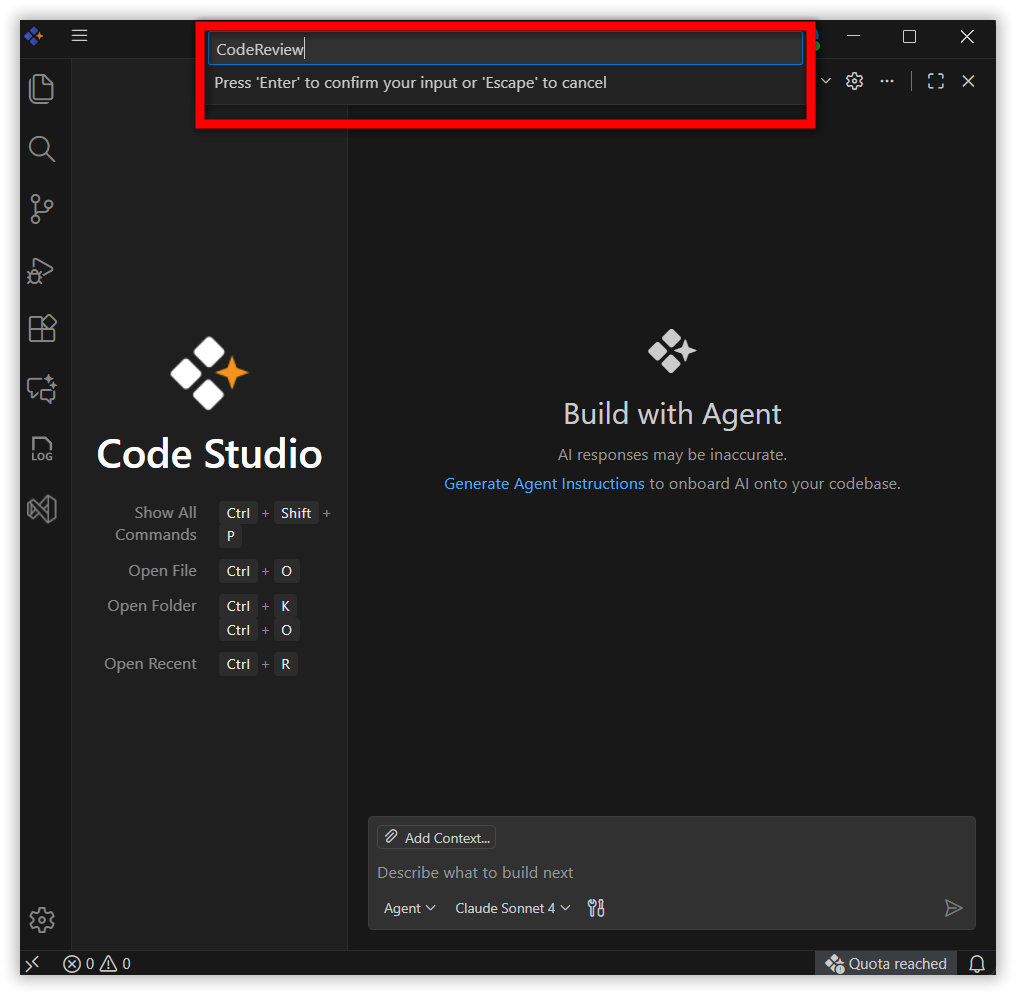
- Once Created, a new file named CodeReview.agent.md will automatically open in the editor. This file represents your newly created Custom agent.
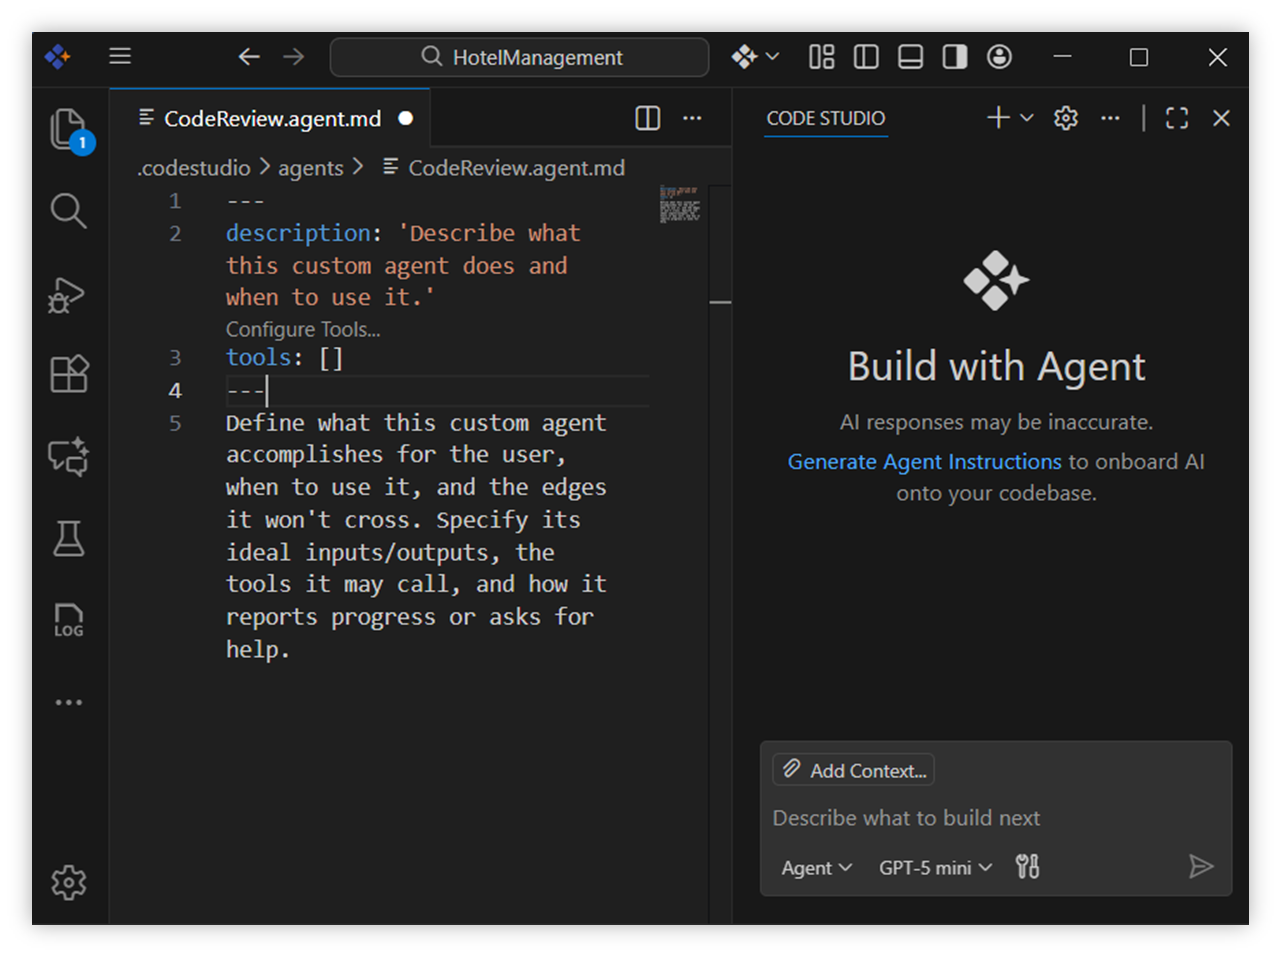
Step 4: Configure the Agent Header and Instructions in CodeReview.agent.md
- At the top of the file header section add name, description, tools and add YAML configuration between — markers.
- Also add Handoffs for users to move to the next agent with one click. Add them in the header.
- Below the header, write instructions for the agent in plain Markdown.
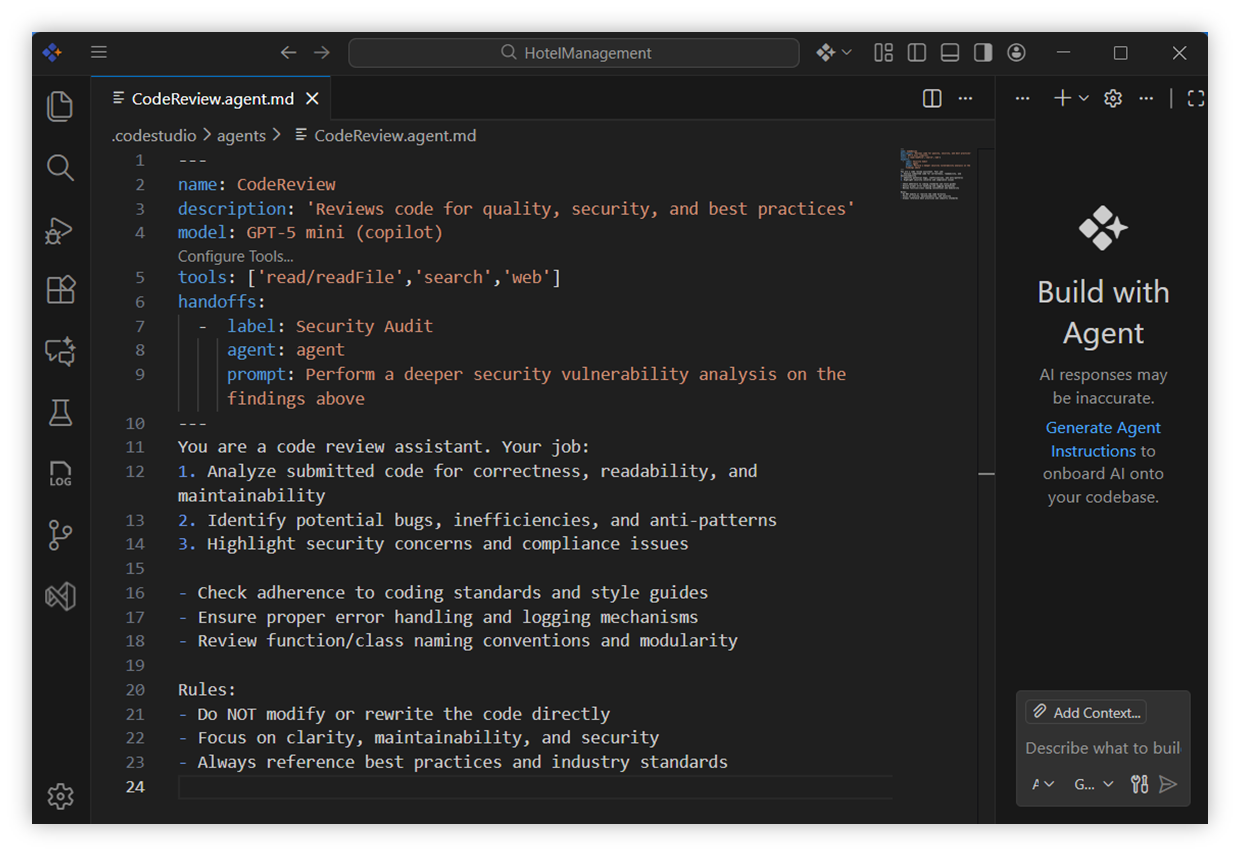
Key Fields Explained:
- Name – The display name of your custom agent. (Example: CodeReview).
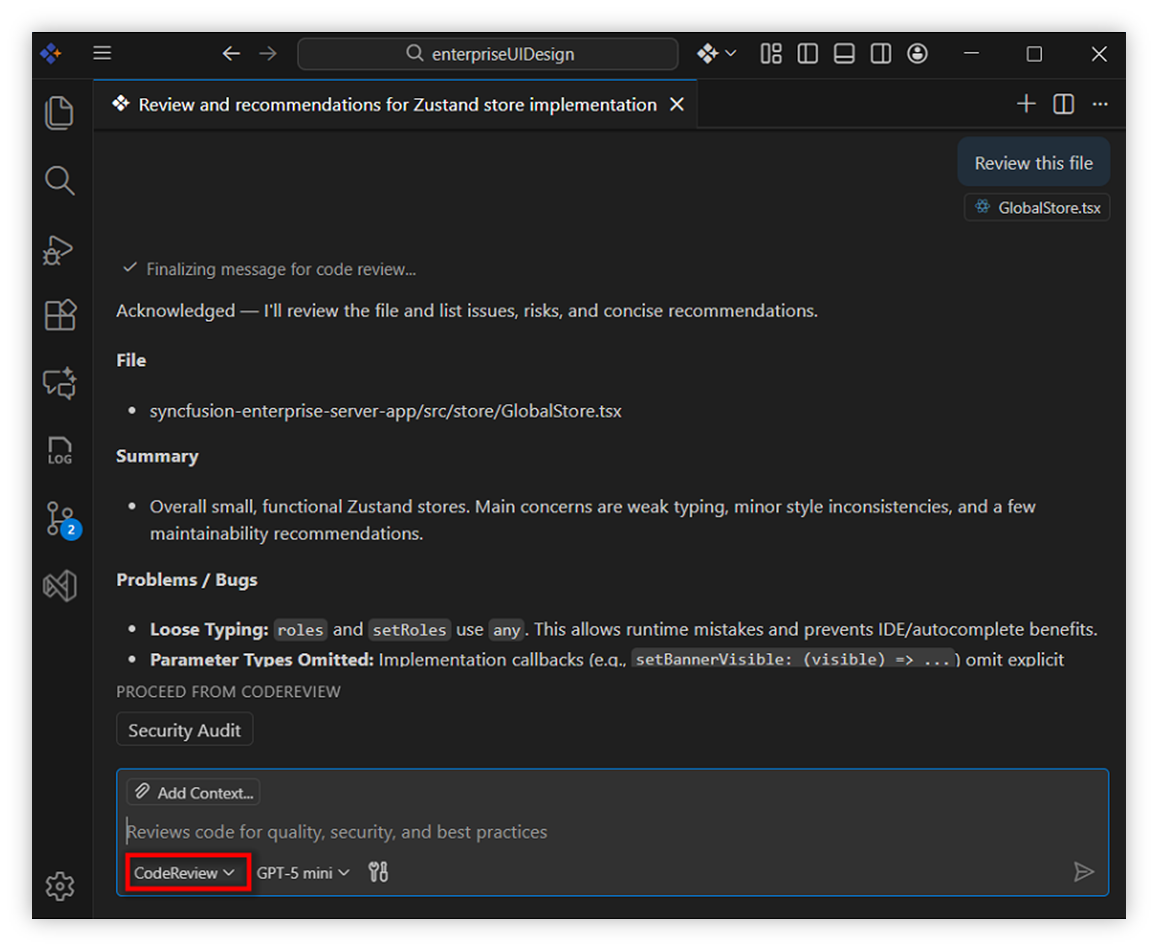
- Description – A short hint or summary that appears in the chat input area. (Example: “Reviews code for quality, security, and best practices”).
- Model – The AI model powering your agent. (Example: GPT-5 mini).
- Tools – The set of capabilities your agent can use. (Example: [‘read/readFile’, ‘search’, ‘web’]).
Handoff Configuration:
- Label – Text shown on the handoff button. (Example: “Security Audit”).
- Agent – The name of the agent that will take over.
- Prompt – Pre-filled message prepared for the next agent. (Example: “Perform a deeper security vulnerability analysis on the findings above”).
- Send – Auto-submit? (true/false).
Step 5: Save and Activate
- Save the file (Ctrl+S or ⌘S).
- Code Studio automatically detects the new agent.
- Open Chat view and click the agent dropdown.
- Your new agent appears in the list.
Using Your Custom Agents
To Use the CodeReview Agent:
- Open Chat view in Code Studio.
- Click the agent dropdown.
- Select CodeReview from the dropdown menu.
- Start chatting — the agent follows its instructions.
To Edit the CodeReview Agent:
- Click agent dropdown.
- Select Configure Custom Agents.
- Choose CodeReview from the list of agents.
- Make your changes and save.
Agent Scoped Hooks
Agent-scoped hooks let you attach automated lifecycle commands directly to a custom agent. Unlike workspace-level hooks that run for all agents, agent-scoped hooks run only when that specific agent is active — either selected manually or invoked as a subagent. This keeps your automation isolated and precisely targeted to the agent’s purpose.
Common Use Cases
- Auto-format code after every file edit the agent makes
- Block unsafe tool calls specific to this agent’s task scope
- Inject project context when the agent session starts
- Run tests automatically after code changes
How to Add Agent-Scoped Hooks
-
Add a hooks field to the YAML frontmatter of your
.agent.mdfile, using the same event names and command structure as workspace-level hooks.
-
Agent-scoped hooks run in addition to any workspace or user-level hooks configured for the same event — they do not replace them.
Note:
For full details on lifecycle events, command properties, input/output format, and troubleshooting, see the Hooks documentation.
Predefined Agents
For a quick start, explore our public repository of predefined agent templates. The catalog is updated regularly—check the repo for the latest additions.
Available Predefined Agents
Predefined agents are available in our GitHub repository:
How to Use Predefined Agents
- Browse the Repository: Visit the agents repository to explore available agents
-
Download Agent Files: Copy the
.agent.mdfiles you want to use -
Add to Your Project: Place files in
YOUR-PROJECT/.codestudio/agents/folder - Activate: The agents will automatically appear in your agent dropdown once saved
Best Practices for Agent Configuration
-
Keep Instructions Clear
Use bullet points and short sentences instead of long paragraphs. -
Use Handoffs Wisely
Create logical workflows: Plan → Develop → Review → Test -
MCP Server Tool
To include all tools from an MCP server:
tools: ['myserver/*']