Overview of Syncfusion components Installation in Mac
28 Apr 20216 minutes to read
The Syncfusion Essential Studio allows you to create the Xamarin application in Visual Studio for Mac with the Syncfusion components.
Mac Build and Installation
The steps below show how to install the Xamarin Mac installer.
-
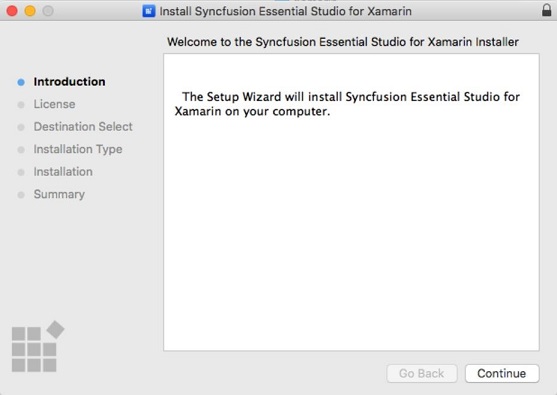
Open Syncfusion Xamarin Mac Installer(.pkg) file. The Installer Wizard opens. Click Continue.
-
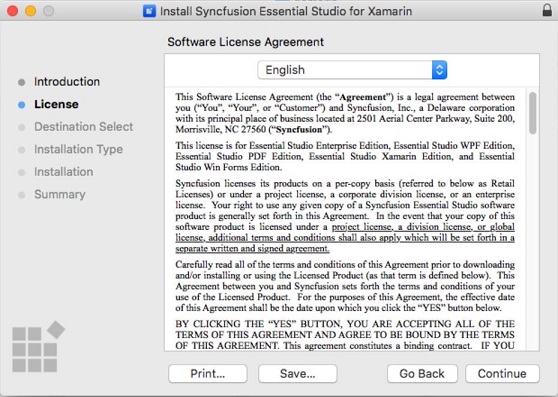
The Software License Agreement wizard will appear. Click the Continue button.
-
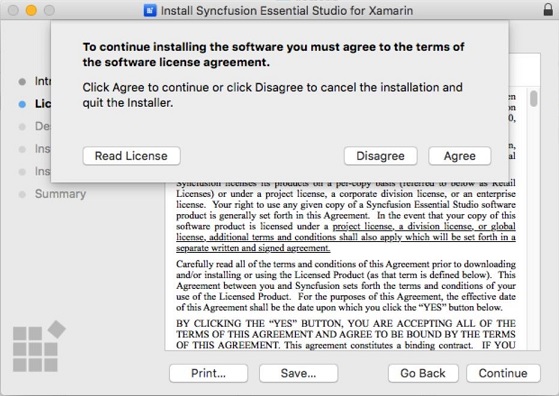
The License Agreement’s Confirmation window will appear. If you have read the Software License Agreement, click Agree.
NOTE
The Unlock key is not required to install the Mac installer. The Syncfusion Mac installer can be used for development purposes without registering the Unlock key.
-
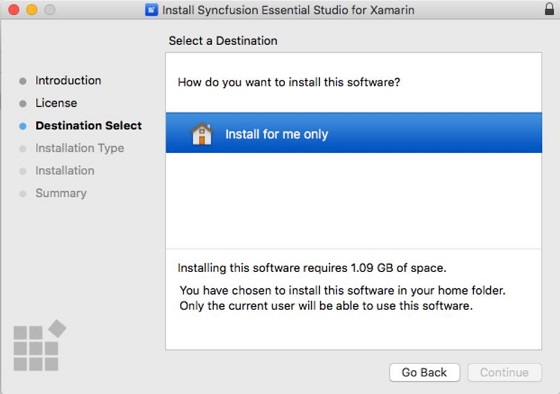
The Destination select wizard will appear. You can choose which disc to install the Syncfusion Essential Studio for Xamarin installer on here.
-
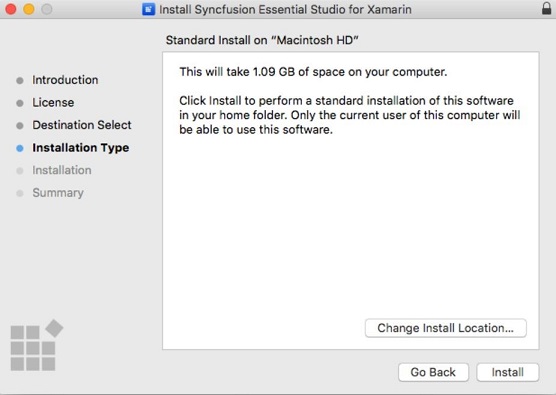
The Installation Type wizard will appear. Click Install to begin the standard installation of the Syncfusion Xamarin Mac installer.
-
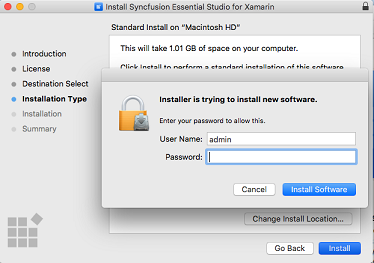
The Authentication window will appear. To begin the installation, enter the Mac machine’s password and click Install Software.
-
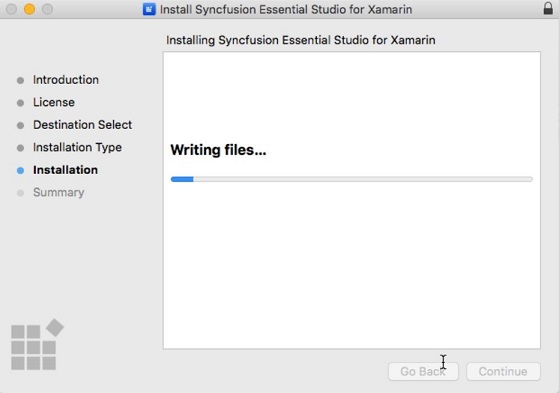
The installation process will begin on your machine.
-
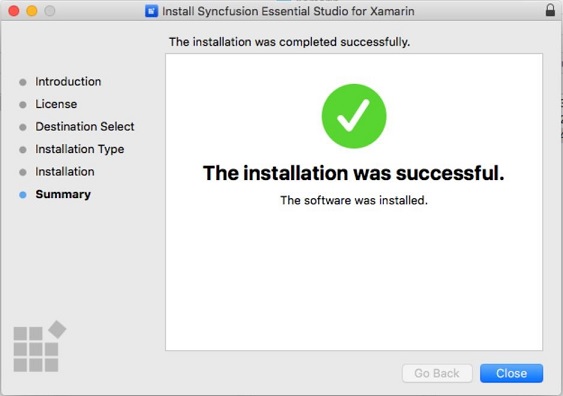
Once the installation is complete, the completed screen will be displayed. To exit the installation wizard, click Close.
By default, Mac installer will install the files in following location.
Location: {Documents}\Syncfusion\ {version}\ {platform}
Add reference to the project
You can then add the assembly references to the respective projects such as PCL, XForms.Droid, XForms.iOS. You can find the dependencies for each control from this link.
IMPORTANT
After adding the reference, currently, an additional step is required for iOS and UWP projects. For example, if we are using SfKanban, we need to call the Init method of SfKanbanRenderer as shown in this KB article.
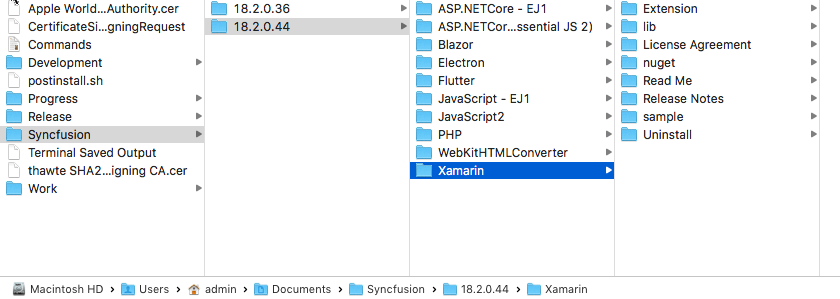
Explore the libraries package
You can find the Syncfusion libraries, samples and NuGet from the installed location in Mac.
{Essential Studio installed location}\Syncfusion\Essential Studio{version}\Xamarin
-
“ Lib ” folder - eg, /Users/labuser/Documents/Syncfusion/16.2.0.41/Xamarin/lib
It contains all the required libraries for Xamarin.iOS, Xamarin.Android, and Xamarin.Forms projects. -
“Nuget” folder - eg, /Users/labuser/Documents/Syncfusion/16.2.0.41/nuget
It contains the above libraries as NuGet packages. The same NuGet packages also can be configured from online nuget.org. -
“sample” folder - e.g., /Users/labuser/Documents/Syncfusion/16.2.0.41/sample
It contains the sample applications for our controls in Xamarin.iOS, Xamarin.Android, and Xamarin.Forms platforms in iOS, Android, and Forms folders, respectively.
The “Forms” directory includes,
- Individual control sample folders: It contains the samples for individual controls such as SfChart, SfDataGrid, etc. Since they represent the individual controls, these samples are light-weighted. You can check the samples for your required controls alone faster with minimum deployment time.
- “nuget” folder: It contains the compiled assemblies of the above samples as NuGet package. It is referred in the common sample browser as explained in the next step.
- “SampleBrowser” folder: It contains common sample browser, which refers the individual control’s samples as NuGet package. Run this to see the demo samples of all the controls in single application.
- It also contains showcase samples such as Patient Monitor, Server Monitor, and Invoice.
Add reference to the project
You can then add the assembly references to the respective projects such as PCL, XForms.Droid, XForms.iOS. You can find the dependencies for each control from this link.
Creating a New Xamarin Visual Studio MAC project for a Control
-
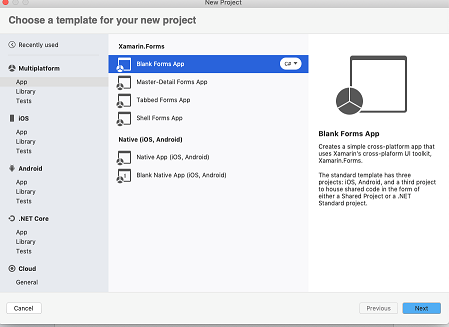
Firstly, create a new project in Visual Studio MAC, using File-> New Project.
-
Choose Blank Forms App under Xamarin.Forms category under the Multi platform sub-heading.
-
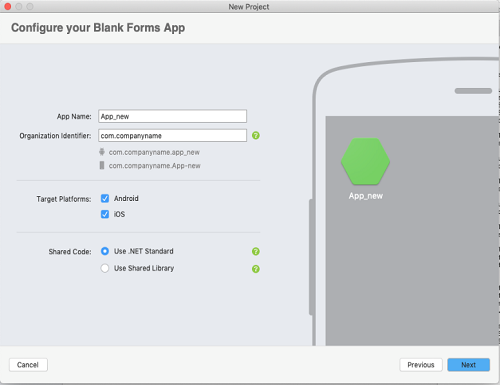
Enter the Application Name as required and click Next.
NOTE
Make sure both Android and iOS target platforms are clicked and shared code is .NETStandard.
-
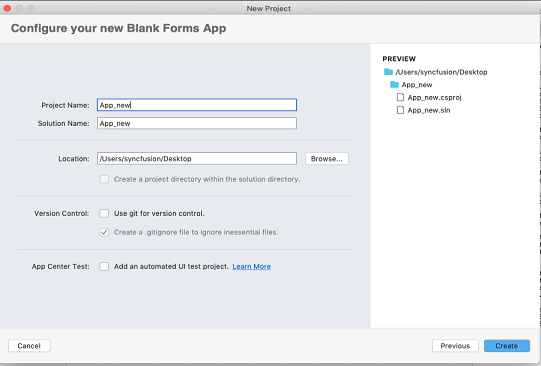
Choose the location where the created project needs to be stored for future reference and then Click Create.
-
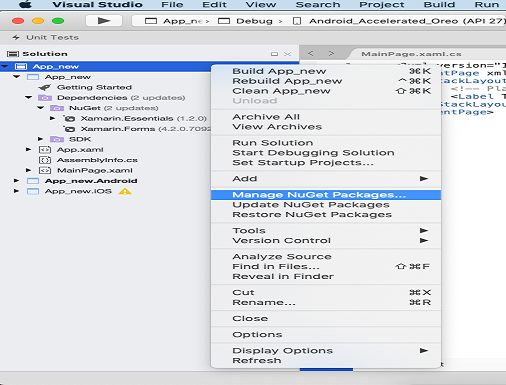
Option 1: Right click solution -> Click Manage NuGet packages.
NOTE
You can follow the NuGet Packages to use the NuGet-Syncfusion Xamarin Controls/Components.
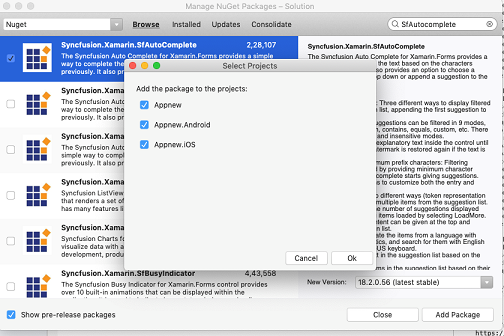
Select the packages required to be added and click Add Packages
Now select all projects in the solution in the appeared dialog box and Click OK.
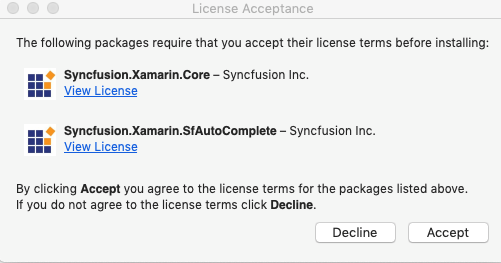
To successfully add the packages, Click Accept for the license acceptance for the added packages in solution
Now, your new project with required packages have been created successfully.
-
Option 2:
You can add the assembly references to the respective projects such as PCL, XForms.Droid, XForms.iOS from the MAC build installed location in your machine. You can find the dependencies for each control from this link.You can find the Syncfusion libraries, samples and NuGet from the installed location in Mac.
{Essential Studio installed location}\Syncfusion\Essential Studio{version}\Xamarin
“Lib ” folder - e.g., /Users/labuser/Documents/Syncfusion/16.2.0.41/Xamarin/lib
It contains all the required libraries for Xamarin.iOS, Xamarin.Android, and Xamarin.Forms projects.
Deploying a new control in a created project in MAC
-
Add the required code for control in PCL project.
For example, For SfAutocomplete, refer this link.
Import the SfAutocomplete namespace in respective page and initialize the autocomplete using the code below.
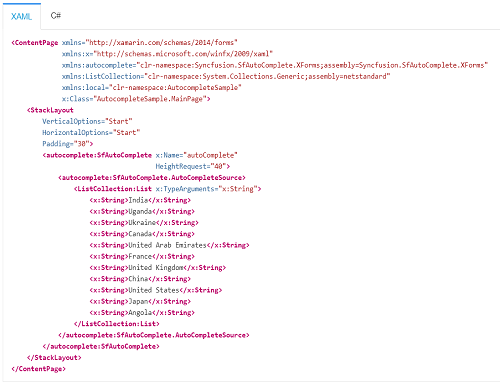
refer this link to learn more about the options available in SfAutocomplete to populate data.
-
Additional step for iOS
We need to add Renderer for each control added in our project by adding Renderer in AppDelegate class in iOS project
NOTE
If you are adding the reference from toolbox, this step is not needed.
Here, Create an instance of
SfAutocompleteRendererin FinishedLaunching overridden method of an AppDelegate class in iOS project as shown below: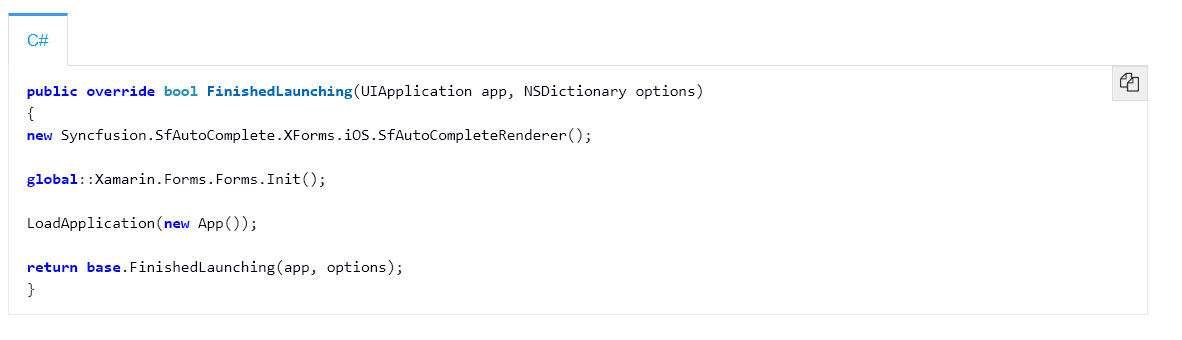
The complete Getting Started sample is available in this link.
-
Right click the iOS/ Android project-> Select Set As Startup Project in Debug/Release mode. Build and Run the project in any platform as desired.
Thus, you can create Xamarin Visual Studio MAC project for any Syncfusion Xamarin control using the above guidelines.