Report Server VM with Microsoft Azure
This section shows how to use the Report in the Azure portal to select and then create the Syncfusion Report Server virtual machine..
Pre-configured image via Azure Marketplace
One of the fastest ways to get Report Server up and running in Azure, based on a pre-configured Server image, is through the Azure Marketplace.
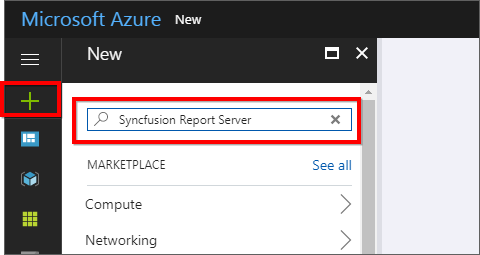
- Sign in to the Azure portal.
- Starting in the upper left, click New
-
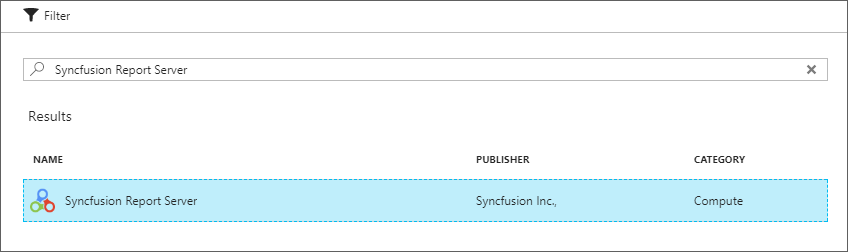
Search for “Syncfusion Report Server”.
-
Select Report Server and click on “Create” button.

Basics blade
The Basics blade requests administrative information for the virtual machine.
- Name: Enter a Name for the virtual machine. The name must be 1-15 characters long and it cannot contain special characters.
- User name: Enter a User name that are used to create a local account on the VM. The local account is used to sign in to and manage the VM.
- Password: Enter strong Password that are used to create a local account on the VM. The local account is used to sign in to and manage the VM. The password must be 8-123 characters long and meet three out of the four following complexity requirements: one lower case character, one upper case character, one number, and one special character.
- Subscription: The Subscription is optional. Learn more about subscription here.
- Resource group: Select an existing Resource group or type the name for a new one. Learn more about resource groups here.
- Location: Select an Azure data center Location where you want the VM to run.
- When you are done, click Next to continue to the next blade.

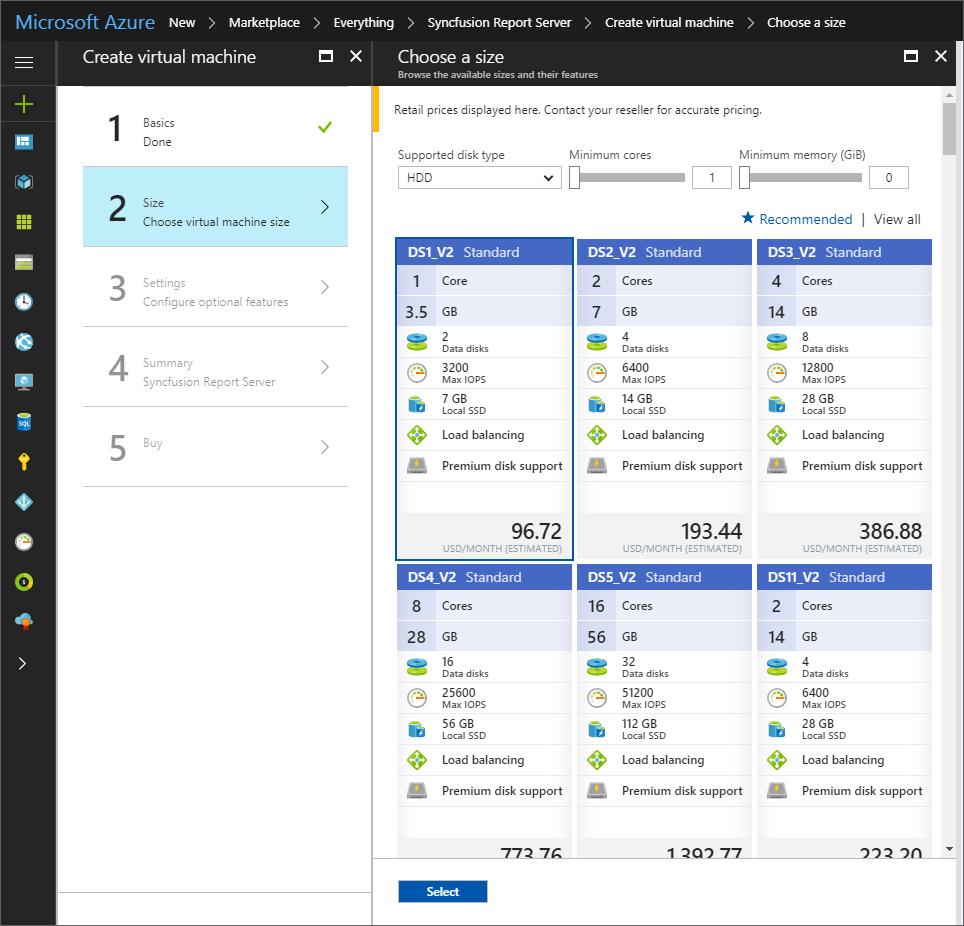
Size blade
The Size blade identifies the configuration details of the VM, and lists various choices that include OS, number of processors, disk storage type, and estimated monthly usage costs.
- Choose a VM size, and then click Select to continue.
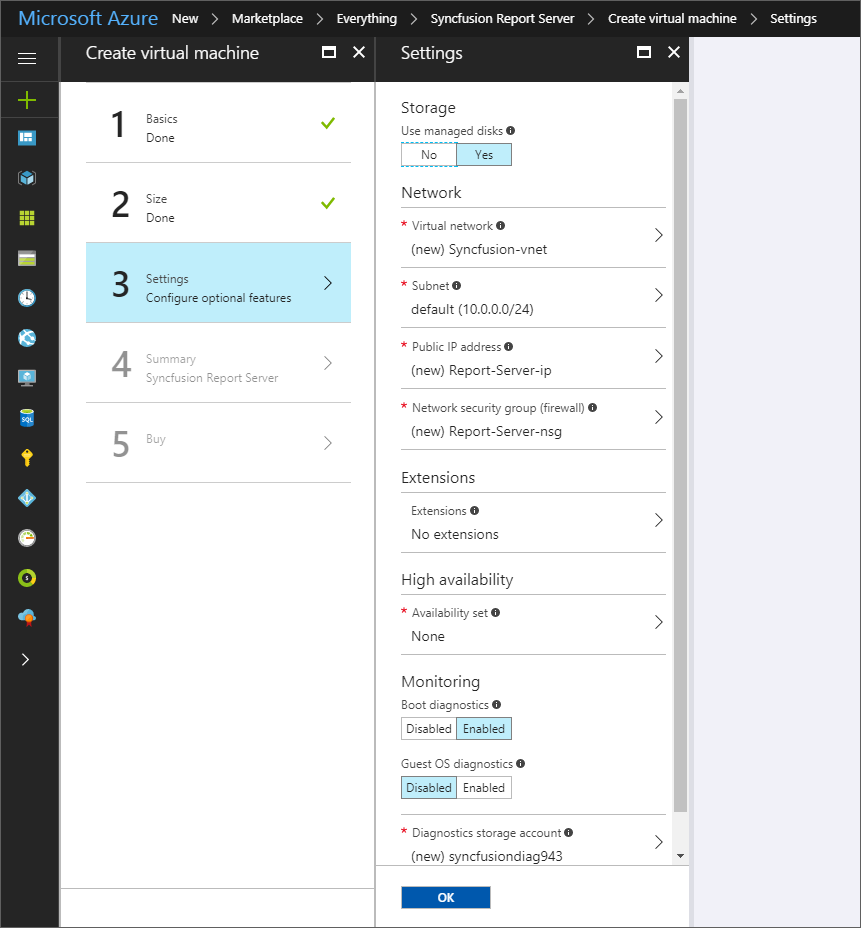
Settings blade
The Settings blade requests storage and network options. You can accept the default settings. Azure creates appropriate entries where necessary.
If selected a virtual machine size that supports it, you can try Azure Premium Storage by selecting Premium (SSD) in Disk type.
Storage
-
Storage: Premium disks (SSD) are backed by solid state drives and offer consistent, low-latency performance. They provide the best balance between price and performance, and are ideal for I/O-intensive applications and production workloads. Standard disks (HDD) are backed by magnetic drives and are preferable for applications where data is accessed infrequently.
When all done making changes, click OK. - Use managed disks: Enable this feature to have Azure automatically manage the availability of disks to provide data redundancy and fault tolerance, without creating and managing storage accounts on your own. Managed disks may not be available in all regions. Learn more about managed disk here
- Storage account: Disks for Azure virtual machines are created in storage accounts. Learn more about storage account here.
Network
- Virtual network: are logically isolated from each other in Azure. You can configure their IP address ranges, subnets, route tables, gateways, and security settings, much like a traditional network in your data center. Virtual machines in the same virtual network can access each other by default.
- Subnet: A subnet is a range of IP addresses in your virtual network, which can be used to isolate virtual machines from each other or from the Internet.
- Public IP address: Use a public IP address if you want to communicate with the virtual machine from outside the virtual network.
- Network security group (firewall): A network security group is a set of firewall rules that control traffic to and from your virtual machine.
Extensions
- Extensions: Add new features, like configuration management or antivirus protection, to your virtual machine using extensions. Learn more about extension here.
High availability
- Availability set: To provide redundancy to your application, we recommend that you group two or more virtual machines in an availability set. This configuration ensures that during a planned or unplanned maintenance event, at least one virtual machine will be available and meet the 99.95% Azure SLA. The availability set of a virtual machine can’t be changed after it is created.
Monitoring
- Boot diagnostics: Capture serial console output and screenshots of the virtual machine running on a host to help diagnose startup issues.
- Guest OS diagnostics: Get metrics every minute for your virtual machine. You can use them to create alerts and stay informed on your applications.
- Diagnostics storage account: Metrics are written to a storage account so you can analyze them with your own tools.
When you’re done making changes, click OK.
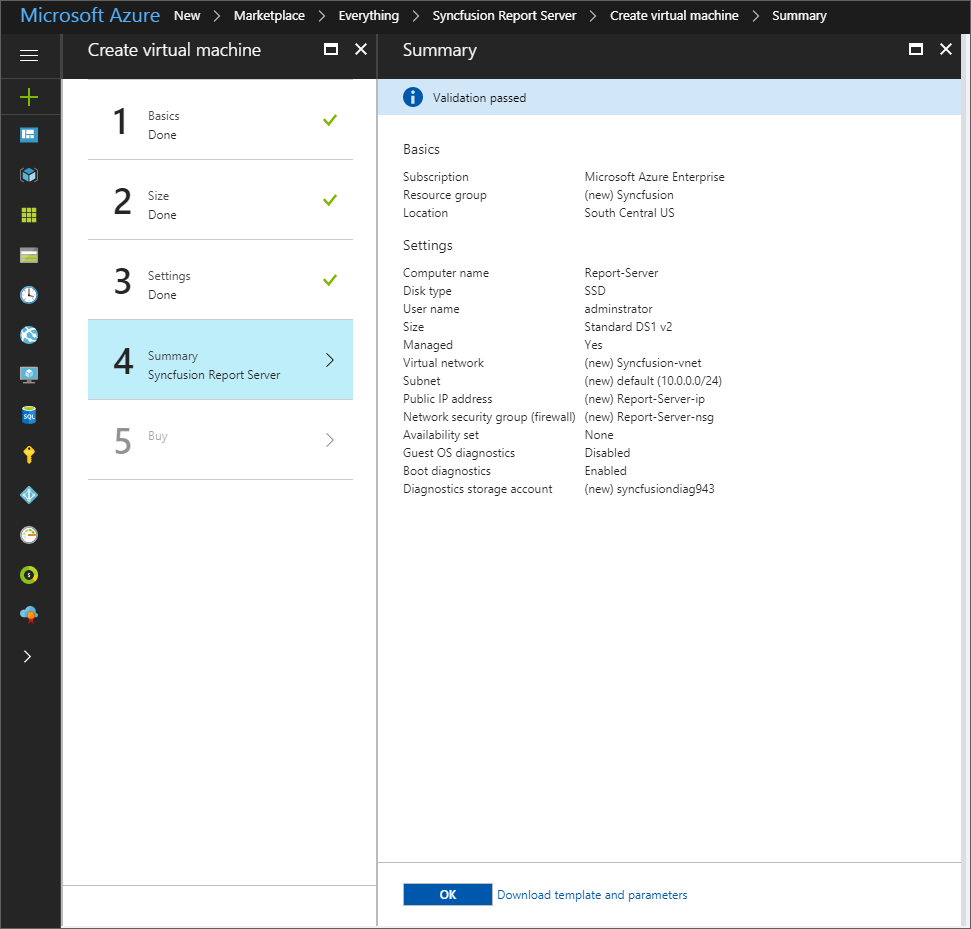
Summary blade
-
On the summary page, click OK to start the Syncfusion Report Server virtual machine deployment.
Connect to Syncfusion Report Server virtual machine
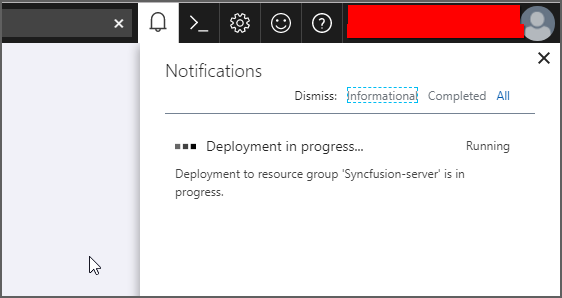
Once the deployment progress has been completed, Report Server VM can be connected through Remote Desktop Connection (RDP).
Follow the below steps to connect to the virtual machine
-
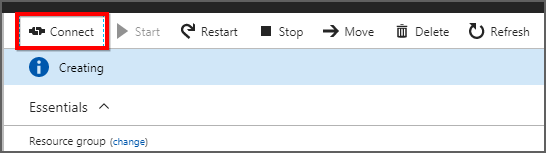
Click on Connect on the virtual machine Overview window. A Remote Desktop Protocol (.rdp) file will be downloaded from the Azure portal.
-
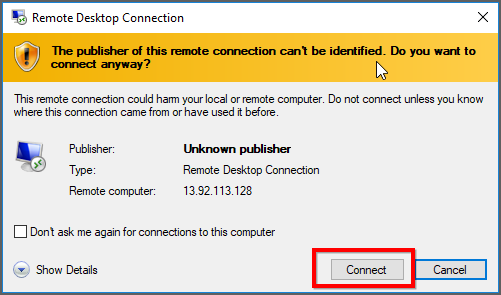
Open the .rdp file and click on continue for the unknown publisher warning.
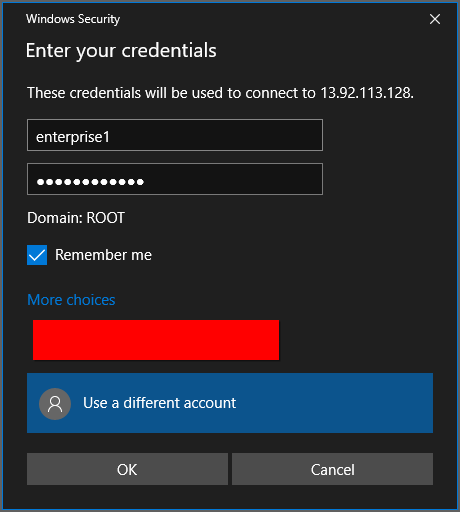
- Enter the credentials that you have given while deploying the VM as like below and click on OK.
-
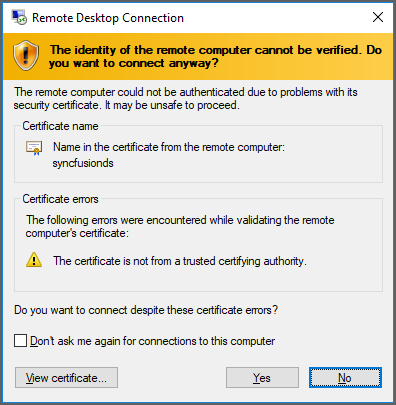
On successful connection, the identity verification window will be shown. Click OK to accept the certificate problems and connect to the virtual machine.
Run the Report Server
Desktop shortcuts to start and stop the Report Server can be found once connected to the virtual machine. By default, Report Server is hosted in the 80 port in the IIS.
Follow the steps to run the Report Server
- Open the Start Syncfusion Report Server shortcut to run the Report Server.
- As the Report Server has not been configured yet, application startup page will be shown
- Follow the steps here to do the application startup