- Publishing Dashboard to Server
- Publishing Data source to Server
- Publishing Widget to Server
- Publishing Data to Server
Contact Support
Publishing to Server
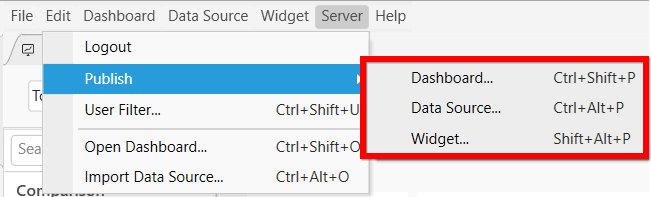
Dashboards, Data sources and Widgets can be exported to server from Dashboard Designer through the Publish option in the Application Menu.
Publishing Dashboard to Server
Click Server Menu and navigate to Publish menu item. Select Dashboard… menu item.

If you logged in to Dashboard Server already, you will be prompted with the publish dialog like below.

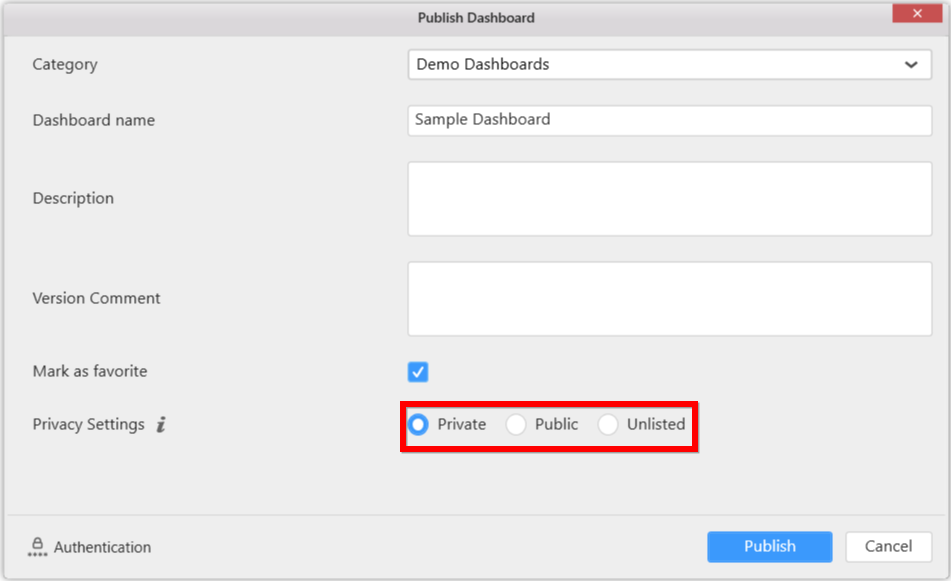
In this dialog, Category drop down list shows the list of categories added in the connected dashboard server. This represents the category under which the dashboard need to be published. Set the dashboard name near the Dashboard name label.
Set the description, if you prefer, commenting over the dashboard, near Description area. Version Comment is for commenting over each version of publish. Mark as favorite is for marking dashboard as favorite in the dashboard server. However, these are optional.
Privacy Settings is for setting accessibility for dashboard in the dashboard server. By default, Private option is selected.
Click Publish to export dashboard to dashboard server.This dashboard can now be viewed under Dashboards in the published dashboard server like below.

Click Cancel to cancel the export operation and close the dialog.
Publishing Data source to Server
Click Server Menu and navigate to Publish menu item. Select Data Source… menu item.

If you logged into Dashboard Server already, you will be prompted with the publish dialog like below.

In this dialog, enter the data source name with which you require the data source to be published, in Data Source name text area.
Enter the description in the Description text area illustrating the data source, if required. This is optional.
Click Next button, the publishing options dialog will be shown for exporting file type data source in the server.

Click Publish to export server type data source to dashboard server.

This data source can now be viewed under Data Sources in the published dashboard server like below.

Click Cancel to cancel the export operation and close the dialog.
Publishing Widget to Server
Click Server menu and navigate to Publish menu item. Select Widget… menu item.
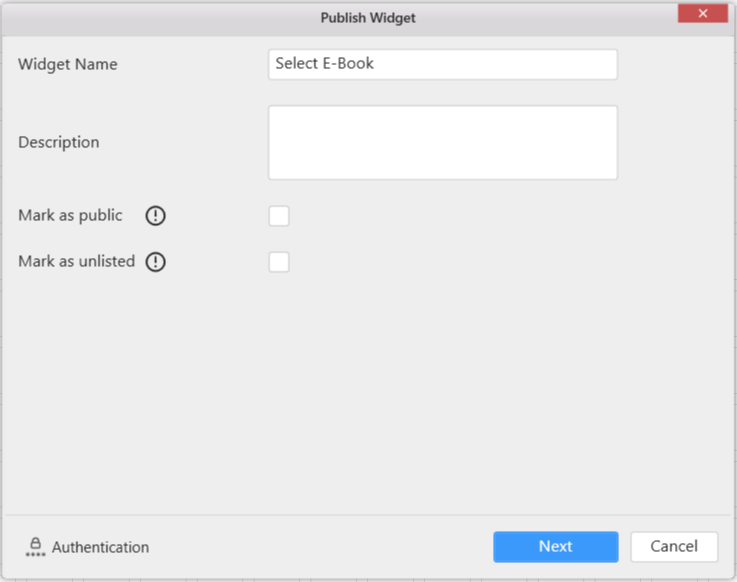
If you logged into Dashboard Server already, you will be prompted with the publish dialog like below.

In this dialog, enter the widget name with which you require the widget to be published/exported to server, in Widget Name text area.
Enter the description in the Description text area illustrating the widget,if required. This is optional.
Privacy Settings is for setting accessibility for widget in the
dashboard server. By default, Private option is selected.
Next button will be shown, if widget is configured with file type
datasource. Click Next button, the publishing options dialog will be shown for exporting file type data source in the server.

Publish button will be shown, if widget is configured with server type
data source. Click Publish to export widget to dashboard server.

This widget can now be viewed under Widgets in the published dashboard server like below.

Click Cancel to cancel the export operation and close the dialog.
Publishing Data to Server
Data publish is required for publishing dashboards into dashboard server whose data was created through connection types other than server-based data connection types.
With this, proceeding after Publish Dashboard dialog, the following dialog will be shown which provides three publishing options to publish the data for corresponding data source.

The below are the publishing option,
- Extract to Embedded database
- Live Query
- Data Agent
Publishing Data Extract to Embedded Database
This option allows you to publish the data of the corresponding dashboard with its embedded database directly, without specifying the target server.
Publishing Data to Live Query (Target Database Server)
This option allows you to publish the data of the corresponding dashboard to a targeted database server whose system requirements has been discussed here. The database server should either have Microsoft SQL Server installed or ODBC-enabled databases like SQL, MySQL or Oracle, or Spark SQL configured.
You can test connection details using Test Connection button in the Publish Dashboard dialog.

For data connections, other than server type, such as Microsoft Excel, JSON, CSV, Salesforce, Web Data Source and Microsoft Azure Table Storage, the data will be moved into the servers optionally as SQL Server, Spark SQL or ODBC-enabled databases (MSSQL, MySQL or Oracle) from the in-memory database which has been created while designing the data source.
Publishing Data to Data Agent
This option allows you to publish the data of the corresponding dashboard to SQL server. Also, it enables you to extract the updated data periodically from source connection type based on schedules.

Click here to know more about Data Agent.
You can configure the target server for every data source listed in the left-side panel of publishing window independently.
NOTE
If you are unable to view published dashboard while using two different machines or servers, user needs to ensure the access permission to the server which is configured with dashboard server.
User Filter Configuration
You may configure user filters to restrict data view based on user logged in. Please refer here for more detail.
Privacy Settings
You can set dashboard accessibility for particular dashboard while publishing it to a Dashboard Server using Privacy Settings option in the Publish Dashboard dialog.
NOTE
Setting dashboard as public will disable the user based filter and other user specific functionalities applied to the dashboard.
You can mark a dashboard as public even after publishing to dashboard server as discussed here.
NOTE
You can click information icon to know about
Privacy Settingsoptions as shown like below.

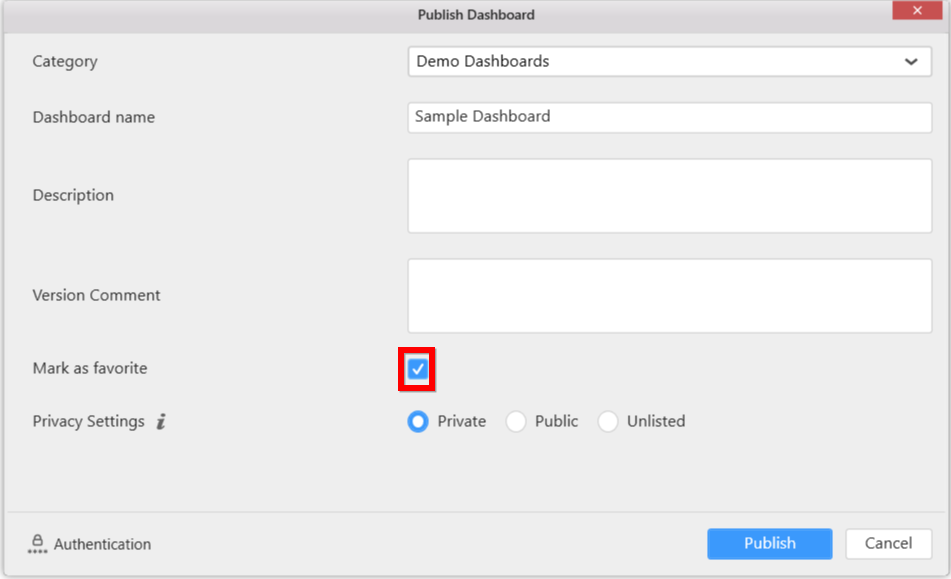
Marking as Favorite
You can mark a particular dashboard as favorite while publishing to a Dashboard Server, so that dashboard can be listed under Favorite Dashboards category in the Dashboard Server. To set a dashboard as favorite, enable the check box Mark as favorite in the Publish Dashboard dialog.
You can mark a dashboard as favorite even after publishing to dashboard server as discussed here.
