User Interactions
22 Feb 20184 minutes to read
Highlight
EjRangeNavigator provides highlighting supports to the intervals on mouse hover. To enable the highlighting option, set the Enable property to true in the HighlightSettings of NavigatorStyleSettings.
<div>
    <ej-range-navigator id="range" load="loadingdata">
        <e-chart-series>
            <e-series name="Product A" type="Line" enable-animation="false" fill="#69D2E7" opacity="0.5">
            </e-series>
        </e-chart-series>
        <e-selected-range-settings start="2010/5/1" end="2010/10/1"></e-selected-range-settings>
        <e-navigator-style-settings><e-highlight-settings enable="true"></e-highlight-settings></e-navigator-style-settings>
    </ej-range-navigator>
</div>
Customize the highlight style
To customize the highlighted intervals, use color, border and opacity options in the HighlightSettings.
<div>
    <ej-range-navigator id="range" load="loadingdata">
        <e-chart-series>
            <e-series name="Product A" type="Line">
            </e-series>
        </e-chart-series>
        <e-selected-range-settings start="2010/5/1" end="2011/10/1"></e-selected-range-settings>
        <e-navigator-style-settings><e-highlight-settings enable="true" color="#006fa0"><e-border color="red" width="2"></e-border></e-highlight-settings></e-navigator-style-settings>
        </ej-range-navigator>
</div>
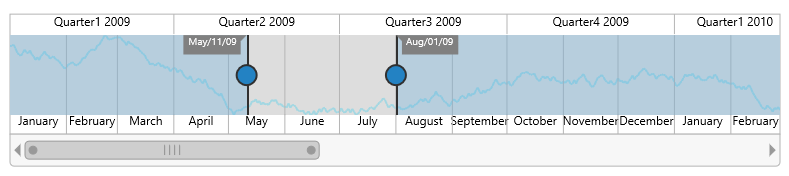
Selection
EjRangeNavigator provides selection supports to the intervals by, clicking and dragging the highlighted intervals. To enable the selection option, set the Enable property to true in the SelectionSettings.
<div>
<ej-range-navigator id="range" load="loadingdata">
    <e-chart-series>
        <e-series name="Product A" type="Line">
        </e-series>
    </e-chart-series>
    <e-selected-range-settings start="2010/5/1" end="2011/10/1"></e-selected-range-settings>
    <e-navigator-style-settings><e-selection-settings enable="true"></e-selection-settings></e-navigator-style-settings>
    </ej-range-navigator>
</div>
Customize the selection style
To customize the selected intervals, use color, border and opacity options in the SelectionSettings.
<div>
    <ej-range-navigator id="range" load="loadingdata">
        <e-chart-series>
            <e-series name="Product A" type="Line">
            </e-series>
        </e-chart-series>
        <e-selected-range-settings start="2010/5/1" end="2011/10/1"></e-selected-range-settings>
        <e-navigator-style-settings><e-selection-settings enable="true" color="#27e8e5"><e-border color="red" width="2"></e-border></e-selection-settings></e-navigator-style-settings>
        </ej-range-navigator>
</div>
Scrollbar
-
To render the Scrollbar in RangeNavigator, you need to enable EnableScrollbar option.
-
ScrollRangeSettings of RangeNavigator Start and End value is used to set the minimum and maximum datasource value to be added in the range navigator.
-
Based on the ScrollRangeSettings Start, End value and dataSource Start, End value scrollbar will be adjust.
-
When you change the scrollbar position, ScrollEnd event returns the current position of start and end range value.
<div>
<ej-range-navigator id="range" load="loadingdata" enable-scrollbar="true" scroll-end="onScrollbarChange">
    <e-chart-series>
        <e-series name="Product A" type="Line">
        </e-series>
    </e-chart-series>
    <e-selected-range-settings start="2010/5/1" end="2011/10/1"></e-selected-range-settings>
    <e-scroll-range-settings start="2010/1/1" end="2011/11/31"></e-scroll-range-settings>
    </ej-range-navigator>
</div>function onScrollbarChange(sender) {
var start = sender.data.newRange.start;
var end = sender.data.newRange.end;
}