How can I help you?
Core Concepts
Basics
API Configuration
Using tag helper methods we can set values to Syncfusion Widget properties during or after the creation.
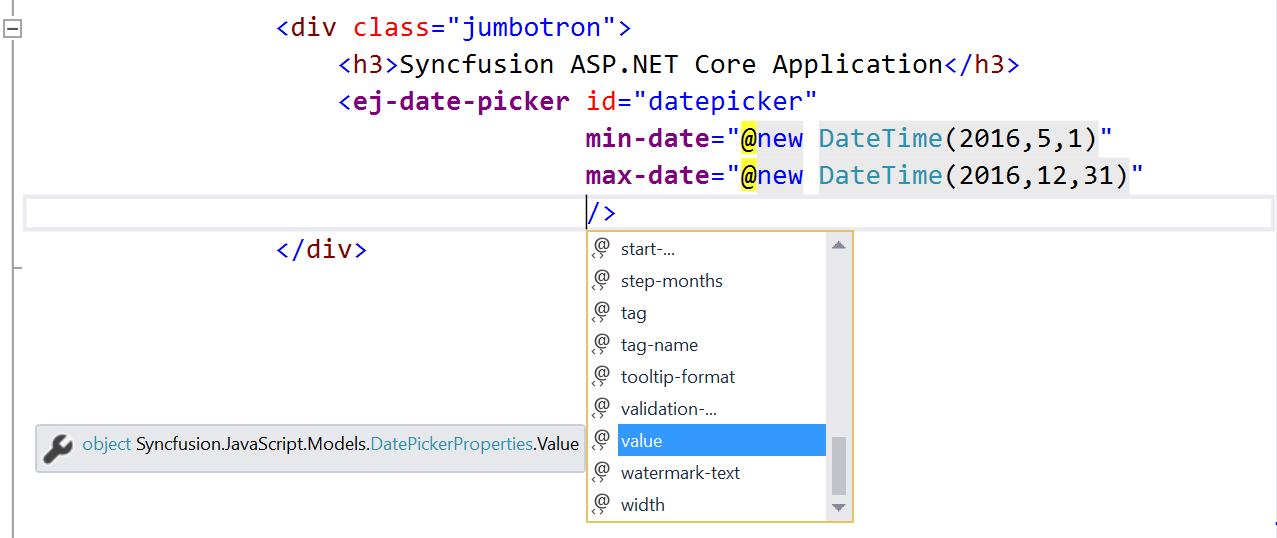
In the above example, minimum & maximum range defined for DatePicker component.
Wiring Client Side Events
Client side events can be wired in the same way as properties. But here all the client side events are grouped into “ClientSideEvents” Action method
-
Specify the client side event name in string format.
For example:
<ej-date-picker id="datepicker" min-date="@new DateTime(2016,5,1)" max-date="@new DateTime(2016,12,31)" value="@DateTime.Now.AddDays(1)" change="datepicker_change" select="datepicker_select"> </ej-date-picker> -
Declare the client side events in Script sections
 @section scripts{

     <script>
         function datepicker_change(args) {
         // event handler
         //args contains entire model of DatePicker to get the value of all properties
         }
         function datepicker_select(args) {
         // event handler
         //args contains entire model of DatePicker to get the value of all properties
         }
     </script>

 }
Invoking methods
Syncfusion JavaScript widget client side methods can be accessed via their client side object. You can access the client side object via jQuery.data() utility method.
-
Create server side component in CSHTML
<ej-date-picker id="datepicker" min-date="@new DateTime(2016,5,1)" max-date="@new DateTime(2016,12,31)" value="@DateTime.Now.AddDays(1)"> </ej-date-picker> -
Access the client side object using jQuery.data() as shown below
<script> $(document).ready(function () { var datepickerObject = $("#datepicker").data("ejDatePicker"); }); </script> -
Access the method from client side object as like properties access as show below
 <script>
     $(document).ready(function () {
     var datepickerObject = $("#datepicker").data("ejDatePicker");
     datepickerObject.disable(); // to disable the datepicker object
     var selectedDate = datepickerObject.getValue(); // to access the selected value
     });
 </script>
Globalization
As per MSDN, “Globalization involves designing and developing a world-ready app that supports localized interfaces and regional data for users in the multiple cultures”.
The ejGlobalize plugin provides options parse numeric, currency and date values using culture file. The assets/scripts/i18n contains more than 350 cultures currently. You can load the particular culture into application using setCulture method.
The Internationalize any of our Syncfusion components/page into particular culture, please follow the below steps
-
Add the reference ej.globalize.min.js script into your application.
NOTE
ej.globalize.min.js library already avails in within ej.web.all.min.js file, therefore it is not necessary to externally refer it in your application if you have referred ej.web.all.min.js already. For version lower than 13.4.0.53 refer jQuery.globalize.min.js along with ej.web.all.min.js
-
Add the required culture file into page which is located in assets/scripts/i18n.
<script src="~/lib/syncfusion-javascript/Scripts/ej/common/ej.globalize.min.js"></script>> <script src="~/lib/syncfusion-javascript/Scripts/ej/i18n/ej.culture.fr-FR.min.js"></script> -
Set the culture by using setCulture() method. Here we used French (fr-FR) culture as current culture
<script> if (typeof (ej.globalize) != 'undefined') { ej.setCulture("fr-FR");//set Culture fr-FR } </script> -
Use format() method to format the object like numbers, date, price etc…
 <script>
     if (typeof (ej.globalize) != 'undefined') {
     console.log("en-US Culture : ");
     ej.setCulture("en-US");  //set Culture. Default culture is en-US
     console.log(ej.globalize.format(53422, 'C')); // Formatting Price
     console.log(ej.globalize.format(new Date(2016,07,15), 'D')); //Formatting date
     console.log(ej.globalize.format(123123.576, 'n2')); // Formatting number

     console.log("fr-FR Culture : ");
     ej.setCulture("fr-FR");//set Culture fr-FR

     console.log(ej.globalize.format(53422, 'C'));// Formatting Price
     console.log(ej.globalize.format(new Date(2016, 07, 15), 'D')); //Formatting date
     console.log(ej.globalize.format(123123.576, 'n2')); // Formatting number
         }
 </script>
Dynamic globalization
Find the steps to globalize the ASP.NET Core application from below
-
Specify the target culture in web.config file under **
** root <system.web> <globalization uiCulture="fr-FR" culture="fr-FR" enableClientBasedCulture="true"/> </system.web> -
Load the culture file based on current culture which is specified in web.config as shown in below
<script src="~/lib/syncfusion-javascript/Scripts/ej/i18n/ej.culture.@(System.Globalization.CultureInfo.CurrentCulture.Name.ToString()).min.js"></script> -
Access the current culture using System.Globalization.CultureInfo and set the culture to ej.globalize widget.
 <script>
     if (typeof (ej.globalize) != 'undefined') {
     ej.setCulture('@System.Threading.Thread.CurrentThread.CurrentCulture.Name');//access the current culture from web.config and set it
     console.log(ej.globalize.format(53422, 'C'));// Formatting Price
     console.log(ej.globalize.format(new Date(2016, 07, 15), 'D')); //Formatting date
     console.log(ej.globalize.format(123123.576, 'n2')); // Formatting number
     }
 </script>
Localization
Localization is the process of customizing an application for given language and region.
Find the steps to configure the Syncfusion Components to particular language from below
-
Specify the target culture in web.config file under **
** root <system.web> <globalization uiCulture="fr-FR" culture="fr-FR" enableClientBasedCulture="true"/> </system.web> -
Load the globalize culture file from i18n folder dynamically using below codes
<script src="~/lib/syncfusion-javascript/Scripts/ej/i18n/ej.culture.@(System.Globalization.CultureInfo.CurrentCulture.Name.ToString()).min.js"></script> -
Download and refer the Syncfusion UI component localized text from ej-global repository.
-
Load the Localized text file from local texts folder as like previous step
<script src="~/lib/syncfusion-javascript/Scripts/ej/localetexts/ej.localetexts.@(System.Globalization.CultureInfo.CurrentCulture.Name.ToString()).js"></script> -
Set the culture to Syncfusion UI components using Locale helper method as shown in below
<ej-date-picker id="datepicker" min-date="@new DateTime(2016,5,1)" max-date="@new DateTime(2016,12,31)" locale="@System.Globalization.CultureInfo.CurrentCulture.Name.ToString()" change="datepicker_change" select="datepicker_select"> </ej-date-picker> -
Compile and execute the application. You can able to see the below output in the browser
Accessibility
All the Essential JS UI widgets provide built-in compliance with the WAI-ARIA specifications. This ensures that the widgets work properly with assistive technologies. WAI-ARIA compliance for the widgets have been achieved by providing proper keyboard navigation support as well as by defining the required ARIA attributes to the DOM elements.
For example, the ejButton widget, when created through JavaScript code will render in the web browser with HTML DOM elements (along with the assigned built-in ARIA attributes) as shown below,
<ej-button id="button11" text="Login" size="Normal" show-rounded-corner="true"/>When the above code is executed on the browser, the button widget will render with the following equivalent HTML DOM attributes created for it,
<button type="Submit" id="button11" class="e-button e-js e-btn-normal e-btn e-select e-widget e-txt e-corner" tabindex="" role="button" aria-describedby="Login" aria-disabled="false">Login</button>Here, aria-describedby is the ARIA property assigned to the Syncfusion button widget so that the button description is notified to the user through assistive technologies.
Likewise, aria-disabled is one of the ARIA state assigned to the button, which states that if none of the button actions are currently available, then the button is said to be in an aria-disabled state.
Client Side Validation
To perform the validation for EJ form controls, please refer following steps.
Step 1: First you need to include jquery.validate (1.15.0) script in your Layout.cshtml page.
Step 2: After adding this script file, you can validate the EJ form controls in same way as you perform the jQuery validation for HTML form elements. But here you have to do some little bit configuration along with that. Let we discuss about it.
If validation gets fail, you have to place the error message in proper position using “errorPlacement” API which is available in default settings of jQuery validation. Also built-in “error” class will be added to corresponding form element. Here you have to specify a custom class with your own style using “errorClass” API. These are the common settings for all of our EJ form controls.
And some of our EJ form controls contains the form values in hidden element for its functionality purpose and these hidden elements are not validated by default. If you want to include the hidden elements in jQuery validation, you have to set “[]” in “ignore” API of “$.validator.setDefaults”. Refer following list to find out the EJ form controls, which contains the value in hidden element.
- Checkbox
- MaskEdit
- NumericTextbox
- CurrencyTextbox
- PercentageTextbox
- RTE
- Dropdownlist
Please refer following code block to configure the above mentioned jQuery validation settings.
    <script>
        $.validator.setDefaults({
           //to validate all fields(hidden also)
           ignore: [],
           //if we don’t set custom class, default “error” class will be added
           errorClass: 'e-validation-error',
           //it specifies the error message display position
           errorPlacement: function (error, element) {
               $(error).insertAfter(element.closest(".e-widget"));
           }
        });
    </script>
Up to 13.4.0.58 version, above specified jQuery validation settings were configured in source level of EJ form controls. Since 14.1.0.41 release onwards, above specified settings has been removed from source and it need to be specified in sample level in order to improve the customization of this validation.
Step 3: After configuring above jQuery validation settings, you have to specify the validation rules and messages using the APIs (“validation-rules”, “validation-message”), which is available in the validation supportable EJ controls.
        @{
            // defining validation rule required
            Dictionary<string, object> rule = new Dictionary<string, object>();
            rule.Add("required",true);
            // defining validation message for required
            Dictionary<string, object> messages = new Dictionary<string, object>();
            messages.Add("required", "Value Required");
        }

        <form>
            <ej-date-picker id="datepicker" validation-rules="rule" validation-message="messages">
            </ej-date-picker>
        <form>