How can I help you?
Getting Started
This section explains briefly about how to create an Uploadbox in your application with JavaScript. Essential JavaScript Uploadbox widget provides support to upload files or photos within your web page. From the following guidelines, you can learn how to upload the files that are used in a Resume Upload scenario. This helps you to restrict some file extensions when you upload the resume in server by using Uploadbox control.
The following screenshot demonstrates the functionality of Uploadbox with the file extension.

In the above screenshot, you can upload a resume that restricts .html and .txt files and allows .png file extension. This helps you to avoid unsupported resume formats getting uploaded in a server.
NOTE
To get upload the file, you should either run this sample in Visual Studio IDE or host in local IIS.
Create Uploadbox widgets
Essential JavaScript Uploadbox widget basically renders built-in features like upload multiple files, and deletes the files from Uploadbox. You can know the status of uploading the file whether it is completed or failed and you can retry uploading the files. You can easily create the Uploadbox widget by using the following steps.
Create an HTML file and add the following template to the HTML file.
<!DOCTYPE html>
<html>
<head>
    <meta name="viewport" content="width=device-width, initial-scale=1.0" charset="utf-8" />
    <!-- Style sheet for default theme (flat azure) -->
    <link href="http://cdn.syncfusion.com/33.1.44/js/web/flat-azure/ej.web.all.min.css" rel="stylesheet" />
    <!--Scripts-->
    <script src="http://cdn.syncfusion.com/js/assets/external/jquery-1.10.2.min.js"></script>
    <script src="http://cdn.syncfusion.com/js/assets/external/jquery.easing.1.3.min.js"></script>
    <script src="http://cdn.syncfusion.com/33.1.44/js/web/ej.web.all.min.js"></script>
    <!--Add custom scripts here -->
</head>
<body>
    <!-- add upload box element here  -->
</body>
</html>
Add input element to render a Uploadbox.
<div id="targetElement">
    <div id="UploadDefault"></div>
</div>
NOTE
ID attribute must be provided for rendering and proper working of uploadbox control.
Add the given styles to display the Uploadbox with margin alignments.
<style>
    #targetElement {
        width: 500px;
        height: 500px;
        margin: 0 auto;
    }

    #UploadDefault {
        margin: 0 auto;
    }
</style>
Create a new handler file (.ashx) and save it as saveFiles.ashx and then copy the following code into it.
Assign this file to the saveUrl property.
SaveFiles.ashx

    public void ProcessRequest(HttpContext context)
    {
        string targetFolder = HttpContext.Current.Server.MapPath("uploadfiles");
        if (!Directory.Exists(targetFolder))
        {
            Directory.CreateDirectory(targetFolder);
        }
        HttpRequest request = context.Request;
        HttpFileCollection uploadedFiles = context.Request.Files;
        if (uploadedFiles != null && uploadedFiles.Count > 0)
        {
            for (int i = 0; i < uploadedFiles.Count; i++)
            {
                if (uploadedFiles[i].FileName != null && uploadedFiles[i].FileName != "")
                {
                    string fileName = uploadedFiles[i].FileName;
                    int index = fileName.LastIndexOf("\\");
                    if (index > -1)
                    {
                        fileName = fileName.Substring(index + 1);
                    }
                    uploadedFiles[i].SaveAs(targetFolder + "\\" + fileName);
                }
            }
        }
    }
Create a new handler file (.ashx) and save it as removeFiles.ashx and then copy the following code into it.
Assign this file to the removeUrl property.
removeFiles.ashx

    public void ProcessRequest(HttpContext context)
    {
        System.Collections.Specialized.NameValueCollection s = context.Request.Params;
        string fileName = s["fileNames"];
        string targetFolder = HttpContext.Current.Server.MapPath("uploadfiles");
        if (Directory.Exists(targetFolder))
        {
            string physicalPath = targetFolder + "\\" + fileName;
            if (System.IO.File.Exists(physicalPath))
            {
                System.IO.File.Delete(physicalPath);
            }
        }
    }
Initialize the script for Uploadbox.
$(function () {
//Declaration
$("#UploadDefault").ejUploadbox({
saveUrl: "saveFiles.ashx",
removeUrl: "removeFiles.ashx"
});
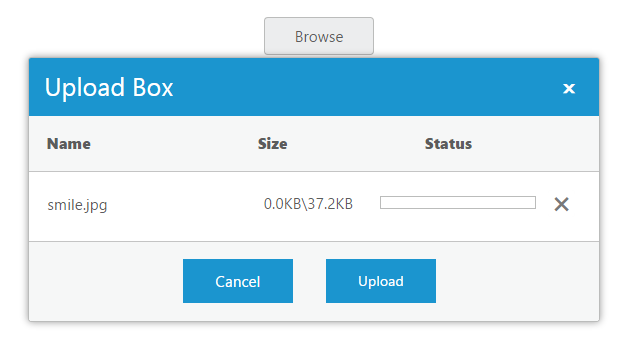
});The following screenshot displays an Uploadbox control.
After you upload the files, the following screen shot is displayed.
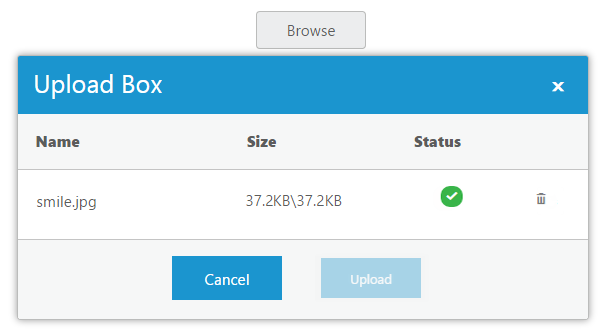
NOTE
The above screenshot displays the Uploadbox control that shows the files are uploaded successfully.
Set Restriction for File Extension
In a real-time scenario, some file extensions are restricted. You can allow files and restrict files by using the following two properties extensionsAllow and extensionsDeny enabled in Uploadbox.
NOTE
The SaveUrl and RemoveUrl are the same as above (see step 4)
Add input elements to create elements for file extension.
NOTE
Add the following input elements and two button elements to give file extensions that should support uploading.
<div id="targetElement">
    <table id="uploadTable">
        <tr>
            <td>
                Extensions:
            </td>
            <td></td>
        </tr>
        <tr>
            <td>
                <input type="text" id="Allow" class="ejinputtext" placeholder="Format" />
                <input type="button" class="e-btn" id="upbutton1" value="Allow" />
            </td>
            <td></td>
        </tr>
        <tr>
            <td>
                <input type="text" id="Deny" class="ejinputtext" placeholder="Format" />
                <input type="button" class="e-btn" id="upbutton2" value="Deny" />
            </td>
            <td>
                <div id="UploadDefault"></div>
            </td>
        </tr>
    </table>
</div>
Add the following code example in script section.
var object;
    $(function () {
        $("#UploadDefault").ejUploadbox({
            saveUrl: "saveFiles.ashx",
            removeUrl: "removeFiles.ashx"
        });
        object = $("#UploadDefault").data("ejUploadbox");
        $("#upbutton1").ejButton({
            click: "allow",
        });
        $("#upbutton2").ejButton({
            click: "deny",
        });
    });
    function allow() {
        object.option('extensionsAllow', $("#Allow").val());
        object.option('extensionsDeny', "");
    }
    function deny() {
        object.option('extensionsAllow', "");
        object.option('extensionsDeny', $("#Deny").val());
    }
Add the given styles to display the Uploadbox with margin alignments.
<style>
    #targetElement {
        width: 520px;
        height: 500px;
        margin: 0 auto;
    }
    #UploadDefault {
        float: right;
    }
    #uploadTable {
        width: 100%;
    }
    #Allow, #Deny {
        width: 150px;
        height: 20px;
        padding: 5px;
    }
</style>
NOTE
You can restrict one or more files at a time by giving it as .html,.txt
The following screenshot displays an Uploadbox control with the file extension.
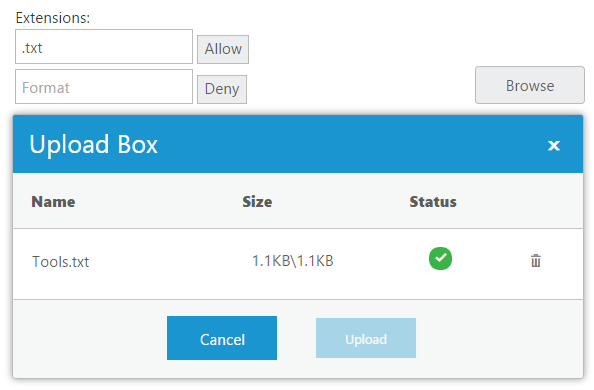
The above screenshot shows the Uploadbox that allows “.png” files and restricts “.txt” and “.html” file formats. You can give the number file formats in both allow and deny textbox elements.
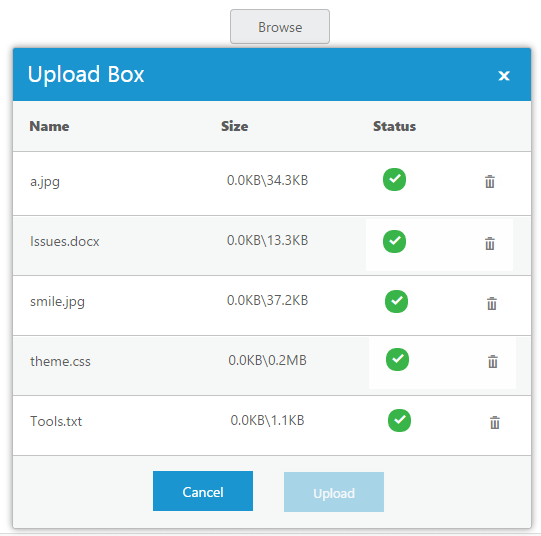
Upload Multiple Files
You can click the Browse button and select the file to upload multiple files in Uploadbox control. You can see the selected files in Uploadbox control and you can upload all the files.
The following screenshot displays an Uploadbox control with multiple files.