How can I help you?
TypeScript for Syncfusion Essential JS
The Essential JavaScript package provides the default type definition file ej.web.all.d.ts to include the support for type-checking while initializing any of the Syncfusion widgets. The important step you need to do is to copy the ej.web.all.d.ts file into your project and then need to refer it in your TypeScript application (app.ts file), so that you will get the intelliSense support and also the compile time type-checking.
You can find the ej.web.all.d.ts file in the following location,
(installed location)\Syncfusion\Essential Studio\33.1.44\JavaScript\assets\typescript
Apart from ej.web.all.d.ts file, it is also necessary to make use of the jquery.d.ts file in your TypeScript application, which can be downloaded from here.
Prerequisites
To work with TypeScript, the below mentioned System requirements are necessary,
- Visual Studio 2012/ 2013
- TypeScript 1.0 – It is available as built-in with Visual Studio 2013, but the Visual Studio 2012 users’ needs to download it from here.
- Microsoft Web Essential (for Visual Studio 2012 / Visual Studio 2013)
Getting Started
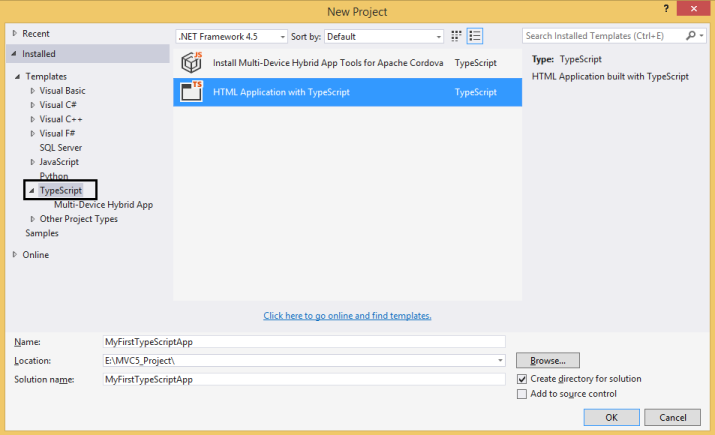
Start Visual Studio 2013 and Create a new TypeScript Application from File|New|Project and save it with a meaningful name as shown below (Select the TypeScript option, which is available by default in the listed Templates on the left side),
Now, you need to add the required Scripts and style sheets into your Project, as shown below – Copy the required Scripts and Content/ejthemes from the installed location on your machine into your new TypeScript application for rendering the Syncfusion widgets (steps for copying the required scripts and stylesheets are described in the manual reference section of the Control Initialization topic),
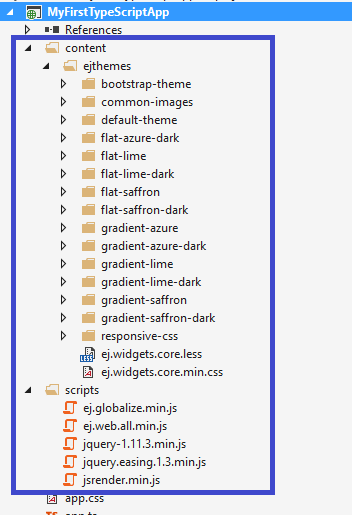
Scripts & Content folder copied into current project
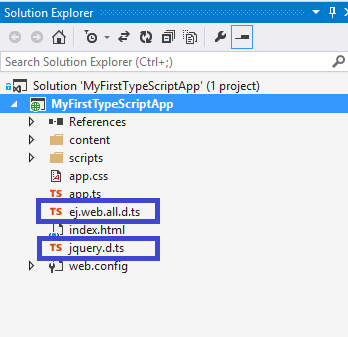
Add the ej.web.all.d.ts and jquery.d.ts type-definition files in your project and refer it in the app.ts file of your project as shown below,
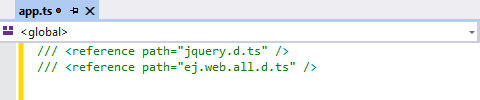
Now, refer these two files within the app.ts file (before referring these files, remove all the unwanted content in that app.ts file) as shown below,
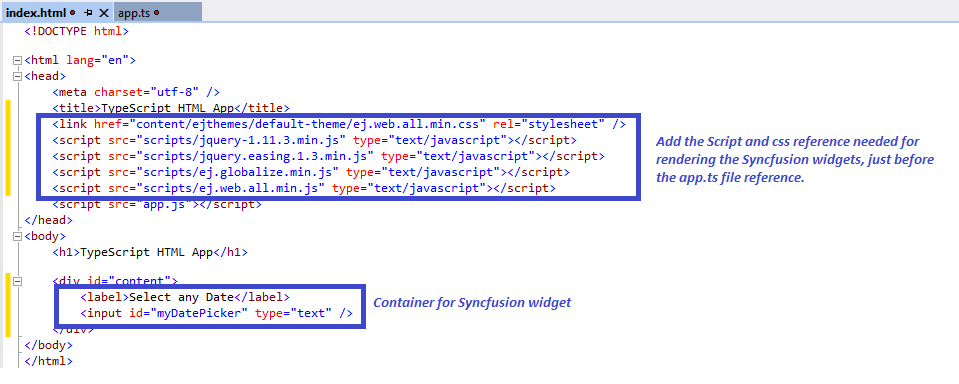
Within the Index.html page, define the container name for the specific Syncfusion widget to be used and also make the other Script and CSS references in this page as shown below,
Now build your application, so that the app.js file is automatically generated and got added to your project (User have nothing to do with this file). Now, whatever code changes that you make in app.ts file will be reflected in app.js file automatically.
Usually, the Syncfusion widget initialization is done within this app.ts file using either of the following two ways.
- Widget Class
- jQuery Interface
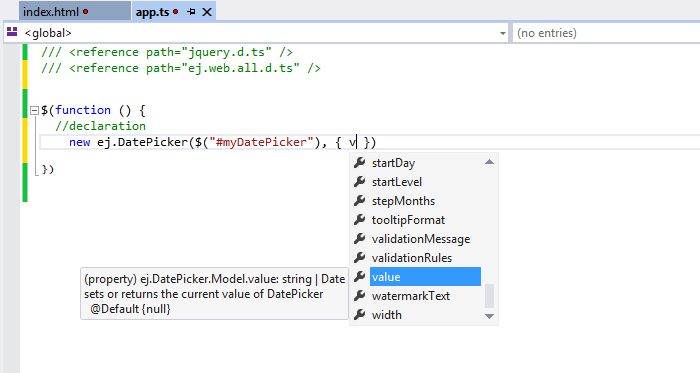
Widget Class
Initialization of Syncfusion widgets can be done through the instance created for the required Widget’s classes.
Initializing DatePicker widget through ej.DatePicker class
Accessing DatePicker methods through the DatePicker instance
jQuery Interface
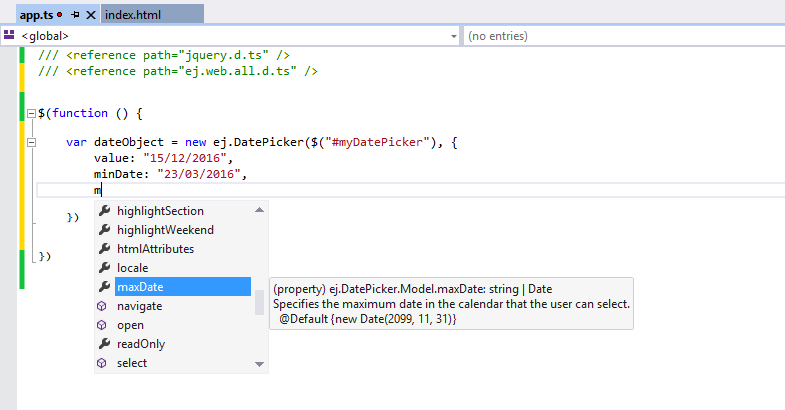
Here, the widgets are initialized using the plug-in name, by passing all the required widget properties to it. The property names can be accessible through intelliSense and while providing input values to those properties – if any wrong data values were assigned to the properties by the user, then it will be automatically notified to the user at the compile time itself with an error message.
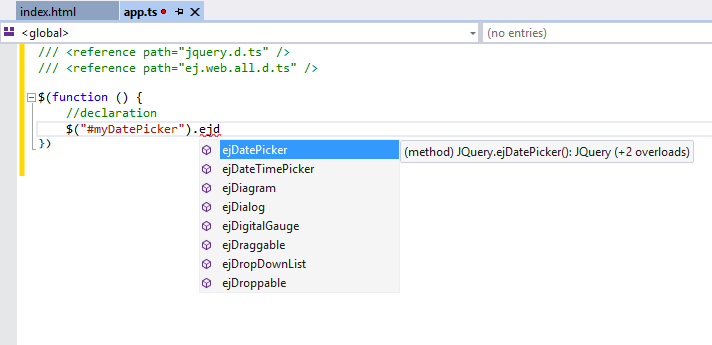
Initializing the DatePicker widget through intelliSense
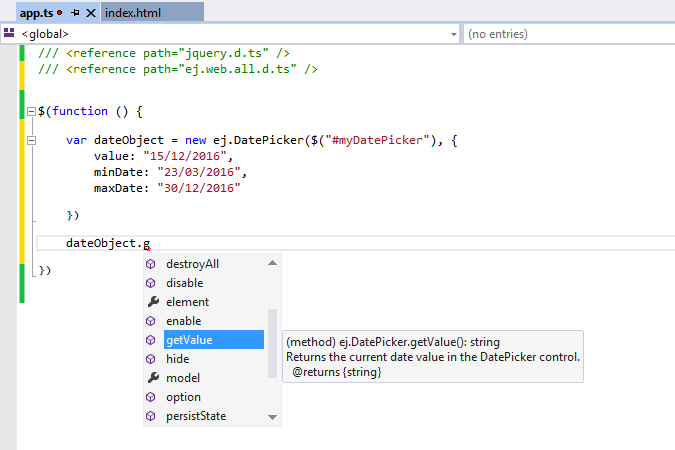
Configuring the DatePicker properties
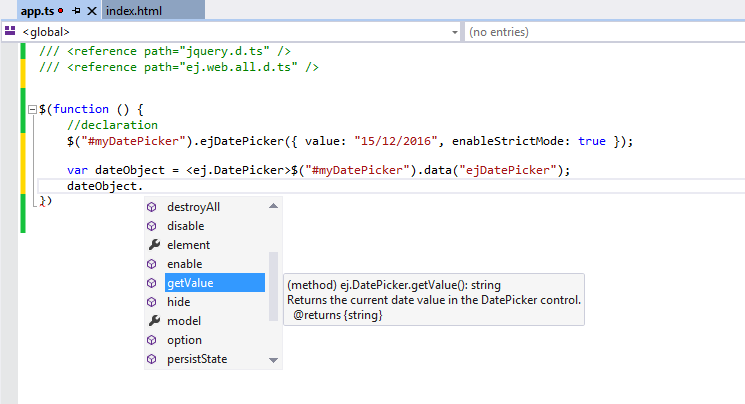
Accessing the DatePicker methods through the widgets’ object