How can I help you?
Control Initialization
The Syncfusion controls can be initialized by using either of the following ways,
- Manual reference of scripts and style sheets in a HTML page.
- Using Syncfusion NuGet Package in Visual Studio for scripts and style sheet reference.
- Using CDN link for script and style sheet reference.
- Using Custom Script Generator (CSG) for specific scripts and style sheet reference.
Manual reference of scripts and style sheets in a HTML page
Maintain the HTML page (where we usually place our control definition code) and also the required scripts & style sheets in a common folder structure.
HTML file creation
Create a basic HTML file as shown below and place it in a separate folder.
<!DOCTYPE html>
  <html xmlns="http://www.w3.org/1999/xhtml">
       <head>
          <title>My first HTML page</title>
       </head>
       <body>
       </body>
  </html>
For example, if you have created a folder named JS_Sample and placed the above HTML file into it, then create two new folders Scripts and Content under that root folder JS_Sample to maintain the scripts and style sheets respectively as shown below,

Adding the required style sheets into Content folder
In the below specified location, you can find all the required web related theme folders. Copy the folder web in to the Content\ej folder of your application.
(installed location)\Syncfusion\Essential Studio\32.2.3\JavaScript\assets\css
NOTE
The common-images folder is needed to be copied into your application mandatorily, as it includes all the common font icons and other images required for the control to render.
Now, Include the specific theme reference to your HTML file by referring the appropriate ej.web.all.min.css file from a particular theme folder (here, we have referred the default-theme), within the head section as shown below,
<!DOCTYPE html>
<html xmlns="http://www.w3.org/1999/xhtml">
    <head>
        <title>My first HTML page</title>
        <link href="Content/ej/web/default-theme/ej.web.all.min.css" rel="stylesheet" />
    </head>
    <body>

    </body>
</html>
Adding the required JavaScript files
Essential JS widgets requires the following external dependent scripts,
- jQuery (version supported from 1.7.1 to 3.1.0)
- jsrender.min.js
NOTE
jQuery.easing external dependency has been removed from version 14.3.0.49 onwards. Kindly include this jQuery.easing dependency for versions lesser than 14.3.0.49 in order to support animation effects.
In the below specified location, you can find the dependent script files. Copy and paste it into the Scripts folder of your application,
(installed location)\Syncfusion\Essential Studio\32.2.3\JavaScript\assets\external
Supported jQuery Versions
The following table provides jQuery compatibility information.
| EJ Versions | Compatible jQuery Versions | ||
|---|---|---|---|
| From | To | From | To |
| 14.3.0.49 | 14.3.0.52 | 1.7.1 | 3.1.0 |
| 13.2.0.29 | 14.2.0.32 | 1.7.1 | 2.2.4 |
| lower version | 13.1.0.30 | 1.7.1 | 2.1.3 |
jQuery-2.1.4, jQuery-3.0.0 support has been given from ejVersion 13.2.0.29, 14.3.0.49 onwards respectively.
Apart from the above dependent scripts, you need to refer the ej.web.all.min.js file, which contains all the JavaScript components script and globalize library packed together in a minified format.
NOTE
Syncfusion recommends not to use this file in the production environment as it contains all the controls and size will be huge. Please use our Custom Script Generator to generate only the needed scripts for the controls you have used in your application before going into production.
Copy the ej.web.all.min.js file into the Scripts\ej folder.
(installed location)\ Syncfusion\Essential Studio\32.2.3\JavaScript\assets\scripts\web

Script files copied into the Sample Project
Include the script references in the head section of your HTML page as shown below,
<!DOCTYPE html>
<html xmlns="http://www.w3.org/1999/xhtml">
  <head>
    <title>My first HTML page</title>
    <link href="Content/ej/web/default-theme/ej.web.all.min.css" rel="stylesheet" />
    <script src="Scripts/jquery-1.10.2.min.js"></script>
    <script src="Scripts/jsrender.min.js"></script>
    <script src="Scripts/ej/ej.web.all.min.js"></script>
  </head>
  <body>
  </body>
</html>
NOTE
The order of the reference to the script files made in the above section should be maintained in the same manner as mentioned above.
Adding Syncfusion Widget into your HTML page
Add the <input> element within the <body> section, which acts as a container for ejDatePicker widget to render and then initialize the ejDatePicker widget within the script section as shown below,
<!DOCTYPE html>
<html xmlns="http://www.w3.org/1999/xhtml">
    <head>
        <title>My first HTML page</title>
        <link href="Content/ej/web/default-theme/ej.web.all.min.css" rel="stylesheet" />
        <script src="Scripts/jquery-1.10.2.min.js"></script>
        <script src="Scripts/jsrender.min.js"></script>
        <script src="Scripts/ej/ej.web.all.min.js"></script>
    </head>
    <body>
        <!--Container for ejDatePicker widget-->
        <input id="startDate" type="text" />

        <script type="text/javascript">
            $(function () {
                // initialization of ejDatePicker control
                $("#startDate").ejDatePicker();
            });
        </script>
    </body>
</html>
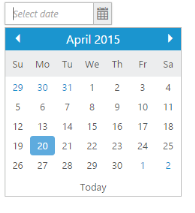
Open your HTML page in the web browser and the screen will display the DatePicker widget as shown below,
Using different jquery versions into your HTML page
If the different versions of jQuery is used into your HTML page $.noConflict method is used to resolve the conflict.
The following code example illustrates this for ej controls with different version of jquery is used.
<!DOCTYPE html>
<html xmlns="http://www.w3.org/1999/xhtml">
    <head>
        <title>My first HTML page</title>
        <link href="Content/ej/web/default-theme/ej.web.all.min.css" rel="stylesheet" />
        <script src="Scripts/jquery-1.5.1.min.js"></script>
        <script src="Scripts/jquery-1.7.1.min.js"></script>
        <script src="Scripts/jsrender.min.js"></script>
        <script src="Scripts/ej/ej.web.all.min.js"></script>
        <script>
           var $jqueryNew = jQuery.noConflict(true); // $jqueryNew refers the version 1.7.1
        </script>
    </head>
    <body>
        <!--Container for ejDatePicker widget-->
        <input id="startDate" type="text" />

<script type="text/javascript">

    (function($){
            $jqueryNew("#startDate").ejDatePicker();
      })($jqueryNew);

</script>
</body>
</html>
The following output is displayed as a result of the above code example.

Using Syncfusion NuGet Package in Visual Studio for Scripts and style sheet reference
Using the NuGet Package method in Visual Studio automates the process of copying the required Script files and style sheets directly into your application.
Configuring and Installing NuGet into your project
Configure the Syncfusion NuGet Package for Essential JS in Visual Studio initially, before proceeding with the following installation procedure.
Right click on your project (for ex, ASP.NET Empty Web application) in the Solution explorer and navigate to Manage NuGet Packages|Online|Syncfusion NuGet Packages, which will display the list of available packages in it, as shown below.
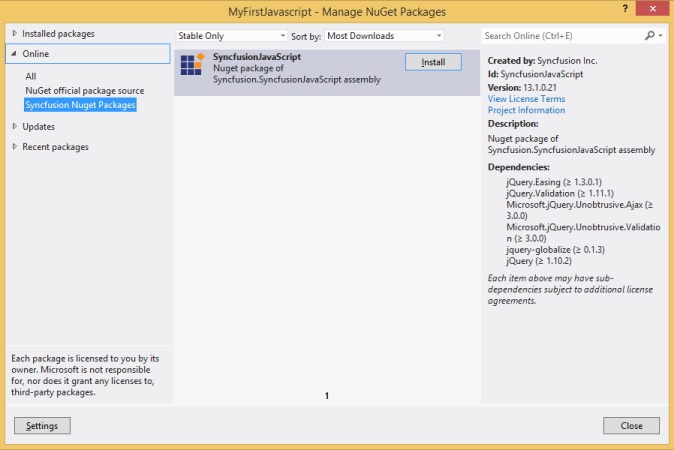
Install the SyncfusionJavaScript package shown in the above image.
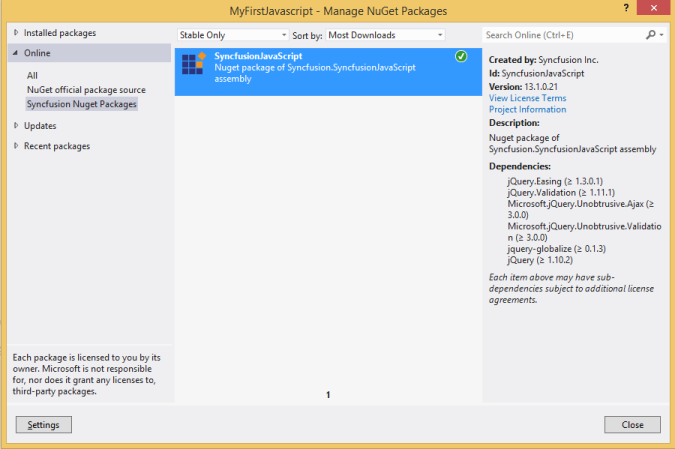
The below image depicts that the NuGet Packages for JavaScript has been successfully installed into your project.
Adding HTML page in your application
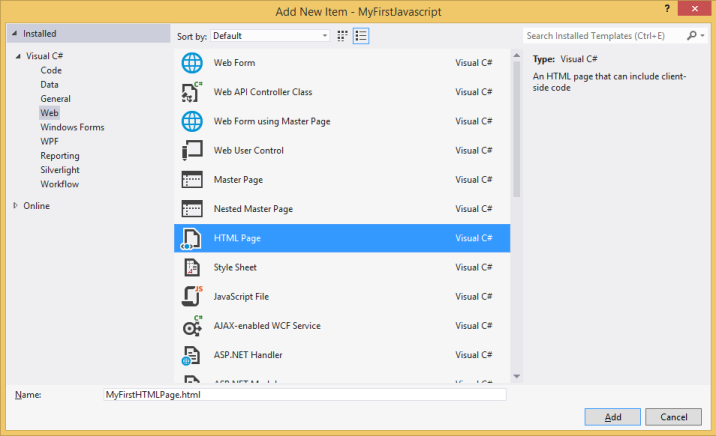
Right click on your Project in Solution Explorer. Select Add|New Item|HTML Page and add it to your application. The blank HTML page will be added.
Adding reference to the required style sheets
Since the style sheets are automatically loaded into the Content folder of your application, include the specific theme reference to the newly created HTML file by referring the appropriate ej.web.all.min.css file from a particular theme folder (here, we have referred the default-theme and you can use whatever theme you need in the below highlighted code), within the head section as shown below,
<!DOCTYPE html>
<html xmlns="http://www.w3.org/1999/xhtml">
    <head>
        <title>My first HTML page</title>
        <link href="Content/ej/web/default-theme/ej.web.all.min.css" rel="stylesheet" />
    </head>
    <body>
    </body>
</html>
Adding reference to the required JavaScript files
Include the reference to the required JavaScript files in your HTML page as shown below,
<!DOCTYPE html>
<html xmlns="http://www.w3.org/1999/xhtml">
<head>
    <title>My first HTML page</title>
    <link href="Content/ej/web/default-theme/ej.web.all.min.css" rel="stylesheet" />
    <script src="Scripts/jquery-1.10.2.min.js"></script>
    <script src="Scripts/jsrender.min.js"></script>
    <script src="Scripts/ej/ej.web.all.min.js"></script>
</head>
<body>
</body>
</html>
Adding Syncfusion Widget into your HTML page
Finally, to add the Syncfusion datepicker widget into the HTML page, refer the same steps mentioned here in the manual method.
Using CDN link for script and style sheet reference
With this method, you can skip the process of copying and pasting the required script and style sheets into your application and can directly provide the CDN link references for it.
HTML file creation
Create a basic HTML file and directly refer all the required CDN links for the scripts and style sheets within the <head> section as shown below,
<!DOCTYPE html>
<html xmlns="http://www.w3.org/1999/xhtml">
    <head>
        <title>My first HTML page</title>
        <link href="http://cdn.syncfusion.com/32.2.3/js/web/flat-azure/ej.web.all.min.css" rel="stylesheet" />
        <script src="http://cdn.syncfusion.com/js/assets/external/jquery-1.10.2.min.js"></script>
        <script src="http://cdn.syncfusion.com/js/assets/external/jsrender.min.js"></script>
        <script src="http://cdn.syncfusion.com/32.2.3/js/web/ej.web.all.min.js"></script>
    </head>
    <body>
    </body>
</html>
Adding Syncfusion Widget into your HTML page
Add the <input> element within the <body> section, which acts as a container for ejDatePicker widget to render and then initialize the ejDatePicker widget within the script section as shown below,
<!DOCTYPE html>
<html xmlns="http://www.w3.org/1999/xhtml">
    <head>
        <title>My first HTML page</title>
        <link href="http://cdn.syncfusion.com/32.2.3/js/web/flat-azure/ej.web.all.min.css" rel="stylesheet" />
        <script src="http://cdn.syncfusion.com/js/assets/external/jquery-1.10.2.min.js"></script>
        <script src="http://cdn.syncfusion.com/js/assets/external/jsrender.min.js"></script>
        <script src="http://cdn.syncfusion.com/32.2.3/js/web/ej.web.all.min.js"></script>
    </head>
    <body>
        <!--Container for ejDatePicker widget-->
        <input id="startDate" type="text" />

        <script type="text/javascript">
            $(function () {
                // initialization of ejDatePicker control
                $("#startDate").ejDatePicker();
            });
        </script>
    </body>
</html>
Open your HTML page in the web browser and the screen will display the DatePicker widget as shown below,
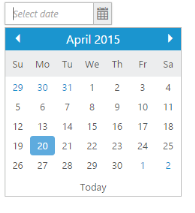
The DatePicker control is rendered with its default appearance now. You can then use its various available properties to set its value and also make use of its available events to trigger when necessary.
Using Custom Script Generator (CSG) for specific scripts and style sheet reference
With this tool, you can create a single file that packs only the required scripts and css files. Both minified and unminified versions of the scripts and css can be downloaded from this tool.
For more reference on usage of this tool, please click here.
After downloading the necessary files from this tool, the folder structure will look like below and you need to create a HTML file inside it.

The folder will contain the scripts and content folder by default which will hold the required scripts and css respectively. Inside the HTML file, refer the scripts and css from the downloaded folders.
Refer this section for css reference inside the HTML file and this section for script reference inside the HTML file. After referring the scripts and css files, refer this section to create the Syncfusion widget.