How can I help you?
Introduction of JavaScript Electron
Introduction
Electron (Previously known as Atom Shell) is used create a cross platform desktop application for different OS like Linux, Windows and OS X by using JavaScript and able to access platform specific native API’s.
Electron uses Chromium browser and Node.js (Building block of Electron) and we can able to build the app with HTML, CSS, and JavaScript.
For more information, refer the official electron page in this link.
Prerequisites and Compatibility
Prerequisites
While running the electron it requiresNode.js(which includesnpm) on your system.
Compatibility
OS X
Only 64bit binaries are provided for OS X, and the minimum OS X version supported is OS X 10.9.
Windows
Electron supports Windows 7 and later, older OS versions are not supported.
Both x86 and amd64 (x64) binaries are provided for Windows and it is not supported in the ARM version of Windows.
Using Syncfusion Essential JS controls with Electron Framework:
This step by step guide is used to create a combination of Essential JS UI controls with Electron Framework.
Steps to add the sample and run the Application
Follow the below steps and enter the below commands using command prompt window.
Step1:
To clone and run this repository needGit and Node.js(which comes withnpm) installed on your system, then enter the below command using terminal (Mac OS) or Command Prompt (Windows).
NOTE
For Mac OS run the command in administrator mode with $sudo as prefix
- Clone the Quick Start repository
$ git clone <a href=https://github.com/electron/electron-quick-start>https://github.com/electron/electron-quick-start</a> 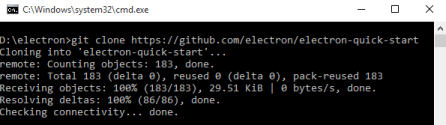
- Go into the repository
$ cd electron-quick-start 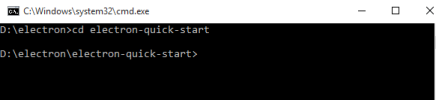
- Install the dependencies
$ npm install 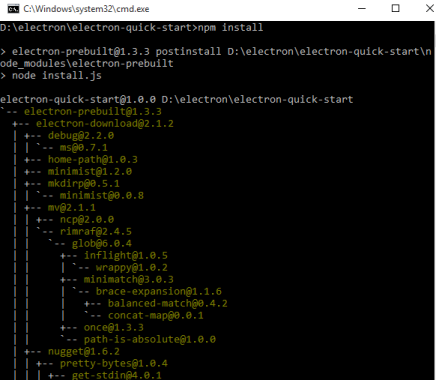
NOTE
Learn more about Electron and its API in the documentation.
Step2:
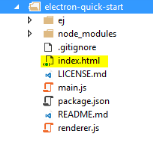
Add the Syncfusion JS and CSS file reference in index.html file as mentioned on this link, Refer the index.html location in the below image.
NOTE
When refer jQuery reference add the below_ code in head tag.
window.nodeRequire = require;
delete window.exports;
delete window.module;
Step3:
Add the below sample code in index.html file to render Accordion control.
<div id="accordion" style="margin: auto;">
        <h3>ASP.NET</h3>
        <div>Microsoft ASP.NET is a set of technologies in the Microsoft .NET Framework for building Web applications and XML Web services. ASP.NET pages execute on the server and generate markup such as HTML, WML, or XML that is sent to a desktop or mobile browser. </div>
        <h3>ASP.NET MVC</h3>
        <div>The Model-View-Controller (MVC) architectural pattern separates an application into three main components: the model, the view, and the controller. The ASP.NET MVC Framework provides an alternative to the ASP.NET Web Forms pattern for creating Web applications. </div>
        <h3>JavaScript</h3>
        <div>JavaScript (JS) is an interpreted computer programming language. It was originally implemented as part of web browsers so that client-side scripts could interact with the user, control the browser, communicate asynchronously, and alter the document content that was displayed. </div>
    </div>
Initialize Accordion in the script.
$(function () {
       // document ready
       // Initialize Accordion control creation.
       $("#accordion").ejAccordion({ width: "500px" });
       });
Step4:
Run the Electron Application using the below command.
$ npm start 
Now see the created Electron Application as below.
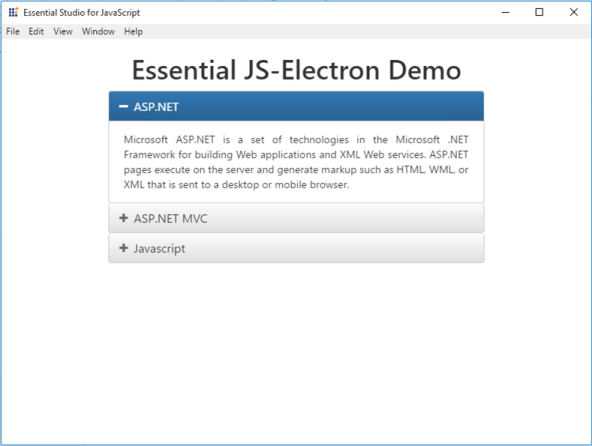
Steps to use Electron Packager
Bundle the Electron based application and make it as executable file by usingElectron PackagerAfter creating the application as mentioned above, use the below steps to package the application.
Electron Packager for Windows
Use the below CLI to create Electron package for windows.
- Install Electron packager
$ npm install electron-packager –g- Package the application
$ electron-packager ./ JS_Electron --platform=win32 --arch=ia32 ./JS_ElectronNow JS_Electron-win32-ia32 folder is created. Open the mentioned folder and JS_Electron.exe is the runnable Application file for the created Electron project.
Electron Packager for OS X
Use the below CLI to create Electron package in Mac OS(OS X).
- Install npm
sudo npm install- Install electron packager
sudo npm install electron-packager -g- Package the application
sudo electron-packager ./ JS_Electron --platform=darwin ./JS_ElectronNow the Electron Application is created in the mentioned folder JS_Electron-darwin-x64.