Ionic3
7 Jun 20236 minutes to read
Introduction
The Ionic 3 is an open source Mobile SDK for developing native and progressive web apps and that it works with newer version of Angular4 and with a newer version of typescript.
Prerequisites and Compatibility
Prerequisites
While running the ionic it requires Node.js (which includes npm) on your system.
Install Ionic
First install the latest Cordova and Ionic command-line tools in your terminal. Follow the Windows and Mac guides to install required tools for development.
Windows
npm install -g cordova ionicMac
$ sudo npm install -g cordova ionicGetting started
Creating a basic app with Ionic 3.
To create an Ionic 3 latest project with Syncfusion components, we need to follow the below steps.
Step 1: Update to latest version of the ionic CLI. Run the below commands.
Windows
npm uninstall -g ionicnpm install -g ionic@latestMac
sudo npm install -g ionic@latestStep 2: Need to run the below command to create an ionic 3 default project.
ionic start ionic3-syncfusion tabsNote: ionic3-syncfusion is project name and tabs is the project template.
Step 3: Install our angular 4 source from npm packages.
npm install ej-angular2 --saveStep 4: Include our component common module name(EJAngular2Module) in app.module.ts file in ionic 3 project.
import { NgModule, ErrorHandler } from '@angular/core';
import { BrowserModule } from '@angular/platform-browser';
import { IonicApp, IonicModule, IonicErrorHandler } from 'ionic-angular';
import { MyApp } from './app.component';

import { AboutPage } from '../pages/about/about';
import { ContactPage } from '../pages/contact/contact';
import { HomePage } from '../pages/home/home';
import { TabsPage } from '../pages/tabs/tabs';
import {EJAngular2Module } from 'ej-angular2';

import { StatusBar } from '@ionic-native/status-bar';
import { SplashScreen } from '@ionic-native/splash-screen';

@NgModule({
  declarations: [
    MyApp,
    AboutPage,
    ContactPage,
    HomePage,
    TabsPage
  ],
  imports: [
    BrowserModule,
      IonicModule.forRoot(MyApp), EJAngular2Module.forRoot()
  ],
  bootstrap: [IonicApp],
  entryComponents: [
    MyApp,
    AboutPage,
    ContactPage,
    HomePage,
    TabsPage
  ],
  providers: [
    StatusBar,
    SplashScreen,
    {provide: ErrorHandler, useClass: IonicErrorHandler}
  ]
})
export class AppModule {}
Step 5: Enter the below command to load the Syncfusion scripts and CSS through npm node modules.
npm install syncfusion-javascriptThen refer our scripts and CSS files in index.html file like below from the installed npm Syncfusion location.
<link href="../node_modules/syncfusion-javascript/Content/ej/web/default-theme/ej.web.all.min.css" rel="stylesheet" />
   <script src="../node_modules/jquery/dist/jquery.min.js"></script>
    <script src="../node_modules/jsrender/jsrender.min.js"></script>
<script src="../node_modules/syncfusion-javascript/Scripts/ej/web/ej.web.all.min.js"></script>Note: If you don’t want to install the references from npm, you can simply use the CDN links or local reference to refer Syncfusion references.
Step 6: Now you can initialize our component in the html,ts file.
<ej-grid [allowPaging]="true" [allowSorting]="true" [dataSource]="gridData">
    <e-columns>
        <e-column field="OrderID" headerText="Order ID" width="75" textAlign="right"></e-column>
        <e-column field="CustomerID" headerText="Customer ID" width="80"></e-column>
        <e-column field="EmployeeID" headerText="Employee ID" width="75" textAlign="right"></e-column>
        <e-column field="Freight" width="75" format="{0:C}" textAlign="right"></e-column>
        <e-column field="OrderDate" headerText="Order Date" width="80" format="{0:MM/dd/yyyy}" textAlign="right"></e-column>
        <e-column field="ShipCity" headerText="Ship City" width="110"></e-column>
    </e-columns>
</ej-grid>import { Component } from '@angular/core';
import { Platform } from 'ionic-angular';
import { StatusBar } from '@ionic-native/status-bar';
import { SplashScreen } from '@ionic-native/splash-screen';
import { NorthwindService } from '../services/northwind.service';
import { TabsPage } from '../pages/tabs/tabs';
@Component({
templateUrl: 'app.html',
selector: 'ej-app',
styles: ['.e-grid{position:inherit !important'],
providers: [NorthwindService]
})
export class MyApp {
public gridData: any;
public dataManager: any;
public value: any;
constructor(private service: NorthwindService) {
this.gridData = service.getOrders();
this.value = new Date();
}
}Step 7: Finally run the below command to run the ionic 3 project.
ionic serveQuick start application
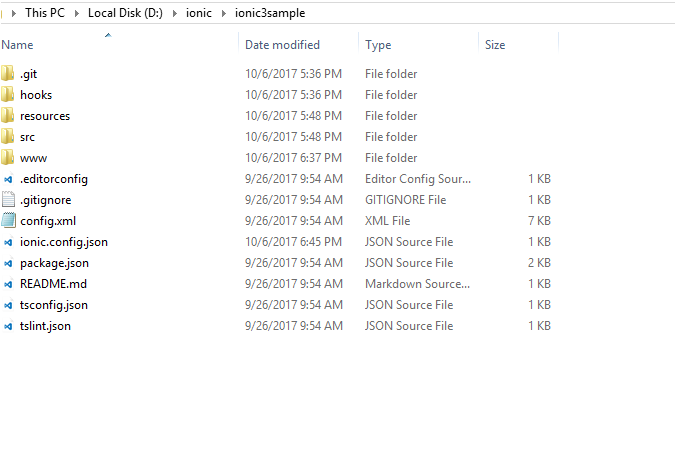
Get Syncfusion blank ionic3 project from this link. Then extract the project, folder holds following files

Now open command prompt and navigate to this ionic project location, then type npm command for installing node_modules in project
npm install