How can I help you?
Creating a Syncfusion® .NET MAUI application
29 May 20253 minutes to read
Syncfusion® provides a .NET MAUI Project Template for building applications with Syncfusion® components in Visual Studio Code. This template includes all the necessary components, NuGet references, namespaces, and code snippets needed for development. It also features a project wizard that streamlines the process of creating .NET MAUI applications using Syncfusion® components.
NOTE
Syncfusion® Visual Studio Code project templates now support .NET MAUI project templates starting from
v25.1.35.
The following steps below will assist you to create your Syncfusion® .NET MAUI Application through Visual Studio Code:
-
To create a Syncfusion® .NET MAUI application in Visual Studio Code, open the command palette by pressing Ctrl+Shift+P. Then, search for Syncfusion® in the Visual Studio Code palette to access the templates provided by Syncfusion®.

-
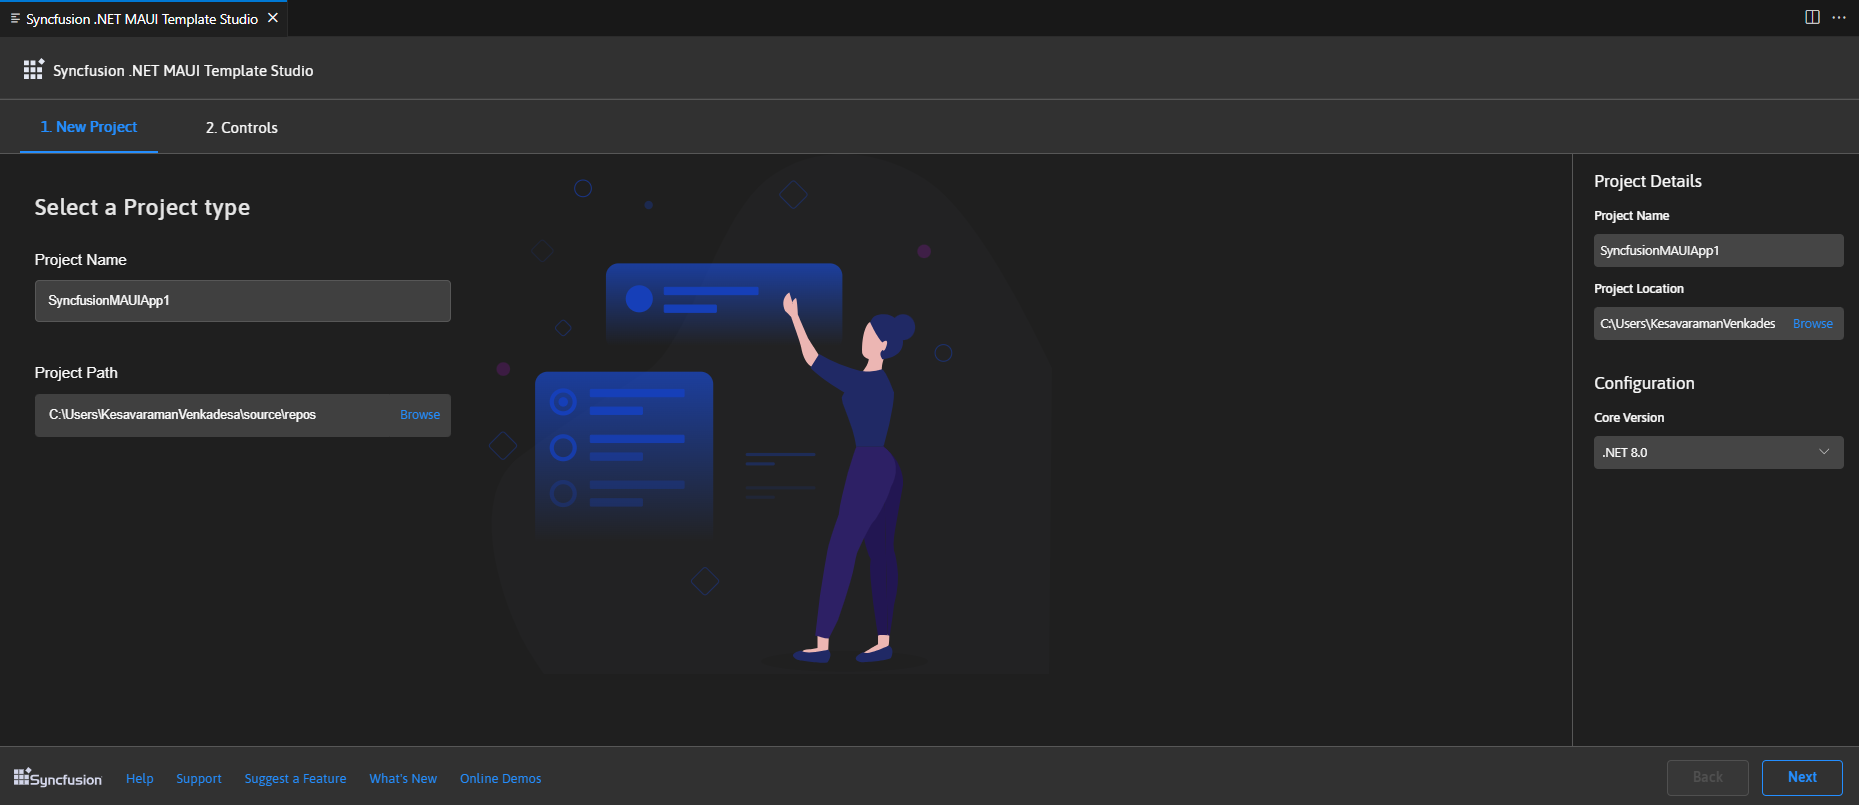
Select Syncfusion® .NET MAUI Template Studio: Launch and press Enter. This will open the Template Studio wizard for configuring your Syncfusion® .NET MAUI application. Enter a unique Project Name to identify your app, then specify the Project Location—the directory where your project files will be saved. Make sure the selected location meets your project requirements.
-
To select a component, click the Next button or the Components tab. From there, you can add the desired Syncfusion® .NET MAUI components to your application. Simply choose the necessary Syncfusion® .NET MAUI components for your project.
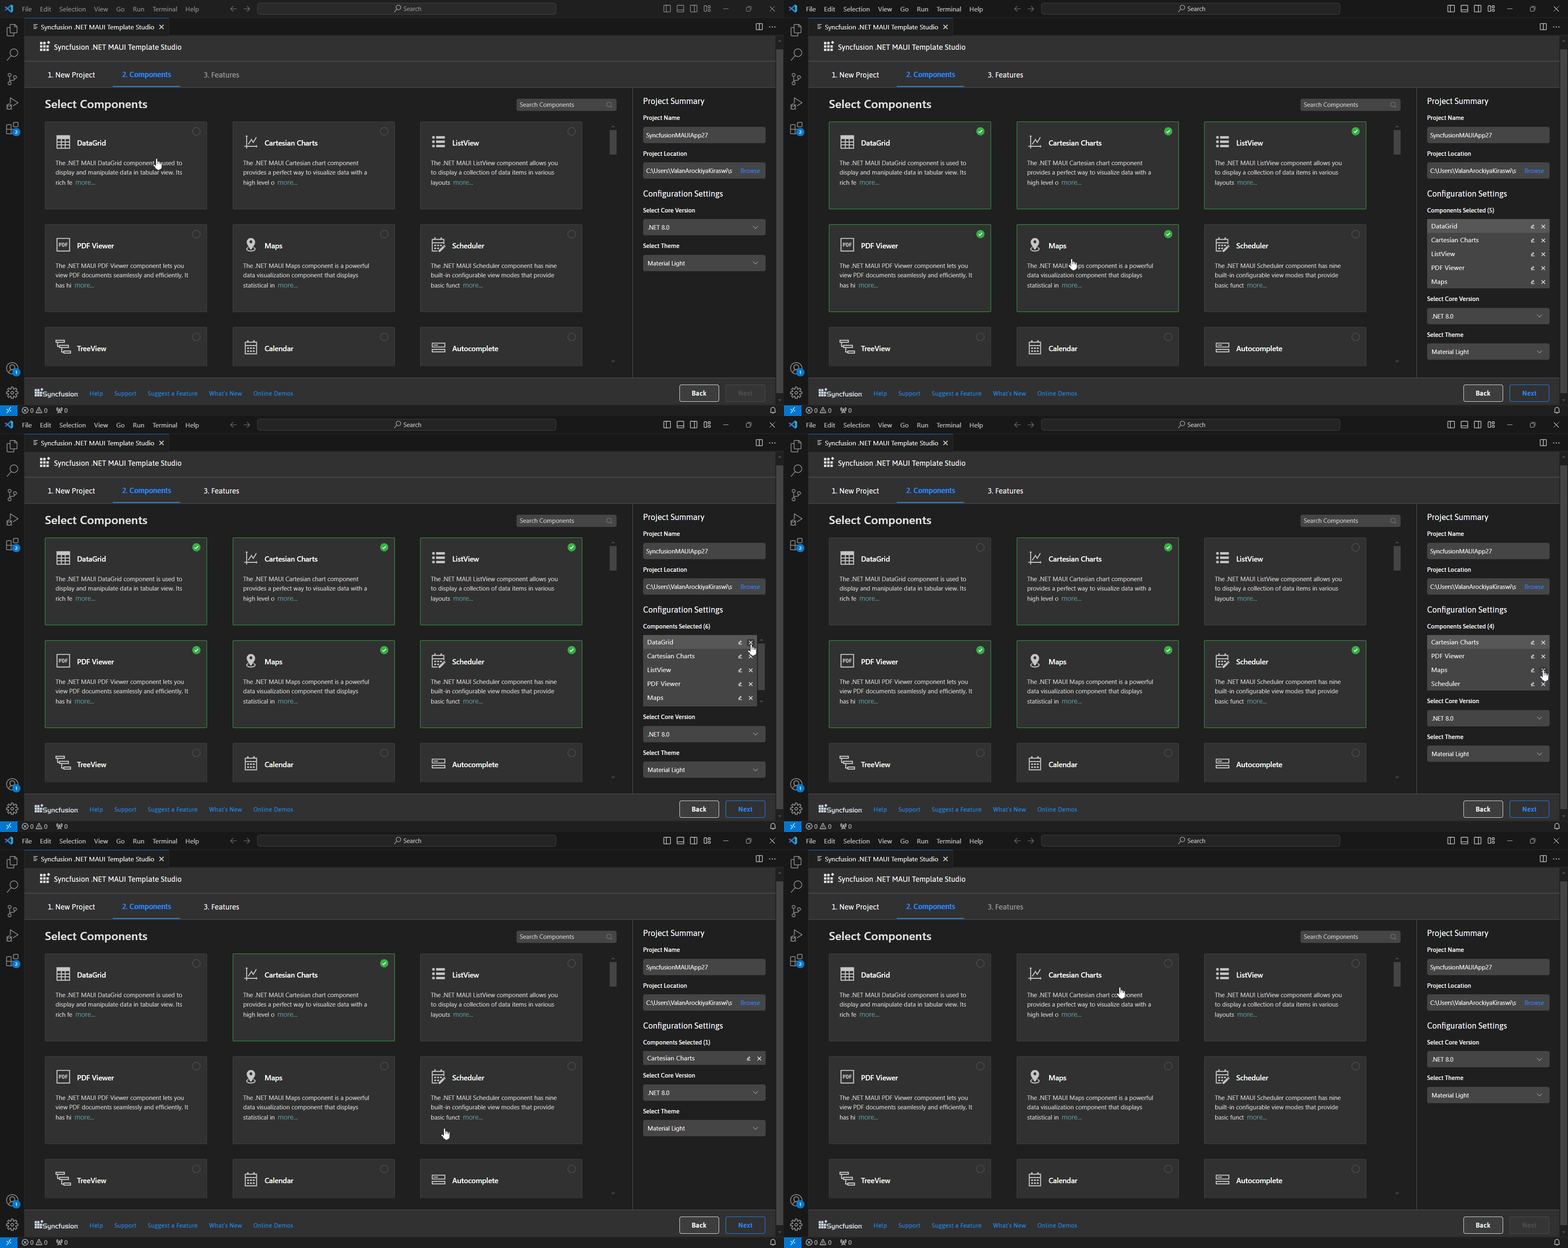
Select the required component(s) by clicking on the corresponding checkbox.
Choose the required component(s) by clicking the corresponding component box.
To unselect the added component(s), use either one of the following options:
Option 1: Click the corresponding selected component checkbox.
Option 2: Click ‘x’ button for the corresponding component in the component list from Components Selected.
NOTE
Note: Select at least one control to enable the Features tab.
-
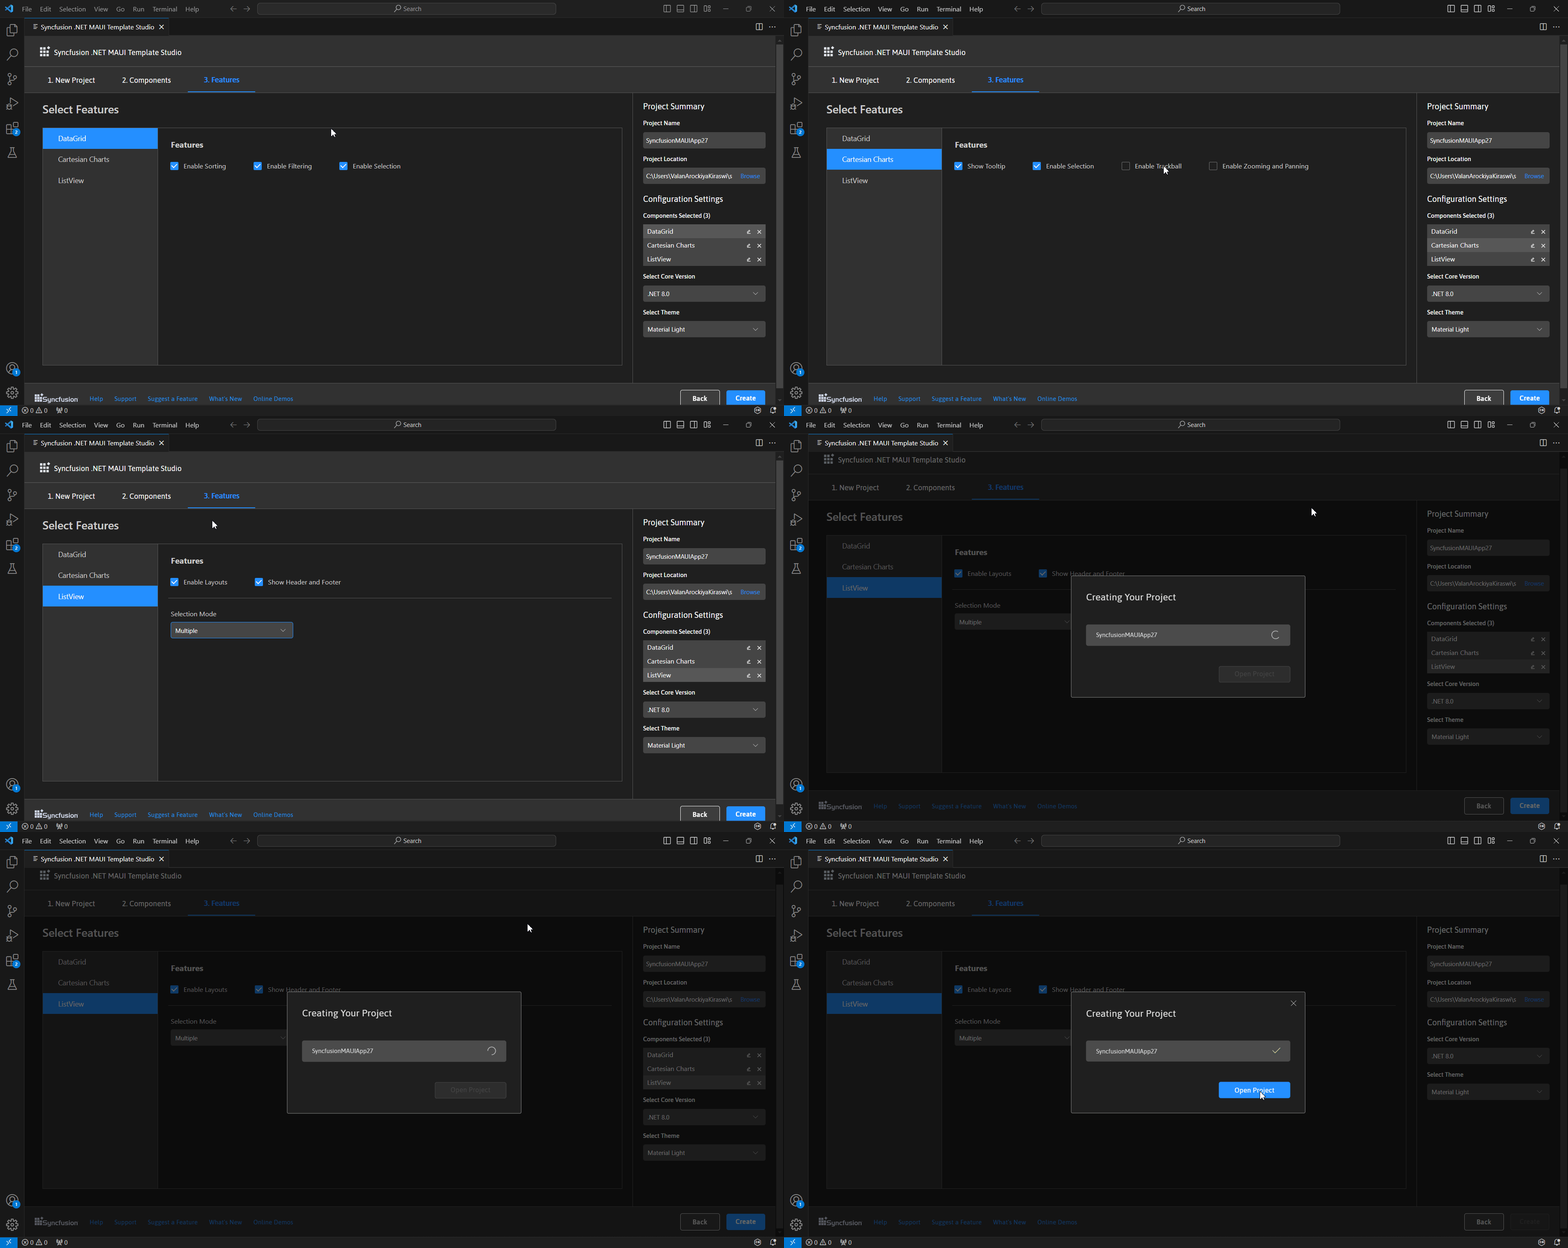
The features for the selected controls will be displayed when you click the Next button or the Features tab. From there, you can select or unselect the desired features for your selected components.
Project Summary section
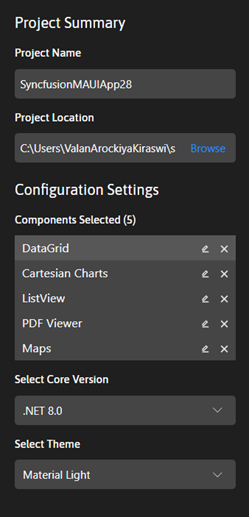
In the Project Summary section, you can customize the Project Name to uniquely identify your application and specify the Project Location, which is the directory where your project files will be saved. You can also adjust the Configuration Settings by removing one or more controls from the Components Selected list. Additionally, choose your preferred Core Version (.NET 8.0 or .NET 9.0) and Theme (Material Light or Material Dark).
-
Click the Create button to generate the Syncfusion® .NET MAUI application. The created application includes the necessary Syncfusion® NuGet packages and rendering code for the selected Syncfusion®components.
-
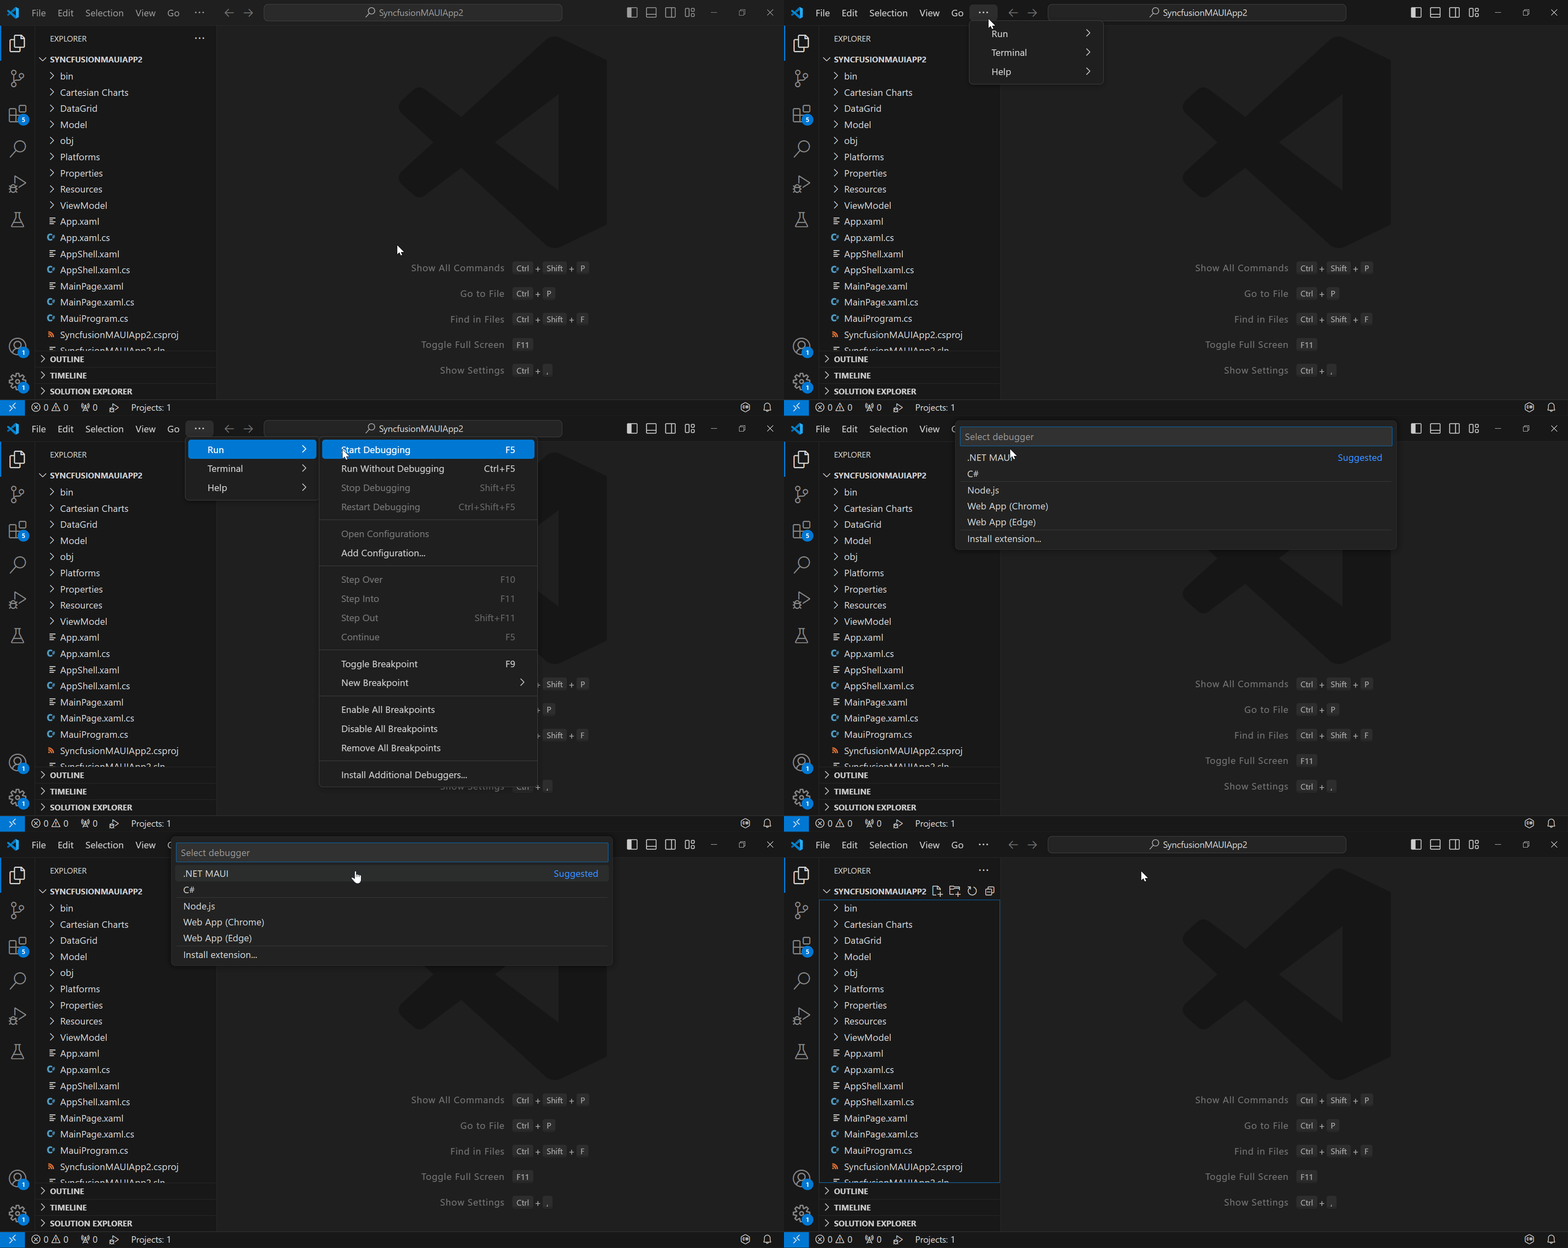
To view the Syncfusion® components in your application, run it by pressing F5 or selecting Run > Start Debugging. Then, search for .NET MAUI and select it to launch the application.
NOTE
Note: If the .NET MAUI extension is a preview version, the debugger will be listed as .NET MAUI. However, if the .NET MAUI extension is stable, this configuration will be replaced with C#.
-
The Syncfusion® .NET MAUI application is configured with the latest NuGet package versions, namespaces, and component rendering code for Syncfusion® components.
-
If you installed the trial setup or NuGet packages from nuget.org you must register the Syncfusion® license key to your application since Syncfusion® introduced the licensing system from 2018 Volume 2 (v16.2.0.41) Essential Studio® release. Navigate to the help topic to generate and register the Syncfusion® license key to your application. Refer to this blog post for understanding the licensing changes introduced in Essential Studio®.