Add Syncfusion Components to the WPF Application
18 Nov 20183 minutes to read
Syncfusion® WPF Item Templates let you add Syncfusion® WPF components to a WPF application along with the required Syncfusion® references.
The Syncfusion® WPF item templates are available from Syncfusion Essential Studio release
v19.1.0.54.
Prerequisites
Check whether the WPF Extensions - Syncfusion® are installed in the Visual Studio Extension Manager. In Visual Studio 2019 or later, go to Extensions -> Manage Extensions -> Installed. In Visual Studio 2017 or lower, go to Tools -> Extensions and Updates -> Installed. If this extension is not installed, follow the steps from the download and installation help topic to install it.
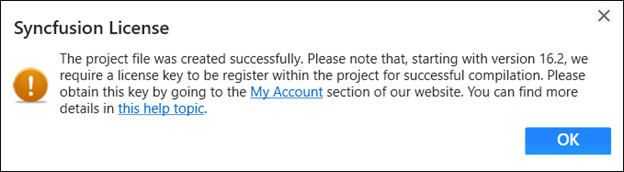
If you installed the trial setup or NuGet packages, a Syncfusion® license registration message is displayed. Syncfusion® introduced the licensing system in 2018 Volume 2 (v16.2.0.41) of the Essential Studio® release. For more information, refer to the licensing help topic.
Add Components using Syncfusion® Item Template
The following steps will guide you to add the Syncfusion® WPF components to your Visual Studio WPF application.
-
Open a new or existing WPF application. Any standard WPF project (targeting .NET Framework, .NET Core, or .NET 5+) is supported.
-
Launch the Add Syncfusion® Item wizard using one of the following options:
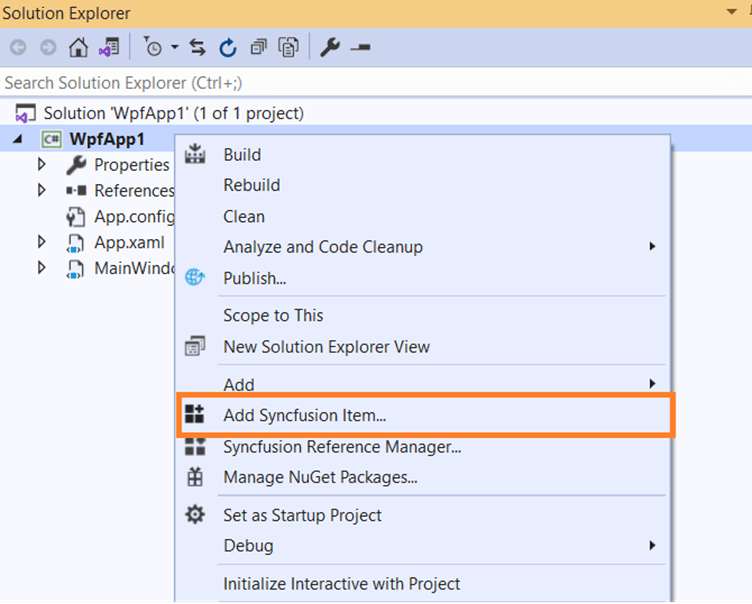
Option 1: From the Solution Explorer, right-click the WPF application and choose Add Syncfusion® Item….
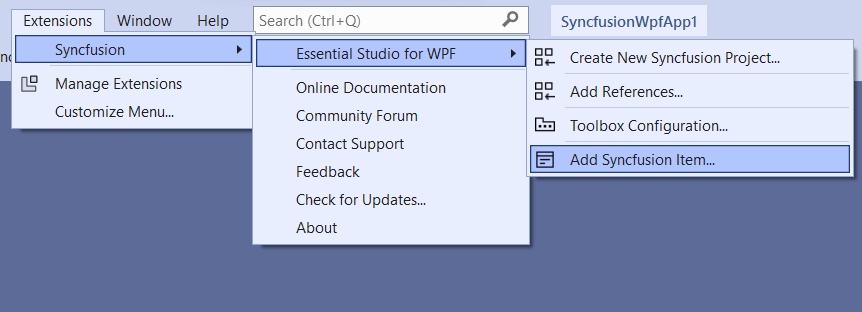
Option 2: From the Extensions menu, click Essential Studio® for WPF > Add Syncfusion® Item….
-
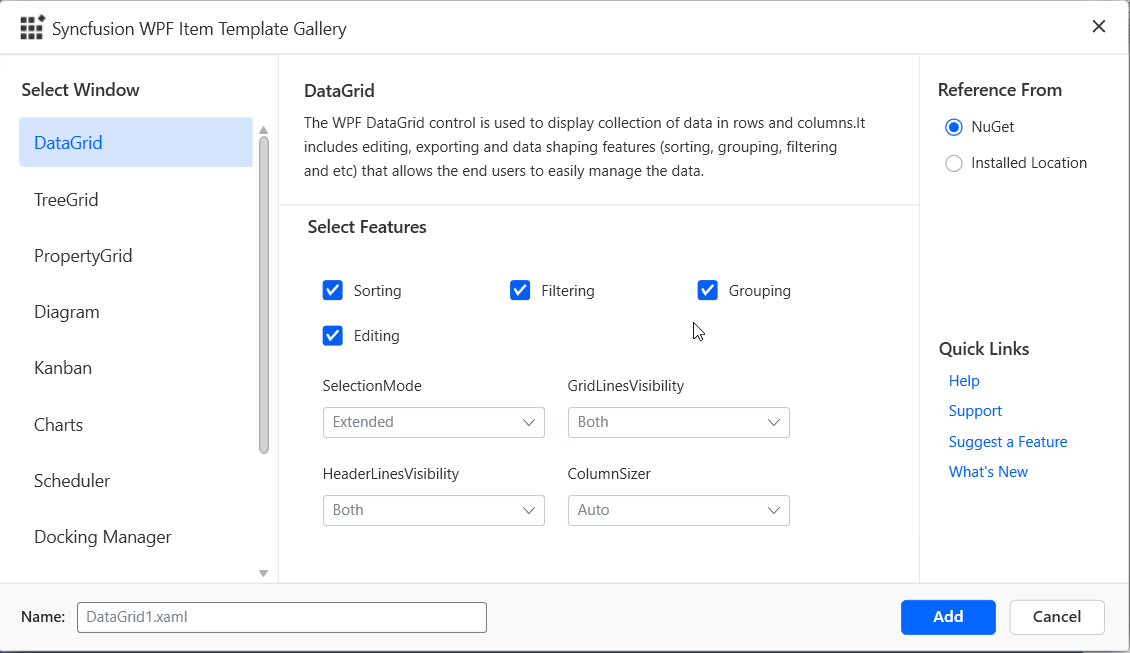
The Syncfusion® WPF Item Template wizard appears.
-
Select the components from the Component list, organized into categories such as UI Component Suite, Grid SDK, Chart SDK, Scheduler SDK, Gantt SDK, and Diagram SDK. The features associated with the selected component are displayed. Choose the features required for your project.
-
Choose where to add the required Syncfusion® assemblies. Options include GAC location, Essential Studio® installed location, or NuGet packages.
If the Syncfusion® Essential Studio® WPF installation is present, the Installed location and GAC options are enabled. Otherwise, use the NuGet option. The GAC option is not available for .NET Core and later (.NET 5+) applications. The Version drop-down lists the installed WPF versions.
-
Click Add. A pop-up appears with information about the Component files and NuGet/Assemblies that will be added.
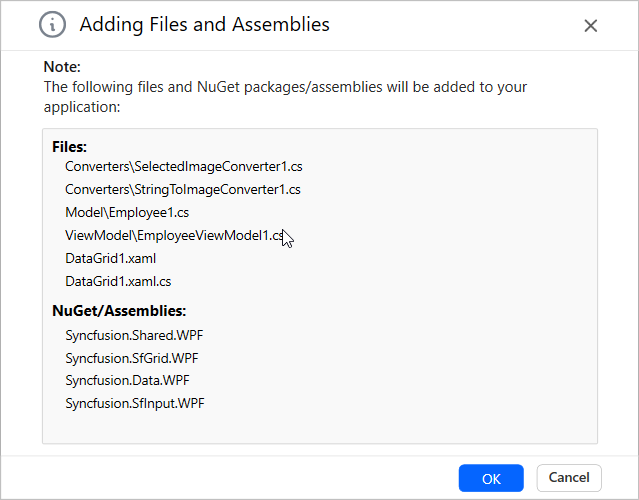
-
Click OK to incorporate the chosen components into the WPF application, along with the required Syncfusion® assemblies.
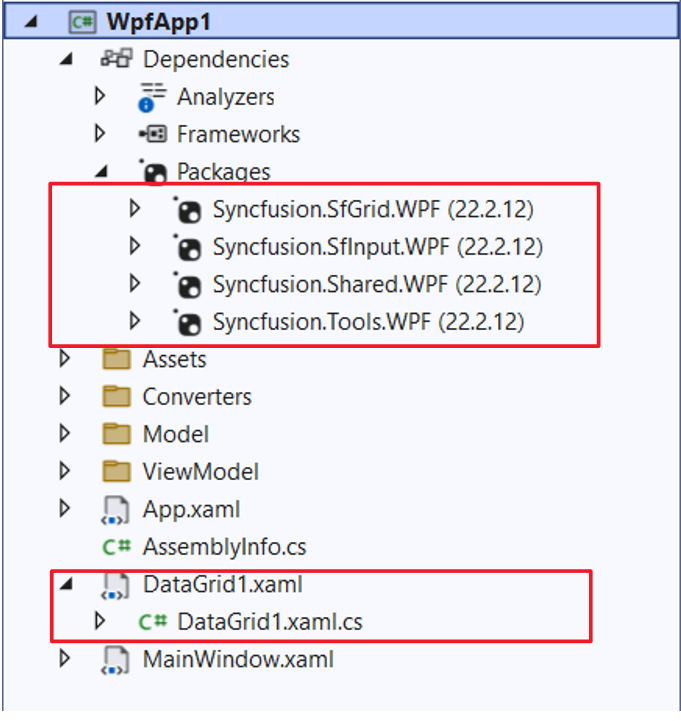
-
If you installed the trial setup or NuGet packages, the Syncfusion® license registration message box is displayed. Navigate to the help topic shown in the message box to generate and register the Syncfusion® license key for your project. Refer to this blog post to understand the licensing changes introduced in Essential Studio®.