How can I help you?
Getting started with Syncfusion® WPF RichTextBox
1 Jul 202622 minutes to read
WPF RichTextBox (SfRichTextBoxAdv) enables you to create, edit, view, and print Word documents in WPF applications. This section guides you through the steps to get started and create a RichTextBox in a WPF application.
Create a RichTextBox in WPF using SfRichTextBoxAdv
In this walkthrough, you will create a WPF application that uses the SfRichTextBoxAdv control.
The steps below cover the essential tasks required to add and use the SfRichTextBoxAdv control in a WPF project.
Create a New WPF Project
- Open Visual Studio.
- Click Create a new project.
- In the Create a new project window, search for WPF App, and select a template based on your requirement:
- WPF Application (.NET)
- WPF App (.NET Framework)
- Click Next, and enter the following details:
-
Project name:
DocumentEditor - Location: Choose your preferred location
-
Solution name:
DocumentEditor
-
Project name:
NOTE
The project name is used as the default namespace (for example, in
x:Class). It is recommended to use DocumentEditor to match the code examples provided.
- Select the target framework:
- For .NET → Click Next and choose the latest supported .NET version
- For .NET Framework → Select the required version in the same window
- Click Create
Add SfRichTextBoxAdv dependencies
Using NuGet Package Manager (UI):
- In Solution Explorer, right-click the project and choose Manage NuGet Packages.
- Search for Syncfusion.SfRichTextBoxAdv.Wpf and install the latest version.
- Ensure the necessary dependencies are installed correctly, and the project is restored.
Using Package Manager Console:
Install-Package Syncfusion.SfRichTextBoxAdv.WPFThe following assembly references are required to use the SfRichTextBoxAdv control in your application.
- Syncfusion.SfRichTextBoxAdv.WPF
- Syncfusion.Compression.Base
- Syncfusion.OfficeChart.Base
- Syncfusion.Shared.WPF
- Syncfusion.DocIO.Base
NOTE
Starting with v16.2.0.41 (2018 Vol 2), if you reference Syncfusion® assemblies from trial setup or from the NuGet feed, you also have to add “Syncfusion.Licensing” assembly reference and include a license key in your project. Please refer to this link to know about registering Syncfusion® license key in your WPF application to use our components.
Add SfRichTextBoxAdv control
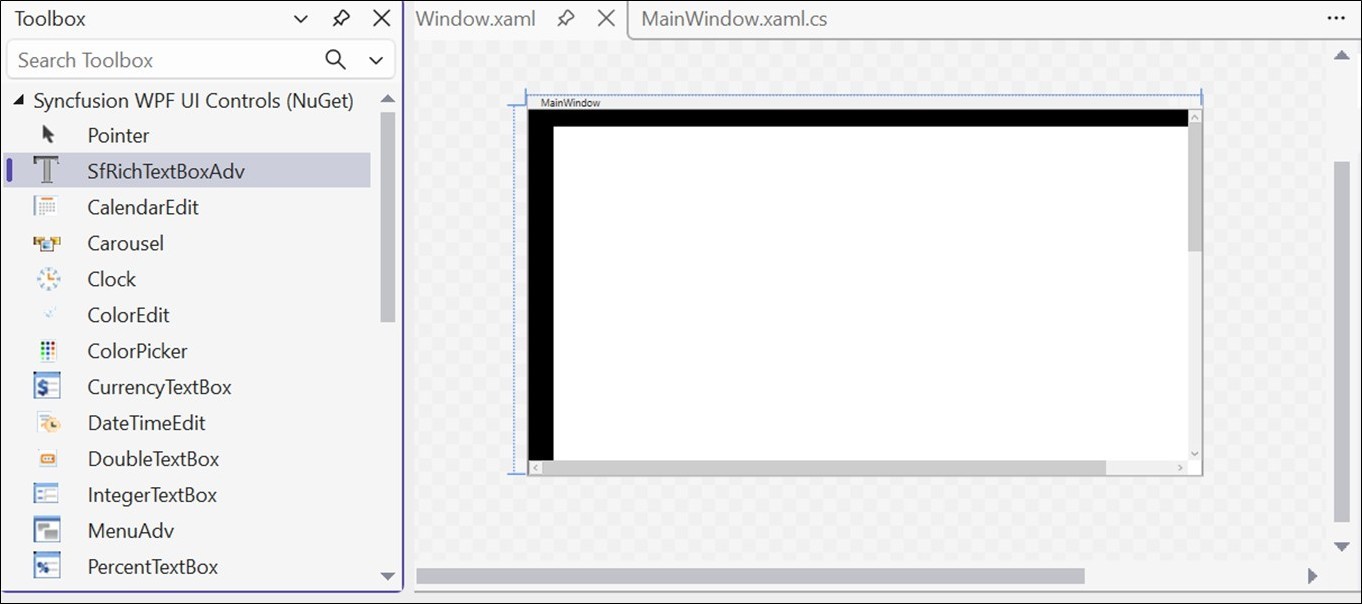
Open the Toolbox window and drag the SfRichTextBoxAdv control onto the Design view of the WPF application to add it to the user interface.
To add the control manually in XAML, follow these steps:
-
Import the Syncfusion® WPF schema
http://schemas.syncfusion.com/wpfor the SfRichTextBoxAdv control namespaceSyncfusion.Windows.Controls.RichTextBoxAdvin the XAML page. -
Declare SfRichTextBoxAdv control in the XAML page.
<Window xmlns="http://schemas.microsoft.com/winfx/2006/xaml/presentation"
        xmlns:x="http://schemas.microsoft.com/winfx/2006/xaml"
        xmlns:syncfusion="http://schemas.syncfusion.com/wpf"
        x:Class="DocumentEditor.MainWindow"
        Title="MainWindow" Height="450" Width="800">
    <Grid>
        <syncfusion:SfRichTextBoxAdv x:Name="richTextBoxAdv"/>
    </Grid>
</Window>
To add the control manually in C#, add the following code in MainWindow.xaml.cs
using Syncfusion.Windows.Controls.RichTextBoxAdv;
using System.Windows;
using System.Windows.Controls;

namespace DocumentEditor
{
    public partial class MainWindow : Window
    {
        public MainWindow()
        {
            InitializeComponent();

            // Create a Grid container to use as the layout root
            Grid rootGrid = new Grid();

            // Create an instance of the SfRichTextBoxAdv control
            SfRichTextBoxAdv richTextBoxAdv = new SfRichTextBoxAdv();

            // Add the SfRichTextBoxAdv control to the Grid
            rootGrid.Children.Add(richTextBoxAdv);

            // Set the Grid as the content of the Window
            this.Content = rootGrid;
        }
    }
}
Run the Application
- Press F5 or click Debug → Start Debugging in Visual Studio.
- The application launches and displays the SfRichTextBoxAdv control.
- Press Ctrl+O to open an existing document. The selected document will be displayed within the SfRichTextBoxAdv control, as shown below.

NOTE
Add ribbon UI to SfRichTextBoxAdv
If you need a ribbon-based user interface, you can add SfRichTextRibbon with SfRichTextBoxAdv control. It enhances the user experience by organizing commands into tabs and groups, similar to Microsoft Word.
Add SfRichTextRibbon Dependencies
Using NuGet Package Manager (UI)
- In Solution Explorer, right-click the project and choose Manage NuGet Packages.
- Search for Syncfusion.SfRichTextRibbon.Wpf and install the latest version.
- Ensure the necessary dependencies are installed correctly, and the project is restored.
Using Package Manager Console
Install-Package Syncfusion.SfRichTextRibbon.WPFNOTE
Installing the SfRichTextRibbon NuGet package will automatically install the required SfRichTextBoxAdv NuGet package as a dependency.
The following assembly references are required to use the SfRichTextRibbon control in your application.
- Syncfusion.SfRichTextRibbon.WPF
- Syncfusion.SfRichTextBoxAdv.WPF
- Syncfusion.Compression.Base
- Syncfusion.OfficeChart.Base
- Syncfusion.Shared.WPF
- Syncfusion.Tools.WPF
- Syncfusion.DocIO.Base
Configure RibbonWindow for SfRichTextRibbon
To use the SfRichTextRibbon control in a WPF application, the application must use Syncfusion® RibbonWindow instead of the default Window.
-
Import the Syncfusion® WPF schema
http://schemas.syncfusion.com/wpfin the MainWindow.xaml file. -
Replace the root element Window with syncfusion:RibbonWindow in the MainWindow.xaml file.
-
Additionally, in the MainWindow.xaml.cs file, change the base class of
MainWindowfrom Window to RibbonWindow to enable full support for the SfRichTextRibbon control.
Add SfRichTextRibbon to the application
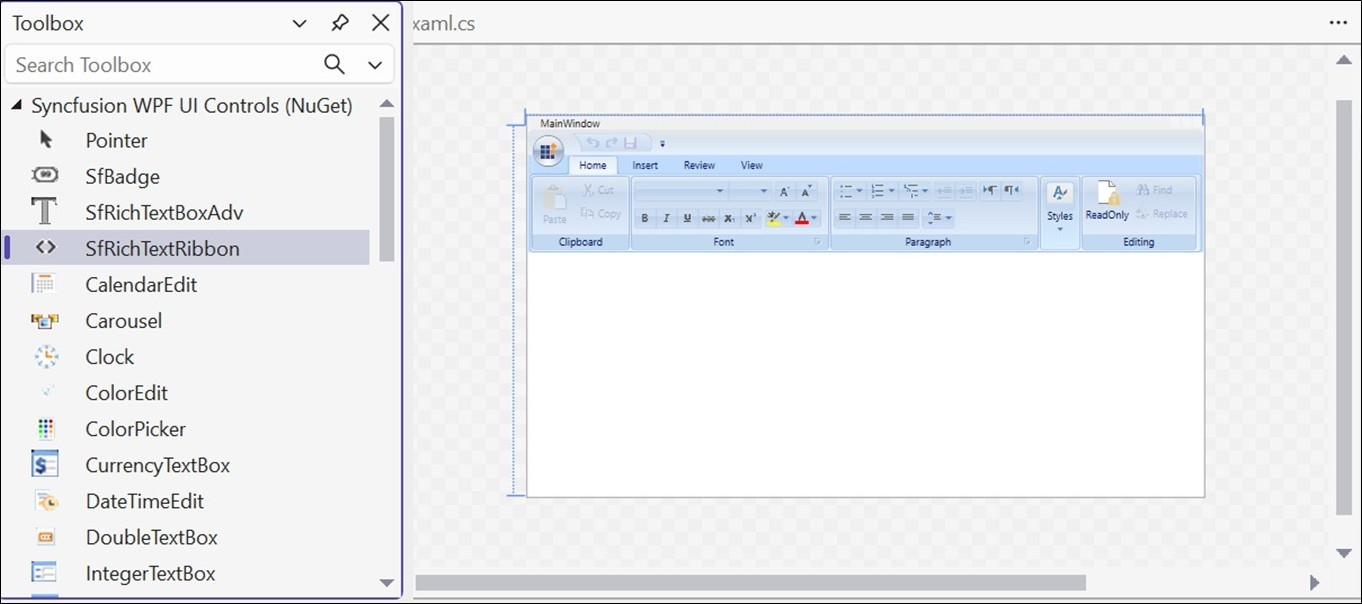
Open the Toolbox window and drag the SfRichTextRibbon and SfRichTextBoxAdv onto the Design view. Bind the SfRichTextBoxAdv as DataContext to the SfRichTextRibbon in XAML.
To add the control manually in XAML, follow these steps:
-
Import the Syncfusion® WPF schema
http://schemas.syncfusion.com/wpfor the SfRichTextRibbon control namespaceSyncfusion.Windows.Controls.RichTextBoxAdvin the XAML page. -
Declare the SfRichTextRibbon and SfRichTextBoxAdv controls in the XAML page.
-
To establish interaction between SfRichTextRibbon and SfRichTextBoxAdv, bind the SfRichTextBoxAdv as the DataContext to the SfRichTextRibbon.
<syncfusion:RibbonWindow xmlns="http://schemas.microsoft.com/winfx/2006/xaml/presentation"
                         xmlns:x="http://schemas.microsoft.com/winfx/2006/xaml"
                         xmlns:syncfusion="http://schemas.syncfusion.com/wpf"
                         x:Class="DocumentEditor.MainWindow"
                         Title="MainWindow" Height="450" Width="800">
<Grid>
     <Grid.RowDefinitions>
         <RowDefinition Height="Auto"/>
         <RowDefinition Height="*"/>
     </Grid.RowDefinitions>
     <syncfusion:SfRichTextRibbon x:Name="richTextRibbon" SnapsToDevicePixels="True"  DataContext="{Binding ElementName=richTextBoxAdv}"/>
     <syncfusion:SfRichTextBoxAdv x:Name="richTextBoxAdv" Background="#F1F1F1" Grid.Row="1"/>
 </Grid>
</syncfusion:RibbonWindow>
To add the control manually in C#, add the below code in MainWindow.xaml.cs
using Syncfusion.Windows.Controls.RichTextBoxAdv;
using Syncfusion.Windows.Tools.Controls;
using System.Windows;
using System.Windows.Controls;
using System.Windows.Media;

namespace DocumentEditor
{
    public partial class MainWindow : RibbonWindow
    {
        public MainWindow()
        {
            InitializeComponent();

            // Create the root Grid container for layout
            Grid rootGrid = new Grid();

            // Define the first row (auto-sized for ribbon)
            RowDefinition row1 = new RowDefinition();
            row1.Height = GridLength.Auto;

            // Define the second row (fills remaining space for editor)
            RowDefinition row2 = new RowDefinition();
            row2.Height = new GridLength(1, GridUnitType.Star);

            // Add row definitions to the grid
            rootGrid.RowDefinitions.Add(row1);
            rootGrid.RowDefinitions.Add(row2);

            // Instantiate the rich text editor control
            SfRichTextBoxAdv richTextBoxAdv = new SfRichTextBoxAdv();

            // Set background color for better UI appearance
            richTextBoxAdv.Background = new SolidColorBrush((Color)ColorConverter.ConvertFromString("#F1F1F1"));

            // Instantiate the ribbon control
            SfRichTextRibbon richTextRibbon = new SfRichTextRibbon();

            // Enable pixel snapping for sharper rendering
            richTextRibbon.SnapsToDevicePixels = true;

            // Set the DataContext of the ribbon to the editor
            // This allows the ribbon to interact with the editor (binding commands)
            richTextRibbon.DataContext = richTextBoxAdv;

            // Position the ribbon in the first row
            Grid.SetRow(richTextRibbon, 0);

            // Position the editor in the second row
            Grid.SetRow(richTextBoxAdv, 1);

            // Add controls to the grid
            rootGrid.Children.Add(richTextRibbon);
            rootGrid.Children.Add(richTextBoxAdv);

            // Set the constructed grid as the content of the UserControl
            this.Content = rootGrid;
        }
    }
}
NOTE
Prefer using
SfRichTextRibbonwithinRibbonWindowin your application, since the backstage of Ribbon will be opened only when the ribbon is loaded under theRibbonWindow
Run the Application with Ribbon UI
- Press F5 or click Debug → Start Debugging in Visual Studio.
- The application will launch with the SfRichTextRibbon and SfRichTextBoxAdv controls.
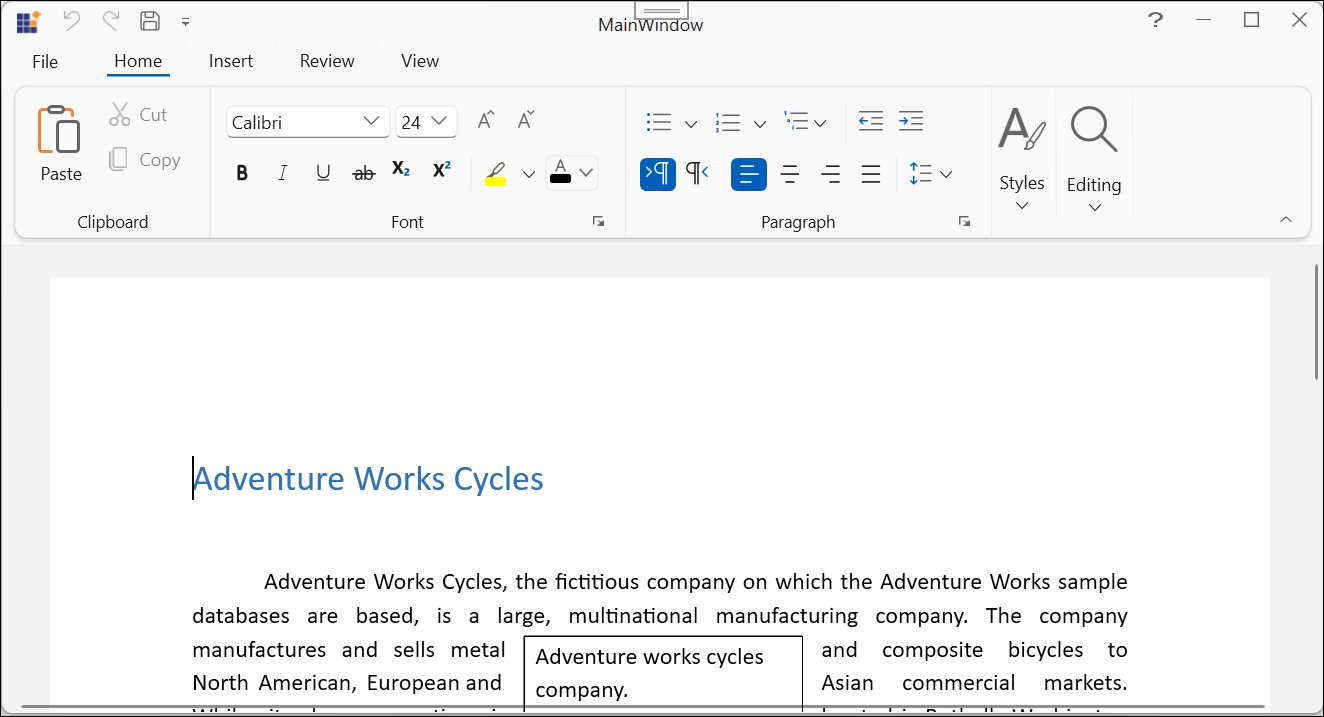
- Press Ctrl + O or use the Open option in the SfRichTextRibbon to open a document, which will be displayed in the SfRichTextBoxAdv control, with ribbon options available for editing and formatting, as shown below

NOTE
Theme
In this walkthrough, you will apply a theme to the WPF SfRichTextBoxAdv and SfRichTextRibbon controls.
The steps below outline the essential tasks required to configure and apply themes in a WPF application.
Add Theme Dependencies
Using NuGet Package Manager (UI)
- In Solution Explorer, right-click the project and choose Manage NuGet Packages.
- In the Browse tab, search for and install the latest version of the following packages:
- Syncfusion.SfRichTextBoxAdv.Wpf – Rich text editor control
- Syncfusion.SfRichTextRibbon.Wpf – Ribbon UI for the editor
- Syncfusion.Themes.Windows11Light.WPF – Windows 11 Light theme
- Ensure all dependencies are installed successfully and the project is restored without errors.
Using Package Manager Console
Install-Package Syncfusion.SfRichTextBoxAdv.WPF
Install-Package Syncfusion.SfRichTextRibbon.WPF
Install-Package Syncfusion.Themes.Windows11Light.WPF
The following assemblies are required to enable theme support:
- Syncfusion.SfRichTextBoxAdv.WPF
- Syncfusion.SfRichTextRibbon.WPF
- Syncfusion.Compression.Base
- Syncfusion.OfficeChart.Base
- Syncfusion.Shared.WPF
- Syncfusion.Tools.WPF
- Syncfusion.DocIO.Base
- Syncfusion.Themes.Windows11Light.WPF
- Syncfusion.SfSkinManager.WPF
Available Themes
Syncfusion provides multiple built-in themes that can be applied based on application requirements.
In this section, the Windows 11 Light theme is used as an example to demonstrate how to apply a theme to the SfRichTextBoxAdv and SfRichTextRibbon controls.
To explore the complete list of available themes and learn how to create custom themes, refer to:
Apply Themes to SfRichTextBoxAdv and SfRichTextRibbon
To add the controls and apply a theme manually in XAML, follow these steps:
Add SfRichTextBoxAdv and SfRichTextRibbon in XAML
Refer to the following link for detailed instructions:
Add SfRichTextBoxAdv and SfRichTextRibbon in XAML
Apply Theme in XAML
- Import Syncfusion® WPF schema http://schemas.syncfusion.com/wpf or the SfSkinManager namespace Syncfusion.SfSkinManager into a XAML page.
- Define the theme using the
SfSkinManager.Themeproperty. - Set the
ThemeNamevalue to Windows11Light or any preferred theme. - Ensure the theme is applied at the
Windowlevel so that it is inherited by all child controls.
<syncfusion:RibbonWindow xmlns="http://schemas.microsoft.com/winfx/2006/xaml/presentation"
                         xmlns:x="http://schemas.microsoft.com/winfx/2006/xaml"
                         xmlns:syncfusion="http://schemas.syncfusion.com/wpf"
                         x:Class="DocumentEditor.MainWindow"
                         Title="MainWindow" Height="450" Width="800"
                         xmlns:syncfusionskin ="clr-namespace:Syncfusion.SfSkinManager;assembly=Syncfusion.SfSkinManager.WPF"
                         syncfusionskin:SfSkinManager.Theme="{syncfusionskin:SkinManagerExtension ThemeName=Windows11Light}">
<Grid>
     <Grid.RowDefinitions>
         <RowDefinition Height="Auto"/>
         <RowDefinition Height="*"/>
     </Grid.RowDefinitions>
     <syncfusion:SfRichTextRibbon x:Name="richTextRibbon" SnapsToDevicePixels="True"  DataContext="{Binding ElementName=richTextBoxAdv}"/>
     <syncfusion:SfRichTextBoxAdv x:Name="richTextBoxAdv" Background="#F1F1F1" Grid.Row="1"/>
 </Grid>
</syncfusion:RibbonWindow>
NOTE
- The Windows 11 Light theme is used as the default theme. You can change the
ThemeNamebased on your requirements.- The applied theme is automatically inherited by all child controls.
To apply a theme programmatically in C#, add the below code in MainWindow.xaml.cs
using Syncfusion.SfSkinManager;
using Syncfusion.Windows.Controls.RichTextBoxAdv;
using Syncfusion.Windows.Tools.Controls;
using System.Windows;
using System.Windows.Controls;
using System.Windows.Media;

namespace DocumentEditor
{
    public partial class MainWindow : RibbonWindow
    {
        public MainWindow()
        {
            InitializeComponent();

            // Create the root Grid container for layout
            Grid rootGrid = new Grid();

            // Define the first row (auto-sized for ribbon)
            RowDefinition row1 = new RowDefinition();
            row1.Height = GridLength.Auto;

            // Define the second row (fills remaining space for editor)
            RowDefinition row2 = new RowDefinition();
            row2.Height = new GridLength(1, GridUnitType.Star);

            // Add row definitions to the grid
            rootGrid.RowDefinitions.Add(row1);
            rootGrid.RowDefinitions.Add(row2);

            // Instantiate the rich text editor control
            SfRichTextBoxAdv richTextBoxAdv = new SfRichTextBoxAdv();

            // Set background color for better UI appearance
            richTextBoxAdv.Background = new SolidColorBrush((Color)ColorConverter.ConvertFromString("#F1F1F1"));

            // Instantiate the ribbon control
            SfRichTextRibbon richTextRibbon = new SfRichTextRibbon();

            // Enable pixel snapping for sharper rendering
            richTextRibbon.SnapsToDevicePixels = true;

            // Set the DataContext of the ribbon to the editor
            // This allows the ribbon to interact with the editor (binding commands)
            richTextRibbon.DataContext = richTextBoxAdv;

            // Position the ribbon in the first row
            Grid.SetRow(richTextRibbon, 0);

            // Position the editor in the second row
            Grid.SetRow(richTextBoxAdv, 1);

            // Add controls to the grid
            rootGrid.Children.Add(richTextRibbon);
            rootGrid.Children.Add(richTextBoxAdv);

            // Set the constructed grid as the content of the UserControl
            this.Content = rootGrid;

            // Applies the Windows 11 Light theme to the window
            SfSkinManager.SetTheme(this, new Theme() { ThemeName = "Windows11Light" });
        }
    }
}
Run the Application with Theme Applied
- Press F5 or click Debug → Start Debugging in Visual Studio.
- The application will launch with the SfRichTextRibbon and SfRichTextBoxAdv controls using the Windows 11 Light theme.
- Press Ctrl + O or use the Open option in the SfRichTextRibbon to open a document.
- The document is displayed in the editor, along with the themed ribbon and editor interface, as shown below.
NOTE