Fixing Bugs in Seconds: Smart Error Resolution with Syncfusion Code Studio AI
15 Jun 20265 minutes to read
Overview
Tracking down a bug can take significant time, especially when the root cause is a simple typo, a missing import, or a type mismatch buried across multiple files. Code Studio AI helps you identify and resolve these errors quickly by surfacing AI-powered fixes directly in your editor.
This tutorial walks you through three approaches to fixing bugs with Code Studio AI: using hover quick fixes for single errors, sending problems from the Problems panel as context to the AI agent, and attaching files so the AI understands your broader codebase before suggesting a fix.
What You Will Learn
By the end of this tutorial, you’ll be able to:
- Use AI-powered quick fixes to resolve errors instantly with a single click
- Navigate and resolve issues efficiently using the Problems panel
- Add project files as context to help AI understand your codebase better
- Leverage context-menu options for targeted problem-solving
- Verify that AI-generated fixes match your intended logic
Steps to Fix Bugs with AI
Step 1: Apply a Quick Fix by Hovering
Use this approach when you have a single, isolated error to resolve.
-
Open your project which has errors in Code Studio.
- Move your mouse cursor over any red underlined error in your code. Code Studio AI displays the following options:
- Quick Fix — Apply an immediate fix for the specific error.
- Fix — Get a detailed AI-generated solution.
- View Problem — See the error details in the Problems panel.
-
Click Quick Fix to apply the fix instantly.
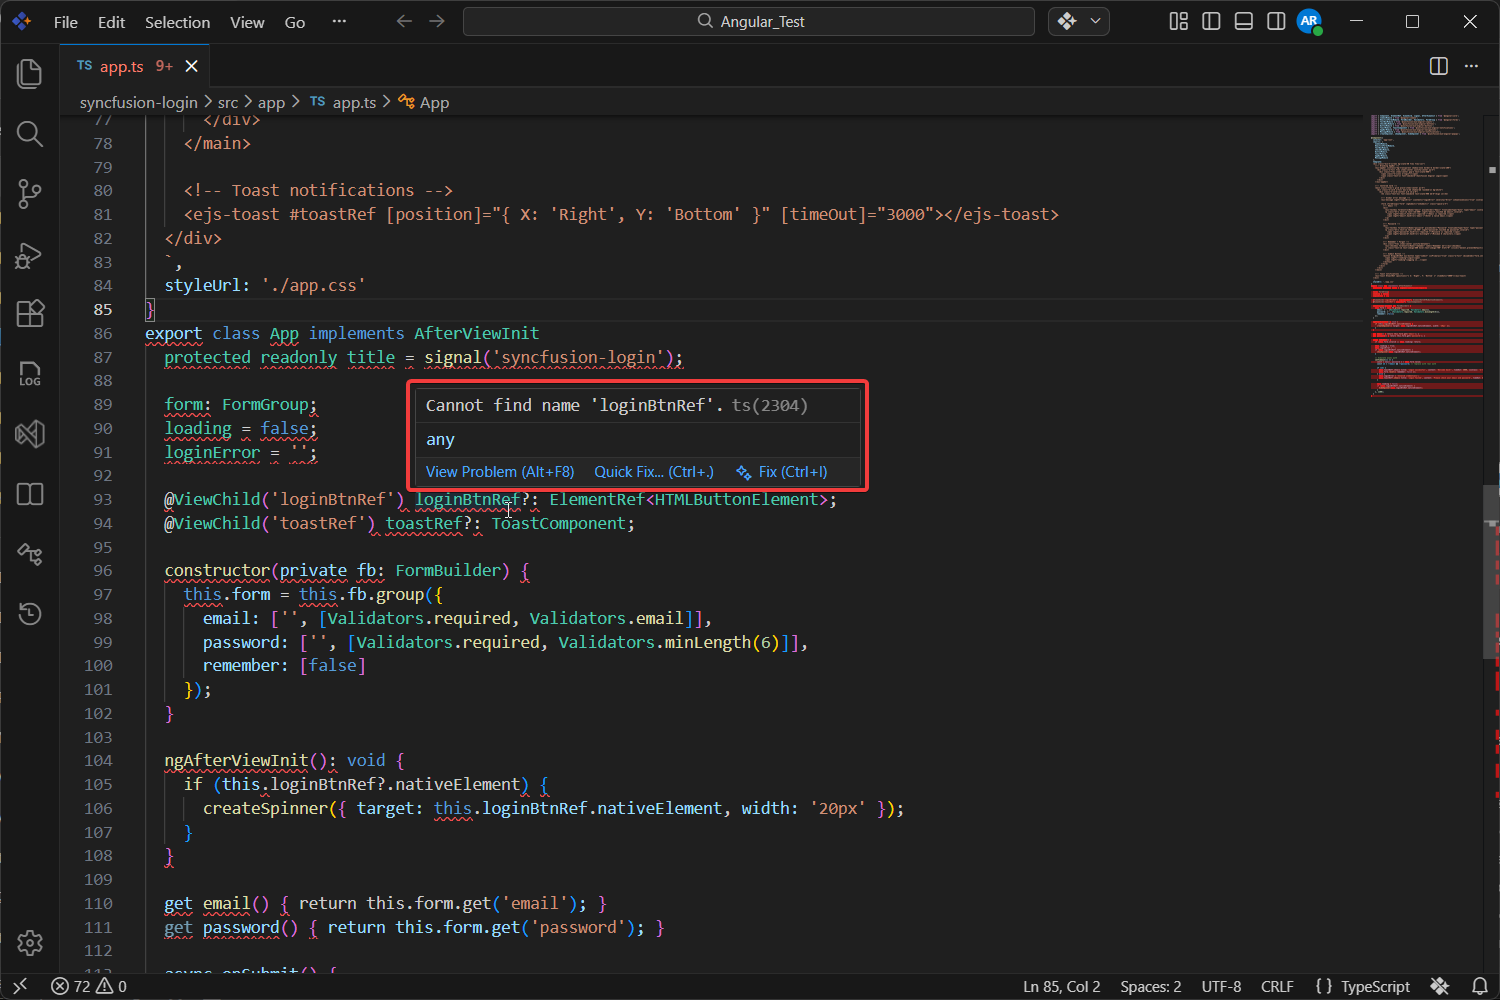
The AI analyzes your code, understands the context, and applies the fix.
Step 2: Send Problems as Context Using the Problems Panel
Use this approach when you have multiple errors and want to send specific problems to the AI as context.
-
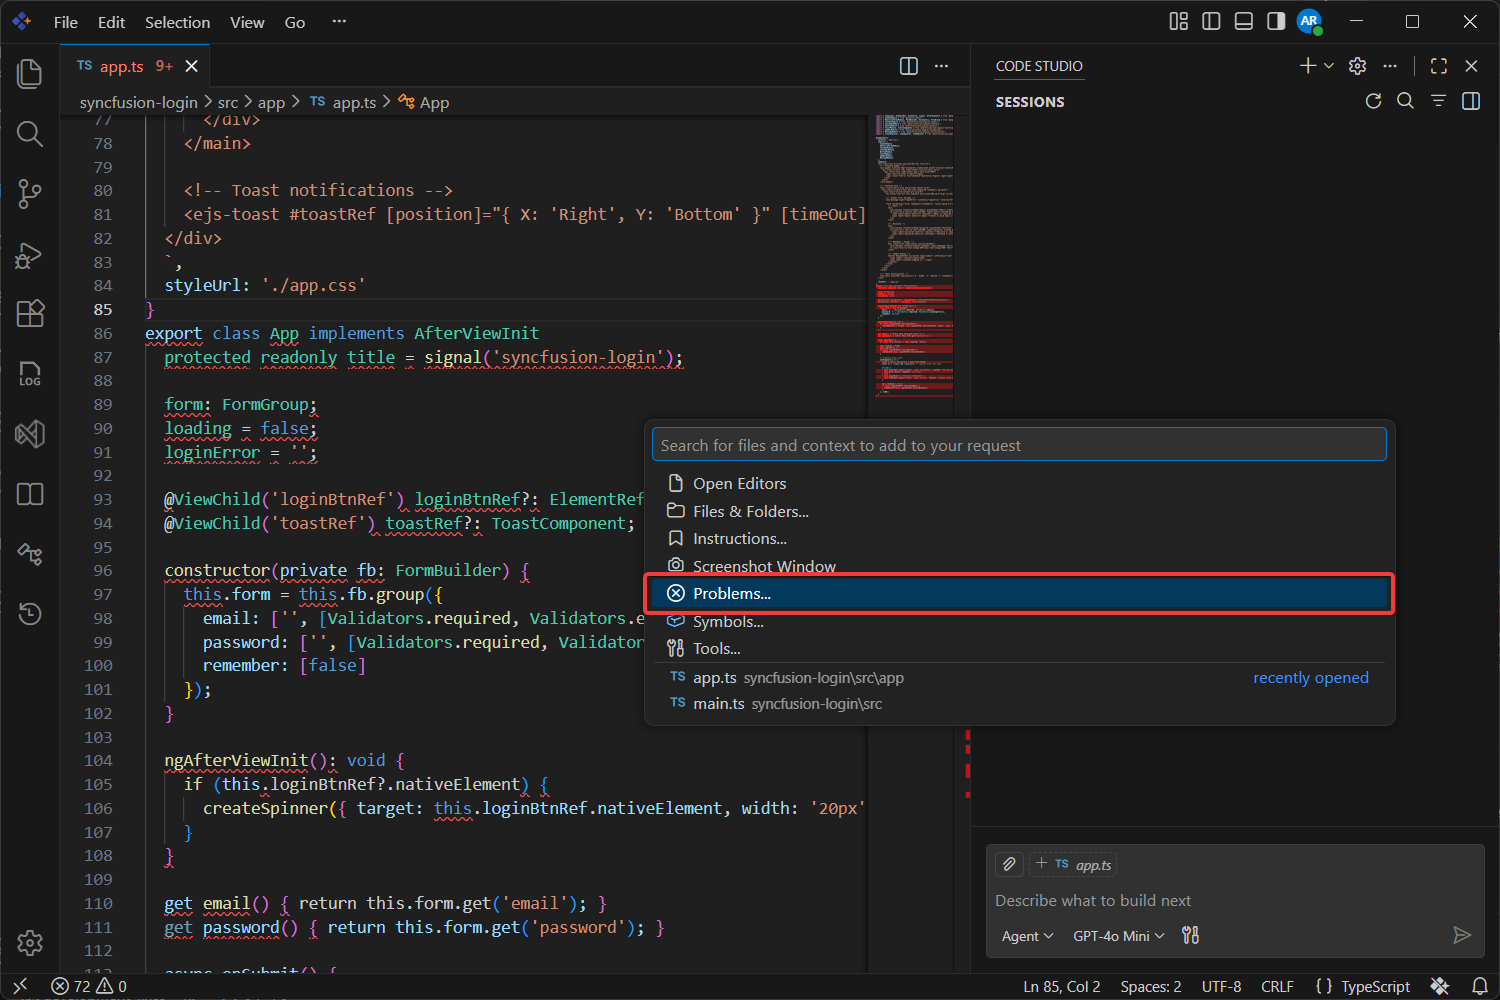
Open the Chat Panel by pressing
Ctrl+Alt+B(Windows/Linux) orCmd+Alt+B(Mac), or click the Code Studio icon to the left of the centered search box. Then click + at the bottom of the chat window:
-
Choose the Problems option from the attachment menu:
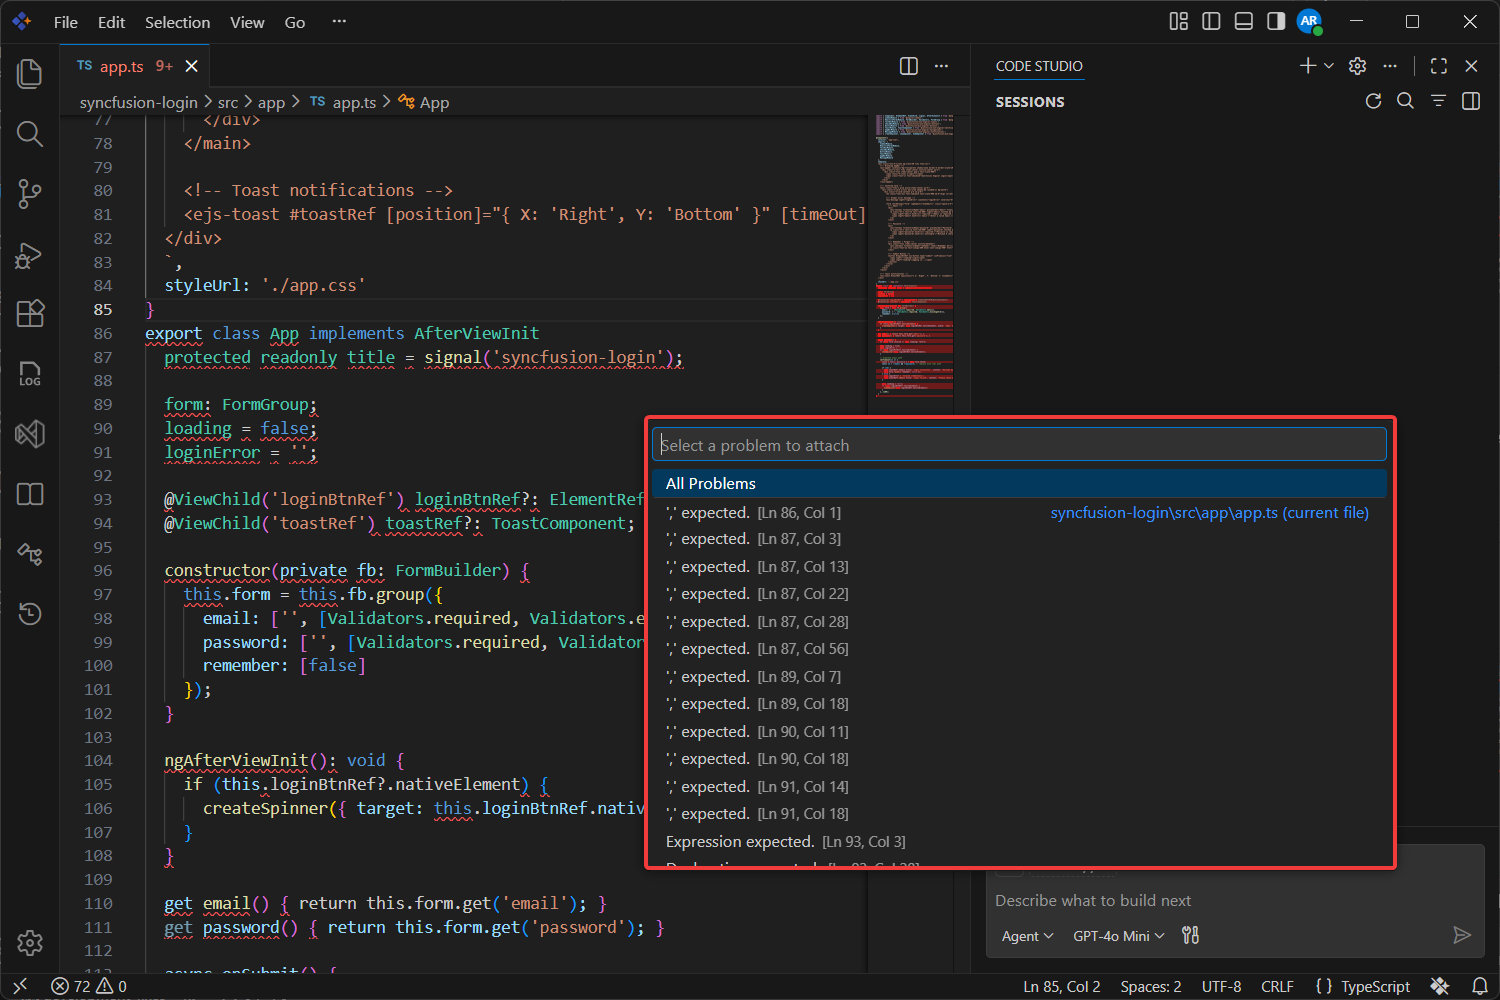
- Select the problems to fix. You have two options:
- Click All Problems to send all problems as context.
- Click individual problems to select specific ones.
-
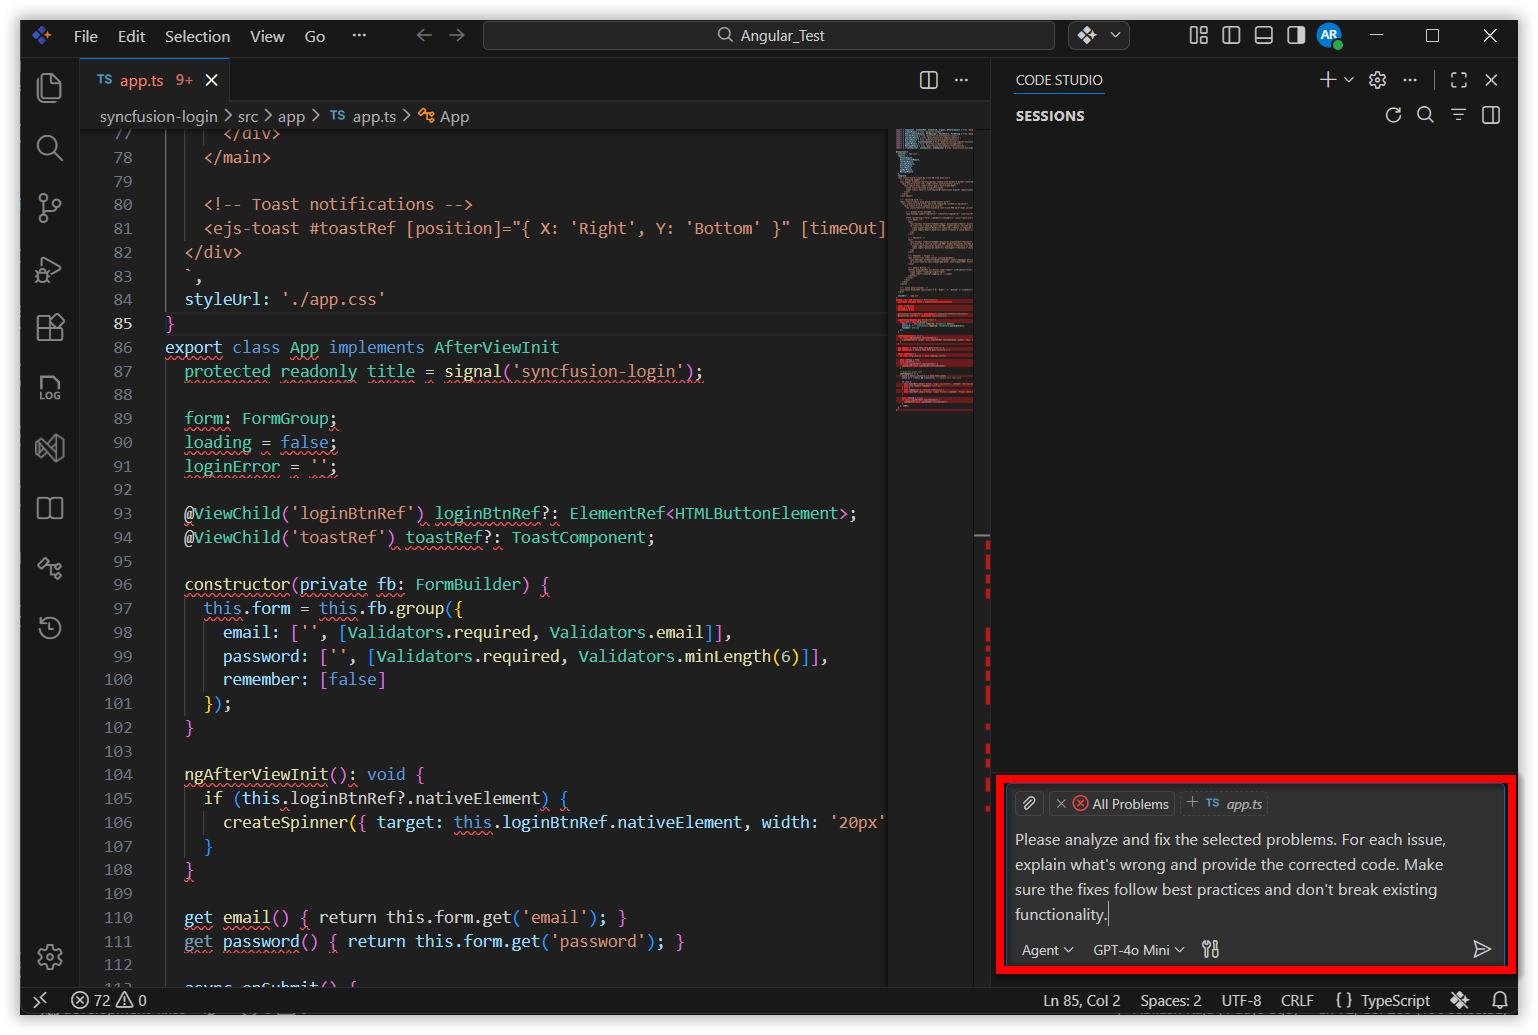
Type a prompt in the chat to ask the agent to fix the selected problems. For example:
Please analyze and fix the selected problems. For each issue, explain what's wrong and provide the corrected code. Make sure the fixes follow best practices and don't break existing functionality.Review the suggested fixes before applying them:
Tip: Use this workflow when you want the AI to focus on specific issues across your project without adding whole files as context.
Step 3: Add Files as Context for Complex Issues
Use this approach when errors require understanding of multiple files or your project’s architecture. There are four ways to add a file as context:
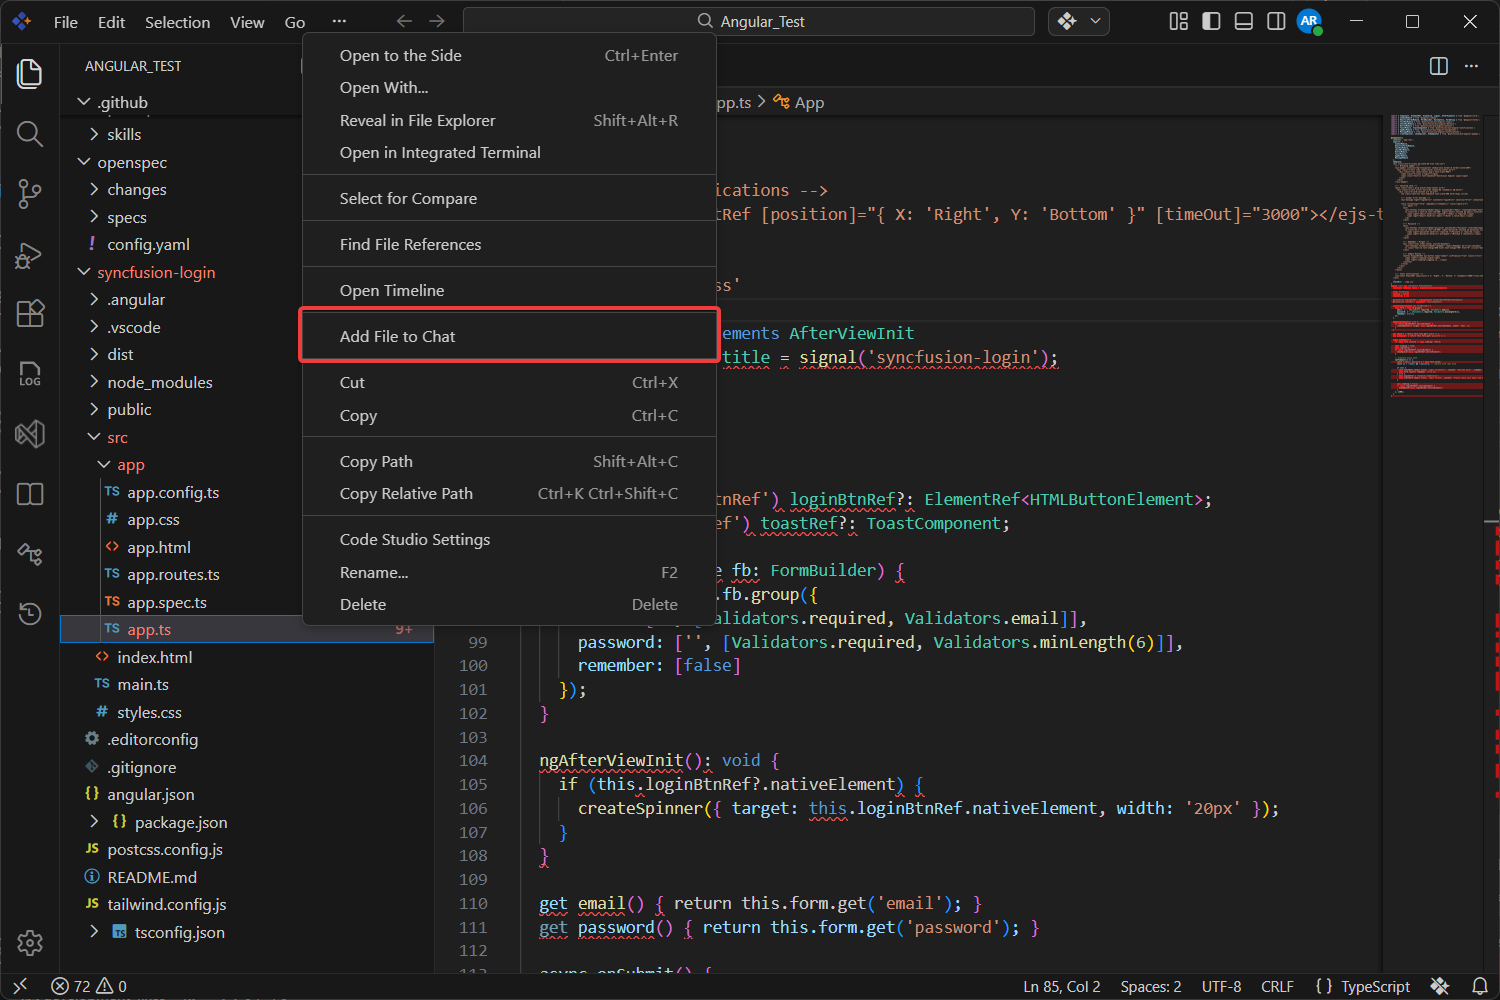
Method 1: Right-click in Explorer
-
Right-click the file in the Explorer and select Add file to chat:
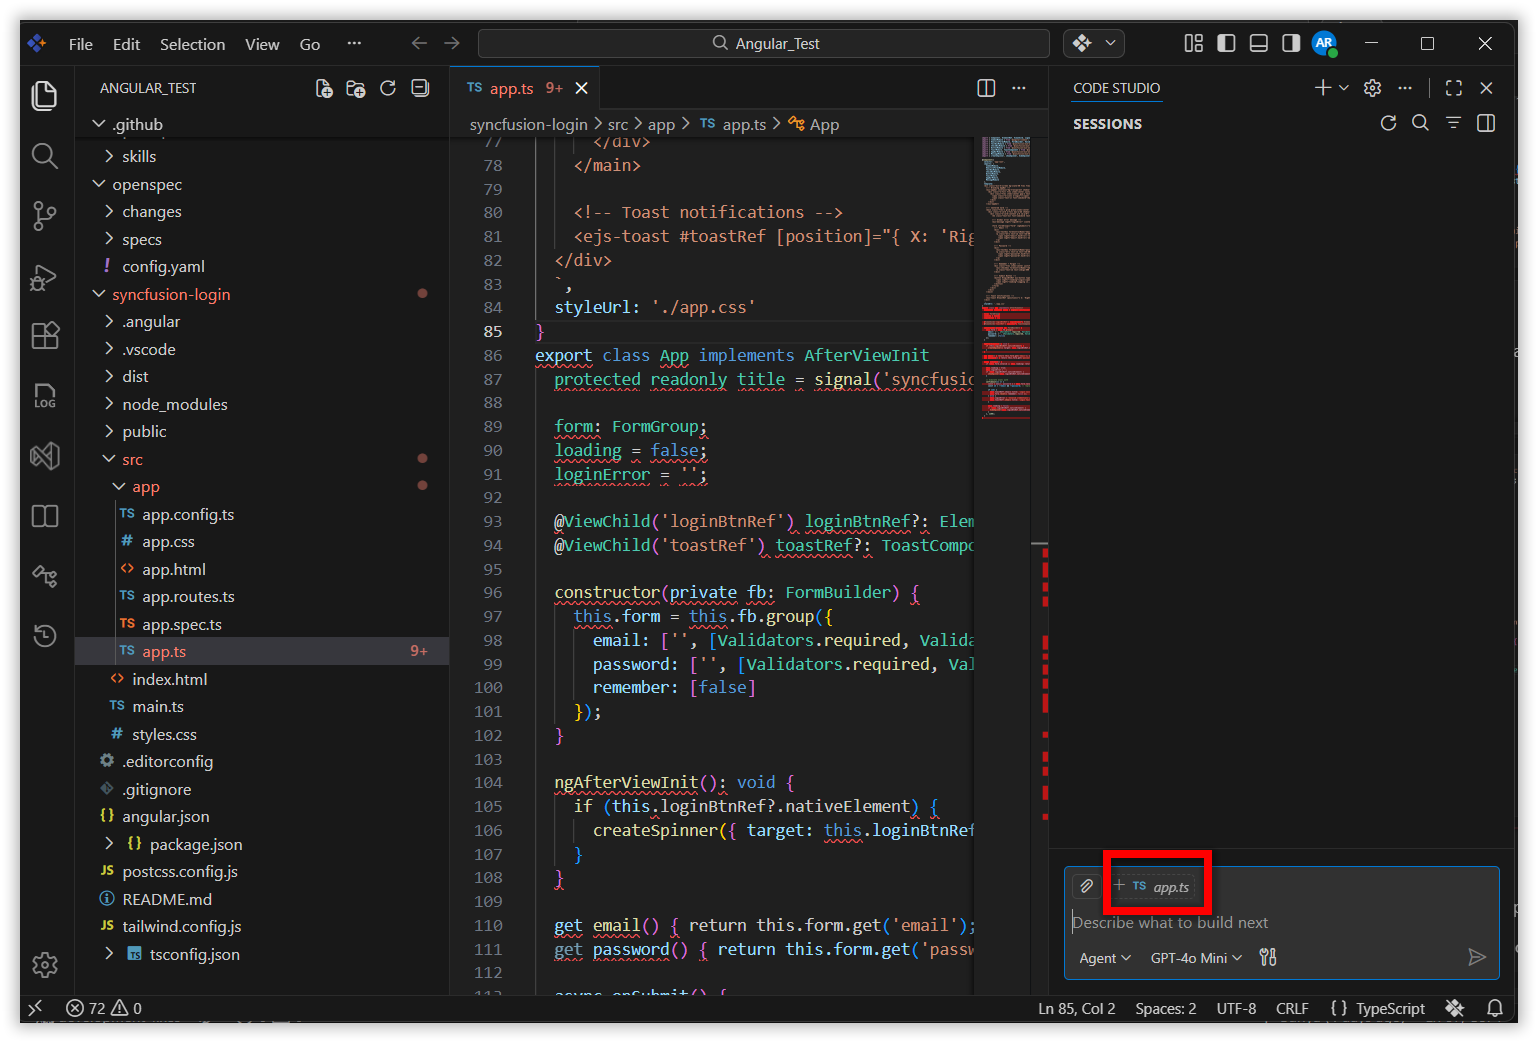
Method 2: Use Suggested Context
-
Open the file with errors. The Chat Panel will suggest the file as context — click the file name in the chat to add it:
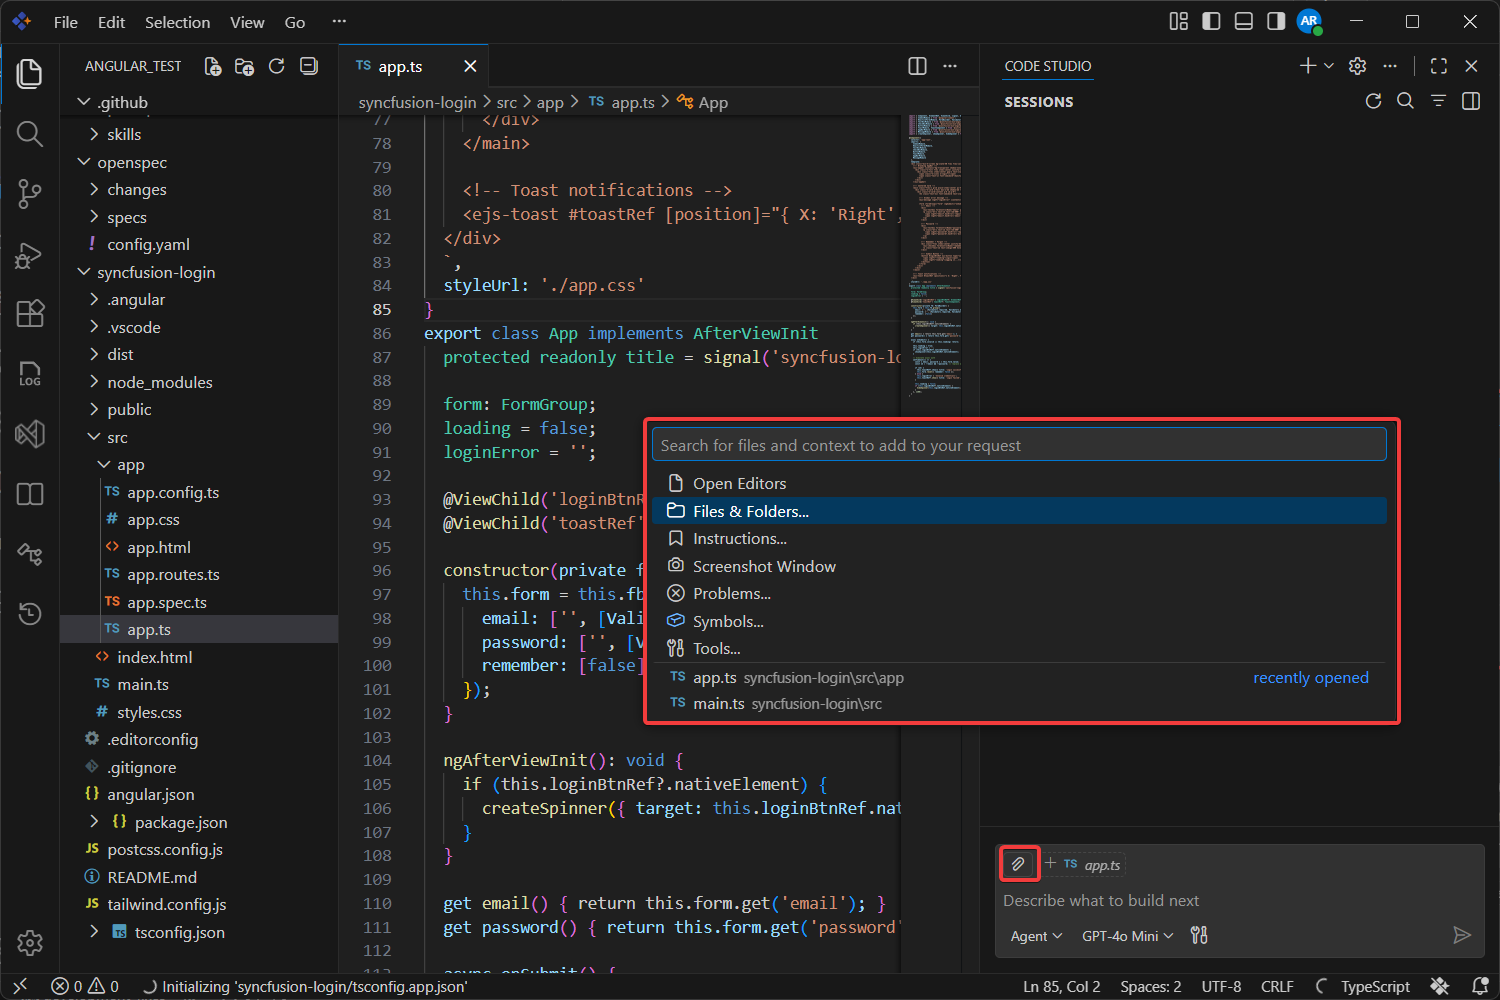
Method 3: Use the Add Context Menu
-
Open the Chat Panel (see Step 2, action 1 for how to open it and access Add context).
-
Select the file with errors from the list. It will be sent as context:
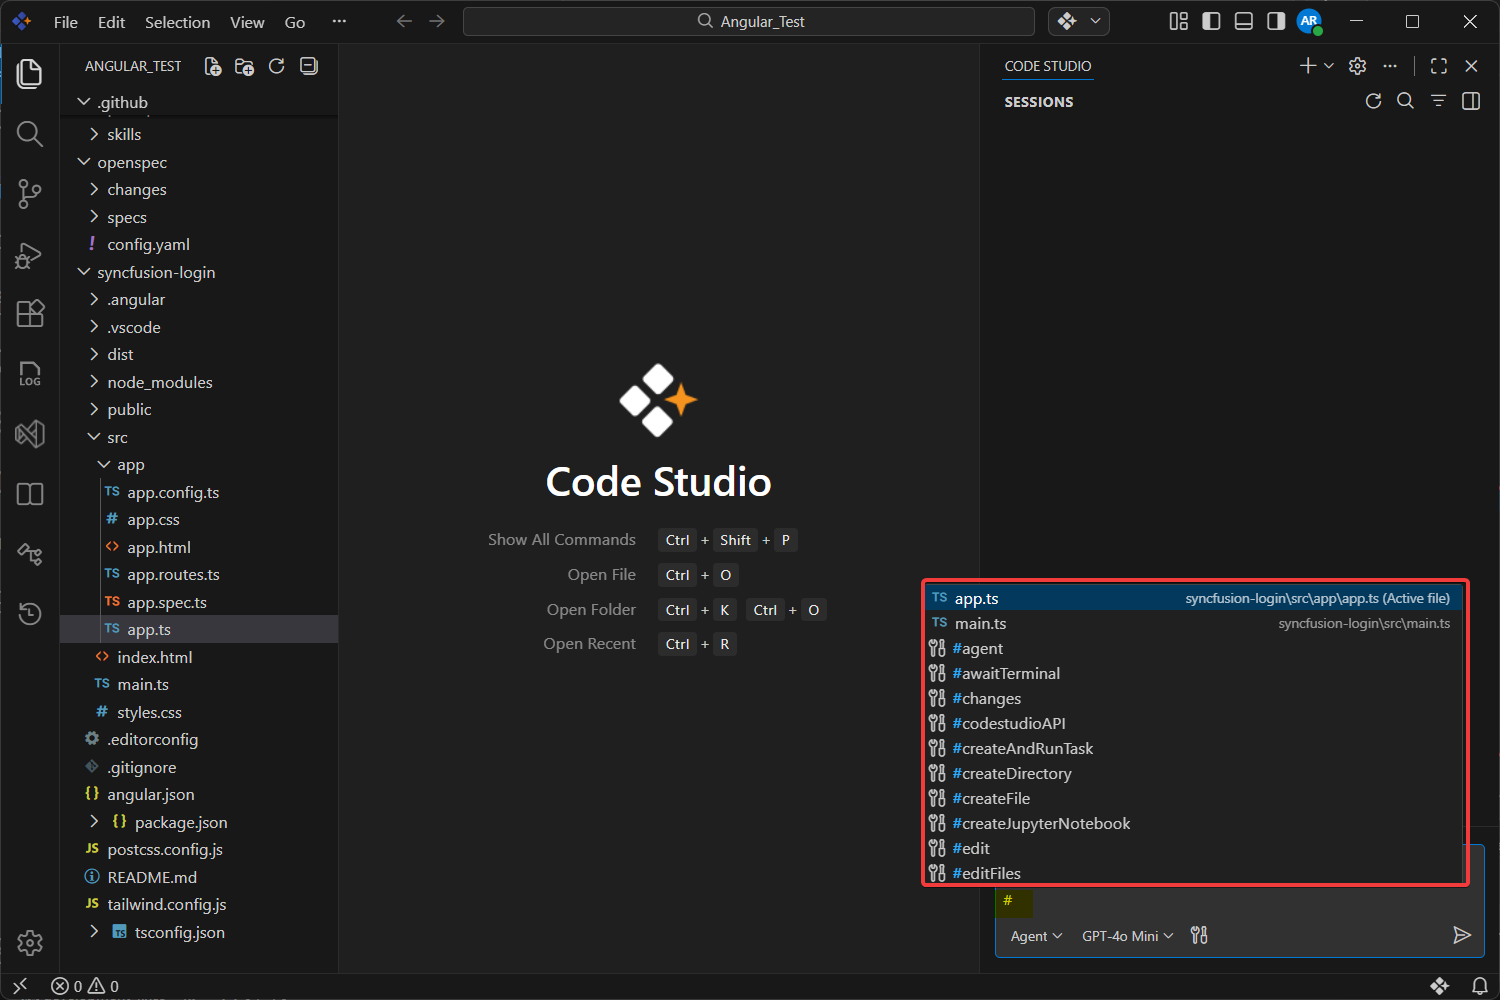
Method 4: Use the # Symbol in Chat
-
Open the Chat Panel by pressing
Ctrl+Alt+B(Windows/Linux) orCmd+Alt+B(Mac). -
Type
#in the chat input box. A list of files will appear. -
Select your file from the list to send it as context:
After adding the file as context, type a prompt asking the agent to fix the issues. For example:
Please review the attached file and fix all errors. Explain what's causing each error and provide the corrected code. Ensure the fixes maintain code quality and don't introduce new bugs..png)
The more relevant context the AI has, the more accurate its suggestions will be.
What’s Next
- Use Autocomplete to catch errors as you type and reduce bugs before they occur.
- Explore Agent mode for generating and fixing code autonomously across your project.
- Use the Ask feature to have the AI explain error messages and suggest solutions in detail.